Introduction: Harnessing Clean Energy from Waste at Home
As the urgency for sustainable living and renewable energy grows, more homeowners are exploring innovative technologies that turn waste into clean power. Home biogas digesters offer a transformative solution—converting organic household waste into usable biogas for cooking, heating, and even electricity generation. Unlike solar or wind, biogas systems recycle what would otherwise be landfill material, offering a closed-loop approach to sustainability. However, the success of a home biogas digester depends heavily on having the right tools and equipment, both for setup and ongoing operation. This in-depth guide will walk you through everything you need to know about sourcing, selecting, and using the essential tools and components for installing a reliable home biogas digester. Whether you’re a DIY enthusiast or a sustainability advocate looking for practical solutions, this guide will ensure your project is safe, efficient, and future-proof.
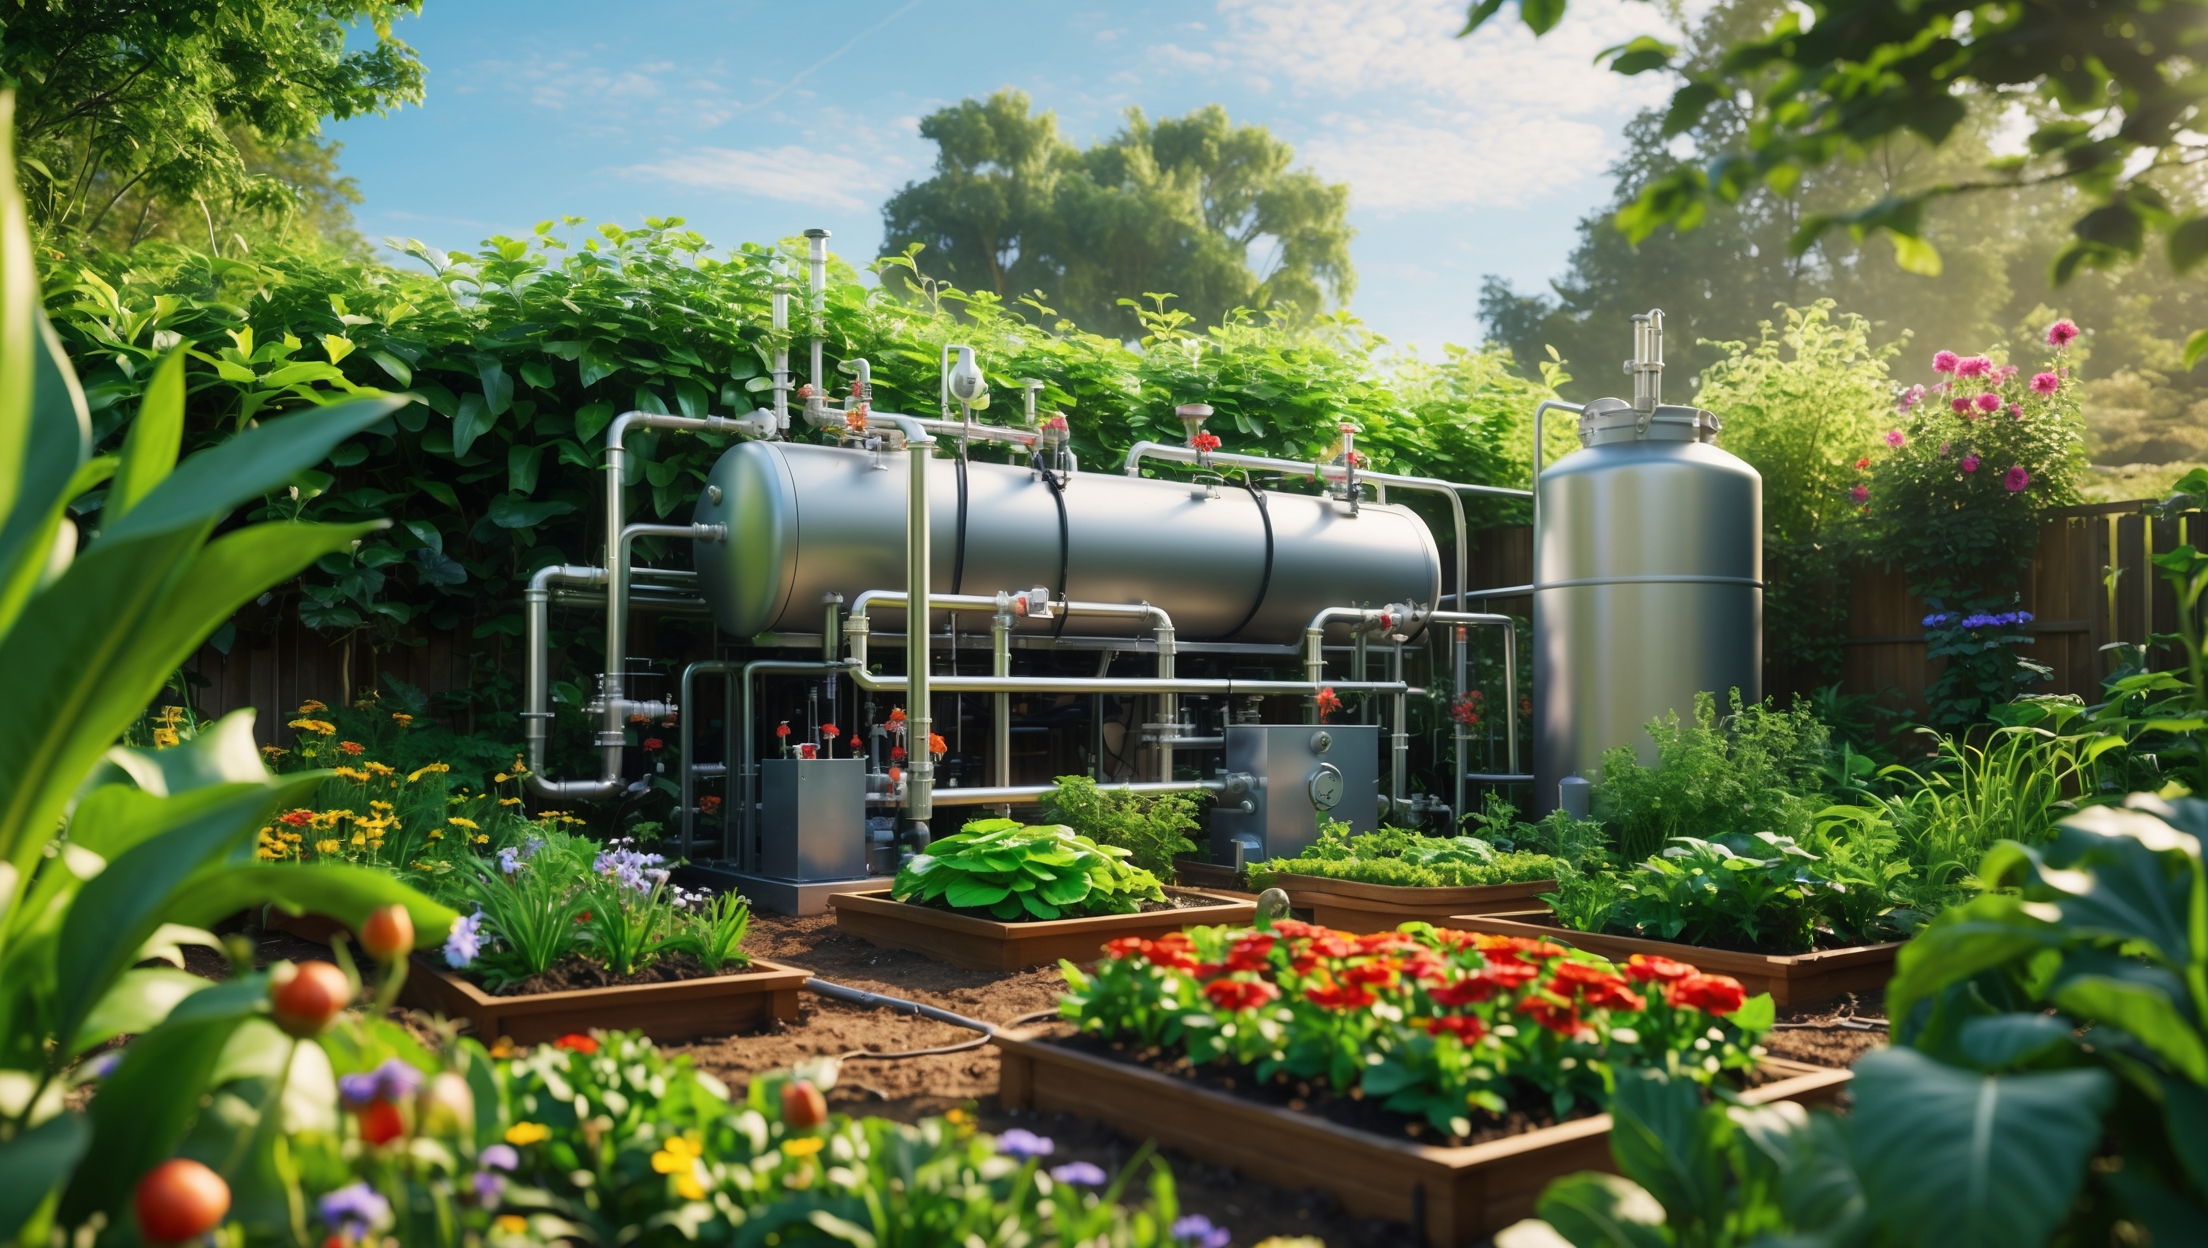
Understanding Home Biogas Digesters: Technology Overview
Before diving into equipment lists and setup procedures, it’s crucial to understand how home biogas digesters function. A typical system consists of an airtight tank (the digester) where organic waste—such as food scraps, animal manure, and yard clippings—breaks down anaerobically. This process generates methane-rich biogas, which can be piped directly to stoves or heaters, and produces nutrient-rich liquid fertilizer as a byproduct.
- Feedstock Input: Organic waste is added regularly.
- Digestion Chamber: Waste decomposes in the absence of oxygen, creating biogas.
- Gas Collection: Methane is captured and stored in a flexible gas holder or tank.
- Effluent Output: Spent material exits as a liquid fertilizer.
The success of this system relies on proper sizing, airtight construction, and safe gas handling—each of which requires specific tools and components.
Essential Tools for Installing a Home Biogas Digester
Setting up a biogas digester at home is a hands-on project. The right tools not only make installation efficient but also ensure system longevity and safety. Below are the core tool categories and their applications:
1. Measurement & Layout Tools
- Measuring Tape: For precise placement of tanks and piping.
- Level: Ensures the digester sits evenly, which is crucial for waste flow.
- Marking Chalk or Pencil: For outlining foundation and pipe routes.
2. Excavation & Foundation Tools
- Shovel & Spade: For digging pits for the digester tank and trenches for piping.
- Wheelbarrow: Transporting soil and materials.
- Tamping Tool: Compacting the base to support heavy tanks.
3. Cutting & Assembly Tools
- Pipe Cutter or Hacksaw: For sizing PVC or HDPE pipes.
- Utility Knife: Cutting flexible hoses or liners.
- Adjustable Wrenches: Tightening connections and securing fittings.
- Screwdrivers (Flathead and Phillips): Assembly of clamps or mechanical components.
- Drill with Bits: For mounting gas lines or creating access points.
4. Plumbing & Sealing Tools
- Pipe Wrench: For tightening large pipe fittings.
- PTFE (Plumber’s) Tape: Sealing threaded joints to prevent leaks.
- Pipe Bender (Optional): For custom piping routes.
- Silicone Sealant Gun: Ensures airtight seals around connections.
5. Safety Equipment
- Protective Gloves: Handling waste and sharp materials.
- Safety Goggles: Cutting and drilling operations.
- Gas Leak Detector (Handheld): Verifying system integrity post-installation.
- Dust Mask or Respirator: For excavation in dry or dusty environments.
Key Equipment and Components: Choosing the Right Parts
Beyond tools, your system’s performance depends on the quality and compatibility of its main components. Here’s what you’ll need for a robust home biogas digester installation:
1. Digester Tank
- Material: Reinforced plastic (HDPE/PP), fiberglass, or concrete. Plastic is preferred for DIY due to ease of handling.
- Size: Typical home systems range from 1,000 to 3,000 liters, depending on daily waste input.
- Features: Airtight lid, inlet/outlet ports, access hatch for maintenance.
2. Gas Holder or Storage Bag
- Flexible Membrane Bag: UV-resistant, durable, expandable.
- Rigid Storage Tank (Optional): For higher pressure or larger volumes.
- Gas Pressure Regulator: Maintains steady supply for appliances.
3. Piping and Fittings
- PVC or HDPE Piping: Corrosion-resistant and suitable for biogas transport.
- Ball Valves: Allow isolation of sections for maintenance.
- Hose Clamps and Unions: Secure connections, simplify disassembly.
- One-way Valve (Check Valve): Prevents backflow of gas or effluent.
4. Feedstock Input and Effluent Output Systems
- Feed Hopper: Funnels waste into the digester; should be easy to clean.
- Effluent Outlet Pipe: For safe discharge of liquid fertilizer.
- Overflow Protection: Prevents accidental spills.
5. Gas Appliances and Safety Features
- Biogas Stove or Burner: Specifically designed for low-pressure methane.
- Biogas Lamps (Optional): For lighting in off-grid scenarios.
- Water Trap (Condensate Collector): Prevents water vapor from entering appliances.
- Flame Arrestor: Safety device to prevent flame flashback.
Sourcing and Selecting Equipment: What to Look For
Quality Materials
Choose components made from materials resistant to corrosion, UV exposure, and chemical breakdown. For piping, UV-stabilized HDPE or PVC is highly recommended. Biogas is mildly corrosive, so avoid standard steel fittings unless specifically coated.
Compatibility and Sizing
All system parts should be compatible in terms of diameter and pressure ratings. Oversized or undersized pipes can lead to gas leaks or pressure drops. Reference manufacturer guidelines for recommended dimensions based on your intended daily waste input.
Supplier Reliability
Purchase tanks, gas bags, and specialized valves from reputable suppliers with experience in biogas systems. Check for third-party certifications when possible. For generic plumbing tools, trusted hardware brands are suitable.
Site Preparation and Foundation Setup
Site Selection
Pick a location with:
- Easy access for regular waste input and effluent removal.
- Good drainage to prevent waterlogging.
- Minimal shade for optimal digestion temperatures (ideally 20–35°C / 68–95°F).
- Safe distance from living areas (minimum 10 meters/33 feet recommended).
Excavation Process
Use a measuring tape, marking chalk, and shovels to excavate a pit that will securely house the digester tank. Compact the base with a tamping tool to prevent settling. For above-ground systems, ensure the site is level and stable.
Step-by-Step Equipment Setup
1. Assembling the Digester Tank
- Position the tank in the prepared pit or on the foundation slab.
- Install the inlet and outlet pipes, sealing all joints with PTFE tape and silicone sealant.
- Fit the airtight lid and gas outlet connection.
2. Installing the Gas Storage System
- Connect the digester’s gas outlet to the flexible storage bag or rigid tank.
- Install a pressure regulator and check valve between the digester and storage.
- Mount the water trap at the lowest point in the gas line to collect condensate.
3. Laying Piping and Fittings
- Route PVC/HDPE pipes from the digester to the appliance location, using elbows and unions as needed.
- Secure all joints with hose clamps and test for leaks using soapy water or a gas leak detector.
- Install ball valves for easy isolation during maintenance.
4. Setting Up Gas Appliances
- Connect the biogas stove or lamp, ensuring they are certified for biogas use.
- Install a flame arrestor adjacent to the appliance for added safety.
Testing and Commissioning the System
Once all components are installed:
- Check all seals, joints, and valves for leaks using a handheld gas detector or soapy water.
- Introduce starter organic material (e.g., animal manure) to jump-start the digestion process.
- Monitor pressure build-up in the gas holder over several days.
- Test appliances with a small volume of biogas; adjust regulator as needed for safe operation.
Maintenance Tools and Tips for Longevity
Routine Tools
- Inspection Mirror: For checking hard-to-see joints.
- pH Test Strips: Monitor digester health (ideal pH 6.8–7.5).
- Spare Seals and Gaskets: On hand for quick repairs.
- Cleaning Brushes: For feed hopper and pipe maintenance.
Maintenance Best Practices
- Check gas lines and joints monthly for leaks or wear.
- Flush the water trap regularly to prevent clogs.
- Remove sludge buildup from the tank yearly if necessary.
- Maintain a log of waste input and output for system optimization.
Safety Considerations and Checklists
- Always wear gloves and goggles when handling waste or chemicals.
- Install the digester away from open flames, electrical panels, and living spaces.
- Use a gas leak detector after any maintenance or repair.
- Ensure all pressure relief and flame arrestor devices are functional.
- Educate all household members about the system’s basic operation and emergency shutoff.
Conclusion: Empowering Sustainable Energy with the Right Tools
Setting up a home biogas digester is one of the most impactful steps a household can take toward energy independence and environmental stewardship. By recycling kitchen and garden waste into renewable fuel and organic fertilizer, you’re not only reducing your carbon footprint but also closing the loop on resource use. However, the key to a successful, safe, and efficient biogas system lies in careful equipment selection and proper tool use at every stage—from excavation to daily operation.
Investing in quality materials, using the right safety gear, and following best practices for site preparation and system assembly will pay dividends in years of reliable, hassle-free energy. Routine maintenance and vigilance around gas safety are non-negotiable for protecting your investment and household. As more communities embrace decentralized, sustainable energy solutions, mastering the tools and techniques for home biogas digesters will empower you to lead by example—demonstrating that clean energy innovation starts right in our own backyards.
Whether you’re just starting your research or you’re ready to break ground, this detailed guide aims to equip you with the knowledge and confidence to build a biogas system that’s efficient, durable, and truly green. With the right tools in hand, sustainable living isn’t just a goal—it’s a practical reality.


Since you mention the importance of airtight construction for the digester, could you clarify what kind of sealant or material is best for making sure the tank is completely airtight? Are there specific brands or types to avoid leaks over time?
For an airtight seal on your biogas digester, a high-quality silicone sealant is generally recommended because it’s resistant to corrosion, chemicals, and temperature changes. Look for products labeled as aquarium-grade or designed for outdoor plumbing, as these offer strong, long-lasting seals. Brands like GE Silicone or Loctite are commonly used. Avoid basic household caulks or acrylic sealants, as they can degrade over time and may not handle the constant moisture and gas exposure.
Could you explain a bit more about the types of organic waste that work best as feedstock? For example, is it okay to add things like dairy or meat scraps, or should those be avoided to keep the digester functioning well?
For home biogas digesters, the best feedstock is typically plant-based kitchen scraps, such as fruit and vegetable peels, coffee grounds, and small amounts of leftover cooked food. It’s best to avoid adding dairy, meat, fats, or oils, as these can slow down digestion, cause odors, and potentially attract pests or create blockages. Sticking to non-animal, biodegradable waste will help your system function efficiently and safely.
When it comes to budgeting for a basic but reliable home biogas system, could you offer a rough estimate for the essential equipment and tools needed, excluding the cost of organic feedstock?
For a basic but reliable home biogas digester setup, you can expect to spend between $400 and $1,200 on essential equipment and tools. This includes materials for the digester tank (such as HDPE or reinforced concrete), gas storage bags or cylinders, piping, valves, a gas stove, and simple plumbing tools. The price can vary depending on system size, local material costs, and whether you buy a kit or build from scratch.
If I wanted to use the produced biogas for both cooking and heating, would I need any different equipment or additional modifications compared to just running a single stove?
Yes, using biogas for both cooking and heating usually requires some additional equipment and modifications. Besides the basic setup for a stove, you’ll need extra piping and control valves to safely direct biogas to different appliances. For heating, you might also need a biogas-compatible heater and possibly a gas storage bag to ensure steady supply and pressure. Always ensure all devices are designed for biogas use and follow safety guidelines.
When sourcing the required components, do you recommend any cost-saving alternatives that still meet reliability standards, especially for families just starting out with biogas who are watching their budgets?
Absolutely, there are several ways to save costs while maintaining reliability. For the digester tank, repurposed food-grade barrels or IBC totes work well if they’re in good condition. PVC pipes and standard plumbing fittings can be used for gas lines instead of specialty kits. For the gas storage, an inner tube from a large truck tire can substitute for pricier gas bags. Always ensure components are durable and airtight, and check local groups or online marketplaces for gently used materials.
I noticed you mentioned gas handling safety. Are there any budget-friendly options for gas storage tanks and piping that are still safe to use, or is it best to stick with higher-end equipment from the start?
There are budget-friendly gas storage tanks and piping options available, such as food-grade HDPE tanks and certified PVC or PE pipes rated for gas. However, safety should never be compromised. If you choose lower-cost materials, make sure they meet local safety codes and are specifically rated for biogas use. Always use proper fittings and regularly inspect for leaks. Investing in quality valves and pressure relief systems is also important, even with budget equipment.
For someone who’s on a tight budget, are there any tools or materials in the setup that are worth investing more in, while others can be improvised or bought secondhand? I’m trying to balance cost and safety.
When working with a tight budget, it’s wise to invest in high-quality, new components that are critical for safety—such as gas-tight pipes, pressure regulators, and the main digester tank. These parts should not be compromised. Tools like spades, wrenches, and containers for feeding or slurry can often be borrowed, bought secondhand, or improvised. Focus your spending on parts that contain or handle the biogas, since leaks can be dangerous.
You mentioned that the digester needs to be airtight for proper operation. What specific tools or materials would you recommend for sealing the system effectively, especially if I’m building one from scratch rather than using a pre-made kit?
For effective sealing of a homemade biogas digester, consider using high-quality silicone sealant, rubber gaskets, and waterproof epoxy resin at all joints and connections. Hose clamps and heavy-duty pipe tape can also help secure gas lines. It’s important to double-check that all lids, seams, and pipe fittings are tightly sealed to prevent any leaks and maintain the necessary airtight environment.
After installation, what ongoing maintenance tools should homeowners keep on hand to ensure efficient operation and troubleshoot common issues with their biogas system?
Homeowners should keep a basic tool kit with wrenches, screwdrivers, and pliers for tightening connections or fixing minor leaks. It’s helpful to have a gas leak detector (or soapy water spray) for checking joints and pipes. A pH testing kit is useful to monitor digester health. Spare gaskets and pipe fittings are also handy for quick replacements. Regular checks and these tools will help keep your system running smoothly.
For someone on a tight budget, are there any essential tools or components you can recommend buying secondhand, or is it safest to purchase everything new when setting up a biogas system?
It’s possible to save money by buying certain components secondhand, such as barrels, gas storage tanks, or basic plumbing tools, as long as they’re in good condition and made from compatible materials. For safety-critical parts like gas piping, pressure regulators, and seals, it’s best to purchase them new to ensure reliability and prevent leaks. Inspect all used items carefully for rust, cracks, or contamination before using them in your system.
For someone interested in a DIY approach, are there affordable equipment kits for beginners, or do most people need to source every component separately? Any tips for keeping costs manageable without compromising on safety?
There are beginner-friendly DIY biogas digester kits available that include most of the essential components, making the process much simpler and safer for newcomers. These kits tend to be more affordable than commercial full-scale models and can save you time sourcing parts. If you choose to build from scratch, look for secondhand barrels, PVC pipes, and valves, but always prioritize sturdy, food-grade materials to avoid leaks or contamination. Carefully follow safety guidelines, especially regarding gas-tight seals and proper ventilation, to keep your project safe and cost-effective.
Could you provide more details about the types of safety equipment needed for handling methane during installation and daily use? Is specialized training required for homeowners?
Handling methane safely is important because it’s flammable and can be hazardous if leaked. Recommended safety equipment includes gas leak detectors, flame arrestors, gloves, safety goggles, and proper ventilation systems. While basic safety practices can be learned from manuals, it’s a good idea for homeowners to get an introduction to biogas safety—some suppliers offer brief training or resources. If you’re uncomfortable, consulting with a professional for initial setup and safety checks is strongly advised.
For someone trying to keep initial costs reasonable, which of the essential tools or components could be sourced secondhand or substituted with lower-cost alternatives without compromising safety or efficiency?
You can often find secondhand gas pipes, valves, storage containers, and even some types of pumps in good condition, especially from local classifieds or online marketplaces. Basic hand tools like wrenches, drills, and shovels can also be sourced used or borrowed. However, avoid cutting costs on the digester tank and gas collection bags, as their integrity is crucial for safety and efficiency.
You mentioned nutrient-rich fertilizer as a byproduct. Are there best practices for safely storing and using this effluent, especially if we want to use it in a vegetable garden?
The effluent from a biogas digester is indeed rich in nutrients but should be handled carefully. Store it in sealed containers away from water sources to prevent contamination. Before applying it to a vegetable garden, consider composting or diluting it, as this reduces pathogens. Avoid direct contact with edible plant parts, and ideally, apply it to the soil around non-root crops or well before harvest to maximize safety.
Once the system is up and running, what sort of maintenance tools should I have on hand for troubleshooting issues like blockages or gas leaks? Does the article cover any proactive maintenance steps to keep the biogas system efficient and safe over time?
You’ll want to keep a few essential tools nearby, such as pipe wrenches for tightening connections, a plunger or flexible rod for clearing minor blockages, and soapy water spray for detecting gas leaks. The article does mention proactive steps like regular inspection of joints, checking for residue buildup, and monitoring system pressure to catch issues early. Following these routines helps keep your biogas digester running smoothly and safely.
Could you elaborate on the specific tools needed to ensure the system is airtight during installation? I’m particularly concerned about methane leaks and would like to know if there are any US-certified products or techniques you’d suggest for sealing connections.
To ensure your biogas digester is airtight, use a high-quality pipe thread sealant or Teflon tape on threaded connections. For larger seals, opt for a US-certified silicone-based sealant rated for gas applications. Hose clamps and gaskets should meet US standards (such as UL or CSA certification) for gas safety. After assembly, perform a leak test using a soap solution on all joints—bubbles indicate leaks. Gas-rated PTFE tape and gas-tight rubber grommets are also recommended for added security.
Is it possible to install a basic home biogas system on a tight student budget, or are there ways to repurpose household materials for some of the major components mentioned in the guide?
Yes, you can definitely set up a basic home biogas system on a student budget. Many key components, like the digester tank, gas storage bag, and piping, can be made from repurposed household items such as large plastic barrels, old inner tubes, and PVC pipes. Focus on ensuring airtight seals and safe gas handling, but otherwise, using upcycled materials is both possible and practical.
For someone who’s never worked with gas lines before, how difficult is it to safely install the piping from the digestion chamber to a stove or heater? Are there any specific tools or fittings you’d recommend to make sure there are no leaks?
Installing gas piping for a home biogas system can be manageable for beginners if you follow instructions carefully, but it does require attention to safety. Use high-quality, biogas-rated PVC or HDPE pipes and proper gas-tight fittings. A pipe cutter, adjustable wrench, and leak detection solution (like soapy water) are essential tools. Always test connections for leaks before use. If you feel unsure, it’s a good idea to consult a professional to double-check your setup.
About the feedstock input—do I need special tools to prep different types of waste like food scraps versus yard clippings, or can everything go in as-is? Just want to make sure I don’t run into clogging issues.
You don’t need highly specialized tools, but it’s best to chop or shred both food scraps and yard clippings before adding them to your biogas digester. This helps prevent clogging and ensures efficient breakdown. A kitchen knife or garden shears usually work well for most household waste. Larger pieces or fibrous materials like branches should be avoided or chopped into very small pieces. Regularly mixing the input can also help keep things running smoothly.
Could you clarify what ongoing maintenance is required after initial installation, especially concerning the digester’s airtight seal and gas handling? I’d like an idea of what to expect in terms of upkeep.
After installation, you’ll need to regularly check the digester’s airtight seal for any signs of wear, cracks, or leaks and reseal or replace gaskets as needed to maintain gas integrity. For gas handling, inspect the gas pipes, valves, and storage bags for leaks or blockages. Routine removal of sludge and monitoring the feedstock input will also help keep the system running smoothly. Most tasks involve visual inspections and occasional minor repairs.
For people who live in colder climates, how does temperature affect the efficiency of the digestion process, and are there specific equipment recommendations to help maintain optimal conditions?
In colder climates, biogas digestion tends to slow down because the microbes responsible for breaking down organic matter are less active at low temperatures. To maintain efficiency, it’s important to keep the digester insulated—using insulating jackets or foam panels works well. Some setups use solar water heating coils or electric heaters to maintain the optimal temperature range, usually between 30°C and 40°C. Monitoring the temperature and investing in a heating system designed for biogas units can help ensure steady gas production even during cold months.
I’m curious about ongoing maintenance after the initial installation. Which tools are essential for monitoring gas quality and handling potential blockages or leaks in the digester system?
For ongoing maintenance of your home biogas digester, a gas detector or biogas analyzer is essential for monitoring gas quality and detecting any hazardous leaks. To handle potential blockages, keep a set of plumbing snakes, flexible rods, and rubber gloves on hand. It’s also wise to have adjustable wrenches and pipe sealant available for tightening connections or addressing minor leaks. Regular visual inspections and preventive cleaning help keep everything running smoothly.
I’m interested in the safe gas handling aspect you referenced. Are there basic safety tests or monitors you suggest including from the start to detect leaks or monitor methane concentrations around the digester?
Including safety measures from the start is very important. I recommend installing a gas leak detector specifically calibrated for methane, as well as a combustible gas alarm near your digester. Regularly check all joints and connections with soapy water to spot bubbles that indicate leaks. Having a handheld methane meter is also a good idea for routine inspections and added peace of mind.
I’m working with a tight household budget—are there any affordable kits or DIY approaches recommended for beginners, or is it necessary to invest in specialized tools right away for a safe installation?
You don’t need to invest in expensive specialized tools right away. There are affordable home biogas digester kits designed for beginners, many of which include basic setup components and require only common tools like wrenches, screwdrivers, and PVC cutters. If you’re comfortable with DIY projects, you can even build a simple digester using locally available barrels and pipes. Just be sure to follow safety guidelines and instructions closely for safe operation.
You mention that airtight construction is critical for safe and effective biogas production. What specific tools or materials should I prioritize to ensure a proper seal, especially if my digester will be located in an area with variable temperatures?
To ensure a tight, durable seal on your biogas digester, prioritize high-quality silicone or polyurethane sealants rated for outdoor use and temperature fluctuations. Use rubber gaskets or O-rings at all connection points, and stainless steel hose clamps to secure joints. A torque wrench helps avoid over-tightening. For larger tanks, consider using EPDM rubber sheeting as a gasket material. Always double-check seals after temperature changes, as expansion and contraction can create gaps.
When you mention proper sizing of the system, what factors should I consider when determining the right digester size for a small household? Is there a formula based on the amount of daily waste produced?
When choosing the right digester size, consider the number of people in your household and the average daily amount of organic waste you generate, including food scraps and animal manure. Most small household systems are sized based on daily input, typically in kilograms. A common guideline is that 1 kg of waste per day requires about 1 cubic meter of digester volume. Estimating your average waste output will help you select an appropriately sized system.
You mention the need for airtight construction to ensure safety. Are there any specific tools or materials you recommend that are easy to source in the US to achieve reliable, gas-tight seals, especially if I’m building my own digester?
For gas-tight seals when building your own digester, look for high-quality silicone sealants rated for gas applications—these are widely available at hardware stores in the US. You may also consider EPDM or butyl rubber gaskets, which are durable and resistant to biogas. For clamping joints and pipes, stainless steel hose clamps are a reliable option. Make sure all fittings, especially around inlets and outlets, are tightened securely and double-check them for leaks using soapy water.
Could you clarify what specific safety tools are most important when handling and installing the gas collection components? I’m particularly concerned about preventing leaks and ensuring everything is airtight, but I’m not sure which equipment to prioritize.
When handling and installing the gas collection components, it’s important to prioritize a high-quality adjustable wrench for secure fittings, gas-rated Teflon tape for sealing threaded connections, and a reliable leak detection solution like soapy water to check for leaks after assembly. A gas detector designed for biogas (methane) can add another layer of safety. Don’t forget sturdy gloves and safety goggles to protect yourself during installation.
If I want to use mostly kitchen scraps instead of animal manure or yard clippings, will I need different tools or components during installation, or does the system setup stay pretty much the same?
The system setup generally stays the same whether you use kitchen scraps, animal manure, or yard clippings. You won’t need different tools or components for installation. However, with kitchen scraps, you might find it helpful to have a blender or food processor to break down the scraps before adding them, as this helps with faster digestion and avoids clogs. Otherwise, the digester itself and its installation steps remain unchanged.
I noticed biogas systems can be used for heating, cooking, or even electricity. If you start small with just cooking, how difficult is it to upgrade the system later to add more uses?
Upgrading a small biogas system to support additional uses like heating or electricity is quite feasible, but some planning is needed. Typically, you’ll need to increase the digester capacity and possibly upgrade gas storage. Adding connections for appliances like heaters or generators may also require new piping or safety features. Many starter systems are designed to be modular, making expansion easier as your needs grow.
Regarding feedstock input, does it make a big difference if you use mostly food scraps versus animal manure, especially for a small household system? Have you noticed any specific tools or precautions needed for different types of waste?
Yes, the type of feedstock does make a difference. Food scraps generally break down faster and can produce gas more quickly, but they may cause acidity issues if not balanced. Animal manure digests more steadily and helps maintain a healthy microbial population. For food scraps, a kitchen grinder or chopper is helpful to reduce particle size, while handling manure requires gloves and possibly a shovel. Always make sure you avoid adding too much of one type at once, and monitor for odors or clogs.
If my household mostly generates food scraps with some yard waste but little animal manure, will this impact the efficiency of the digester, and does the equipment list or setup process need to be adjusted for this?
Since your household mainly produces food scraps and some yard waste but little animal manure, the digester can still work, but you may notice slightly lower efficiency. Animal manure helps introduce beneficial bacteria that speed up the breakdown process. To address this, consider starting your digester with a small amount of manure or a commercial starter culture. Also, avoid using too much woody yard waste, as it’s harder to digest. The basic equipment list and setup process remain the same, but you may want to include a compost grinder to process fibrous material more easily.
I’m interested in the long-term maintenance requirements. Are there any specialized tools needed for ongoing operation and troubleshooting, or can most issues be handled with standard home equipment?
Most ongoing maintenance tasks for a home biogas digester can be managed with standard home tools, such as wrenches, screwdrivers, and buckets for cleaning or minor adjustments. Occasionally, you might need basic plumbing supplies, but nothing highly specialized. For troubleshooting, a simple gas leak detector or pH testing kit can be useful, but these are affordable and widely available. No advanced or professional equipment is typically required.
I’m working with a tight budget—are there any essential components or tools from your list that can be safely improvised or bought secondhand, or should I invest in everything new for safety reasons?
You can certainly save money by buying some tools like spades, buckets, or wrenches secondhand, as these are generally safe and durable. However, for key components such as the biogas digester tank, gas pipes, and safety valves, it’s best to invest in new, quality parts to ensure safety and proper operation. Always inspect any secondhand items for wear and cleanliness before use.
How much time should I expect the full installation process to take if I’m doing this as a weekend DIY project? Are there any steps that tend to take longer than homeowners anticipate, based on your guide?
You can typically expect the full installation of a home biogas digester to take anywhere from one full day to an entire weekend, depending on your experience and the complexity of your system. Steps that often take longer than anticipated include site preparation, especially leveling and clearing the area, and assembling the digester components securely. Setting up plumbing connections and checking for leaks can also be time-consuming. Giving yourself extra time for those steps will help your project go smoothly.
The guide talks about capturing and storing methane for direct use, like cooking or heating. Are there recommended types of piping or safety components that small businesses should prioritize when setting up for indoor gas usage?
For indoor biogas use, it’s best to use high-quality, gas-rated piping like copper, stainless steel, or approved flexible gas hoses. Incorporate essential safety components such as non-return valves, pressure regulators, and gas detectors. Always ensure all joints are well-sealed and consider installing an automatic shut-off valve for added protection. Consulting a professional for installation and regular leak checks is highly recommended for small businesses.
Are there cost-effective options for the essential equipment you list, or is it important to invest in higher-end tools upfront to ensure safety and reliability?
You can definitely find cost-effective options for most of the basic tools needed to install a home biogas digester. Items like spades, buckets, and wrenches can be budget-friendly without sacrificing much quality. However, for key safety gear—especially gas leak detectors and pressure gauges—it’s wise to invest in reliable, higher-quality versions. This ensures both safety and accurate monitoring during operation.
I’m on a pretty tight budget—are there any affordable DIY alternatives to some of the specialized tools listed for setting up a biogas digester, or is it risky to substitute with basic household tools?
You can definitely use some household tools for installing a home biogas digester, especially for tasks like digging or assembling basic parts. For example, a sturdy shovel and basic wrenches usually work fine. However, for sealing gas lines or ensuring leak-proof connections, it’s safer to use proper equipment to avoid safety risks. Prioritize specialized tools where safety is involved, and improvise only with non-critical tasks.
For small business owners with a commercial kitchen, are there differences in the types of digesters or equipment needed compared to typical home units, especially considering higher volumes of food scraps?
Yes, commercial kitchens typically need larger-capacity biogas digesters than residential units. Commercial models are designed to handle higher volumes of food scraps and may include more robust feeding mechanisms, enhanced safety features, and automated monitoring systems. You’ll also want to ensure compliance with local regulations regarding waste processing. It’s a good idea to consult manufacturers who specialize in commercial biogas equipment to find a system that matches your waste output and space.
Are there any cost-effective alternatives for some of the essential components, like the gas collection tank or feedstock input system, that won’t compromise the safety or efficiency of the digester?
Yes, there are cost-effective alternatives that maintain safety and efficiency. For the gas collection tank, you can use heavy-duty, food-grade plastic water tanks, which are affordable and durable. For the feedstock input system, standard PVC pipes and airtight rubber seals work well as budget-friendly options. Just ensure all materials are chemical-resistant, securely fitted, and regularly inspected to prevent leaks or contamination.
I’m considering installing a biogas digester mainly for cooking, but I’m worried about the upfront costs. Could you share a rough estimate of what the essential tools and components would cost for a small household system?
For a small household biogas digester, essential components like the digester tank, inlet/outlet pipes, gas storage bag, basic plumbing materials, and safety valves usually cost between $300 and $700, depending on your location and whether you buy a kit or gather parts separately. Basic tools such as wrenches, drills, and sealant might add another $50–$100 if you don’t already own them. DIY can help keep costs lower compared to prefabricated systems.
You mention the importance of airtight construction for safety—what kind of sealant or gasket material is recommended to make sure the digester remains fully airtight over time?
For ensuring long-term airtightness in a home biogas digester, use high-quality silicone sealant rated for gas-tight applications. Silicone remains flexible and durable against moisture and temperature changes. For flanged joints or lids, EPDM rubber gaskets are a good choice, as they resist chemical degradation and maintain a good seal over time. Always check that the chosen materials are compatible with methane and the conditions inside your digester.
When it comes to selecting the right tools for building a system that can handle both kitchen scraps and yard clippings, are there any size or equipment considerations I should be aware of for optimal efficiency?
When handling both kitchen scraps and yard clippings, look for a digester with a larger capacity—usually over 500 liters—to manage the bulkier yard waste. A robust shredder or chipper is helpful for breaking down tougher plant material, while sturdy mixing tools will ensure even decomposition. Make sure your system’s inlet is wide enough to accommodate clippings, and choose durable piping to prevent blockages.
Once the system is installed, what kind of ongoing maintenance or monitoring equipment should I plan to get? I want to be sure the digester keeps running efficiently and safely after initial setup.
After installing your home biogas digester, plan to have a gas pressure gauge to monitor biogas production, a thermometer to check digester temperature, and pH test strips or a meter for monitoring acidity. Regularly check for leaks around fittings and pipes. Cleaning filters and mixers, removing accumulated sludge, and making sure the feedstock stays consistent will help keep everything running smoothly and safely.
How complex is the actual installation process for someone who wants to set up a biogas digester at home, especially when it comes to making sure the system is truly airtight and safe for handling methane?
Installing a home biogas digester does require some technical skill, mainly in ensuring airtight connections and safe methane handling. The main challenges are sealing all joints and fittings, using appropriate gaskets, and routinely checking for leaks. Following the manufacturer’s instructions closely and using a soapy water test to detect escaping gas are important safety steps. Many kits are designed for DIY installation, but if you’re unsure, getting help from a professional is a good idea.
Once the system is up and running, how often should the spent liquid fertilizer be collected and what equipment is best for managing the effluent output safely and efficiently?
Once your home biogas digester is operating, you should collect the spent liquid fertilizer, also known as effluent, every few days or as the storage tank fills—this can vary depending on your digester’s size and input volume. For safe and efficient management, use sealed containers to collect the effluent and wear gloves when handling it. A simple pump or spigot system can help transfer the liquid directly into watering cans, storage drums, or distribution systems for your garden.
What contingency plans or troubleshooting steps do you suggest if biogas production suddenly drops or if there is a leak in the gas collection part of the system?
If biogas production drops, first check the feedstock quality and quantity—ensure you’re adding enough organic material and that it isn’t too acidic or dry. Confirm the digester is warm enough, ideally between 30–37°C. For gas leaks, inspect all joints, valves, and the gas storage bag for cracks or loose fittings. Tighten connections or replace damaged parts as needed. Always ventilate the area before repairs and avoid any open flames nearby.
Could you clarify what specific safety precautions or equipment are most important when handling the gas collection part of the digester setup? I’m especially curious about how to prevent leaks or accidental exposure to methane during installation.
When handling the gas collection part of your biogas digester, use gas-tight, corrosion-resistant piping and fittings to prevent leaks. Always check for leaks with a soapy water solution after installation—never with an open flame. Install the gas collector outdoors or in a well-ventilated area to avoid methane buildup. Wearing gloves and a mask during installation can help minimize accidental exposure to raw biogas.