

Introduction: Why Solar Greenhouses Are the Future of Sustainable Home Gardening
As climate patterns shift and food independence becomes increasingly important, solar-powered greenhouses have emerged as a transformative solution for sustainable home gardening. Unlike traditional greenhouses, which rely heavily on grid electricity or fossil fuels for heating and cooling, solar greenhouses harness the power of the sun to create a stable, productive environment for plants year-round. From growing organic vegetables in winter to cultivating delicate herbs and tropical fruits, these structures offer unparalleled flexibility and sustainability. But before you break ground, it’s crucial to understand the financial commitment involved. A well-planned solar greenhouse not only saves money over time but can also improve household resilience, reduce food miles, and cut your carbon footprint. This comprehensive guide dives deep into the real costs of building a home solar greenhouse, offering practical budgeting strategies and transparent breakdowns—so you can grow green without breaking the bank.
Understanding Solar Greenhouse Design Basics
What Makes a Greenhouse “Solar”?
A solar greenhouse is engineered to maximize the capture, storage, and distribution of solar energy for heating and, in some cases, power generation. Key features often include strategic orientation (typically south-facing in the Northern Hemisphere), high-insulation glazing, thermal mass (like water barrels or stone walls), and sometimes integrated photovoltaic (PV) solar panels for electrical needs.
Passive vs. Active Solar Greenhouses
- Passive Solar Greenhouses: Use design elements to collect and retain heat—think insulated north walls, floor-to-ceiling glass on the south side, and thermal mass materials.
- Active Solar Greenhouses: Incorporate solar technology such as PV panels, solar water heaters, or solar fans to control temperature and humidity.
Major Cost Factors: The Full Breakdown
1. Site Preparation and Foundation
Excavation and Leveling: Preparing the site can cost anywhere from $500 to $2,000, depending on slope, soil type, and size. Good drainage is essential to avoid waterlogging.
Foundation Types: Options include concrete slabs ($2,000–$5,000 for a 12×20 ft greenhouse), treated wood ($800–$2,000), or masonry. Insulated foundations cost more but prevent heat loss.
2. Structure and Framing Materials
- Aluminum: Durable and rust-proof; costs $1,000–$3,500 for a mid-sized frame.
- Galvanized Steel: Cheaper than aluminum ($800–$2,500) but heavier.
- Wood: Aesthetic, renewable, but needs maintenance; $1,200–$3,000.
3. Glazing/Panel Choices
- Polycarbonate Panels: Double- or triple-wall for insulation; $1.50–$3.00/sq ft. Good for DIYers.
- Glass: Classic look, excellent light transmission, but pricier at $3–$7/sq ft and heavier.
- Solar Glass: Integrated PV cells; costs vary widely ($20–$40/sq ft), but can offset energy use.
4. Solar Heating and Power Systems
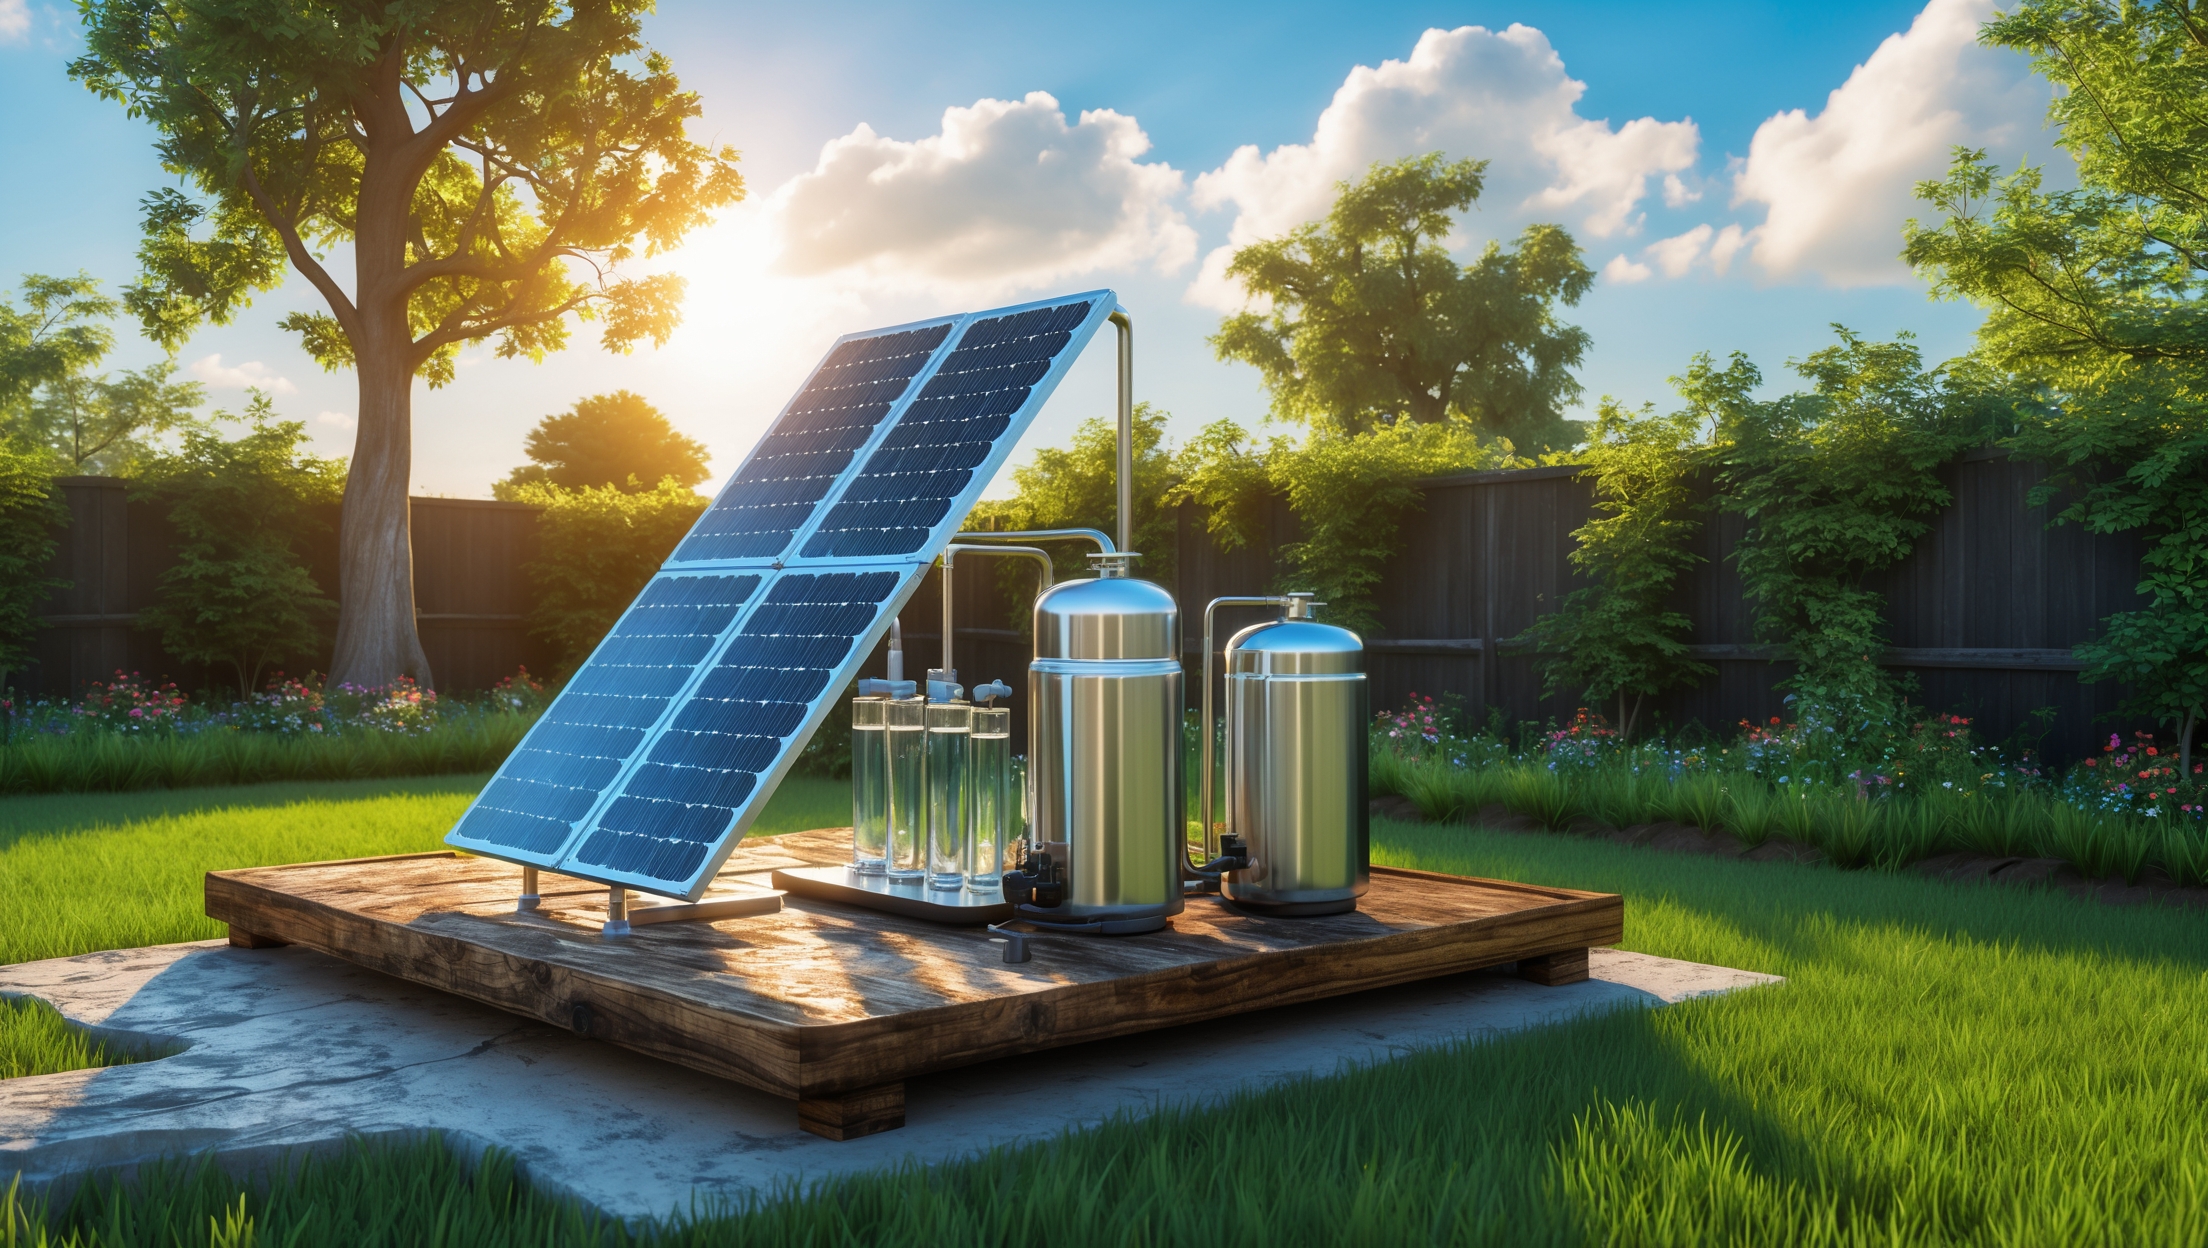
- PV Solar Panels: 1–2 kW system typically $2,000–$5,000 installed (before rebates).
- Solar Water Heater: $1,000–$3,000 for a system to circulate heated water through beds or underfloor pipes.
- Thermal Mass (e.g., water barrels, stone): $100–$900, depending on size and materials.
5. Ventilation, Insulation, and Climate Control
- Automatic Vents and Louvers: $300–$1,200.
- Fan Systems (solar-powered): $400–$1,500.
- Insulating Curtains or Shades: $200–$1,000.
6. Internal Systems and Accessories
- Raised Beds and Benches: $300–$1,200.
- Irrigation (drip or mist): $150–$600.
- Rainwater Harvesting Integration: $500–$2,000.
- Monitoring/Automation (optional): $400–$2,000 for sensors and smart controllers.
7. Labor (DIY vs. Professional)
Labor can be 30–50% of the total cost if you hire professionals—expect $5,000–$12,000 for a turnkey mid-size project. DIYers can save substantially but should budget for specialty tasks (e.g., electrical work).
8. Permits and Fees
Local permits range from $100–$1,000. Check with your municipality—some require site plans, electrical permits, and inspections.
Sample Budget: 12×20 ft Solar Greenhouse (Mid-Range)
- Site Preparation: $1,200
- Foundation (insulated wood): $1,500
- Aluminum Frame: $2,200
- Double-wall Polycarbonate Panels: $2,100
- PV Solar Panel (1.5 kW): $3,000
- Solar Water Heater: $1,800
- Thermal Mass (water barrels): $400
- Vents, Fan, Shades: $1,800
- Benches, Irrigation: $900
- Rainwater Harvesting: $800
- Automation: $800
- Labor (DIY with some pro help): $2,500
- Permits: $400
- Total Estimated Cost: $19,400
Budgeting Tips for a Cost-Effective Solar Greenhouse
Prioritize Insulation and Orientation
Invest in high-quality glazing and insulation—these pay for themselves by reducing heating (and cooling) needs. Orient your greenhouse for maximum winter sun exposure and use deciduous trees or shade cloth for summer cooling.
Phase Your Investment
- Start with passive solar features (orientation, thermal mass, basic insulation).
- Add active systems (PV panels, solar heating) later as budget allows.
Repurpose and Source Locally
Use salvaged materials where possible—old windows, reclaimed wood, or barrels for thermal mass. Sourcing materials locally saves on transport costs and reduces environmental impact.
Take Advantage of Incentives and Rebates
Many regions offer tax credits, rebates, or low-interest loans for solar installations. Check federal, state, and local programs, and factor them into your budget planning.
DIY Where Feasible
If you have basic construction skills, tackle framing, glazing, or raised beds yourself. Hire professionals for electrical or complex plumbing work to ensure safety and code compliance.
Hidden and Ongoing Costs
Maintenance and Repairs
- Glazing replacement (every 10–15 years for polycarbonate, 20+ for glass)
- Sealant and weatherproofing every 3–5 years
- Cleaning and servicing solar panels: $100–$200/year (if you outsource)
Budget at least $200–$500 annually for ongoing maintenance.
Energy and Water Use
Solar greenhouses minimize grid electricity use, but you may still need supplemental heating, especially in northern climates. Rainwater harvesting mitigates water costs, but plan for filtration and backup supply.
Insurance and Property Taxes
Adding a structure may increase your homeowner’s insurance premium and property taxes. Contact your insurer and local assessor before starting construction.
How to Estimate Your ROI
Yield and Savings
Calculate your potential produce yield (in pounds or kilograms per year) and compare to grocery store prices. Add in savings on herbs, starts, and specialty crops—solar greenhouses can pay for themselves in 5–10 years, depending on crop choices and climate.
Energy Savings
Compare the total energy costs of a traditional greenhouse to your projected solar greenhouse needs. Savings can be substantial, especially with high-insulation and active solar systems.
Resale Value and Lifestyle Benefits
A well-designed solar greenhouse can boost your home’s value and appeal to eco-conscious buyers. Factor in intangible returns: improved food security, year-round gardening, and a lower carbon footprint.
Case Example: Suburban Solar Greenhouse Success Story
In upstate New York, the Johnson family built a 10×16 ft solar greenhouse using double-wall polycarbonate, thermal mass, and a small PV system for vent fans. Their total outlay was $13,500, with $2,500 recouped via a state solar incentive. They now grow greens, tomatoes, and herbs year-round, saving an estimated $1,200 annually on groceries and eliminating winter heating bills for the greenhouse. Their system paid for itself in just over nine years, and they report greatly improved food quality and gardening enjoyment.
Budgeting Checklist: From Dream to Reality
- Define your goals (year-round crops, specialty plants, energy independence, etc.)
- Measure and plan your site
- Get quotes for all major components and labor
- Research local permits and insurance impacts
- Apply for incentives or rebates
- Create a phased investment plan if needed
- Establish a maintenance fund
Conclusion: Building a Solar Greenhouse—A Smart, Sustainable Investment
Constructing a solar-powered greenhouse for your home is more than just a gardening upgrade—it’s a strategic investment in sustainability, self-reliance, and climate resilience. While the upfront costs can seem daunting, a transparent cost breakdown and a thoughtful budgeting strategy reveal the long-term value. By prioritizing energy efficiency, sourcing materials wisely, and taking advantage of available incentives, you can create a year-round oasis for food production that pays dividends for years to come. The key is to approach the project with clear goals, ask plenty of questions, and budget not just for construction but for ongoing care. Every dollar invested in a solar greenhouse is a step toward a greener, healthier, and more independent future. Whether you’re a hobby gardener, a serious homesteader, or simply seeking to reduce your environmental impact, a solar greenhouse offers both practical rewards and the satisfaction of treading lightly on the planet. Start with a solid plan—your garden, your wallet, and the Earth will thank you.


When budgeting for a home solar greenhouse, how should I account for things like thermal mass materials or high-insulation glazing—are there average price ranges for these components? I’m trying to estimate costs before I start sourcing materials.
Thermal mass materials like water barrels or concrete can range from $0.50 to $3 per gallon (for water storage) or $3 to $10 per square foot (for concrete). High-insulation glazing, such as double or triple-pane polycarbonate, typically costs between $2 and $6 per square foot. Be sure to factor in both material and installation costs as you budget.
In the breakdown section, you mention both thermal mass materials like water barrels and more active tech like solar fans. Are there cases where using both together is recommended, or is it better to choose one approach when budgeting for a small backyard greenhouse?
Using both thermal mass materials and active tech like solar fans can actually complement each other, especially in climates with wide temperature swings. Thermal mass helps regulate temperature passively by absorbing and releasing heat, while fans can quickly adjust airflow if needed. For a small backyard greenhouse, combining a modest amount of thermal mass with a simple solar fan offers flexibility and efficient climate control without a big budget increase. It isn’t always about choosing one or the other—using both in balance can be beneficial.
From the budgeting section, do you have any example numbers or case studies for the total cost of a small backyard solar greenhouse? I’m trying to figure out a realistic starting budget before I dive deeper.
Based on the budgeting section, a small backyard solar greenhouse typically costs between $3,000 and $8,000, depending on materials, size, and features. For example, a 10×12 foot structure might run about $4,500 including glazing, framing, insulation, basic solar setup, and installation. These numbers can vary by location and choices, but this range should give you a realistic starting point.
How long does it typically take for the savings on utility costs to offset the initial investment in a home solar greenhouse, especially when integrating photovoltaic panels for electrical needs?
The payback period for a home solar greenhouse with integrated photovoltaic panels usually ranges from 7 to 15 years. This depends on factors such as your local utility rates, the size of your greenhouse, how much energy you use and generate, and any available government incentives or rebates. Careful budgeting and taking advantage of grants or tax credits can shorten the time needed to recover your initial investment through utility savings.
After you’ve decided on the site and orientation, what are the most important initial steps to keep costs on track during the construction phase? Is it worth hiring a professional for the thermal mass and insulation design, or can most DIYers handle this part?
Once your site and orientation are set, focus on creating a detailed materials list and timeline to avoid costly surprises. Carefully track expenses as you go. For thermal mass and insulation, it depends on your experience; simple designs can be DIY-friendly with careful research, but if your climate is extreme or you want maximum efficiency, hiring a professional can help prevent costly mistakes and ensure your greenhouse performs well.
When budgeting for a solar greenhouse, how much should I expect to spend on insulation and thermal mass materials like water barrels or stone walls? Are these typically one-time costs or do they require ongoing maintenance?
For insulation, you can expect to spend anywhere from $1 to $3 per square foot depending on the material (like rigid foam panels or double glazing). Thermal mass materials such as water barrels or stone walls typically cost $100 to $300 each for barrels, or $10 to $20 per square foot for stone walls. These are primarily one-time investments, though occasional maintenance may be needed, like checking for leaks in barrels or resealing stonework every few years.
The article talks about different heating methods—do you have suggestions on the most cost-effective way to maintain stable winter temperatures without driving up long-term expenses, especially in colder northern US states?
For colder northern states, the most cost-effective way to maintain stable winter greenhouse temperatures is combining passive solar design with thermal mass, such as water barrels or stone, to store daytime heat. Adding proper insulation, like double-wall polycarbonate panels and insulated north walls, reduces heat loss. If extra heating is needed, a small wood stove or efficient electric heater used only during extreme cold can help minimize ongoing costs.
I noticed you mention both passive and active solar greenhouse designs. Is there a big difference in upfront costs and long-term savings between the two, especially for a typical suburban backyard setup?
Passive solar greenhouse designs usually have a lower upfront cost because they rely mainly on the building’s orientation, insulation, and basic materials to capture and retain heat. Active solar greenhouses, on the other hand, require additional investments in solar panels, fans, and control systems, making initial costs higher. However, active systems can offer greater control over temperature and potentially higher long-term savings on heating, especially in colder climates. For a typical suburban backyard, passive designs often provide a better balance of affordability and efficiency unless you need year-round growing or precise climate control.
You mention both passive and active solar greenhouse designs. Is there a significant cost difference between building a fully passive versus an active solar greenhouse, especially when it comes to initial investment and ongoing maintenance?
Yes, there is a notable cost difference. Passive solar greenhouses rely mainly on design features like insulation, orientation, and thermal mass, so their initial costs are generally lower and maintenance is minimal. Active solar greenhouses require additional equipment such as solar panels, fans, or thermal storage systems, which means a higher upfront investment and more ongoing maintenance for components like electronics and moving parts. Over time, active systems can also have higher repair or replacement expenses.
For someone planning to grow crops year-round, how much should I budget for possible upgrades if local weather gets more extreme than expected? Would it be better to overbuild at the start?
If you expect harsher weather in the future, it’s wise to budget at least 15-25% extra for upgrades like stronger insulation, backup heating, or reinforced structures. Overbuilding at the start—using sturdier materials and better insulation—can save money and hassle later, but it does increase upfront costs. The best approach depends on your budget flexibility and how likely severe conditions are in your area.
How long does it typically take to see a return on investment for a solar greenhouse? Do factors like local climate or the types of crops grown make a big difference in the payback period?
The payback period for a solar greenhouse usually ranges from 5 to 10 years, depending on the initial investment and ongoing savings. Local climate plays a significant role; sunnier areas may see quicker returns. The types of crops also matter—high-value or year-round crops can boost revenue and shorten the payback period. Careful crop selection and system design are key factors.
I noticed you talked about site preparation as a major cost factor. If my backyard has a slight slope, will leveling it add significantly to the budget, or are there design tweaks that can work with uneven ground?
Leveling a sloped backyard can add to your budget, especially if significant excavation or retaining walls are needed. However, you might be able to adjust the greenhouse design to work with the slope. Options include building on piers or a stepped foundation, which can sometimes be more cost-effective than full leveling. Consulting with a builder or designer can help determine the best approach for your specific site and budget.
After reading about the upfront investment, I’m curious how long it typically takes before you start seeing savings on household expenses by growing food in a solar greenhouse. Is there a common payback period you’ve noticed?
The payback period for a home solar greenhouse can vary based on factors like your local climate, what crops you grow, and how much you would otherwise spend on produce. On average, many homeowners start seeing noticeable savings within 5 to 8 years. This considers both the reduced grocery bills and lower energy costs, especially if you maximize year-round growing.
For someone with a small backyard, is it still practical to include both passive and active features, or would you recommend prioritizing one over the other to keep costs reasonable?
With a small backyard, it’s definitely practical to focus on passive features like thermal mass and south-facing glazing, since they’re cost-effective and don’t require much space. You can add active features, such as fans or heaters, later if you find you need more precise temperature control. Prioritizing passive strategies first usually keeps costs down and works well in smaller greenhouses.
The article mentions that solar greenhouses can cut your carbon footprint, but do you know how long it generally takes for these systems to pay for themselves with energy savings compared to conventional greenhouses?
Payback periods for solar greenhouses typically range from 5 to 15 years, depending on factors like your local climate, energy prices, and the greenhouse’s design and size. Solar greenhouses save energy by reducing heating bills, especially in colder months, so areas with higher energy costs or longer winters often see a faster return on investment compared to conventional greenhouses.
For someone just starting out, what would you recommend as the most cost-effective way to balance insulation and natural sunlight—should I prioritize upgraded glazing or invest in more thermal mass materials first?
If you’re just starting out and need to balance cost and efficiency, it’s usually best to prioritize upgraded glazing first. Good-quality glazing ensures you get sufficient natural sunlight while reducing unwanted heat loss. Once you have efficient glazing in place, you can add thermal mass materials as your budget allows to help store and regulate heat. This approach gives you immediate energy savings and flexibility for future improvements.
I’m intrigued by the idea of integrating photovoltaic panels into a greenhouse setup. Do you have any insights into the payback period for the extra investment in PV panels compared to just sticking with passive solar features?
Photovoltaic panels can increase your initial investment by several thousand dollars, depending on the size and technology used. Typically, payback periods for PV panels range from 7 to 15 years, factoring in local electricity costs and available incentives. Passive solar features have a shorter payback since they rely on design rather than equipment, but they offer less energy generation. PV panels may be worth it if you want to offset utility costs or achieve net-zero energy, especially in regions with good sun exposure.
Curious about the initial planning phase: how much additional time should homeowners expect to spend on design and orientation details to ensure optimal sunlight capture, compared to building a traditional greenhouse?
Homeowners can expect to spend an extra 1 to 2 weeks on the initial planning phase when designing a solar greenhouse, compared to a traditional greenhouse. This extra time is needed to research sun angles, select the right orientation, and possibly consult with experts to maximize sunlight capture. Careful planning at this stage leads to much better energy efficiency and growing conditions.
The article mentions strategic orientation for best sunlight capture. If my backyard doesn’t have a true south-facing spot, will that seriously impact the efficiency, or are there modifications I can make in the design or materials to compensate?
If your backyard can’t accommodate a true south-facing greenhouse, you can still get good results with some adjustments. Consider orienting your greenhouse as close to south as possible or southeast/southwest if necessary. Use high-quality glazing materials that maximize light transmission and consider adding thermal mass (like water barrels or stone) to store heat. Reflective materials on interior walls can also help distribute light more evenly. While there may be some efficiency loss, these modifications can significantly help compensate.
Could you clarify how much of the total cost typically comes from integrating photovoltaic panels compared to just relying on passive solar features like thermal mass and insulation? I am trying to decide if the investment in electrical generation is worthwhile for a smaller home greenhouse.
Integrating photovoltaic panels can account for 30–50% of your total greenhouse cost, especially in smaller projects. Passive solar features like insulation and thermal mass are generally less expensive upfront and focus on reducing heating needs rather than generating electricity. If your main goal is climate control and energy savings, relying on passive features keeps costs lower. Photovoltaic panels become more worthwhile if you need electricity for fans, lights, or automation, but for basic growing needs, passive solar alone is often sufficient.
Can you clarify how much ongoing savings I could realistically expect each year after building a solar greenhouse compared to running a regular greenhouse off the grid? I’m trying to calculate how long it takes to break even.
Annual savings can vary, but a solar greenhouse typically cuts or eliminates energy bills since it uses passive solar heating and may need only minimal supplemental power. In contrast, an off-grid regular greenhouse often requires generators or fuel, which can easily cost $1,000–$2,500 per year or more depending on your climate and size. If your solar setup costs, say, $15,000 to build, and you save $2,000 a year in energy costs, you could expect to break even in about 7–8 years. Actual savings depend on local conditions and energy prices.
You mention thermal mass options like water barrels or stone walls for heat storage. Do you have any recommendations or data on which type of material offers the best value in terms of both cost and energy efficiency for a home solar greenhouse?
In most home solar greenhouses, water barrels usually provide the best value for thermal mass. Water is inexpensive, easy to source, and very effective at storing and releasing heat compared to stone or concrete. For every dollar spent, water barrels typically store more heat per unit of space and are also easier to move or adjust if your setup changes. Stone or concrete can be effective too, but they are often pricier and less flexible for small-scale projects.
Do you have any tips on how to estimate ongoing maintenance costs for a solar greenhouse, especially if I want to try growing through the winter? I want to make sure I don’t underestimate the long-term expenses.
To estimate ongoing maintenance costs for a solar greenhouse, factor in items like replacement of glazing panels, upkeep of solar systems (cleaning and occasional inverter or battery servicing), and routine checks of fans or ventilation equipment. For winter growing, include extra heating costs, possible insulation repairs, and increased lighting or energy use on cloudy days. Keeping a maintenance log from the start will help you track expenses and spot patterns over time.
I see that strategic orientation is important, especially south-facing designs. What should I do if my available backyard space doesn’t face directly south? Will that significantly impact costs or performance?
If your backyard doesn’t face directly south, you can still build an efficient solar greenhouse by angling the roof or main glazing toward the south as much as possible. While a perfect southern orientation maximizes sunlight and efficiency, small deviations won’t drastically affect performance. You might need to slightly increase insulation or supplement with grow lights, but costs should only rise modestly if you adapt the design thoughtfully.
The article mentions using thermal mass like water barrels or stone walls for storing heat. Do you have any recommendations on which material is most cost-effective and easiest to install for someone building a small backyard greenhouse?
For a small backyard greenhouse, water barrels are usually the most cost-effective and easiest thermal mass option. They’re simple to set up—just fill clean, dark-colored barrels with water and place them where they’ll catch sunlight during the day. Stone or masonry walls can work well but are typically more expensive and labor-intensive to install compared to water barrels.
If my property is partially shaded and doesn’t have perfect south-facing exposure, how much would that impact the effectiveness and cost of a solar greenhouse setup?
Partial shade and less-than-ideal south-facing exposure will reduce your greenhouse’s ability to capture sunlight, especially in winter. This can lower its heating efficiency and may require you to invest more in supplemental lighting or heating, which increases ongoing costs. Planning for additional insulation or using shade-tolerant crops can help offset some challenges, but overall, expect both effectiveness and cost-efficiency to be somewhat reduced compared to an optimal site.
For someone looking to grow delicate herbs over winter, how much of a difference does investing in active solar features like PV panels make in the overall cost compared to sticking with a purely passive solar greenhouse design?
Adding active solar features like PV panels to your greenhouse will definitely raise your initial costs, sometimes by several thousand dollars depending on system size and components. For just overwintering delicate herbs, a well-designed passive solar greenhouse often provides enough heat, especially with thermal mass and insulation. Active systems offer more control and backup, but for small-scale herb growing, the extra investment isn’t usually necessary unless you want additional amenities like lighting or automated fans.
The article mentions thermal mass like water barrels or stone walls—are there affordable alternatives that still provide effective heat storage for smaller budgets? I’d love to hear examples suited for DIY builders.
For DIY builders on a tight budget, you can use materials like salvaged bricks, concrete blocks, or even tightly packed gravel as thermal mass. Large, reused plastic containers filled with water are also effective and low-cost. Old tile or ceramic pieces stacked along one wall can store and release heat well too, making them practical options if you have access to leftover or recycled building materials.
I noticed you touched on both passive and active solar greenhouse designs. Are there significant differences in ongoing maintenance costs between these two approaches that homeowners should account for during budgeting?
Yes, there are some notable differences in ongoing maintenance costs between passive and active solar greenhouse designs. Passive greenhouses generally have lower maintenance needs since they rely on natural materials and design features, like insulation and thermal mass, rather than mechanical systems. Active designs, on the other hand, often require regular upkeep of equipment such as fans, pumps, or solar panels, which can add to both routine and unexpected maintenance expenses. Homeowners should definitely factor these differences into their long-term budget planning.
If I want to start growing in my solar greenhouse during winter, how far in advance should I begin construction and what seasonal factors might affect the timeline or upfront costs?
To have your solar greenhouse ready for winter growing, plan to begin construction at least 4 to 6 months ahead. This gives time for permitting, ordering materials, and dealing with possible delays like rain or early frost. Material costs can also rise in late fall or winter, and ground may be harder to work with if the weather turns cold, so starting in late spring or summer is often best.
For someone on a tight budget, which design features would you recommend prioritizing to maximize energy efficiency without driving up costs too much in the initial build?
To keep costs down while maximizing energy efficiency, focus first on insulation—use affordable but effective materials for walls and roof to reduce heat loss. Orient the greenhouse to maximize sunlight, ideally with a south-facing exposure. Simple passive solar features, like thermal mass (barrels of water or stone) to store heat, can also really help without adding much expense. Double-layer plastic glazing is a budget-friendly option for better insulation compared to single-pane. Prioritize these basics before investing in more advanced systems.
The article mentions solar-powered fans and other active systems for temperature and humidity control. Are there any common maintenance or troubleshooting issues with these that a first-time greenhouse builder should budget extra for?
Solar-powered fans and active systems generally require minimal maintenance, but there are a few things to keep in mind. Fans may need occasional cleaning to prevent dust buildup and to ensure proper airflow. Solar panels should be kept clean and checked for damage. Electrical connections can loosen over time, so inspecting wiring annually is wise. Replacement of fan motors or solar batteries may eventually be needed, so budgeting a small yearly amount for repairs or replacements is a good idea.
Do you recommend building a passive or an active solar greenhouse for someone living in a region with cold winters and rising electricity prices? What are the key budgeting differences between the two approaches?
For cold climates with rising electricity costs, a passive solar greenhouse is typically more cost-effective long-term. Passive designs rely on insulation, thermal mass, and strategic orientation to trap and store heat, keeping operational costs low. Active solar greenhouses use equipment like fans, pumps, and solar panels, which increase both upfront and ongoing expenses. While active setups may provide more control, the higher budget requirement is a key difference. If budget and energy savings are top priorities, a well-designed passive system is often the better choice.
The article mentions thermal mass materials like water barrels or stone walls. How do their costs compare, and are there significant performance differences between those options for someone in a colder climate?
Water barrels are often less expensive upfront than constructing stone walls, since you can repurpose barrels and fill them with water. Stone or brick walls cost more due to materials and labor. For colder climates, both store heat well, but stone walls release warmth more slowly and evenly, which can be beneficial overnight. Water barrels heat up and cool down faster, so combining both can be a good strategy depending on your budget and space.
When budgeting for the initial build, what are some common hidden or unexpected costs first-time DIYers like me might face with a solar greenhouse? Does the guide cover these or offer any specific budgeting tips for surprises?
Some common hidden costs for first-time solar greenhouse builders include site preparation, unexpected permit fees, extra insulation materials, and potential upgrades to foundation or ventilation systems. The guide does address these areas by highlighting the importance of setting aside a contingency budget and lists categories where unexpected expenses often arise. You’ll find practical tips for tracking your budget and preparing for surprises throughout the planning and building process.
You mention that site preparation is a major cost factor. Could you elaborate on what specific site features might drive up the cost the most, especially in colder parts of the US?
Site preparation costs can increase significantly in colder regions due to factors like uneven or sloped ground that requires excavation, rocky or clay-heavy soil that’s harder to work with, and the need for deep frost-protected foundations. If your greenhouse site has poor drainage, extra work may be needed to prevent water issues, and removing snow or frozen ground before building can also add expenses.
I noticed you mentioned using thermal mass like water barrels or stone walls in a solar greenhouse. Could you share more about how to estimate the cost and sizing of thermal mass materials based on greenhouse size or local climate?
To estimate thermal mass needs, start by considering your greenhouse’s volume and how much temperature moderation you want. Typically, you’ll need around 2–5 gallons of water or an equivalent amount of stone per square foot of floor space for noticeable effect. For cost, check local prices for materials like water barrels or stone, then multiply by the quantity matched to your calculated need. Climate matters too—colder areas need more mass for stability. Adjust these estimates based on how extreme your local temperature swings are.
For someone completely new to building anything like this, could you break down what upfront costs I should expect before I even consider adding features like PV solar panels or water heaters?
Certainly! Before adding extras like solar panels or water heaters, your main upfront costs will include the greenhouse structure itself (frame and glazing materials), foundation work, site preparation (such as leveling and clearing), ventilation systems, and basic tools or equipment. You might also need permits or inspections, depending on your area. These core expenses give you a functional greenhouse and help you plan what features to add later as your budget allows.
The article mentions using thermal mass like water barrels or stone walls to store heat. Could you give more details on how much those materials typically cost and how to decide which type works best for a backyard greenhouse?
Water barrels generally cost between $30 and $60 each, with standard 55-gallon barrels being the most common. Stone or masonry walls are more expensive, often ranging from $15 to $35 per square foot installed. Water barrels are easy to add and move, while stone offers durability and steady heat release. For a backyard greenhouse, water barrels are usually the most cost-effective and flexible solution, but if you want a permanent feature and have the budget, stone walls can be an excellent long-term investment.
The article talks a lot about budgeting, but do you have any advice on how to estimate long-term savings from lower grocery bills and reduced utility costs once the greenhouse is up and running?
To estimate your long-term savings, start by tracking your current grocery and utility bills for a few months. After your greenhouse is operational, compare these amounts to the new costs. Account for the value of produce you grow yourself and any reductions in heating or electricity bills. Over a year, average out the savings, and you’ll have a solid figure for your annual benefit, which you can then project into the future.
If I want to start small and expand later, what are the most important investments to make up front when building a beginner-friendly solar greenhouse?
When starting small with a solar greenhouse, prioritize investing in a sturdy, well-insulated structure and quality glazing to maximize efficiency. Make sure your frame and foundation can support expansion in the future. Also, consider solar components like ventilation fans and basic solar panels that are modular and easy to add onto later. This approach ensures your initial setup remains useful as your needs grow.
After breaking down the major costs, could you suggest a realistic timeline for moving from planning to completion of a small home solar greenhouse? How does solar integration affect the overall project timeframe?
For a small home solar greenhouse, the typical timeline from planning to completion is about 2 to 4 months. Planning and permitting usually take 2-4 weeks, material sourcing another 2 weeks, and actual construction 4-6 weeks. Integrating solar components may add 1-2 weeks, mainly due to electrical setup and panel installation. Solar integration doesn’t drastically extend the timeline but requires coordination with qualified installers and inspections.
I’m curious about the long-term savings with a solar greenhouse compared to traditional greenhouses. Do you have any ballpark figures that show how quickly homeowners can recoup their initial investment through reduced energy costs?
A solar greenhouse can significantly lower your heating and electricity costs compared to traditional greenhouses, with some homeowners seeing energy savings of 40–70%. Payback periods often range from 5 to 10 years, depending on your local climate, energy prices, and the specific design. After this period, most of the savings go straight to your pocket since ongoing energy costs are much lower. Actual numbers will vary, but these estimates should help you gauge potential long-term benefits.
If my property doesn’t face directly south, how much should I factor into the budget for additional heating or solar equipment to compensate for less-than-ideal orientation? Are there design modifications that help keep costs manageable?
If your greenhouse can’t face true south, you might want to budget an extra 10–30% for supplemental heating or solar panels, depending on how far off the orientation is and your climate. Design tweaks can help limit costs: consider adding extra insulation, using thermal mass like water barrels, or installing reflective insulation on the north wall. These modifications can help retain heat and reduce additional energy needs.
If I want to grow veggies through the winter in a region with limited sun, is it better to invest in more high-insulation glazing or spend a bit extra on an active system with PV panels? I’m trying to prioritize features most helpful for cold climates.
For cold climates with limited winter sun, focusing on high-insulation glazing can help retain heat and reduce energy loss, making passive warmth more effective. However, if sunlight is extremely scarce, adding a PV-powered active heating or supplemental lighting system can be crucial for consistent veggie growth. Prioritize the best insulation your budget allows, then consider an active system as a backup or supplement when passive gains aren’t enough.
I’m curious about the thermal mass materials you brought up, like water barrels and stone walls. From a budgeting standpoint, how big of an impact does choosing one type of thermal mass over another have on overall construction costs and heat retention performance?
Choosing between thermal mass materials like water barrels and stone walls can affect both cost and heat retention. Water barrels are generally less expensive and easy to install, making them budget-friendly while offering effective heat storage. Stone or masonry walls, on the other hand, cost significantly more due to material and labor but provide longer-lasting and steady heat release. If your budget is tight, water barrels are a solid choice, while stone walls are better if you prioritize longevity and consistent thermal performance.
The article mentions using thermal mass like water barrels or stone walls. Do you have any advice on estimating their costs or choosing between these options for an average-sized backyard greenhouse?
When deciding between water barrels and stone walls for thermal mass, consider both cost and practicality. Water barrels are generally cheaper and easier to install—expect to pay $20–$50 per barrel. Stone walls are more expensive due to material and labor, often several hundred dollars. For an average backyard greenhouse, water barrels offer a flexible and cost-effective solution, while stone is more permanent but pricier.
Building a solar greenhouse sounds promising for food independence, but I’m wondering about the timeline. From planning to planting, what sort of timeframe should someone realistically set aside before they see their first harvest in a new home solar greenhouse?
A realistic timeline from initial planning to your first harvest in a home solar greenhouse is typically around 4 to 8 months. This estimate covers project planning, acquiring permits, sourcing materials, construction, and greenhouse setup. After construction, most vegetables take 1 to 3 months to mature, depending on the crops you choose. So, if you start planning now, you could potentially be harvesting within the same year.
The article says thermal mass like water barrels or stone walls can help retain heat. Could you clarify how to estimate the cost and amount of thermal mass needed for, say, a small backyard greenhouse?
To estimate the thermal mass you’ll need, calculate about 2–5 gallons of water or the equivalent in stone per square foot of greenhouse space. For example, a 100 sq ft greenhouse would use 200–500 gallons of water. Water barrels cost around $1–$2 per gallon, and stone walls run about $10–$20 per square foot installed. The exact amount needed depends on your climate and insulation, but these figures provide a starting point.
Once the initial greenhouse is up, how soon can one expect to see savings on household grocery bills, especially if trying to grow year-round? Any tips for accurately forecasting that payback period?
After your greenhouse is up and running, you could start seeing savings within the first growing season, often 2–6 months, depending on what and how much you grow. For year-round use, track your harvest yields and compare them to local grocery prices. To forecast the payback period, total your upfront and ongoing costs, estimate yearly savings based on realistic harvests, and divide the total costs by annual savings. Keeping good records will make your calculations more accurate over time.
How long does it typically take to recoup the initial investment for a home solar greenhouse through energy savings and reduced grocery bills? Does the payback period differ much between passive and active designs?
The payback period for a home solar greenhouse usually ranges from 5 to 10 years, depending on upfront costs, local climate, and how much produce you grow. Passive designs often have lower initial costs and maintenance, so they tend to recoup investment a bit faster—sometimes by a year or two—compared to active systems, which include extra equipment like fans or heaters. Your actual payback time will depend on your energy savings and how much you offset grocery expenses.
How long does it usually take to build a basic home solar greenhouse if I’m doing it myself and have never taken on a project like this before? I’m just wondering how much time I should realistically set aside.
For someone new to DIY projects, building a basic home solar greenhouse can typically take between 2 to 4 weeks, working on weekends or a few hours each day. This timeframe includes planning, gathering materials, site prep, construction, and finishing touches. Factors like weather, greenhouse size, and your comfort with tools can affect the timeline, so it’s good to add a little extra time just in case.
When budgeting for a solar greenhouse, what are some common hidden or underestimated expenses that tend to surprise homeowners after construction begins?
Some often underestimated costs when building a solar greenhouse include site preparation (like clearing, grading, or unexpected drainage work), permit fees, and utility connections. Homeowners are also surprised by the price of specialty glazing, insulation upgrades, and ventilation systems. Ongoing expenses like increased water use and maintenance supplies can add up, too. Planning a buffer in your budget for these items can help avoid surprises.
In your cost breakdown, do you touch on any common unexpected expenses that homeowners should be prepared for during construction of a solar-powered greenhouse?
Yes, the article highlights several unexpected expenses that can arise during the building of a solar-powered greenhouse. These include costs related to unforeseen site preparation issues, weather delays, and upgrades to electrical systems to handle solar components. It also suggests setting aside a contingency fund in your budget to cover these and any other surprises that might come up during construction.
For someone interested in extending their growing season but with a limited budget, would you recommend focusing more on upgrading insulation and thermal mass, or investing in active solar technologies like fans and PV panels?
If your budget is limited, it usually makes more sense to focus on upgrading insulation and adding thermal mass first. These improvements help stabilize temperatures and reduce heat loss, which are key for extending your growing season affordably. Active solar technologies like fans and PV panels can be effective, but they tend to have higher upfront costs and ongoing maintenance. Prioritizing passive strategies will give you more value for your money initially.
When budgeting for a solar greenhouse, how much extra should I expect to spend if I want to include photovoltaic panels for powering fans and supplemental systems, rather than just relying on passive solar design?
If you want to include photovoltaic panels to power fans and supplemental systems, you should budget an additional $2,500 to $7,000 on top of a basic passive solar greenhouse. The final cost will depend on your energy needs, the size of your greenhouse, and local installation rates. Calculate your expected electricity usage to size your PV system accurately and get a few quotes for comparison.
I noticed the section about site preparation, but what kind of extra costs should I expect if my property has uneven terrain or poor soil? Will that dramatically impact the overall budget?
Uneven terrain or poor soil can add to your costs, mainly due to the need for grading, leveling, or bringing in quality soil. Expenses might include excavation, retaining walls, or trucking in topsoil, which can range from a few hundred to several thousand dollars depending on the scale. While these extras can noticeably increase your budget, the impact will vary based on how much site work is required.
In your cost breakdown, do you include the price difference between using passive solar heating techniques versus installing photovoltaic panels for electricity? I am trying to figure out which approach might be more budget-friendly for a small backyard greenhouse in a northern climate.
The cost breakdown in the article separates passive solar heating features (like insulation, thermal mass, and orientation) from photovoltaic (PV) panel installation costs. Passive techniques generally have a lower upfront cost and ongoing savings since they reduce the need for supplemental heating. PV panels are an additional investment if you want to power fans, lights, or other equipment. For a budget-friendly solution in a northern climate, maximizing passive solar design often provides the best value, but adding PV panels can offset electricity needs if your budget allows.
You mention using thermal mass materials like water barrels or stone walls to store heat. Could you break down the typical price range for these materials and how much they impact the overall budget?
Water barrels typically cost between $20 and $60 each, depending on size and whether you buy new or repurposed. Stone or masonry walls can range from $10 to $30 per square foot, factoring in materials and labor. For a small to medium greenhouse, thermal mass might account for 5% to 15% of your total budget, but it can significantly reduce ongoing heating costs.
How long does it typically take from planning to completion to build a home solar greenhouse? I’m trying to figure out if this could be a feasible summer project for our family or if we should allow more time.
Building a home solar greenhouse usually takes between 4 to 8 weeks from initial planning to completion, depending on the size, complexity, and your experience level. If your family is working on it part-time or during weekends, it may take a bit longer. For most summer projects, it’s feasible, but it’s wise to allow some extra time for unexpected delays like weather or material delivery.
Could you expand on how the orientation of a solar greenhouse, like facing it south in the Northern Hemisphere, impacts both the construction budget and the ongoing energy expenses?
Orienting a solar greenhouse south in the Northern Hemisphere maximizes sunlight exposure, which can reduce your need for supplemental heating and lower energy expenses over time. While proper orientation may require adjustments in site preparation or layout—possibly adding to initial construction costs—the overall savings from reduced energy bills usually outweigh these costs in the long run. Investing in optimal orientation is a smart way to boost efficiency and save money over the greenhouse’s lifespan.
The article mentions strategic orientation and high-insulation glazing. If my backyard doesn’t have an ideal south-facing spot, how might that impact both the effectiveness and cost of the greenhouse setup?
If your backyard lacks a south-facing spot, the greenhouse may receive less sunlight, reducing its efficiency for plant growth and increasing the need for supplemental heating and lighting. This can raise both energy use and operational costs. You might also need to invest more in high-insulation glazing or thermal mass to help maintain stable temperatures, which could add to construction expenses.
You mention thermal mass materials like water barrels and stone walls for heat retention. Can you give a ballpark budget estimate for adding these features to a small home greenhouse?
For a small home greenhouse, adding thermal mass with water barrels usually costs around $50–$100 per barrel, depending on size and whether you buy new or recycled barrels. Stone walls can be pricier, with materials and basic installation ranging from $20–$40 per square foot. For a modest setup, budgeting $200–$500 for water barrels and $500–$1,500 for a small stone wall is a good starting point.
I’m curious about how the design elements, like orientation and thermal mass, actually impact heating bills during winter. Are there real savings compared to a regular greenhouse using electric heaters?
Design choices like south-facing orientation and adding thermal mass (such as water barrels or stone) allow a solar greenhouse to capture and store the sun’s heat during the day, then slowly release it at night. This keeps temperatures more stable and reduces the need for electric heating. In winter, these features can significantly lower or even eliminate heating bills compared to standard greenhouses, which often rely heavily on electric heaters.
Could you clarify whether the guide accounts for the ongoing maintenance costs of active solar systems like water heaters and solar fans, or is the cost breakdown mainly focused on up-front building expenses?
The cost breakdown in the guide primarily focuses on the up-front building expenses, including materials and installation. While it mentions active solar systems such as water heaters and solar fans, it does not provide a detailed estimate of their ongoing maintenance costs. For a complete budget, you may want to factor in future maintenance and operational expenses separately.
When considering thermal mass options like water barrels versus stone walls for heat retention, which one tends to be more cost-effective both initially and in terms of ongoing maintenance?
Water barrels are generally more cost-effective than stone walls both in terms of initial investment and ongoing maintenance. Barrels can often be sourced inexpensively and are easy to install, while stone walls require more materials, labor, and a higher upfront cost. Maintenance for water barrels is minimal—just occasional cleaning—while stone walls can need repairs over time, especially if exposed to moisture.
Could you clarify how much more expensive it is to incorporate active solar features, like photovoltaic panels or solar water heaters, compared to sticking with a purely passive design? I’m weighing the initial cost against long-term savings for a small backyard greenhouse.
Incorporating active solar features like photovoltaic panels or solar water heaters typically adds several thousand dollars to your upfront costs, depending on system size and complexity. For a small backyard greenhouse, passive solar options may cost just a few hundred to a couple thousand dollars. Active systems can double or triple the initial outlay, but they often lead to significant long-term savings on energy bills by generating electricity or hot water, especially if your greenhouse use is year-round.
When budgeting for a home solar greenhouse, how do costs typically differ between using mainly passive solar design elements versus adding active features like photovoltaic panels or solar fans? Is there a ballpark percentage increase for switching to an active system?
Using mainly passive solar design—like south-facing orientation, thermal mass, or insulation—usually involves lower upfront costs, as these rely on design rather than equipment. Adding active features such as photovoltaic panels or solar fans can raise your budget substantially. In general, switching from a purely passive setup to one with active solar systems often increases costs by about 20% to 40%, depending on the size and quality of the equipment you choose.
When budgeting for a home solar greenhouse, what are some unexpected expenses people often run into during construction or early operation that might not be obvious from the initial breakdown?
Some unexpected expenses can include permitting fees if your local area requires them, costs for improving site drainage, or extra foundation work if the ground isn’t level. People also sometimes forget about electrical upgrades for ventilation fans or heaters. Early operation surprises might involve higher water bills, repairs to glazing from weather damage, or additional insulation if the initial build isn’t efficient enough.
How do the ongoing maintenance costs of a solar greenhouse differ between a basic passive setup and one that uses active solar technology like fans and PV panels?
Ongoing maintenance costs for a basic passive solar greenhouse are generally lower, since there are fewer moving parts and less equipment involved. You’ll mostly need to maintain the structure, glazing, and vents. In contrast, a setup with active solar technology—like fans and photovoltaic (PV) panels—will have additional costs for inspecting, cleaning, repairing, or replacing electrical components, fans, and the PV system over time.
Could you elaborate on how site preparation costs can vary depending on local conditions? For example, if my backyard is on a slight slope, would that significantly change the budget or design for a solar greenhouse?
Site preparation costs can change a lot based on your backyard’s conditions. If your yard is on a slope, you might need extra grading or a retaining wall to create a level base for the greenhouse, which adds to your costs. Sloped sites can also affect drainage, so you may need to budget for additional drainage solutions. Design-wise, a slope could influence foundation choices, as you might need piers or a stepped foundation to keep the structure stable.
I’m completely new to building structures—about how long does it usually take a beginner DIYer to build one of these solar greenhouses from start to finish, assuming I follow your budgeting and breakdown steps?
For a beginner with basic tools and no prior construction experience, building a home solar greenhouse typically takes about 2 to 4 weeks if you work on it part-time, like weekends and evenings. This estimate covers everything from preparing the site to finishing touches, as outlined in the article. Working steadily and following the steps will help keep the project manageable and rewarding.
When budgeting for a home solar greenhouse, what are a few commonly overlooked expenses that tend to surprise first-time builders? I’d like to avoid underestimating the full financial commitment involved.
Some commonly overlooked expenses include the cost of site preparation, such as leveling ground or removing debris, which can add up quickly. First-time builders also often underestimate the price of quality insulation, automated ventilation systems, and backup heating for colder months. Utility connections, permits, and ongoing maintenance supplies can also surprise people. Planning for these in your budget will help avoid unexpected costs.
If I want to build a solar greenhouse that can grow vegetables year-round in a cold climate, what are some essential features or upgrades I shouldn’t skip, even if my budget is limited?
For year-round vegetable growing in a cold climate, focus on good insulation (like double-layer polycarbonate panels), a thermal mass system to store heat (such as water barrels or stone), and reliable ventilation to prevent overheating on sunny winter days. If possible, add a backup heater for extreme cold spells. Prioritizing these features will help maintain stable temperatures and protect your plants through the winter.
I want to build a small solar greenhouse mainly for winter vegetables. How do I estimate the total budget if I plan to do most of the labor myself but still want decent insulation and basic solar-powered ventilation?
To estimate your total budget, list all materials you’ll need: greenhouse frame (wood or metal), glazing (like polycarbonate panels or double-layer plastic for insulation), foundation, insulation materials, and a basic solar-powered ventilation kit (fan, solar panel, wiring). Get local prices for these items and add a small buffer for extra hardware or unexpected expenses. Since you’re handling the labor, your main costs will be materials and any needed tools.
After reading about the site preparation and the need for high-insulation glazing, how much extra time should I plan for ordering specialized materials or getting permits compared to building a standard greenhouse?
Ordering specialized, high-insulation glazing can add anywhere from 2 to 6 weeks to your timeline, depending on supplier lead times and shipping. Getting permits for a solar greenhouse may also take longer—plan for an additional 2 to 4 weeks, since local authorities sometimes require more documentation for energy-efficient structures. Overall, you might need to budget an extra 4 to 10 weeks compared to a standard greenhouse project.
I noticed you mentioned integrating PV panels for electrical needs. How much extra should we budget for adding solar panels versus just relying on passive solar features and thermal mass?
Adding photovoltaic (PV) panels to a solar greenhouse typically costs between $2.50 and $4.00 per watt installed, depending on system size and local factors. For a modest 2 kW system, expect an added cost of $5,000 to $8,000. If you only use passive solar features and thermal mass, you can avoid these expenses, but you’ll depend on grid electricity for things like fans or supplemental lighting.
How much more expensive is it to add active solar features like photovoltaic panels or solar fans to a home greenhouse versus sticking with just passive solar design?
Adding active solar features like photovoltaic panels or solar fans increases your initial investment compared to using only passive solar design. Passive designs use strategic placement, insulation, and glazing, which are generally lower-cost. In contrast, photovoltaic panels can add several thousand dollars depending on system size, while solar fans typically cost a few hundred dollars more. Overall, active solar systems can increase your costs by 20–40% or more, but they may offer greater energy savings and control.
The article mentions using thermal mass materials like water barrels or stone walls to store heat in passive solar greenhouses. Do you have any ballpark figures on how much these elements add to the overall budget, and is one option (water versus stone) more cost-effective or efficient than the other?
Thermal mass materials do have different costs and benefits. Water barrels are generally more budget-friendly, often costing between $20 and $50 each for 55-gallon drums, plus minimal setup. Stone or masonry walls are pricier, typically running $10 to $25 per square foot installed. Water is more cost-effective if you’re on a tight budget, while stone offers better long-term durability and thermal efficiency but at a higher upfront cost.
I noticed you mention thermal mass materials like water barrels or stone walls. Are there any significant differences in up-front cost or efficiency between these options when planning for winter vegetable production?
Water barrels are generally less expensive up front compared to building stone or masonry walls, making them a popular choice for budget-conscious greenhouse projects. However, stone or masonry walls provide more consistent thermal mass and can regulate temperature over longer periods, which may benefit winter vegetable production. If you’re prioritizing cost, water barrels are effective, but if you’re looking for greater thermal stability, investing in stone walls might be worthwhile.
When budgeting for a home solar greenhouse, how much do integrated PV solar panels typically add to the overall cost compared to just sticking with passive solar features like thermal mass or orientation?
Integrated PV solar panels usually add a significant amount to the initial cost—sometimes several thousand dollars, depending on the size of your greenhouse and the capacity of the system. Passive solar features like thermal mass and optimal orientation are much less expensive, often just a few hundred dollars for materials. PV systems bring long-term energy savings, but they can more than double the upfront budget compared to passive-only designs.
Are there any budget-friendly construction materials or DIY options that still provide good insulation and solar efficiency for someone just starting out with a home solar greenhouse?
Yes, there are several affordable materials and DIY options that balance cost, insulation, and solar efficiency. Double-layer polyethylene film is budget-friendly and offers decent insulation when inflated. Corrugated polycarbonate panels are also an economical choice with good light transmission and durability. For the frame, using untreated lumber or PVC piping can help lower costs if you’re building it yourself. Adding a layer of bubble wrap to interior walls is a simple, inexpensive way to boost insulation as well.
Based on your breakdown, are there any recurring maintenance costs with solar greenhouses that people often overlook when budgeting for the first year?
Yes, some recurring maintenance costs are often overlooked. These can include cleaning solar panels to maintain efficiency, replacing or repairing greenhouse glazing, maintaining ventilation systems, and checking batteries or inverters if you’re using solar storage. It’s also wise to budget for pest management, routine inspection of seals and structural components, and possibly replacing filters or fans. Including these in your first-year budget can help avoid surprises.
When designing a solar greenhouse, how big of a difference does incorporating thermal mass like water barrels actually make for winter heating compared to relying just on insulation?
Incorporating thermal mass like water barrels makes a significant difference for winter heating. Thermal mass absorbs heat from the sun during the day and releases it slowly at night, helping to regulate temperature swings. While insulation helps retain heat, it doesn’t store it. By combining both, your greenhouse will stay warmer at night and during cold snaps, reducing reliance on supplemental heating.
What specific budgeting tips do you recommend if someone has a small backyard with awkward orientation and is worried about not getting enough direct sunlight for a south-facing design?
If your backyard has limited space or doesn’t face south, focus your budget on materials that maximize light, such as high-quality glazing and reflective interior surfaces. Consider a lean-to greenhouse attached to a sunniest wall, or use portable, modular structures. Invest in supplemental LED grow lights only for the shadiest spots rather than the whole greenhouse. Planning for efficient insulation will also help make the most of limited sunlight, reducing your long-term costs.
I’m new to solar greenhouses and noticed you mention both passive and active designs. For someone living in the northern US with really cold winters, would investing in active solar panels be worth the extra upfront cost for better temperature control, or can passive features alone do the job?
In the northern US, passive features like insulation, thermal mass, and strategic glazing can help, but extreme cold often challenges passive-only greenhouses. Active solar panels add upfront cost but provide more reliable heat, especially during long, cloudy winters. Many northern growers find a hybrid approach works best—using passive design to reduce energy needs and active solar systems to maintain stable temperatures. This can protect plants from deep freezes and extend your growing season.
When planning the initial construction, how much time should I realistically set aside from start to finish for a DIY solar greenhouse, assuming I’ve never done something like this before?
For a first-time DIY builder, you should expect the whole process to take between 4 to 8 weeks, depending on the size and complexity of your solar greenhouse, your schedule, and how much help you have. This estimate includes time for planning, gathering materials, site prep, construction, and finishing touches. If you’re working mostly on weekends, plan for the longer end of that range.
What parts of the budget tend to surprise people most when planning a solar greenhouse? I’m trying to avoid unexpected costs if I take on a DIY build.
People are often surprised by the costs of site preparation, ventilation systems, and quality glazing materials when building a solar greenhouse. Insulation and thermal mass (like water barrels or concrete) can also add up quickly. Permits and electrical work are other areas that catch some DIY builders off guard. It helps to research each item in detail and build in a buffer for unexpected expenses.
I noticed you mentioned integrating photovoltaic panels for electrical needs. Do you have a ballpark estimate for how much adding PV panels typically increases the total project cost for a small home greenhouse?
For a small home greenhouse, adding photovoltaic panels usually increases the total project cost by $3,000 to $7,000, depending on the size and your electricity needs. This range covers basic setup with enough panels for lighting, fans, and small equipment. Keep in mind that prices vary based on quality, local incentives, and installation complexity.
The article talks about how solar greenhouses cut food miles and improve household resilience. If I’m hoping to grow vegetables year-round in a colder climate, how big of an investment should I realistically expect to start with, and are there cost-saving tips for beginners?
For year-round vegetable growing in a colder climate, expect to invest between $5,000 and $25,000 for a small to medium solar greenhouse, depending on size, materials, and automation. Costs can be lowered by choosing a simple design, building it yourself, using recycled materials, or starting with a smaller structure and expanding later. Insulating well and selecting cold-hardy crops will also reduce ongoing heating expenses.
Are there specific design features or materials you recommend to maximize insulation and thermal mass without making the overall construction budget skyrocket, especially for someone building a small-scale home greenhouse?
To maximize insulation on a budget for a small greenhouse, consider double-wall polycarbonate panels—they are highly insulative yet affordable compared to glass. For thermal mass, use water barrels or stone placed where sunlight can hit them; both are cost-effective options that absorb and slowly release heat. Also, frame with wood rather than metal to reduce heat loss. These choices improve efficiency without significantly raising costs.
In the article, you mention that adding PV panels can be part of an active solar greenhouse setup. Could you clarify what percentage of a typical greenhouse’s electricity needs can realistically be met with rooftop solar panels in most climates?
The percentage of a greenhouse’s electricity needs that can be met with rooftop solar panels varies by factors like roof size, panel efficiency, and local sunlight hours. Typically, rooftop PV panels can supply anywhere from 30% to 70% of a greenhouse’s electricity demands in most climates, though reaching the higher end often requires energy-efficient equipment and optimal panel placement.
When budgeting for my own solar greenhouse, I’m struggling to figure out how much I should set aside for thermal mass materials like water barrels or stone walls. Could you give some estimates or tips based on what typically works for home setups?
For a typical home solar greenhouse, thermal mass like water barrels or stone/brick walls can cost anywhere from $1 to $3 per gallon of water storage (for barrels), or $10 to $20 per square foot for stone or masonry walls. Many home setups use 55-gallon barrels, which usually run $30–$60 each. A good rule is to allocate 20–30% of your overall materials budget for thermal mass. Start with what your climate and greenhouse size require and scale up as needed.
Once the construction and solar components are installed, what ongoing maintenance or unexpected costs should homeowners factor into their budgeting for a solar greenhouse?
After installation, homeowners should plan for occasional cleaning of the solar panels and glazing to maintain efficiency, as well as routine checks of the ventilation and heating systems. Budget for replacing filters, bulbs, or fans every few years. Unexpected costs might include repairs from storm damage, pest control, or fixing leaks. Setting aside a small annual maintenance fund can help cover these potential expenses.
The article mentions using both water barrels and stone walls for thermal mass in passive solar greenhouses. Do these options vary a lot in terms of up-front costs or effectiveness, especially for a small-scale home project?
Water barrels tend to have a lower up-front cost since you can often repurpose used barrels, and they’re easy to set up in a small greenhouse. Stone walls are more expensive due to material and construction costs, and they take up more space. For small-scale projects, water barrels are usually more cost-effective and flexible, though stone walls may retain and release heat over a longer period.
You mention both passive and active solar greenhouse designs. Is there a big difference in upfront costs between these two options, and are there situations where one is a lot more cost-effective than the other for a small home setup?
Passive solar greenhouse designs usually have lower upfront costs because they rely mainly on orientation, insulation, and natural heat retention, without needing fans or pumps. Active designs, which use equipment like heaters, solar panels, or ventilation systems, add to initial expenses. For a small home setup, passive designs are often more cost-effective unless you need strict temperature control or plan to grow year-round in a challenging climate.
Once the greenhouse is built, what are the ongoing operational costs for things like maintaining solar panels or replacing glazing, and how do these recurring expenses affect the long-term savings projected in the article?
Ongoing operational costs include periodic cleaning and inspection of solar panels, which are generally low but important for maintaining efficiency. Glazing may need replacement every 10 to 20 years, depending on material and local conditions, which is a more significant but infrequent cost. These expenses slightly reduce long-term savings, but they are usually much less than ongoing utility costs for traditional greenhouses, so the projected savings in the article still hold up well over time.
You mention using thermal mass like water barrels or stone walls to help with heat storage. Could you provide an estimate of the upfront cost for incorporating these features, and how much I might save on ongoing energy expenses by including them?
Incorporating thermal mass such as water barrels or stone walls in your greenhouse typically costs between $100 to $500 for water barrels (depending on size and number) and $500 to $2,000 for stone walls. These features can reduce heating costs by 20–50%, as they help retain daytime warmth and minimize the need for supplemental heating at night, leading to noticeable savings on energy bills over time.
For homeowners in regions with less winter sunlight, does the guide include advice on sizing or supplementing solar features to maintain year-round productivity, or is it mostly tailored for sunnier areas?
The guide does address the challenges faced by homeowners in regions with less winter sunlight. It offers advice on sizing solar panels and storage systems to account for reduced sunlight, and suggests supplemental options like backup heaters and grow lights. While there is information relevant to sunnier areas, the recommendations are adaptable to ensure year-round productivity in less sunny climates as well.
When planning out the site, are there any hidden costs related to prepping the ground or orienting the greenhouse southward? My backyard has a slope and several trees, so I’m curious what to expect before construction even begins.
When prepping a sloped site, you might need extra grading or a retaining wall, which can add to costs. Removing trees (including stumps and roots) often requires professional help and disposal fees. If you need to reorient the greenhouse for optimal sunlight, additional excavation or foundation adjustments might be necessary. Also, check for any utility lines or drainage issues that could complicate site prep before construction.
The article mentions both thermal mass materials and high-insulation glazing as key features. Which of these ends up being a bigger portion of the budget, and are there situations where it makes sense to prioritize one over the other?
High-insulation glazing typically takes up a larger portion of the budget because quality glazing materials are expensive and cover a significant surface area. However, if your climate has extreme temperature swings, investing more in thermal mass may make sense for better heat retention. In milder climates, prioritizing high-quality glazing for insulation can offer better energy efficiency and comfort.
When budgeting for a solar greenhouse, do the long-term savings from reduced energy usage typically outweigh the initial investment in insulation, glazing, and thermal mass? It would help to see some real examples or payback timelines.
Long-term savings from reduced energy use in a well-designed solar greenhouse often do outweigh the upfront costs for insulation, glazing, and thermal mass, though payback periods vary. For example, with moderate climates and quality materials, payback can range from 5 to 12 years. Factors like local energy prices, greenhouse size, and efficiency affect the timeline. Homeowners frequently report noticeable savings on heating bills, especially in colder regions, making the investment worthwhile over time.
Can you break down typical maintenance or unexpected costs that might come up after the initial build? I want to make sure I’m not overlooking anything in the long-term budgeting.
After the initial build, typical maintenance costs for a solar greenhouse include replacing glazing panels (every 10–15 years), maintaining or repairing ventilation systems, and servicing heating or cooling elements. Unexpected costs might arise from storm damage, pest infestations, or electrical issues with solar components. Also, budget for replacing worn seals or weatherproofing, and periodic system checks to keep everything running efficiently. Setting aside a small annual fund can help cover these unforeseen expenses.
I’m trying to figure out if the added expense of installing photovoltaic (PV) panels for electricity in an active solar greenhouse really pays off compared to sticking with just the passive design elements you mentioned. Could you shed light on the typical cost difference and long-term savings between the two setups?
The upfront cost for adding PV panels to an active solar greenhouse setup is typically several thousand dollars more than relying on passive design alone. Passive elements (like orientation, insulation, thermal mass) usually cost less and require minimal maintenance. PV panels can reduce or eliminate electricity bills over time, so if your greenhouse will need regular power for fans, lighting, or automation, they can pay for themselves in 7–15 years depending on your energy usage and local rates. If your needs are minimal, passive approaches might be more cost-effective long term.
Could you provide more details on what typically drives the largest portion of the budget when building a solar greenhouse, especially for someone interested in growing vegetables year-round in a colder climate?
The largest portion of the budget for a solar greenhouse in a colder climate typically goes to the building materials and insulation. High-quality glazing (like double-pane polycarbonate or glass) and insulated framing are crucial for maintaining warmth through winter. Next, heating systems—whether passive solar mass, backup heaters, or thermal batteries—can add significant costs. If you plan to grow year-round, investing in reliable insulation and thermal storage will be essential to minimize ongoing heating expenses and protect your crops.
You mentioned thermal mass materials like water barrels or stone walls as key features. Are there significant upfront or installation costs for these, and how do they compare to the potential savings over time?
Thermal mass materials like water barrels or stone walls do add some upfront costs to your greenhouse project. Water barrels are relatively inexpensive and easy to install, while stone or masonry walls can be pricier due to materials and labor. However, by storing heat and reducing the need for additional heating, these features often lead to noticeable energy savings over time, eventually offsetting their initial installation costs.
When planning the orientation and layout, how much can local climate affect the effectiveness of passive solar features? For example, would someone in the Pacific Northwest need a different design focus compared to someone in the Southwest?
Local climate has a big impact on how effective passive solar features will be in your greenhouse. In the Pacific Northwest, where there’s more cloud cover and less sunlight, you’d want to maximize south-facing glazing and use materials that retain heat. In the Southwest, you’d focus more on shading, ventilation, and preventing overheating, since there’s abundant sun. So yes, your design should be tailored to your region’s sunlight, temperature swings, and humidity.
I’m a bit confused about the budgeting part. Besides the bigger expenses like glazing and solar panels, are there any smaller, hidden costs that first-timers commonly overlook when building a solar greenhouse?
Absolutely, there are several smaller expenses that are easy to miss. These include hardware like fasteners and sealants, weatherproofing materials, ventilation fans, electrical wiring, thermostats, and foundation work. Also, consider costs for permits, tools, and recurring maintenance items like replacement filters. Planning for these ahead of time can help you avoid surprises as your project progresses.
I noticed the article talks about integrated PV solar panels for electrical needs. Would including PV panels significantly increase the total cost, and are there incentives or rebates that could help offset this expense for home gardeners?
Including integrated PV solar panels will increase your upfront costs, sometimes by several thousand dollars, depending on the size and capacity needed. However, there are often federal and state incentives, such as tax credits or rebates, that can help reduce these expenses for homeowners. It’s a good idea to check current local programs, as they can make PV installation much more affordable for home gardeners.
I’m interested in integrating PV panels for electrical needs in my greenhouse, like you mentioned. Do you have advice on how to budget for that, or know if it’s worth adding them at the build stage versus later down the line?
Including PV panels during your initial build can often be more cost-effective, since you can plan electrical layouts and structural support for the panels from the start. It also lets you streamline permits and potentially qualify for green building incentives. For budgeting, factor in panel costs, inverters, wiring, mounting hardware, and installation fees. Get multiple quotes and consider both current and future power needs to size your system appropriately. If your budget is tight, you can build with the necessary infrastructure and add the panels later, but retrofitting usually adds extra costs.
The article highlights that solar greenhouses can save money over time, but what is a realistic payback period for a home setup after considering all initial costs and ongoing maintenance? Are there any common hidden expenses that first-time builders should watch out for?
For a typical home solar greenhouse, the payback period usually ranges from 5 to 12 years, depending on your climate, material choices, and how much you reduce energy costs. Hidden expenses to watch for include permitting fees, site preparation, unplanned insulation upgrades, and potential replacement of glazing materials down the road. Regular maintenance like cleaning panels and checking seals should also be factored into your budget.
I noticed you mentioned orientation and strategic glazing for solar greenhouses. How precise does the orientation need to be? If my yard doesn’t face perfectly south, will it really affect performance and budget?
The orientation of your solar greenhouse does play a role in maximizing sunlight, but it doesn’t need to be perfectly south-facing. Even if your yard faces southeast or southwest, you can still achieve good performance, especially with proper glazing placement. You might lose a bit of efficiency, but it usually won’t have a major impact on your overall budget or results. Adjusting the angle or size of the glazed area can help make up for less-than-ideal orientation.
Could you clarify how the budget for a solar greenhouse might change if you’re planning to grow food throughout harsh winters? Are there extra design elements that significantly increase costs for cold climates?
If you plan to grow food through harsh winters, your budget will need to cover extra insulation, stronger greenhouse glazing (like double- or triple-wall polycarbonate), and possibly a supplemental heating system. You may also need thermal mass materials to store heat, and better weather sealing to reduce heat loss. These upgrades can significantly increase both construction and operational costs compared to a greenhouse used only in milder seasons.
For a family hoping to grow most of their vegetables year-round, how much space would a typical solar greenhouse need, and how does that affect the upfront cost breakdown mentioned in the article?
For a family aiming to grow most of their vegetables year-round, a solar greenhouse size of about 200 to 300 square feet is usually recommended. Larger greenhouses increase costs for materials, glazing, foundation, and heating systems. For example, if the article’s cost breakdown is based on 100 square feet, you can expect to roughly double or triple the upfront costs for a 200–300 square foot structure, depending on materials and features chosen.
When planning the layout, you mention the importance of south-facing orientation and proper glazing. If my available space doesn’t allow for an ideal south-facing setup, how much will this impact the cost or effectiveness of a solar greenhouse?
If you can’t orient your greenhouse directly south, you’ll likely see reduced sunlight exposure, especially in winter, which can lower efficiency and increase heating costs. You might need to invest in additional insulation or supplemental lighting to maintain consistent temperatures, which can raise both upfront and ongoing expenses. Positioning the greenhouse to capture as much sun as possible and choosing high-quality glazing will help offset some of these drawbacks.
Can you share more about how integrated PV solar panels compare cost-wise to just using passive design elements? I’m wondering if adding solar panels is worth the extra investment for a DIY build.
Integrated PV solar panels do add a significant upfront cost compared to relying solely on passive design elements like south-facing glazing, thermal mass, and insulation. Passive options are usually less expensive and simpler to install, especially for a DIY project. However, solar panels can offset ongoing energy bills by generating electricity. If your main goal is just to optimize temperature and minimize costs, passive design is more budget-friendly. If you want long-term energy production and potential savings on utilities, the extra investment in PV panels may make sense.
Could you give some guidance on what the most affordable insulation materials are for someone just starting out? I want to maximize heat retention, but I’m worried high-insulation glazing might push my project over budget.
If you’re looking to keep costs down, consider using double-layer polyethylene film for insulation—it’s inexpensive and does a good job at retaining heat when inflated between layers. Corrugated polycarbonate panels are another affordable option with better durability and insulation than plain plastic, but they do cost a bit more. You can also use bubble wrap as a temporary or supplemental layer to boost heat retention on a tight budget.
If I want to start small with a passive solar greenhouse and upgrade to more active solar features later, is that a practical approach? Are there certain design decisions I should keep in mind if I want to add things like solar panels down the line?
Starting with a passive solar greenhouse and upgrading to active solar features later is definitely practical. When planning, make sure your greenhouse orientation and roof structure can support solar panels in the future. Leave space for wiring and battery storage if you plan to add solar electricity. Also, consider installing a strong, south-facing roof and accessible electrical conduits, so integrating new systems later will be easier and more cost-effective.
I’m curious about whether a passive or active solar greenhouse would be better for colder climates with long winters. Do you have any cost comparisons or recommendations for choosing between the two types for someone living in northern states?
For northern states with long, cold winters, a passive solar greenhouse often has lower upfront and ongoing costs since it relies on design features like insulation, thermal mass, and orientation to maximize heat retention. Active greenhouses use extra equipment like fans or heaters, which can increase both installation and energy costs. While active systems provide more precise temperature control, many find passive designs more cost-effective unless you need to grow temperature-sensitive crops year-round. Consider your budget and growing needs—if you need minimal energy bills, passive is usually recommended for colder climates.
The article talks about using water barrels or stone walls for thermal mass. Are there major differences in cost and effectiveness between those options, especially in climates that get really hot during the summer? I’d love some advice before deciding which to use.
Water barrels generally cost less up front since you can repurpose used barrels, while stone walls require more materials and labor, making them more expensive. In hot climates, both absorb and release heat, but stone walls can hold heat longer and may risk overheating if not shaded. Water barrels are easier to move or adjust. For flexibility and lower cost, water barrels are a good start, but if you want long-term thermal stability and don’t mind the expense, stone walls are very effective.
I’m in a northern state, so maintaining temperature during the winter is a big concern. Does the article suggest any particular combination of passive and active solar elements that works best for cold climates?
The article highlights that in northern states, combining passive solar design—such as south-facing orientation, thermal mass (like stone or water barrels), and good insulation—with active systems like solar-powered heaters or ventilation can be effective. This mix helps trap daytime heat while reducing overnight losses. The article suggests that layering these strategies offers the best winter performance in colder climates.
You mention strategic orientation, like facing the greenhouse south in the Northern Hemisphere. Is there a significant difference in heating costs if my backyard only allows an east-facing setup, or are there workaround design choices for less-than-ideal locations?
An east-facing greenhouse will typically receive less sunlight and warmth in the afternoon compared to a south-facing one, which can lead to higher heating costs, especially in winter. However, you can offset this by adding extra insulation, using thermal mass like water barrels or stone to store heat, or incorporating supplemental heating. Choosing high-quality glazing and considering reflective surfaces inside can also help maximize available sunlight.
For budgeting purposes, about how long does it usually take for a home solar greenhouse to pay for itself in saved energy and produce costs? I’d love to have a rough idea before making a big investment.
The payback period for a home solar greenhouse typically ranges from 5 to 15 years, depending on your local climate, energy costs, greenhouse size, and how much of your own produce you end up growing. If you use efficient designs and maximize year-round use, you may see a faster return. Carefully tracking your current food and energy spending can help you estimate your personal payback time more accurately.
The article talks about passive versus active solar greenhouses. If my site has limited access to sunlight during part of the year, is it better to prioritize active systems or can smart passive design still maintain a stable environment for plants?
If your site gets limited sunlight at certain times, a smart passive design can still help by maximizing heat capture and retention, but it may not be enough on its own for stable temperatures year-round. In these cases, incorporating some active systems—like supplemental heating, thermal mass, or ventilation—can ensure your plants stay healthy when sunlight is scarce. Combining both approaches often gives the most reliable results in challenging locations.
For someone in a northern climate, are there extra expenses or design tweaks I should anticipate to maintain stable temperatures in a solar greenhouse, especially during prolonged cloudy spells?
In northern climates, you may need to invest in enhanced insulation, such as double or triple glazing and insulated north walls, to retain heat. Adding thermal mass like water barrels or stone can help store daytime heat for nights or cloudy periods. Backup heating systems, such as electric or propane heaters, might also be necessary to maintain plant health during long stretches of overcast weather. These features will increase both initial costs and ongoing energy expenses.
In your budgeting strategies, do you factor in ongoing maintenance costs, or is the breakdown strictly for construction and installation? I am curious how much I should set aside for yearly upkeep after the greenhouse is up and running.
The budgeting breakdown in the article mainly focuses on construction and installation costs. However, it’s smart to plan for ongoing maintenance as well. For a home solar greenhouse, average yearly upkeep—including cleaning panels, checking seals, minor repairs, and maintaining ventilation—can range from $200 to $500, depending on size and local climate. Setting aside a small annual budget for maintenance will help keep your greenhouse running efficiently.
You mentioned the importance of thermal mass like water barrels or stone walls for heat retention. Do you have any practical advice on how to estimate the amount or cost of thermal mass needed for a typical backyard greenhouse in a temperate climate?
To estimate thermal mass, a common guideline is to provide about 2 to 5 gallons of water (or an equivalent amount of stone or concrete) per square foot of greenhouse floor. For a 100-square-foot greenhouse, you’d want 200 to 500 gallons total. Water barrels are inexpensive—55-gallon food-grade drums often cost $20–$40 each. For stone or masonry, calculate the volume needed and multiply by local material prices. Adjust based on how much temperature stability you need.
When estimating the total cost, how much of the budget typically goes toward the active solar components like PV panels or solar water heaters versus the basic structure itself?
Active solar components like PV panels or solar water heaters usually account for about 30% to 50% of the total greenhouse budget, depending on system size and sophistication. The basic structure, including framing, glazing, and foundation, typically makes up the remaining 50% to 70%. These percentages can vary depending on material choices and whether you do some of the installation yourself.
I’m curious if there are any common mistakes people make when budgeting for a solar greenhouse that end up costing more in the long run, especially regarding thermal mass or site preparation?
Yes, two common budgeting mistakes are underestimating the cost or need for adequate thermal mass and neglecting proper site preparation. Insufficient thermal mass can make it harder to regulate temperatures, leading to higher heating or cooling expenses later. Overlooking site work—like grading, drainage, or soil quality—can mean extra costs to fix issues after construction. Planning thoroughly for these elements from the start usually saves money in the long term.
Can you explain how the cost of adding integrated photovoltaic panels for electrical needs compares to just relying on passive solar features? I’m trying to decide if the extra investment in PV panels is justified for a home greenhouse setup.
Passive solar features, like proper orientation, insulation, and thermal mass, are usually lower-cost upfront since they use design to maximize sunlight and heat without extra equipment. Adding integrated photovoltaic (PV) panels significantly increases your initial investment—costs can range from several thousand dollars depending on system size and installation. However, PV panels provide electricity for things like fans, lights, or heaters, potentially reducing energy bills over time. If your greenhouse needs more than just passive heat—for example, year-round operation or electrical equipment—PV panels can be justified, but for basic use, passive solar alone may suffice.
When planning for things like thermal mass and insulation, are there affordable material options for families on a fairly tight budget, or do these features always come with a big upfront price?
Affordable options definitely exist for adding thermal mass and insulation to your solar greenhouse. For thermal mass, you can use materials like water barrels or salvaged bricks—both are cost-effective and widely available. For insulation, recycled rigid foam boards or even double-layered polyethylene sheets work well without a hefty price tag. With some creativity and sourcing secondhand materials, you can incorporate these features without a big upfront investment.
The article talks about using high-insulation glazing. Are there specific types you’d recommend for balancing upfront cost with energy savings? I’m trying to estimate the payback period for different glazing options.
For balancing upfront costs with energy savings, consider double-pane polycarbonate or low-e (low-emissivity) glass. Double-pane polycarbonate is durable, provides good insulation, and is usually less expensive than glass. Low-e glass is pricier but offers excellent thermal performance. Generally, the payback period for better-insulated glazing ranges from 5 to 10 years, depending on your climate and energy costs. Calculating payback is easier if you gather quotes for each glazing type and estimate annual energy savings.
I noticed you talked about orientation and high-insulation glazing. How critical are those for someone on a tight budget? Are there any affordable tricks or materials you’d recommend that still make a big difference in heat retention?
Orientation and good insulation are important, but you can still make smart choices on a tight budget. Facing your greenhouse south (in the northern hemisphere) maximizes free sunlight. For glazing, consider using double-layer polycarbonate panels or even two layers of clear plastic sheeting with an air gap between them—both are affordable and improve insulation. Sealing gaps with weatherstripping or caulk also helps retain heat without much cost.
Does your cost breakdown include any additional expenses for integrating PV solar panels for electricity, or is that usually considered a separate project from creating a basic solar greenhouse?
The cost breakdown in the article focuses on building a basic solar greenhouse, which uses passive solar design for heating and cooling. Expenses for integrating photovoltaic (PV) solar panels to generate electricity are not included in those estimates, as that’s typically treated as a separate project with its own budget and considerations. If you want to add PV panels later, you’ll want to factor in additional costs for panels, inverters, wiring, and installation.
The article talks about using thermal mass like water barrels or stone walls to store heat. How much should I expect to budget for these thermal mass materials, and are there lower-cost alternatives that work just as well?
For water barrels, expect to pay around $15–$30 each for 55-gallon food-grade barrels, with total costs depending on how many you use. Stone or masonry walls are generally more expensive, often $10–$20 per square foot installed. As lower-cost alternatives, you could use filled plastic jugs or recycled concrete blocks. These options can be effective if distributed throughout the greenhouse, and may save you a significant amount compared to stone or commercial solutions.
The article talks about maximizing sun exposure with south-facing orientation. If my property doesn’t have a perfect south-facing spot, how much does that impact efficiency and operating costs, and are there ways to compensate in the design stage?
A greenhouse that isn’t perfectly south-facing will receive less direct sunlight, especially in winter, which can reduce efficiency and slightly increase heating costs. However, you can compensate by increasing the glazing area on the side with the most sun, using thermal mass to store heat, and installing supplemental lighting if needed. Angling the roof or using reflective surfaces can also help direct more light into the greenhouse.
When budgeting for a passive solar greenhouse, how much of a difference does high-insulation glazing actually make in total heating costs compared to standard panels? Do you have any real-world numbers or case studies that show the payoff period for that upgrade?
High-insulation glazing can reduce heating costs by 30–50% compared to standard panels, especially in colder climates. For example, upgrading from single-pane to double- or triple-pane polycarbonate may cost an extra $8–$15 per square foot, but many growers see payback within 4–7 years in energy savings. Real-world case studies show a greenhouse owner in Colorado recouped the upgrade cost in under 5 years due to lower heating bills.