Introduction: Why Build a Home Solar Air Heater?
As winter approaches, energy bills climb and the urge to keep your living space warm intensifies. Traditional electric or gas heating can be expensive and environmentally taxing. Fortunately, there’s a sustainable, cost-effective solution you can build yourself: a home solar air heater. This simple device harnesses the power of the sun to boost indoor temperatures, reduce your reliance on fossil fuels, and lower utility costs—all while shrinking your carbon footprint. Whether you’re a sustainability enthusiast or a homeowner seeking to cut expenses, understanding the right tools and equipment is essential for a successful solar air heater project.
This comprehensive guide walks you through every tool, material, and piece of equipment you’ll need to construct your own solar air heater. We’ll cover the reasons these tools matter, how to select them, and practical tips for safe, efficient assembly. By the end, you’ll be ready to tackle your project with confidence, knowing you’re investing in both environmental sustainability and winter comfort.
Understanding Solar Air Heaters: A Quick Overview
How Solar Air Heaters Work
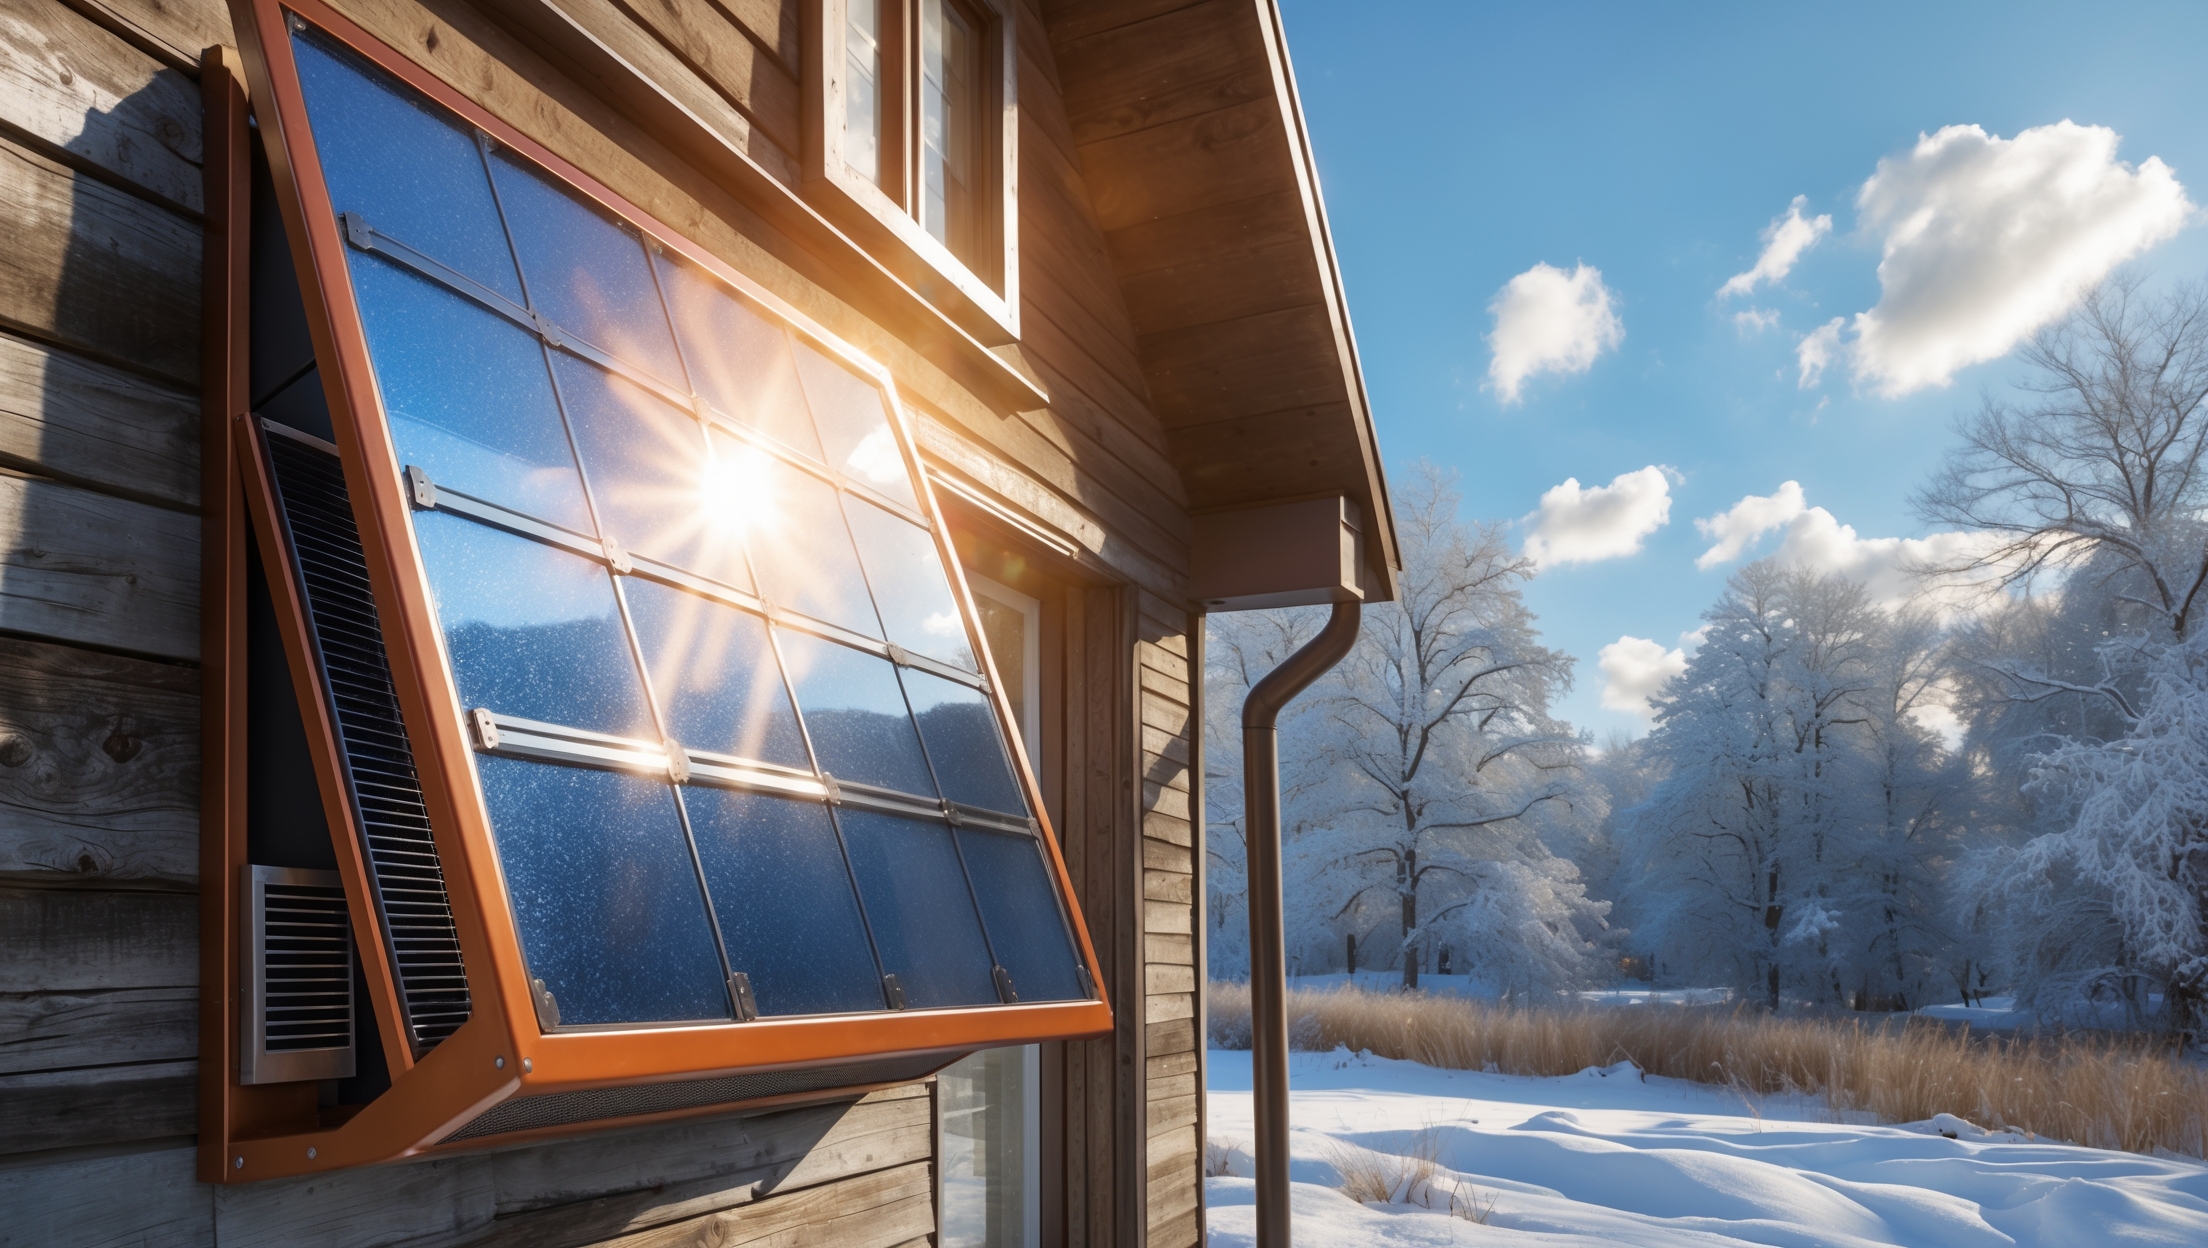
Solar air heaters consist of a collector—usually a box with a transparent front and an absorptive interior surface—mounted on a sun-drenched wall. Cool air from your home is drawn into the collector, heated by the sun, and then recirculated inside through vents. The result? Free, renewable heat supplementing your primary system.
Benefits of DIY Solar Air Heaters
- Reduces heating bills during cold months
- Decreases reliance on fossil fuels
- Low maintenance after installation
- Customizable to fit your specific space and needs
- Promotes hands-on learning in sustainable technology
Essential Tools for Building a Solar Air Heater
Measuring and Marking Tools
- Measuring tape (at least 25 ft): For precise dimensions of your frame and collector.
- Square and level: To ensure accurate cuts and a properly aligned frame.
- Pencil/marker: For marking cut lines and drill points on materials.
Cutting Tools
- Circular saw or table saw: For cutting wood or metal to construct the collector frame.
- Handsaw: Useful for small adjustments or trimming thin materials.
- Metal snips: For cutting sheet metal or aluminum flashing for the absorber plate.
- Utility knife: To trim insulation, weatherstripping, and plastic sheeting.
Drilling and Fastening Tools
- Power drill/driver (corded or cordless): For assembling the frame and attaching the collector to your wall.
- Drill bit set (wood and metal bits): To make pilot holes for screws or bolts.
- Screwdrivers (Phillips and flathead): For manual adjustments and installing vent covers.
- Hammer: For securing nails or tapping frame components into place.
Finishing and Sealing Tools
- Caulking gun: For applying weatherproof sealant to joints and seams.
- Paintbrush/roller: To paint the absorber plate (usually with flat black, high-temperature paint).
- Putty knife: Useful for spreading adhesive or sealant smoothly.
Safety Gear
- Safety glasses: Protects eyes from flying debris during cutting or drilling.
- Work gloves: Prevents cuts and splinters when handling sharp materials.
- Dust mask/respirator: Essential when cutting or painting to avoid inhaling particles or fumes.
- Hearing protection: Recommended if using power saws for extended periods.
Key Materials and Equipment Checklist
Frame Components
- Lumber (2x4s or similar): For building the collector’s box frame. Choose rot-resistant wood for exterior durability.
- Plywood or OSB board: Used for the back panel of the collector.
- Exterior-grade screws/bolts: To assemble the frame securely.
Glazing (Transparent Front)
- Polycarbonate panels: Durable, UV-resistant, and insulates well. Preferred over glass for DIY projects.
- Tempered glass: Offers excellent clarity and longevity but is heavier and more fragile.
Absorber Plate
- Sheet metal (aluminum or steel): Acts as the heat-absorbing surface inside the collector.
- Flat black, high-temperature paint: Maximizes heat absorption and withstands thermal cycling.
Insulation
- Rigid foam board or mineral wool: Lines the collector’s back and sides to minimize heat loss.
- Foil tape: Seals insulation joints and reflects radiant heat inward.
Air Circulation Components
- High-temperature ducting: Connects the collector’s output to your indoor vent.
- Vents/registers: Allows heated air to flow into your living space.
- Inline fan (optional): Boosts airflow on cloudy days or when passive convection isn’t enough.
Weatherproofing and Mounting Hardware
- Silicone caulk or weatherproof sealant: Prevents air or water leaks at joints and glazing edges.
- Metal brackets or cleats: For safely mounting the completed collector to your wall.
- Flashing: Ensures water runs off the top of the collector, not into your wall.
Step-by-Step Equipment Selection: Tips and Recommendations
Choosing the Right Saw
If you’re cutting multiple lengths of wood or working with sheet goods, a circular saw with a fine-tooth blade ensures clean, straight cuts. For those with access to a table saw, it’s ideal for precision and safety. When cutting metal, use metal snips or a power shear to avoid warping the absorber plate.
Power Drill: Cordless vs. Corded
A reliable cordless drill offers flexibility when working outdoors or in tight spaces. Ensure it comes with two battery packs to avoid downtime. For heavier-duty framing or drilling into masonry, a corded drill provides sustained power.
Glazing Materials: Polycarbonate vs. Glass
While tempered glass is highly durable, polycarbonate panels are lighter, easier to handle, and shatter-resistant. For most DIYers, polycarbonate is the preferred choice for safety and ease of installation.
Absorber Plate Paint
Always use a paint rated for high temperatures, such as those used for grills or exhaust manifolds. Standard black paint may degrade quickly and reduce efficiency.
Insulation
Rigid foam board is simple to cut with a utility knife and offers excellent thermal resistance. For high-temperature areas, mineral wool is a fire-safe alternative.
Specialty Tools to Consider
- Jigsaw: Handy for cutting vent holes or curved sections in wood or metal.
- Rivet gun: If your design uses aluminum for both the frame and absorber plate, rivets can provide strong, permanent fastening.
- Infrared thermometer: Useful for checking collector temperatures during testing and adjustment.
Assembly Best Practices: Using Your Tools Efficiently
Measuring and Layout
Double-check all measurements before cutting. Use a square to mark precise corners, ensuring the frame fits tightly and the glazing seats properly.
Cutting Tips
- Clamp workpieces securely to prevent shifting.
- Wear safety gear to protect from splinters and metal shards.
- Cut glazing panels with a fine-tooth blade or scoring tool to avoid chipping.
Drilling and Fastening
- Pre-drill holes to prevent wood or metal from splitting.
- Use exterior-grade fasteners to withstand weather exposure.
- Tighten all screws and bolts firmly, but avoid over-torquing which may crack glazing or strip wood.
Sealing and Insulating
- Apply caulk or sealant on all seams and around glazing edges to block air and water leaks.
- Cover insulation joints with foil tape to maximize heat retention.
Installation: Mounting and Ductwork Tools
Outdoor Mounting
- Ladder: For safe access if installing on a wall above ground level.
- Stud finder: Ensures mounting hardware is secured to structural framing, not just siding.
- Impact driver: Helpful for driving long screws or lag bolts into exterior walls.
Vent Installation
- Hole saw: For cutting precise, round vent openings in walls.
- Caulk gun and weatherproof sealant: To seal vent penetrations against drafts and moisture.
Ducting Tools
- Flexible ducting cutter: For trimming high-temperature ducts to length.
- Hose clamps or duct tape: Secures duct connections and prevents air leaks.
Pro Tips for Tool Maintenance and Storage
Investing in quality tools pays off over multiple projects. Clean saw blades and drill bits after use to prevent rust and maintain sharpness. Store power tools in dry, protected areas. Organize fasteners and small hardware in labeled bins for easy access during assembly. Always recharge batteries after each session to ensure your cordless tools are ready when you need them.
Optional Upgrades: Enhancing Performance with Extra Equipment
- Thermostatic controller: Automates fan operation based on collector temperature, improving efficiency.
- Solar-powered fan: Uses direct solar energy to boost airflow, especially on sunny days.
- Digital temperature probe: Monitors air output temperature for performance tuning.
- Reflective exterior paint or foil: Increases solar gain on the collector’s exterior surfaces.
Cost Considerations: Budgeting for Tools and Equipment
Tool Rental vs. Purchase
If you don’t already own key tools (such as a circular saw or power drill), consider renting from a local hardware store to save on upfront costs—especially if you don’t plan frequent use. For hand tools and safety gear, purchasing is often more economical in the long run.
Material Sourcing Tips
- Check local salvage yards or building supply recyclers for discounted lumber, glazing, and metal.
- Online marketplaces and community groups may offer free or low-cost surplus materials.
- Buy fasteners and sealants in bulk to reduce per-unit expenses.
Sample Budget Breakdown
- Hand/power tools: $100–$250 (assuming rental for major tools)
- Frame materials: $60–$120
- Glazing: $70–$150
- Absorber plate & paint: $40–$80
- Insulation & ducting: $40–$90
- Weatherproofing & mounting hardware: $30–$60
Total estimated outlay: $340–$750 (varies by collector size and tool ownership)
Conclusion: Building Your Path to Sustainable Winter Comfort
Constructing a home solar air heater is a rewarding project that merges sustainability, energy savings, and practical DIY skills. By carefully selecting your tools and equipment, you ensure both the safety and effectiveness of your build. The investment in quality tools will pay off, not only in this project but in future green technology endeavors. Remember to prioritize safety—always use appropriate gear, follow manufacturer instructions, and consult local building codes for proper installation.
As your solar air heater quietly supplements your home’s warmth, you’ll see real reductions in energy costs and your personal carbon footprint. The knowledge gained from this hands-on project empowers you to take on more sustainable living improvements, share your experience with community members, and inspire others to adopt renewable energy solutions. With the right tools and a methodical approach, your winter can be warmer, greener, and more affordable—proof that practical sustainability is within everyone’s reach.
Ready to get started? Gather your tools, source your materials, and watch your solar-powered winter comfort come to life. Every step you take not only heats your home but also paves the way for a cleaner, more resilient energy future.


I’m interested in making my own solar air heater this winter but I’ve never worked with solar projects before. Are there specific types of transparent materials you recommend for the front of the collector that balance cost and durability for beginners?
For beginners, using clear polycarbonate sheets is a solid choice—they’re durable, easy to cut, and more impact-resistant than glass while still allowing good sunlight through. Acrylic (plexiglass) sheets are another affordable option, though they can scratch more easily. Regular window glass works well too, but it’s heavier and can be trickier to handle safely. Polycarbonate is usually the best balance of cost, ease, and durability for first-time solar air heater builds.
For someone who doesn’t have a ton of tools already, which items on your essential tools list are the absolute minimum needed to get a basic solar air heater up and running?
If you’re starting with very few tools, focus on these essentials: a handsaw (or circular saw if you have access), a cordless drill with drill bits, a tape measure, a screwdriver, and a utility knife. These basic items are enough for most of the cutting, assembling, and installation steps involved in building a simple solar air heater.
How much should I budget for all the essential tools and materials you listed? I’d like to know what a realistic total cost might be for someone starting from scratch.
If you’re starting from scratch, you can expect to spend roughly $250 to $500 for all the essential tools and materials needed to build a basic home solar air heater. This range covers items like wood, insulation, clear acrylic or polycarbonate panels, aluminum cans or metal sheets, hardware, and basic tools. Prices can vary based on quality and whether you buy new or used tools, so planning your purchases and looking for deals can help keep costs down.
I run a small shop out of my garage and would like to cut down on heating costs. Are there any adjustments to the standard design that would help heat larger or more open spaces effectively?
For heating a larger or more open garage space, consider increasing the size or number of collectors in your solar air heater setup. You might also use a small fan to help circulate the warm air more efficiently. Insulating your garage and sealing gaps will help retain heat, making the system much more effective in bigger spaces.
What’s the typical timeframe for completing this project for someone with decent DIY skills but not a lot of experience working with solar components?
For someone with solid DIY skills but little experience with solar components, you can usually expect to complete a home solar air heater project over one or two weekends. Planning, gathering materials, and careful assembly are key. Allow extra time for tasks like sealing, mounting, and testing—especially if any steps are new to you. Most people find it manageable within 10 to 15 hours spread out over a few days.
How much time should a reasonably handy person expect to spend on this project, from gathering the tools and materials to final installation, assuming average weather conditions for winter?
You can expect to spend about 1 to 2 full weekends on this project if you’re reasonably handy. Gathering tools and materials usually takes a few hours, assembly typically requires a full day, and installation might need another day depending on your chosen setup and weather. If you encounter any adjustments or drying times (for adhesives or paint), allow for extra time.
If I don’t have much experience with DIY projects, about how much time should I expect to spend building and installing a basic solar air heater? Is this feasible to finish in a weekend, or does it usually take longer?
If you’re new to DIY projects, building and installing a basic solar air heater will likely take between 8 to 16 hours, depending on your pace and available tools. This means you can reasonably expect to complete the project over a weekend if you set aside enough time and are organized with your materials. Just be sure to read through all instructions beforehand and plan for extra time in case you run into any unexpected steps.
After finishing the installation, what kind of maintenance checks should I be prepared for over time? You mentioned low maintenance, but I’d like to know more about any potential issues that might come up, especially during the first winter of use.
Once your home solar air heater is installed, keep an eye on a few key areas, especially in the first winter. Check the collector surface for dust, snow, or debris and clean it as needed to ensure maximum sunlight absorption. Inspect the seals and insulation for air leaks or weather damage. Make sure the fan (if used) and ducts are clear of blockages. Listen for any unusual noises and monitor airflow to confirm the system is working efficiently. Most issues are minor, but regular monthly checks during winter will help catch any problems early.
I’m interested in building one of these, but how long does the average project take from start to finish for someone who only has weekends free? I want to get a realistic idea for planning.
For someone working only on weekends, building a home solar air heater typically takes about 2 to 4 weekends, depending on your experience and the complexity of the setup. The first weekend is usually spent gathering materials and preparing, while assembly and installation take another 1 to 3 weekends. Factoring in time for painting, drying, or adjustments can also help you plan more accurately.
I’m a bit confused about choosing the right materials for the collector box. Are there specific types of wood or metal you recommend that are both durable and affordable for someone on a tight budget?
For a budget-friendly and durable collector box, exterior-grade plywood is a solid choice for wood, as it resists moisture and is easy to work with. If you prefer metal, galvanized sheet metal is affordable and stands up well to the elements. Make sure to seal any wooden parts with weatherproof paint to extend their lifespan.
For someone without much DIY experience, could you provide more information on how to securely mount the solar air heater to an exterior wall without compromising insulation or causing leaks?
To mount your solar air heater safely and avoid leaks or insulation problems, use sturdy brackets anchored into wall studs, not just siding. First, mark the heater’s location and locate the studs. Seal around any holes you need to make for air vents with weatherproof caulk or expanding foam to block drafts and moisture. Add flashing above the heater to help divert rain away. If you’re unsure, a local handyman can help ensure it’s done right.
When you mention the collector box should be mounted on a sun-drenched wall, do you have any tips for optimizing placement or orientation if my house doesn’t have a south-facing wall available?
If your house lacks a true south-facing wall, try to choose the wall that receives the most sunlight throughout the day, ideally facing southeast or southwest. Tilt the collector box slightly to maximize sun exposure, and keep it clear of shade from trees or structures. Even without a perfect orientation, you can still see good efficiency by optimizing exposure and minimizing obstructions.
If my collector box doesn’t seem to be heating the air as much as expected, what common mistakes during assembly should I check for based on your equipment and tool recommendations?
Check that all seams and joints in your collector box are well-sealed to prevent air leaks, as gaps can let warm air escape. Make sure the absorber (such as black-painted aluminum cans or metal) is clean, properly positioned, and has good contact with the box. Verify that the glazing (like clear polycarbonate) is tightly fitted and clear of dust or condensation. Ensure the fan is operating correctly and there are no obstructions in your airflow path.
How effective is a DIY solar air heater in really reducing heating bills during a typical US winter, especially in areas that get limited sun? I’m curious if the upfront effort and investment translates to noticeable monthly savings.
A DIY solar air heater can lower heating bills, especially on sunny days, but its effectiveness depends on your location. In areas with lots of winter sunshine, the savings can be noticeable—sometimes 10–30% off supplemental heating. If you live where winter sun is limited or there’s frequent cloud cover, the benefits are more modest, and payback may take longer. Still, once built, operating costs are minimal, so over several seasons, most users see some return on their investment.
With all the tools and materials needed, do you have any tips for keeping costs down, or maybe recommendations for essential versus optional equipment if I’m on a tight budget?
To keep costs down, focus on essential tools like a saw, drill, screwdriver, and measuring tape. For materials, prioritize insulation, clear glazing (like plexiglass), and black paint for maximum heat absorption. Items like a temperature controller or premium fans can be considered optional if you’re trying to save. Reusing or sourcing secondhand materials, such as old windows or scrap wood, can also help lower expenses.
When building a home solar air heater, how do you determine the optimal size for the collector box to make sure it actually supplements your main heating system during winter, especially in regions with shorter daylight hours?
To determine the optimal size for your solar air heater collector box, start by estimating the area you want to heat and your region’s average winter sunlight hours. Generally, a collector box of 1 to 2 square meters per 10–20 square meters of room space works well. If you have shorter daylight hours, you may want a slightly larger collector to maximize heat collection. Also, make sure the box fits in a sun-facing location without shading for the best performance.
Once the solar air heater is built and installed, how much ongoing maintenance should I expect each winter? Are there common issues or troubleshooting steps I should be aware of to keep it running smoothly?
Once your solar air heater is up and running, maintenance is usually minimal each winter. You’ll want to inspect and clean the collector surface to remove dust, leaves, or snow buildup that could block sunlight. Check seals and insulation for air leaks and make sure fans or dampers operate smoothly. Common issues include airflow reduction from blocked vents or dirt, so keep those clear. Regularly confirming all connections are tight and checking for condensation inside the panels will help everything keep running efficiently.
After the installation is finished, how much maintenance does the solar air heater need in a typical winter? What kinds of issues should I look out for to keep it working efficiently?
Once your solar air heater is installed, maintenance during winter is usually minimal. You should periodically check and clean the collector surface to remove dust, snow, or debris that might block sunlight. Inspect the air ducts and fans for blockages or wear, and ensure all seals are intact to prevent heat loss. Watch for condensation or moisture buildup inside the system, as this can affect efficiency. Regularly checking these areas will help keep your heater working efficiently all winter.
If I’ve never built anything like this before, how long should I expect it to take from gathering the tools and materials to finishing installation? Just trying to plan around winter weather.
If this is your first DIY project of this kind, you can expect the whole process—including gathering tools and materials, assembling the solar air heater, and installing it—to take a full weekend, or roughly 12 to 16 hours spread over two days. Make sure to allow extra time for unexpected challenges and double-check the weather forecast, so you have dry, comfortable conditions to work in.
How long does the entire project usually take from start to finish for a first-timer? I’m trying to figure out if this is something I can do over a weekend or if it needs more time.
For a first-timer, building a home solar air heater usually takes around 1 to 2 full days, depending on your experience with tools and materials. Many people are able to finish over a weekend if they plan ahead and have all the supplies ready. Tasks like sourcing materials, measuring, and assembling can take longer if you’re new to DIY projects, but it’s definitely manageable within a weekend for most beginners.
About the tools you listed, are there any budget-friendly brands or alternatives for measuring and marking that you recommend for someone just getting started with DIY projects?
For measuring and marking, you don’t have to spend a lot to get the job done. Brands like Stanley, Komelon, and Swanson offer reliable and affordable tape measures, squares, and pencils that are perfect for beginners. Even basic measuring tapes and carpenter pencils from home improvement stores or hardware sections at big-box retailers will work well for most DIY solar air heater projects.
Can you provide a rough estimate of the total cost for all the essential tools and materials listed? I’m trying to gauge if building a solar air heater is feasible on a tight budget.
Based on the tools and materials mentioned in the article, you can expect to spend anywhere from $100 to $300 if you already own basic tools like a drill and saw. If you need to purchase all tools and materials from scratch, the total could reach $400 or more. Costs vary depending on the size of the heater and material choices, but repurposing items or buying second-hand can help keep expenses down.
The article mentions lowering utility costs, but about how much can I realistically expect to save on my heating bills if I install a solar air heater as a supplement during the winter?
The amount you save will depend on factors like your local climate, heater size, insulation, and how much sun you get in winter. Many people report savings of 10% to 30% on their heating bills when using a solar air heater as a supplement. It won’t replace your main system, but it can noticeably reduce how often your heating runs, especially on sunny winter days.
Could you provide an idea of the total estimated cost for materials and tools needed for a typical home solar air heater, especially for someone trying to keep the project budget-friendly?
For a budget-friendly home solar air heater, you can expect to spend around $100 to $250 on materials like plywood, insulation, clear polycarbonate, black paint, and basic hardware. If you already have common tools such as a drill, saw, and measuring tape, you’ll avoid rental or purchase costs. If you need to buy tools, budgeting an additional $30 to $80 should cover the essentials. Sourcing some materials secondhand can lower costs further.
Could you give a rough estimate of the total cost for all the tools and materials required for this project? I’m trying to figure out if building a solar air heater is within my winter budget.
For a basic home solar air heater, the total cost for tools and materials typically ranges from $100 to $300, depending on the size and the materials you choose. Key materials like plywood, insulation, a clear cover (like polycarbonate), and aluminum cans or black-painted metal can be found at most hardware stores. If you already have some tools (like a drill, saw, and screwdriver), your cost will be lower. Adjusting material quality or size can help fit your winter budget.
I noticed you mention using a collector box with an absorptive interior. Are there particular materials you’d recommend for the inside that are both efficient and safe for homes with kids and pets?
For the interior of the collector box, flat black-painted aluminum or steel sheets are excellent choices—they absorb heat efficiently and are safe if properly installed. Make sure to use high-temperature, non-toxic paint to avoid fumes. Avoid plastics or materials that might off-gas when heated, especially in homes with children and pets. Secure all materials well to prevent any sharp edges or loose parts.
Could you clarify how much of a reduction in heating bills homeowners typically see after building and using one of these solar air heaters during winter? I’m trying to figure out if the potential savings justify the DIY effort and initial investment.
Homeowners typically see a reduction of 10% to 30% in their winter heating bills after installing a solar air heater, though results vary based on heater size, home insulation, local sunlight, and usage patterns. For many, the initial DIY investment is recouped within 2–4 winters, especially in sunnier regions or when heating a specific room regularly. If your winter sun exposure is good and you supplement only part of your heating, the savings can make the project worthwhile.
After assembling the solar air heater, how do you actually connect it to your house’s existing vents or wall without causing a lot of damage or needing professional help? Are there beginner-friendly strategies for this step?
You can connect your solar air heater with minimal damage by using flexible ducting and a simple wall vent. Choose a spot like a basement window or a utility room wall. Cut a small hole just big enough for the duct, install a vent cover for a clean finish, and seal around it with weatherproof caulk. Many home improvement stores offer vent kits specifically designed for DIY projects, making this step beginner-friendly.
Based on your experience, how many weekends should a beginner realistically set aside to finish building and installing a solar air heater described in the guide?
For a beginner, it’s realistic to set aside two to three weekends to build and install the solar air heater as described in the guide. The first weekend is usually spent gathering materials and building the core components. The following weekends allow time for assembly, mounting, and any adjustments or weatherproofing. Taking your time ensures a safer and more efficient installation.
What’s the typical timeframe for building and installing one of these, including gathering all the tools and equipment you list? I want to figure out if I can realistically get it done over a busy weekend.
Building and installing a home solar air heater can usually be done in a weekend if you have experience with basic tools. Gathering all the tools and equipment might take a few hours, depending on local availability. Assembly and installation typically take 1–2 days. If you’re completely new to DIY projects, budget some extra time for planning and setup. Overall, completing the project over a busy weekend is realistic if you prepare in advance.
Roughly how long does it take to build a typical solar air heater if you have all the recommended tools and materials? I want to know if this is a realistic weekend project or if I should plan for a longer timeframe.
If you have all the tools and materials ready and follow the guide’s steps, most people can build a typical home solar air heater in about one or two full days. For many, this makes it a manageable weekend project, especially if you have some basic DIY experience. If it’s your first time with a project like this, you might want to allow for some extra time for adjustments or finishing touches.
This guide is really detailed on the tools, but I’m curious—about how long does the average build and installation take for someone doing this alone on weekends? Are there any steps that tend to take longer than expected?
For someone working solo on weekends, building and installing a home solar air heater usually takes around 2 to 3 weekends, depending on your DIY experience and available hours. Framing and assembling the collector box can take the most time, especially if you’re making precise cuts or custom fitting parts. Sealing and weatherproofing also tends to take longer than expected, since it’s important not to rush those steps for good efficiency and durability.
For homeowners who want to integrate the solar air heater with their existing HVAC system for more automated heat distribution, are there additional tools or equipment recommended beyond those listed in the guide?
To integrate the solar air heater with your existing HVAC system, you’ll likely need a few extra components beyond the basic guide. Consider using an automatic damper to control airflow between the solar heater and the HVAC ducts, a temperature sensor or thermostat to trigger the system, and a relay or controller to automate switching between heat sources. Consulting an HVAC technician is also recommended for safe and effective integration.
Can you provide a rough estimate of the total cost for materials and essential tools for someone building a basic version, just to know if it’s truly more budget-friendly than other supplemental heating options?
A basic home solar air heater can typically be built for $100 to $250, depending on material choices and what tools you already own. Essential materials include plywood, insulation, clear glazing (like polycarbonate or plexiglass), black paint, and fasteners. If you need to purchase all basic tools—like a saw, drill, and screwdriver—budget an extra $50 to $100. This makes it a cost-effective option compared to electric space heaters or pellet stoves in the long run.
I see you mention using a 25 ft measuring tape—is that overkill for a smaller solar air heater, or is there a reason a longer tape is recommended even for compact projects?
A 25 ft measuring tape isn’t strictly necessary for a smaller solar air heater, but it can be useful. The extra length makes it easier to measure materials like long pipes or panels in one go, and it’s more versatile for future projects. However, for most compact builds, a shorter tape—like 12 or 16 ft—will work just fine.
Are there any budget-friendly options for the essential tools you list? For example, can I use basic hand tools, or is it really necessary to invest in higher-end equipment to get the performance you describe?
You can definitely use basic hand tools for most parts of building a home solar air heater. Items like a hand saw, screwdriver, measuring tape, and drill will work fine if you already have them. Higher-end tools might make the process quicker or a bit easier, but they’re not required to achieve good performance. Just take your time and double-check your measurements for the best results.
If our home doesn’t get a ton of direct sunlight in winter, can this solar air heater setup still provide enough heat to lower our utility bills, or is it only effective in really sunny climates?
The solar air heater works best in areas with plenty of direct sunlight, as its efficiency relies on the sun’s rays. If your home gets limited sunlight during winter, the heater may not produce enough heat to make a significant impact on your utility bills. However, it can still contribute some supplemental warmth, especially on clear days. You might want to use it alongside other heating solutions for maximum benefit.
I’m pretty new to DIY projects like this. For the solar air heater frame, do you recommend using wood or metal for someone with limited tools and experience? Are there big differences in insulation or durability between the two materials?
For beginners with limited tools, wood is much easier to work with than metal. You can cut and assemble a wooden frame using basic hand tools, while metal requires specialized cutting and joining tools. In terms of insulation, wood is naturally better at preventing heat loss compared to metal, which can get cold and conduct heat away. However, metal frames can be more durable and weather-resistant if properly sealed. For most first-time DIYers, a well-sealed wooden frame is a practical and effective choice.
If I run into problems with heat not circulating back into the room as expected, what troubleshooting steps should I try first, and which basic tools might help diagnose or fix common airflow issues?
If heat isn’t circulating well, first check that the intake and outlet vents are clear and not blocked. Make sure the fan (if used) is powered and working. A basic screwdriver, utility knife, and duct tape can help adjust vent covers or seal any gaps. You might also use a thermometer to compare air temperatures at the inlet and outlet, which can reveal airflow problems. Look for any leaks in the ducting or frame, as these can reduce efficiency.
The article mentions reducing reliance on fossil fuels—do you have any data or examples showing how much a home solar air heater can realistically cut heating bills during a typical winter season?
A home solar air heater can reduce heating bills by about 10–30% during the winter, depending on your climate, the size of the unit, and the insulation in your home. For example, if your winter heating costs are $800, you might save between $80 and $240 over the season. While exact savings vary, many users report noticeable reductions in their utility bills after installing a solar air heater.
After the heater is installed, are there common maintenance tasks I should plan for each season to keep it running efficiently, or is it really as low maintenance as it sounds?
Once your home solar air heater is installed, maintenance is generally minimal, but there are a few seasonal tasks to keep it running efficiently. It’s a good idea to check and clean the collector surface and any vents at least once a season to remove dust or debris. Inspect seals for air leaks and make sure airflow isn’t blocked. These simple checks help ensure the system operates at peak efficiency all winter long.
I’m new to building projects like this, so I’m wondering how complicated it is to actually install the vents and ensure the heated air circulates correctly. Do you need any special tools for that part, or is it just basic ductwork?
Installing the vents for a home solar air heater is usually manageable with basic ductwork skills. You’ll mainly need standard tools like a drill, screwdriver, tin snips, and foil tape. The key is to position the vents so that warm air enters your living space efficiently and cooler air returns to the heater. Careful sealing around duct connections helps ensure good airflow and efficiency. No highly specialized tools are required, just basic handyman gear and attention to detail.
About the venting and airflow process: do I need special tools to safely cut vents into my exterior walls, or is there a way to route the heated air without major modifications to the house?
You don’t necessarily need to cut into your exterior walls to benefit from a solar air heater. If you want to avoid major modifications, you can route the heated air through existing windows using vent adapters, insulated ducts, or window inserts designed for this purpose. If you do choose to cut vents, it’s best to use proper safety gear and tools like a hole saw or reciprocating saw, but for many setups, window-based solutions work well and are much less invasive.
For someone a bit new to DIY projects, could you clarify which of the essential tools are most critical and which ones could be borrowed or substituted to help keep costs down on a first build?
For a beginner, the most critical tools for building a home solar air heater are a drill, screwdriver, and saw, since you’ll need these for basic assembly and cutting. Items like clamps, a caulking gun, or a utility knife can often be borrowed or substituted with what you have at home. Measuring tape and safety gear are also important, but you might already own them. Borrowing or renting larger tools, like power saws, is a great way to save money on your first build.
I see you mention using a measuring tape that’s at least 25 feet long for building the frame and collector. For someone with a smaller wall space or a compact setup, would a shorter tape measure do the job, or is the length important for accuracy?
A shorter tape measure is perfectly fine if you’re working with a smaller wall space or a more compact solar air heater setup. The main reason for recommending a 25-foot tape is to handle larger frames in one go, but for smaller projects, a standard 12- or 16-foot tape will work just as accurately. Just make sure your tape is long enough to measure your longest panel or piece in one stretch for the best results.
How long does the full assembly typically take for someone with only basic DIY skills, and are there any parts of the build that tend to cause issues for beginners?
For someone with basic DIY skills, assembling a home solar air heater usually takes a full weekend or around 8 to 12 hours in total. The steps that most often cause trouble are sealing the air channels to prevent leaks and securely mounting the collector frame. Accurate measurements and patience with caulking or sealing materials can help avoid common mistakes in those areas.
After constructing and installing the solar air heater, what kind of ongoing maintenance should I expect? You mention these systems are low maintenance, but could you give some examples of what needs to be checked or cleaned periodically?
Once your solar air heater is up and running, maintenance is pretty minimal. You should check and clean the glass or collector surface every few months to ensure dust and debris aren’t blocking sunlight. Inspect all seals and insulation annually for leaks or wear, and look at the air ducts and fan (if you use one) to make sure there’s no buildup or blockage. That’s usually all it takes to keep things efficient.
You mentioned using a transparent front for the collector—are there specific materials you recommend for this part that balance durability and heat efficiency?
For the transparent front of the collector, polycarbonate sheets are a popular choice because they’re durable, impact-resistant, and have good light transmission for heat efficiency. Acrylic (Plexiglas) is another option—it’s clear and effective but a bit less impact-resistant than polycarbonate. Tempered glass works very well for heat efficiency but is heavier and can be more fragile, though it’s more durable than regular glass. Each has its pros and cons, but polycarbonate is often the best balance for home projects.
When sourcing materials for the transparent front of the collector, is there much difference in performance between using glass and polycarbonate sheets? I’m hoping to balance efficiency with durability for long-term use.
Glass generally offers slightly better light transmission, which can boost efficiency, but it’s heavier and more prone to breakage. Polycarbonate sheets are tougher, lighter, and highly impact-resistant, making them a better choice if durability is a top priority. Over time, polycarbonate may scratch or yellow, but quality UV-protected sheets can last many years. Both materials work well, so it really depends on whether you value efficiency or long-term ruggedness more.
Can these solar air heaters be installed in apartments or rental homes, or do they require permanent modifications to exterior walls? I’d love to try this but need something that’s easy to remove when I move.
Solar air heaters usually need to be mounted on exterior walls or windows for maximum efficiency, which can involve drilling or installing vents. However, there are portable or window-mounted designs that don’t require permanent changes and can be removed easily when you move. Look for DIY plans that focus on window installations or free-standing units, which are ideal for apartments or rentals.
I noticed you listed a 25 ft measuring tape as essential, but if I’m working with a smaller window or wall, can I scale down the project easily? Would any tools or materials change in that case?
You can definitely scale down the project to fit a smaller window or wall. The main change would be reducing the quantity of materials like wood, insulation, and glazing panels. The core tools stay the same, but you might only need a shorter measuring tape and possibly smaller fasteners. Just make sure your measurements match the dimensions of your chosen space before cutting or assembling anything.
Once the solar air heater is built and installed, how do you recommend maintaining it over the winter months? Are there common issues I should watch out for to keep it running efficiently?
To keep your solar air heater working efficiently all winter, periodically check and clean the glass or plastic cover to ensure sunlight isn’t blocked by dust, snow, or ice. Inspect the air intake and outlet for blockages and make sure seals and insulation remain tight to prevent heat loss. Watch for condensation inside the unit, which can reduce performance—if you notice any, improve ventilation or reseal joints. Regularly monitor airflow and temperature to catch any drops in efficiency early.
After completing the initial assembly using the listed tools and materials, what kind of ongoing maintenance or troubleshooting should homeowners expect to keep the solar air heater working efficiently throughout winter?
Once your solar air heater is set up, regular maintenance involves checking for dust or debris build-up on the collector surface and cleaning it to maximize sunlight absorption. Inspect seals and connections for any air leaks and re-seal if necessary. Throughout winter, also make sure the airflow isn’t blocked and that the fan (if used) operates smoothly. If you notice reduced heat output, check for obstructions or insulation issues. With these periodic checks, your system should run efficiently all season.
I have limited DIY experience—are there specific safety concerns with cutting or assembling the transparent front for the collector? Is there a recommended type of material that’s easier to handle for beginners?
When working with the transparent front, safety is important since materials like glass or acrylic can be sharp or break. For beginners, clear polycarbonate sheets are a good choice—they’re tough, lightweight, and much less likely to crack than glass or acrylic. Always use gloves, work on a stable surface, and wear eye protection during cutting or assembly to prevent injuries.
Could you give a rough estimate of the total cost for tools and equipment if I’m starting from scratch? I’m on a tight student budget and am wondering how affordable this project is.
If you’re starting from scratch, you can expect the total cost for basic tools and equipment to range from $120 to $250, depending on quality and local prices. Essential items include a saw, drill, screws, aluminum cans or sheet metal, insulation, some framing wood, and basic safety gear. You might lower costs by borrowing tools from friends or finding used materials. It’s definitely possible to keep things affordable with some resourcefulness.
Are there any budget-friendly alternatives for some of the essential tools or materials you listed? I want to make the project as cost-effective as possible, especially since this is my first try.
Absolutely, there are several ways to keep costs down for your first home solar air heater project. For example, you can use reclaimed wood or old window frames for the structure, and soda cans or aluminum cans instead of purchasing new metal for the absorber. Basic hand tools like a manual saw or screwdriver can replace power tools if you don’t already have them. Check local classifieds, thrift stores, or construction surplus shops for discounted or free supplies.
I’m curious about the level of maintenance required after installing a DIY solar air heater like this. Are there any common issues I should watch out for during the winter months to keep it running efficiently?
After installing a DIY solar air heater, maintenance is generally simple. Check the system regularly for dust or debris buildup on the collector surface and clean it to ensure maximum sunlight absorption. Inspect seals and insulation for any air leaks, especially before and during winter. Also, monitor the fan and vents for blockages or wear. Addressing these small issues early helps keep your heater running efficiently throughout the season.
Are there any budget-friendly alternatives for some of the recommended tools and materials that won’t compromise the performance or lifespan of the solar air heater?
Yes, there are a few budget-friendly alternatives you can consider. For the frame, repurposed wood pallets or reclaimed lumber work well if they are in good condition. Aluminum cans can replace more expensive absorber plates if prepared and painted with flat black high-heat paint. Instead of specialty insulation, thick foam board remnants or even recycled wool insulation can be used, provided they’re well-sealed. Just make sure any material you choose is weather-resistant and safe for indoor air to ensure your heater remains durable and efficient.
When choosing measuring and marking tools, like the 25-foot tape and square, are there any must-have brands or features that make the construction process easier, especially for someone who might not have much experience with DIY projects?
For measuring and marking tools, look for a tape measure with a sturdy, easy-to-read blade and a smooth retract mechanism—Stanley and Komelon are both reliable brands. For the square, a metal speed square is very handy for beginners because it’s durable and helps with quick marking and checking right angles. Features like clear markings and a comfortable grip can make the process much smoother.
Once the solar air heater is installed, is there any regular maintenance required in colder climates? For example, do I need to worry about snow or ice buildup on the collector throughout the winter?
In colder climates, you should keep an eye on your solar air heater for snow and ice buildup on the collector surface, as this can block sunlight and reduce efficiency. It’s helpful to gently clear off any accumulation after each snowfall. Aside from that, occasional checks for dust, debris, or damage to seals and insulation are recommended to ensure the system stays efficient all winter.
When it comes to cost, are there specific tools or materials listed here where it’s worth spending a bit more for quality, versus parts where a budget brand would be fine for a beginner trying to save money?
For a home solar air heater, it’s wise to invest a bit more in quality glazing (like polycarbonate panels) and weatherproof sealants, since these directly affect efficiency and durability. Tools like a drill or saw can be basic or even borrowed if you’re on a budget. For framing materials, mid-range wood or metal is fine if you seal it properly. Screws, paint, and basic hardware can usually be budget-friendly without much risk.
I’m interested in customizing the heater to fit a unique wall space. What tips do you have for adapting the collector design and vent placement for irregular home layouts?
To customize the collector for an unusual wall space, measure your available area carefully and adjust the collector frame size accordingly, making sure to maintain a good surface area for sunlight capture. Flexible ducting can help route vents around obstacles, and placing vents near existing airflow paths improves performance. If possible, create a cardboard mockup first to test fit and airflow before building the final unit.
You mention that these heaters are customizable for different spaces. Are there particular guidelines or calculations to determine the best size collector for a standard living room or bedroom?
To size a solar air heater for a specific room, you’ll want to match the collector’s output to the room’s volume and heat loss. A common guideline is about 1 square foot of collector per 10 square feet of floor space. For a standard 150-square-foot bedroom, a collector around 15 square feet should work efficiently, but factors like insulation and window size can affect the result.
I’m interested in lowering my heating bills, but I’m concerned about potential heat loss overnight. Does the article suggest any specific insulation methods or materials to maximize heat retention in the collector?
The article does mention ways to reduce heat loss from your solar air heater, especially overnight. It suggests adding insulation to the collector box, such as using rigid foam board or mineral wool around the sides and back. Additionally, installing a well-fitted, insulated cover over the collector’s front at night can help retain heat. Sealing any air leaks with weatherstripping or caulk is also recommended for better efficiency.
About the construction process, how long does a typical DIY solar air heater project take from start to finish for someone with basic tools and moderate DIY experience?
For someone with basic tools and moderate DIY experience, building a home solar air heater generally takes one to two weekends. The actual timeframe depends on your pace and how much time you can dedicate each day, but most people spend about 10–15 hours in total. This includes gathering materials, measuring, cutting, assembling, and mounting the heater.
The article mentions using a measuring tape at least 25 feet long. Is that length necessary for most home installations, or would a shorter tape work if I’m making a smaller heater for a single room?
A 25-foot measuring tape is helpful if you’re working on larger or more complex installations, but for a smaller heater designed for a single room, a shorter tape—like a 12 or 16-foot one—should be more than enough. Just make sure your tape is long enough to measure the largest piece of material you’ll need for your specific design.
How much time should I set aside to build a basic home solar air heater from start to finish if I’m following your list of tools and steps? Is this a weekend project or will it take longer for a beginner?
If you’re following the guide and using the recommended tools, building a basic home solar air heater can typically be done over a weekend, especially if you set aside a full two days. For a beginner, expect the project to take roughly 10 to 12 hours total, including gathering materials, measuring, assembly, and installation. Working at a steady pace with some breaks should let you finish in a weekend.
How much time should I realistically set aside to complete the whole project, from gathering the recommended materials to installation and testing? I only have weekends to work on it and want to set realistic expectations.
You should plan to set aside about three to four weekends to complete the entire project. The first weekend can be used for gathering and organizing materials. The next one or two weekends will likely cover the construction and assembly, depending on your pace and workspace. The final weekend can be reserved for installation and thorough testing. This timeline should allow for careful, unhurried work and any unexpected adjustments.
I noticed you listed a 25 ft measuring tape as essential. For someone with a smaller space, could you recommend modifications to the dimensions or the tool list to suit a compact wall area, maybe for an apartment or tiny house?
If you’re working with a smaller wall area, you can absolutely scale down the dimensions of your solar air heater. A shorter measuring tape—like a 12 or 16 ft version—would be sufficient for compact projects. Additionally, you can use smaller panels, lighter materials, and fewer fasteners, making the build more manageable and better suited for apartments or tiny houses.
What would you estimate as the average out-of-pocket cost for all the necessary tools and materials if starting from scratch? I want to make sure this project will offer real savings over a typical winter heating bill.
If starting completely from scratch, you can expect to spend between $150 and $400 on all the tools and materials for a basic home solar air heater, depending on the size and quality of materials you choose. This includes essentials like wood, insulation, glazing, fans, and basic hand tools. Most people recoup these costs within one to two winters, especially if you normally rely on electric or propane heat. If you already own some tools, your costs could be much lower.
For someone new to DIY projects, about how long does the assembly of a basic solar air heater usually take? Are there common mistakes first-timers should watch out for during the build?
For someone new to DIY, assembling a basic solar air heater typically takes about 6 to 10 hours, often spread over a weekend. Common mistakes include not sealing air gaps properly, using the wrong materials (like untreated wood), or installing the heater at the wrong angle for sunlight. Double-check measurements, use weather-resistant materials, and take your time with insulation to avoid heat loss.
For someone new to DIY solar projects, could you elaborate on how to safely connect the solar air heater to existing home vent systems, if possible? I want to make sure I avoid any common installation mistakes.
Connecting a solar air heater to your existing vent system is possible, but safety and airflow are key concerns. Use insulated ducting to link the heater’s outlet to your home’s vents, ensuring all joints are sealed to prevent air leaks. Install a backdraft damper to stop cold air from entering at night. Avoid tapping into vents tied to gas appliances, as this can affect their operation. If unsure, consulting an HVAC professional is wise to ensure proper and safe integration.
In the article, you talk about mounting the collector on a sun-drenched wall. Are there specific guidelines for choosing the best wall in terms of orientation or shading, especially if my house gets uneven sunlight throughout the day?
To get the best performance from your solar air heater, mount the collector on a south-facing wall if you’re in the northern hemisphere, as this side receives the most consistent sunlight. Make sure the wall isn’t shaded by trees, buildings, or other obstacles during peak sunlight hours, typically between 9 a.m. and 3 p.m. If sunlight is uneven, choose the wall with the longest period of direct sun exposure.
Could you provide more detail on how to select the best transparent front material for the collector? I’m wondering if there are affordable options at hardware stores, or if I need to look for something specialized.
For the transparent front of your solar air heater, common and affordable options at hardware stores include clear acrylic (plexiglass) and polycarbonate sheets. Both allow good sunlight transmission and offer durability. Acrylic is usually less expensive but can crack more easily, while polycarbonate is tougher and more impact-resistant. If you want better insulation, look for twin-wall polycarbonate, though it might cost a bit more. Generally, you don’t need to buy specialized solar glazing unless you’re aiming for maximum efficiency or longevity.
I noticed you mentioned the project is low maintenance after installation—what sort of upkeep is usually needed for a homemade solar air heater over the winter months? Are there common issues to watch for, such as condensation or airflow blockages?
Once your solar air heater is installed, upkeep is pretty minimal. Over the winter, it’s good to occasionally check for dust or debris blocking the intake or outlet vents, as airflow blockages can reduce efficiency. Also, keep an eye out for any condensation inside the unit, which can sometimes occur if there’s a poor seal; resealing joints or adding ventilation can help. Otherwise, just make sure the glazing stays clear and clean to maximize sunlight absorption.
You mentioned the solar air heater should be mounted on a sun-drenched wall. Does the orientation (like south-facing vs. east-facing walls) make a noticeable difference, and do you have any tips for homes with limited direct sunlight?
Orientation does make a noticeable difference—a south-facing wall is ideal in most northern hemisphere locations, as it gets the most sunlight throughout the day, which maximizes the heater’s efficiency. If your home has limited direct sunlight, try to choose the wall that gets the most sun hours, even if it’s not perfectly south-facing. Also, avoid shaded areas and consider trimming back nearby trees or structures if possible to boost solar exposure.
When assembling the collector box for a solar air heater, is there a specific material you’d recommend for maximizing heat absorption while keeping costs reasonable? I’m also curious if certain paints or finishes actually make a noticeable difference in efficiency during cold months.
For the collector box, using plywood or aluminum is common, with aluminum offering better heat conduction but often at a higher price. For maximizing heat absorption, applying a flat black, high-temperature paint to the absorber surface is highly effective—this finish absorbs more solar energy and radiates less heat away compared to glossy or lighter paints. Choosing a non-reflective, matte black paint specifically rated for outdoor or high-heat use can noticeably boost efficiency during colder months.
I noticed the article mentions using a measuring tape that’s at least 25 feet long. Is that length really necessary for most home setups, or can I use a shorter tape if I’m working in a small space like a garage wall?
A 25-foot measuring tape is suggested just to cover a variety of project sizes, but for a small space like a garage wall, you can definitely use a shorter tape. As long as your tape is long enough to measure the dimensions you need for your solar air heater panels and placement, a shorter tape will work just fine.
For the collector box, do you recommend a specific type of transparent front material that balances affordability and durability during harsh winters?
For the collector box front, clear polycarbonate sheets are a popular choice because they’re durable, impact-resistant, and handle harsh winter conditions much better than standard acrylic or thin plastics. They also let plenty of sunlight through for efficient heating. While polycarbonate can cost a bit more upfront than acrylic, it’s much less likely to crack or yellow over time, making it a smart balance between affordability and long-term performance.
About the essential tools, do you have any recommendations for budget-friendly options that won’t compromise the quality or safety of the project? I’m trying to minimize costs but still want my build to last.
You can definitely find quality tools without overspending. For hand tools like screwdrivers, pliers, and wrenches, consider reputable budget brands such as Stanley or Craftsman—they offer good durability at reasonable prices. For power tools, brands like Ryobi and Black+Decker are affordable yet reliable for home projects. Always check for safety certifications and user reviews. Investing a bit more in a solid cordless drill or a quality saw can also make your build safer and longer-lasting.
After the heater is built and installed, how much time do I need to spend on maintenance, especially during the winter months? Are there any common issues to watch out for that could reduce its efficiency?
Ongoing maintenance for a home solar air heater is pretty minimal. During winter, you should check the unit every few weeks to ensure the air intake and exhaust aren’t blocked by snow, dust, or debris. Also, watch for any condensation buildup inside the panels or leaks around the seals. Make sure the fans and vents are working properly. These simple checks help maintain efficiency and prevent common issues like airflow restriction or heat loss.
How long does the average DIY construction process take for a home solar air heater, assuming access to all the recommended tools and materials? Are there any steps that tend to be time-consuming or tricky for first-timers?
For most DIYers with all tools and materials on hand, building a home solar air heater usually takes one to two weekends, or roughly 12–20 hours total. Tasks like sealing air gaps, assembling the collector frame, and installing glazing can be time-consuming, especially for first-timers. Taking your time with these steps ensures better efficiency and longevity for your heater.
How much should I expect to spend on materials and tools for a basic DIY solar air heater, assuming I don’t already own any of the equipment listed in the guide?
For a basic DIY solar air heater, if you need to purchase all materials and tools from scratch, you can expect to spend anywhere from $150 to $300. This estimate includes essential materials like plywood, insulation, glazing, black paint, and hardware, as well as essential tools such as saws, drills, and measuring equipment. Prices may vary depending on local suppliers and product choices.
After installing the solar air heater, how do you know if it’s working at its maximum potential? Are there specific temperature or airflow measurements I should monitor to spot any issues with my build?
To check if your solar air heater is performing well, measure the temperature of the air entering and leaving the unit on a sunny day. Ideally, you should see a temperature increase of 20–40°F (11–22°C). Also, monitor the airflow—use an anemometer to check for steady, strong output. Low temperature rise or weak airflow could mean insulation gaps, leaks, or fan issues that need attention.
The article says the heater gets mounted on a sun-drenched wall. How can I tell which exterior wall of my house gets enough sun in winter? Are there any simple ways to check this before I start building?
To identify the sunniest wall in winter, observe your home’s exterior on sunny days—especially between 9 am and 3 pm, when sunlight is strongest. The wall that gets direct sunlight for most of those hours is your best choice. South-facing walls usually receive the most winter sun in the northern hemisphere. You can also use a smartphone compass app to confirm the direction, or check shadows and light patterns over a few days to be sure.
Could you give more details on the maintenance you’ve had to do after installing your own solar air heater? I’m curious if any parts needed replacing frequently or if there are specific areas to keep an eye on.
After installing my solar air heater, the maintenance has been relatively low. I usually check the air intake and outlet vents every few weeks to clear any dust or debris. The main parts to keep an eye on are the fans and the solar collector surface; sometimes, the fan bearings may need lubrication or replacement after a year or two. Also, inspect for any cracks or leaks in the collector panel seals. So far, no major components have needed frequent replacement, just the occasional cleaning and minor upkeep.
If I already have some basic tools like a standard measuring tape and a hand saw, do I really need specialty equipment to follow your guide, or can I make do with what I have and still get good results?
You can absolutely get started with your measuring tape and hand saw for most of the basic construction in the guide. Specialty equipment like a power drill, caulk gun, or tin snips could make certain steps easier and neater, especially when working with metal or sealing joints, but they’re not strictly required. As long as you work carefully and take your time, you can still achieve good results with basic tools.
Your guide mentions using a square and level for accuracy. Are there any common errors beginners make during assembly that I should watch out for to avoid air leaks or poor heating performance?
Absolutely, ensuring accuracy during assembly is key to a well-sealed and efficient solar air heater. Common mistakes include misaligning frame corners, which can create gaps for air leaks, and failing to seal joints fully with caulk or weatherstripping. Also, double-check that the glazing is flush and the intake and exhaust vents are properly sized and positioned. Take your time with measurements and use your square and level throughout to avoid these issues.
You mention low maintenance after installation—can you elaborate on what kind of long-term upkeep or troubleshooting is typically required for these homemade solar air heaters?
After installation, homemade solar air heaters usually require minimal upkeep. You’ll want to check and clean the glass or transparent cover a few times a year to ensure sunlight isn’t blocked by dust or debris. Inspect for any air leaks or damaged seals that might develop over time and reseal if necessary. Occasionally check the fans (if used) and electrical connections for dust buildup or wear. Most issues are minor, like cleaning or resealing, but regular visual checks help maintain efficiency.
Can you provide an estimated budget range for the essential tools and materials listed, especially for those of us starting from scratch without much DIY equipment?
If you’re starting from scratch, basic tools like a drill, saw, screwdriver set, measuring tape, and safety gear may cost $75–$150 altogether. For materials such as insulation, plywood, paint, plexiglass, and aluminum cans or sheets, you can expect to spend another $100–$200, depending on local prices and whether you buy new or reuse materials. Altogether, your budget range would be roughly $175 to $350 for both tools and materials.
I’m new to DIY projects and am wondering if there are specific materials you’d recommend for the collector box that balance cost and durability, especially for someone trying to keep the budget reasonable.
For a budget-friendly and durable collector box, you might consider using plywood or oriented strand board (OSB) for the frame, as both are cost-effective and sturdy when sealed properly. For the glazing, clear polycarbonate or acrylic sheets work well and are more affordable than glass. Be sure to weatherproof all wood surfaces with outdoor paint or sealant to extend the life of your collector box.
For someone who isn’t very experienced with DIY projects, how complicated is the assembly process described here? Are there particular parts of the build that tend to be tricky for beginners?
The assembly process is fairly straightforward, but some steps can be more challenging for beginners. Cutting and fitting the materials accurately, especially the solar collector and insulation, requires careful measuring and handling tools safely. Sealing the unit properly to prevent air leaks can also be a bit tricky. Taking your time, reading each step closely, and double-checking measurements will help make it more manageable for someone new to DIY.
In the section about tools, you mention the need for measuring tape and a level for accurate cuts. How crucial is it to get those measurements exactly right? Will small mistakes affect the efficiency of the heater?
Precise measurements are important because gaps or misaligned parts can let air escape, reducing the overall efficiency of your solar air heater. Small mistakes of a few millimeters might not be critical, but larger errors can compromise how well the heater retains and circulates warm air. Doing your best to measure and cut accurately will help make sure your heater works as intended.
I saw that you listed a 25 ft measuring tape as essential. If I plan to build a pretty small unit for just one room, could I get away with smaller or fewer tools, or do you still suggest having everything on the list?
If you’re building a smaller solar air heater just for one room, you can definitely use a shorter measuring tape—something like a 10 or 12 ft tape should work fine. For the other tools, consider what each task requires; you may be able to skip a few if your project is simpler, but having the basics will still make the build smoother.
Could you provide more details about the materials for the absorber surface inside the collector? Are there particular metals or coatings you recommend for maximizing heat absorption while keeping costs low?
For the absorber surface, aluminum sheets are a popular choice because they’re lightweight, easy to work with, and conduct heat well. To maximize absorption, paint the surface with flat black, high-temperature paint, which is inexpensive and effective. You could also use steel, but it’s heavier and can be more prone to rust unless properly coated. Avoid glossy finishes, as they reflect sunlight and reduce efficiency.
Could you share more details about the type of transparent material recommended for the collector front? I’m wondering if certain materials perform significantly better in cold climates or if any clear panel will do the job for a home solar air heater.
For the collector front, polycarbonate and tempered glass are most often recommended. Polycarbonate is lightweight, impact-resistant, and insulates well, making it ideal for cold climates. Tempered glass offers higher solar transmittance but is heavier and more fragile. Clear acrylic panels are a budget option but may not insulate as well. For maximum performance in winter, choose double-walled polycarbonate or tempered glass—they retain heat better and withstand freezing temperatures.
If my house doesn’t get a lot of direct sunlight in winter, will a DIY solar air heater still work efficiently, or should I consider any specific design tweaks mentioned in your guide?
If your house has limited direct sunlight in winter, a standard DIY solar air heater may not perform at its best. To improve efficiency, consider some of the guide’s suggestions like positioning the heater on the sunniest wall, using reflective insulation to maximize heat gain, or increasing the collector’s size. Adding thermal mass to store heat during sunny periods and insulating the ductwork can also help boost overall effectiveness.
If my house has limited sun exposure on most walls during winter, would a solar air heater still perform well? Or are there adjustments I should consider in the design based on sun angle or location?
Limited sun exposure will reduce the effectiveness of a solar air heater, since it relies on direct sunlight to generate heat. You could improve performance by placing the heater on the sunniest available wall, angling it to catch more low winter sun, or even using a portable or ground-mounted design that can be optimally oriented. Adding thermal storage (like rocks or water) inside the unit can also help retain heat during cloudy periods.
Does building a home solar air heater typically require any specialized tools beyond what most homeowners might already have, or could I get by with basic measuring and cutting equipment?
For most DIY home solar air heater projects, basic measuring and cutting tools like a tape measure, saw, drill, and screwdriver are usually enough. You might also need caulking tools for sealing and perhaps a rivet gun if you’re using sheet metal, but these are still fairly common. Most homeowners won’t need highly specialized equipment—just standard tools and some patience.
Your guide lists measuring and marking tools, but I’m curious about safety gear too. What kind of protective equipment should I have on hand when constructing and installing the heater?
When working on a home solar air heater, it’s wise to have safety gear ready. Wear safety glasses to protect your eyes from debris, and use work gloves to shield your hands from sharp edges or hot surfaces. A dust mask is helpful if you’re cutting or sanding. Also, sturdy shoes and hearing protection may be useful depending on your tools and workspace.
When selecting materials for the solar air heater, are there affordable options you recommend for someone trying to do this on a tight budget? For example, is there a cost-effective alternative to the transparent front panel?
Absolutely, there are budget-friendly options you can use. For the transparent front panel, clear polycarbonate or acrylic sheets are good, but if you want to save even more, you can use double-layered clear plastic sheeting or even repurposed glass from old windows. Just make sure the material is UV-resistant and can withstand outdoor conditions for the best results.
How long does the average DIY solar air heater project take from start to finish, and is it feasible to complete over a weekend for someone who’s handy but new to solar projects?
For someone who is handy but new to solar projects, building a DIY solar air heater typically takes about one to two full days, depending on the design and size. Most people can finish the project over a weekend if they have all the materials ready and set aside enough uninterrupted time. Reading instructions thoroughly and planning each step in advance will help make the process smoother.
When selecting tools, are there any specific brands or features you recommend to ensure better precision or safety, especially for someone who doesn’t have much experience with construction projects?
For beginners, consider tools with built-in safety features like automatic shut-off on power tools and non-slip grips on hand tools. Brands such as DeWalt, Bosch, and Stanley are known for reliability and user-friendly designs. Look for hand tools with clear measurement markings and power tools that offer adjustable speed settings, as these features help improve both precision and safety.
I saw that the collector is usually mounted on a wall that gets a lot of sun, but how do I figure out which wall of my house would work best for this if I live in a pretty shaded area?
If your property is mostly shaded, try to observe which wall gets the longest and most direct sunlight during winter days, especially between 9 am and 3 pm when the sun is at its highest. Even partial sun exposure can help, so look for the spot with the fewest obstacles like trees or buildings. If sunlight is still limited, consider trimming branches or placing the collector slightly away from the house for better sun access.
Could you give more details on what type of absorptive interior surface works best for the collector? Are there specific materials that give better heat output or are easier to work with for a first-timer?
For the absorptive interior surface of your solar air heater, flat black-painted metal is a top choice. Aluminum sheets painted with matte black high-temperature paint absorb heat well and are lightweight, making them easy to handle. Corrugated metal or black-painted aluminum cans can also work and increase surface area, boosting heat transfer. For beginners, flat aluminum sheets are usually the simplest and most effective option.
For someone trying to keep initial costs low, which tools or materials from your list are essential, and which ones could be considered optional or swapped out for something more budget-friendly without sacrificing too much efficiency?
To keep costs low, focus on essential items like a basic saw, drill, screws, weatherproof caulk, and insulation. For materials, plywood or reclaimed wood works well for the frame, and soda cans or aluminum cans are budget-friendly for the collector. Optional tools like a power sander or specialized meters can be skipped or borrowed. Instead of expensive glass, clear polycarbonate or old storm windows are good alternatives without major efficiency loss.
For someone with no prior experience, how long does it usually take to assemble and install a solar air heater from start to finish? Are there any steps that tend to take longer than expected?
For someone new to DIY projects, assembling and installing a home solar air heater typically takes about one to two full weekends. Most people find that preparing the materials—especially cutting and fitting the collector components—takes longer than expected. Mounting the unit securely and sealing any air gaps can also be time-consuming if you want to maximize efficiency. Taking your time with these steps will pay off in performance.
How much should I realistically budget for all the necessary tools and materials listed in your guide, assuming I don’t already own any of the equipment? Are there any creative ways to save on initial costs without sacrificing performance?
If you’re starting from scratch, budgeting between $200 and $400 for all tools and materials is a realistic estimate, depending on the quality and quantities you choose. To save costs, consider borrowing or renting tools from friends, neighbors, or local tool libraries. Sourcing materials like wood, insulation, or glass from salvage yards or reuse centers can also reduce expenses without affecting the heater’s performance.