
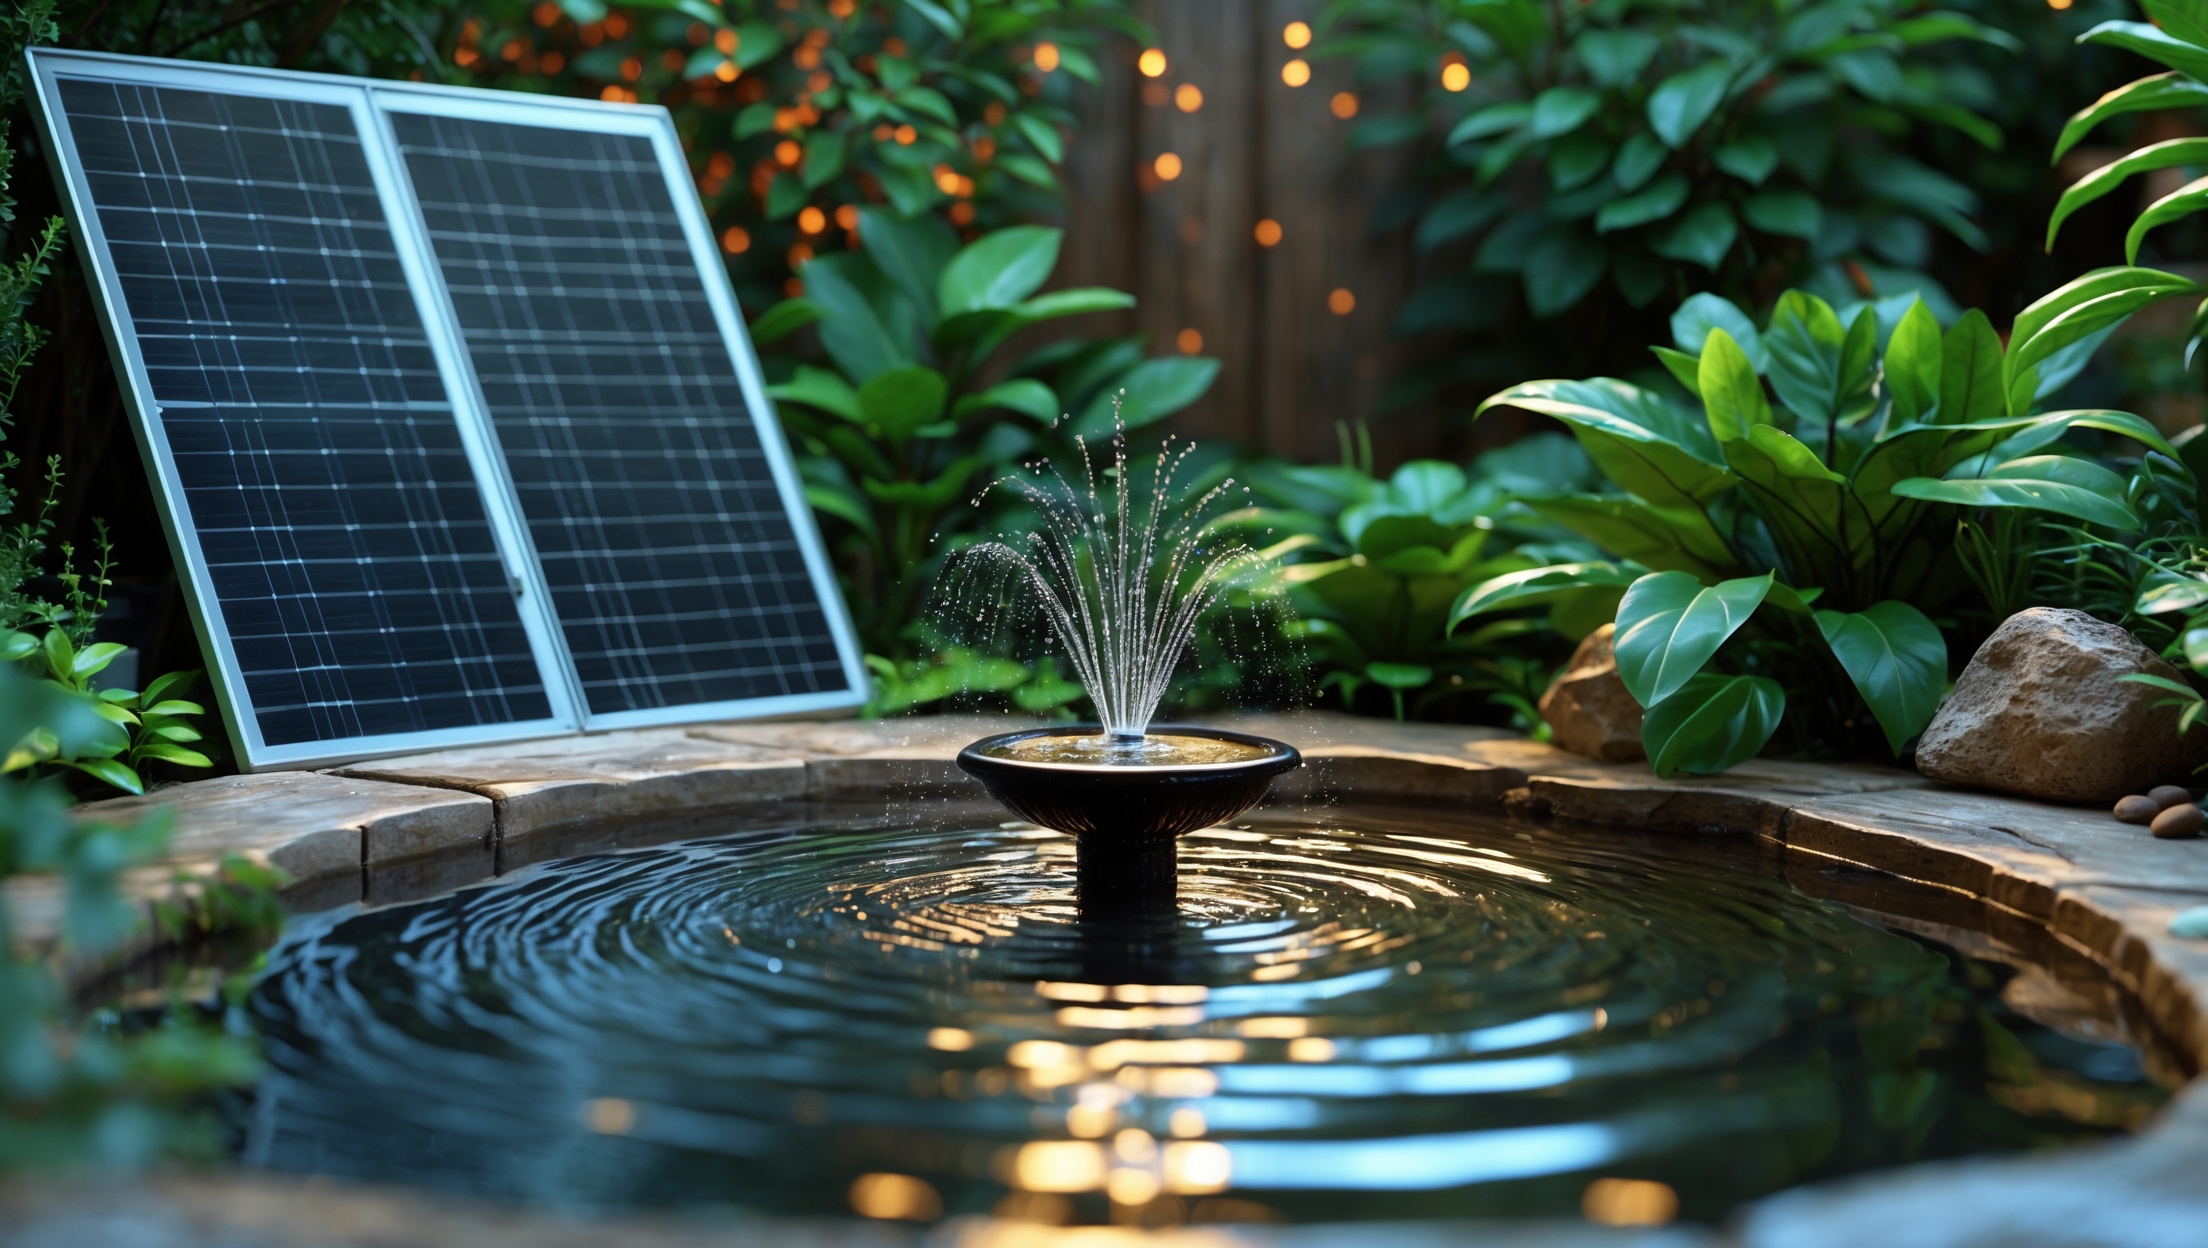
Introduction: Why Safety Matters in Solar-Powered Water Fountains
Solar-powered water fountains are a beautiful, eco-friendly addition to any garden or landscape. They provide the soothing sound of flowing water and attract beneficial wildlife, all while harnessing renewable energy from the sun. However, as with any electrical and water-based installation, safety must be a top priority. Inadequate planning or oversight can lead to electrical hazards, water leaks, equipment failure, or even harm to family members and pets. This comprehensive safety checklist is designed to guide homeowners, sustainability enthusiasts, and DIYers through every critical step of installing a solar-powered water fountain. Whether you’re aiming for a small birdbath or a grand centerpiece, following best safety practices ensures years of reliable, risk-free enjoyment. Let’s explore the essential considerations and precautions that will help you achieve sustainable beauty—without compromise.
Assessing Your Site: The Foundation of Fountain Safety
Sun Exposure and Panel Placement
Before installation, determine the best location for optimal solar panel efficiency and minimal risk. Identify a spot with unobstructed sunlight for at least six hours daily, away from overhanging branches that could drop debris or cast shade. Avoid placing panels where they may be accidentally stepped on, tripped over, or damaged by pets or garden equipment.
- Use a solar pathfinder tool or smartphone app to assess year-round sun availability.
- Position the panel at an angle that maximizes sun capture while minimizing glare toward living spaces.
- Ensure the panel’s mounting hardware is compatible with your surface (soil, stone, concrete, etc.).
Water Source and Drainage Considerations
Choose a level area to prevent water pooling, which can undermine the foundation or cause slippery surfaces. Make sure the location is safe from runoff or flooding, which could contaminate the fountain’s water supply or damage electrical components.
- Test the soil drainage by digging a small test hole and filling it with water.
- Position the fountain away from septic systems, storm drains, and areas prone to standing water.
- Ensure easy access for regular cleaning and maintenance.
Electrical Safety: Keeping Water and Wires Apart
Choosing Weatherproof Components
All electrical elements—solar panels, pumps, connectors, and cables—must be rated for outdoor use. Look for components with IP (Ingress Protection) ratings of at least IP65 for resistance to dust and water jets.
- Use waterproof connectors and outdoor-rated extension cables.
- Verify that all junction boxes are sealed against moisture ingress.
- Select a pump with built-in overload and short-circuit protection.
Safe Cable Management
Poorly routed cables are a tripping hazard and can be easily damaged by garden tools or weather. Plan your cable runs before installation.
- Bury or securely clip cables along fences or under mulch—never let them remain exposed.
- Use conduit or cable covers for added protection against rodents and UV degradation.
- Leave a drip loop in cable runs to prevent water from flowing into electrical connectors.
GFCI Protection and Shut-Offs
A Ground Fault Circuit Interrupter (GFCI) is essential for any outdoor water feature. If your fountain uses an AC-powered backup or hybrid system, install a GFCI outlet or breaker.
- Test GFCI outlets monthly using the built-in test button.
- Ensure the system has an accessible shut-off switch in case of emergency or maintenance.
Water Safety: Preventing Leaks, Stagnation, and Contamination
Leak-Proofing and Containment
Water leaks can cause soil erosion, structural damage, or hazardous slippery areas. Start with a robust, level base and use a watertight fountain basin or liner.
- Inspect all joints and seals for cracks before assembly.
- Apply a non-toxic, waterproof sealant to vulnerable seams.
- Test the system with clean water before connecting electrical components.
Water Quality Management
Stagnant water can breed mosquitoes and bacteria. A properly sized pump ensures constant circulation, which is vital for both water quality and pump longevity.
- Select a pump rated for continuous operation and the correct water volume.
- Install a mesh filter on the pump intake to prevent debris clogging.
- Consider adding a UV clarifier or natural water treatments for algae control if your fountain is large.
Safe Additives and Wildlife
Only use water treatments that are safe for pets, birds, and beneficial insects. Avoid harsh chemicals, especially if your fountain is accessible to wildlife.
- Opt for barley straw or enzyme-based clarifiers over copper-based algaecides.
- Keep the water depth appropriate for the intended wildlife—shallow for birds, deeper for fish.
Structural Safety: Stable, Secure, and Storm-Ready
Foundation and Anchoring
Your fountain must withstand wind, rain, and accidental bumps. Use a compacted gravel base or concrete pad for stability, especially for larger features.
- Anchor the fountain using ground stakes, bolts, or heavy pavers.
- Level the base to prevent tilting or uneven water flow.
- For heavy fountains, verify the underlying surface can support the weight when filled with water.
Storm and Freeze Protection
Solar panels and fountain components should be built to endure extreme weather.
- Choose panels with tempered glass and corrosion-resistant frames.
- In regions with frost, install a drain plug or removable basin for easy winterization.
- Consider using quick-release fittings for fast disassembly before storms or freezing conditions.
Installation Checklist: Step-by-Step Safety Review
- Confirm sun exposure and safe, level placement.
- Verify all solar and pump components are outdoor-rated and undamaged.
- Test GFCI outlets and confirm accessible shut-off switches.
- Inspect and seal all water basin joints.
- Install cables in conduit or bury them as required.
- Anchor fountain securely and double-check level.
- Install mesh filter on pump intake.
- Run a test fill; check for leaks and proper water circulation.
- Keep installation area clear of obstructions and tripping hazards.
- Document all component specifications and warranty information.
Ongoing Safety: Maintenance and Seasonal Checks
Monthly Safety Tasks
- Inspect solar panels for debris or shading; clean with soft water and a non-abrasive cloth.
- Test GFCI and shut-off switches.
- Check cable runs for damage or exposure.
- Remove pump and clean intake filter.
- Top up water and check for leaks or overflow.
Seasonal and Annual Safety Checks
- Drain and winterize the fountain in freezing climates; store the pump indoors.
- Check the structural integrity of the fountain and anchoring system after major storms.
- Review warranty coverage and update records as needed.
Family and Visitor Safety: Protecting Children, Pets, and Guests
Child and Pet Proofing
Even shallow water poses a risk to small children and animals. Consider these precautions:
- Use a mesh or grate over deeper basins to prevent accidental falls.
- Supervise children and pets around the fountain, especially during play.
- Keep chemical treatments out of reach.
Signage and Illumination
For larger or more intricate installations, use discreet signage to alert visitors to water and electrical features. Install solar-powered path lights for nighttime visibility around the fountain area.
Troubleshooting Common Safety Issues
Pump Failure or Overheating
If the pump stops working or becomes hot to the touch, disconnect power immediately. Check for clogs, debris, and correct water level before restarting. Replace any damaged components promptly.
Water Leaks and Pooling
Unexplained wet spots may indicate a leak. Inspect all seals and tubing, and reapply waterproof sealant as needed. If leaks persist, replace faulty parts to prevent further damage.
Electrical Shorts or Malfunctions
Any sign of sparking, buzzing, or irregular pump operation should be treated as an emergency. Shut off power at the source and consult a qualified technician before resuming operation.
Conclusion: Sustainable Beauty Without Compromise
Installing a solar-powered water fountain is a rewarding step toward sustainable living, blending renewable energy with the calming presence of water. However, beauty and sustainability must never come at the expense of safety. By following a detailed checklist—covering site selection, electrical and water safety, structural stability, and ongoing maintenance—you can enjoy your fountain with peace of mind. Consistent attention to safety not only protects your family and property but also extends the life of your investment. Remember, sustainable technologies thrive on careful planning and responsible stewardship. Whether you’re creating a tranquil oasis for wildlife, a playful splash zone for children, or a decorative centerpiece, every precaution you take today ensures that your fountain remains a source of joy and inspiration for years to come. Embrace sustainable beauty—safely and confidently.


About choosing a level location to prevent water pooling—how much of a slope is considered too much? Should I be using a spirit level or is it fine to eyeball it when setting up the fountain base?
It’s best to use a spirit level for accuracy when setting up your fountain base. Even a gentle slope—more than about 1-2 degrees—can cause water to pool unevenly or the fountain to tip over time. Eyeballing it might seem fine, but small tilts can make a big difference, so a level surface is definitely worth the extra effort.
When choosing the fountain’s location, you advise avoiding spots with potential water pooling and areas prone to flooding. If my garden is uneven and susceptible to runoff, what would be the best way to create a safe, level base for installation?
To create a safe, level base in an uneven or runoff-prone garden, first select the flattest possible spot, then dig out and tamp down the area. Add a layer of gravel for drainage, followed by paving stones or a concrete pad to provide a stable, level surface. This setup will help prevent water pooling and protect the fountain’s foundation from erosion or shifting.
I noticed you mentioned using a solar pathfinder tool or a smartphone app to assess sun exposure for panel placement. Are there any specific apps you’d recommend for home users, and do these tools factor in seasonal variations in sunlight, or should I check multiple times during the year?
For home users, apps like Sun Surveyor, Solar Pathfinder Assistant, and PVGIS are quite popular for assessing sun exposure. These tools can simulate sun paths and help identify shading issues. While many do factor in seasonal changes, it’s a good idea to check your location at different times of the year to account for variations in sunlight caused by shifting sun angles and growing foliage.
I noticed the checklist mentions using a solar pathfinder tool or smartphone app to assess sun availability for the panels. Do you have a recommendation on specific apps that are accurate for this purpose? I want to be sure I’m setting up my fountain where it will work best year-round.
A couple of reliable apps for assessing sun availability are Solar Pathfinder Assistant and Sun Surveyor. Sun Surveyor is user-friendly and provides detailed sun path data, while Solar Pathfinder Assistant pairs well if you have a Solar Pathfinder device but also offers helpful solar analysis features. Both can help you find the optimal spot for your fountain to ensure good year-round solar exposure.
I already have a small electric water fountain. Is it worth switching to solar, safety-wise, or are the precautions and maintenance needs mostly the same?
Switching to a solar-powered fountain reduces the risk of electrical hazards outdoors since there’s no need for extension cords or outlets near water. Solar models generally have simpler wiring and are safer in wet environments. However, both types still require regular cleaning and pump maintenance. The main difference is that solar fountains are safer due to lower voltage and less chance of electrical accidents.
If flooding or runoff is a concern in my area, would it be safer to build a raised base for the fountain, or are there other drainage solutions that work better for solar-powered setups?
Building a raised base is a smart way to protect your fountain from flooding and runoff, keeping components dry and stable. Alternatively, you can improve drainage around the fountain with gravel beds, a French drain, or a sloped surface to direct water away. Either method works well for solar setups—just make sure the solar panel remains in direct sunlight.
Our landscaping company often sets up water features in spots that might get occasional runoff. Are there best practices for drainage or certain foundation materials you would suggest to keep the solar-powered fountains safe and stable in those conditions?
For areas with occasional runoff, it’s important to choose a well-draining foundation like compacted gravel or a concrete base with built-in drainage channels. Ensure the fountain is placed slightly above ground level to prevent pooling around the base. Installing a French drain or using permeable pavers around the fountain can also help direct water away, keeping both the structure and its solar components safe and stable.
When choosing a spot to install the solar panel, you mentioned making sure it’s not where it could be stepped on or tripped over. What are some safe mounting options or protective measures for panels in areas with lots of foot traffic or playful pets?
For high-traffic or pet-prone areas, consider mounting the solar panel on a sturdy pole, a nearby fence, or the side of a shed to keep it elevated and out of the way. You can also use protective covers or low-profile mounting brackets to reduce tripping hazards. Just make sure the panel still receives enough direct sunlight in its new position.
Can you elaborate on what kind of mounting hardware is safest and most durable for panels installed in soil, especially if pets are running around? I want to avoid having to redo the installation later.
For solar panels installed in soil, opt for galvanized steel ground-mount frames with concrete footings. These are highly durable and resist corrosion, making them safe even if pets are active nearby. Secure the frames deeply into the ground, and use locking bolts to keep everything stable. This setup minimizes movement or tilting and greatly reduces the likelihood of needing future adjustments or repairs.
You mention the importance of avoiding water pooling around the fountain to prevent slippery surfaces. What type of ground material or surface do you recommend as the safest base for a solar-powered water fountain in a family yard with kids?
For a family yard with kids, a textured, non-slip surface like rubber safety tiles or rough concrete pavers works well as a base for a solar-powered water fountain. These materials help prevent slipping even if some water splashes out. Avoid smooth stone or ceramic tiles, as they can get slippery when wet. Mulch or gravel can also be helpful, as they allow water to drain quickly, reducing the risk of puddles.
What should I watch out for in terms of electrical hazards during installation, especially if I have pets and kids who might play near the fountain?
When installing your solar-powered water fountain, make sure all electrical connections and wires are fully waterproof and securely covered to prevent contact with water or curious hands and paws. Position the solar panel and cables out of reach of children and pets, and avoid running wires across walkways or play areas. Use ground fault circuit interrupters (GFCIs) for added protection, and double-check that connections are tight and not exposed.
If my fountain is going in a spot where my dog sometimes plays, is there a way to protect the solar panel and wiring from accidental damage? I worry about both safety and keeping the setup long-lasting.
To protect your solar panel and wiring from your dog’s play area, consider mounting the solar panel on a raised post or wall that’s out of reach. For wiring, use protective conduit or tubing to shield cables and secure them along edges or underground where possible. This approach keeps everything safer for your dog and helps your fountain system last longer.
If I already have an existing birdbath, is it possible to retrofit it with a solar-powered pump while still following the safety guidelines in your checklist, or would it be safer to buy a kit designed for solar use?
You can retrofit your existing birdbath with a solar-powered pump if you carefully follow safety guidelines, especially regarding waterproofing and secure placement of the solar panel and wiring. However, solar kits designed specifically for birdbaths typically include all necessary safety features and are easier to set up correctly. If you’re comfortable making adjustments and checking compatibility, retrofitting is safe, but using a dedicated solar kit does minimize risk.
For pet owners, are there additional safety guidelines to keep animals from tampering with the solar panel wiring or accidentally damaging the system while playing in the yard?
Absolutely, for pet owners, it’s important to secure all wiring by either burying it underground or using protective conduit to prevent chewing or tugging. Position the solar panel and its components out of common play areas, and consider using barriers or fencing around the setup. Regularly inspect the system for signs of tampering or wear, especially if your pets are curious or energetic outdoors.
The article mentions using a solar pathfinder tool or smartphone app to assess sun availability when choosing the panel placement. Is there a particular app or type of tool you recommend for beginners, and how accurate do these need to be for home fountain setups?
For home fountain setups, you don’t need industrial-level accuracy—just a reasonable idea of how much sunlight the spot gets. Apps like Sun Surveyor or Solar Pathfinder Assistant are user-friendly options for beginners and can help you visualize sun paths on your phone. These tools give you enough information to choose a good solar panel spot for consistent performance.
I’m wondering how to balance placing the solar panel in a spot with maximum sunlight while also making sure it doesn’t become a tripping hazard for customers walking through my garden shop. Any tips on safe, visible placement in a high-traffic area?
To balance sun exposure and safety, try mounting the solar panel above ground level—on a fence, wall, or sturdy pole—so it stays in direct sunlight but out of footpaths. If you must run a cord to the fountain, use cord covers and clear signage, or route it along edges to keep walkways open. Brightly colored markers or small barriers can also draw attention to the setup and prevent tripping.
Could you clarify what types of mounting hardware are safest for securing solar panels on concrete versus soil? I want to make sure the panels aren’t a tripping hazard but also want something that holds up well in different weather conditions.
For concrete surfaces, use heavy-duty mounting brackets or anchors specifically designed for masonry; these provide a strong, low-profile hold and minimize tripping risks. On soil, ground-mount frames with sturdy stakes or screw-type anchors are safest, as they secure panels firmly and withstand wind or rain. In both cases, keep cables neatly tucked away and panels flush with the surface when possible to reduce trip hazards.
What are some signs of drainage problems around the installation site that could pose a safety risk, and how often should I check for those after setting up the fountain?
Watch for pooling water, muddy or soggy ground, and uneven soil settling around the base of the fountain—these are common signs of drainage issues that could lead to slipping hazards or structural instability. It’s a good idea to check for these problems weekly during the first month after installation, then monthly as part of routine maintenance.
Regarding water drainage, you mentioned avoiding spots with potential flooding or runoff. If my yard is slightly sloped, are there certain materials or methods I should use to stabilize and level the fountain base effectively?
For a yard with a slight slope, it’s a good idea to create a stable, level base for your fountain. Use compacted gravel or crushed stone as a foundation layer, which will help with drainage and prevent shifting. You can build a small retaining border with bricks or pavers to keep the base material in place. Double-check with a level before placing the fountain to ensure long-term stability.
Could you clarify how to choose the right mounting hardware for different surfaces like soil vs. concrete? Are there specific materials or brands you recommend for better durability and safety?
For soil, choose ground stakes or anchors made from galvanized steel or heavy-duty plastic, as these resist rust and weathering. For concrete, use masonry anchors or expansion bolts, preferably stainless steel for longevity. Always match the hardware to your fountain’s weight and size, and look for products specifically labeled for outdoor use. While there’s no single brand required, quality brands like Simpson Strong-Tie or Hilti are known for durability and safety.
Could you elaborate on what type of mounting hardware works best for solar panels on uneven garden surfaces like gravel or mulch? I want to make sure my panel stays secure through all kinds of weather but I’m not sure what options are available.
For uneven surfaces like gravel or mulch, using ground-mount frames with adjustable legs is a reliable option. These frames allow you to level the solar panel even when the ground isn’t flat. For added stability, anchor the frame with ground stakes or weighted bases designed for outdoor use. Make sure to check that all fasteners are corrosion-resistant, and periodically inspect the setup to ensure it remains secure after heavy rain or wind.
Could you expand on safe water drainage solutions? My backyard has some minor flooding issues, so I’m concerned about how that might affect the fountain’s foundation and safety.
Absolutely, safe water drainage is crucial, especially if your backyard is prone to flooding. Consider installing a gravel trench or French drain around the fountain’s base to redirect excess water away from the foundation. Elevating the fountain slightly with a concrete pad can also help prevent water from pooling underneath. Regularly check and clear any drainage channels to keep them effective and maintain overall safety.
You mention using a solar pathfinder tool or app to check sunlight at the site. For someone on a tight budget, are there any low-tech ways to figure out if my chosen spot gets enough year-round sun?
You can definitely use some low-tech methods to check sunlight. Try placing a stick or broom handle upright in your chosen spot and observe its shadow throughout a sunny day. If the area gets at least 6 hours of direct sunlight—especially midday—it should work for a solar fountain. Repeat this on different days or seasons to see if trees or buildings cast shade at other times.
Could you elaborate on what type of mounting hardware works best for different surfaces like concrete versus soil? I want to make sure I choose the right materials for where I plan to install the fountain.
For concrete surfaces, it’s best to use heavy-duty anchors or expansion bolts to securely fix the fountain base. These provide a stable hold on hard surfaces. For soil, use ground stakes or long rebar pins that drive deep into the ground for stability. Make sure the hardware is rust-resistant and suitable for outdoor use to ensure long-term safety and durability.
I’m curious about your recommendation to use a solar pathfinder tool or smartphone app to assess sun availability—do you have any favorite apps or tools that you’ve found especially reliable for planning garden installations?
A solar pathfinder tool is excellent for pinpointing the best sun exposure, but if you prefer smartphone apps, Sun Seeker and Sun Surveyor are two reliable options for iOS and Android. They provide detailed sun path tracking, which helps plan where to place your fountain for maximum sunlight throughout the day.
You mention using a solar pathfinder tool or app to check sunlight—could you suggest a couple of specific apps that are user-friendly for someone who’s never done this before?
For beginners, I’d recommend checking out the ‘Solar Pathfinder Assistant’ app, which is designed to work with or without the Solar Pathfinder tool, and is quite user-friendly. Another good option is ‘PV Solar Planner’, which helps you assess sunlight availability using your phone’s camera and GPS. Both apps guide you through the process step by step, making it easy even if you have no prior experience.
When the article talks about making sure the panel’s mounting hardware matches your surface, are there specific types of mounts or materials you would recommend for uneven flagstone patios? I want to avoid accidental tripping or weather-related issues.
For uneven flagstone patios, adjustable mounting brackets or tiltable solar panel mounts are a good choice, as they allow you to compensate for irregular surfaces and secure the panel firmly. Stainless steel or powder-coated aluminum mounts are durable and weather-resistant. Using low-profile mounts can help reduce tripping hazards, and make sure to anchor the hardware tightly and seal any gaps to prevent water intrusion.
I noticed you mentioned using a solar pathfinder tool or smartphone app to assess sun exposure before installing the fountain. Do you have recommendations for specific apps that work well for this purpose, especially for beginners?
For beginners, two user-friendly smartphone apps to assess sun exposure are Sun Seeker and Sun Surveyor. Both allow you to visualize the sun’s path at different times of the year, making it easier to find the best spot for your solar-powered fountain. They work on both iOS and Android, and don’t require any technical expertise to get started.
If I follow all these safety steps, how long does it typically take for a DIYer to set up a small solar fountain from start to finish, including finding the right spot and doing the basic leveling you mention?
For most DIYers, setting up a small solar-powered water fountain—including picking the spot, basic leveling, and completing all safety steps—usually takes between 2 to 4 hours. The actual time depends on the complexity of your fountain and the ground conditions, but if you’re prepared and have your materials ready, you should be able to finish in a single afternoon.
Are there any major safety differences between installing a small birdbath-style fountain versus a large, freestanding centerpiece when it comes to solar setup and location?
Yes, there are some important safety differences. A small birdbath-style fountain is usually lighter and easier to secure, with lower risk if it tips over or leaks. Larger freestanding centerpieces are heavier, need a stable and level base, and may require extra anchoring to prevent accidents. For both, ensure solar panels are placed where they won’t be tripped over, but large fountains may need longer cables and more careful placement away from walkways or areas where children play.
You mention the risk of water pooling and slippery surfaces. Are there any particular materials or surface treatments you suggest for areas around the fountain to reduce slip hazards while still keeping the installation looking natural?
For areas around the fountain, textured natural stone like slate or flagstone works well because it provides grip and blends beautifully with the landscape. You can also consider stamped or broom-finished concrete for a natural look with added slip resistance. If you prefer wood, composite decking with anti-slip grooves is a good option. Applying a clear, non-slip sealant to stone or concrete surfaces can further help reduce slip hazards while maintaining a natural appearance.
Is there a big difference in safety steps between installing a small birdbath versus a larger solar-powered fountain? I’m not sure which size I want so just wondering if the precautions change a lot.
The basic safety precautions are mostly the same for both small birdbaths and larger solar-powered fountains, such as checking wiring, ensuring secure placement, and keeping water away from electrical connections. However, with larger fountains, you might need to pay extra attention to stability (prevent tipping), handling heavier components safely, and possibly more complex assembly. Overall, the main steps are similar, but larger setups may require a bit more care and effort.
How can I make sure that placing the fountain doesn’t create drainage problems or water damage, especially during heavy rainfall? Is there a specific way to test for potential runoff issues before installing the fountain?
To prevent drainage issues or water damage, pick a spot where water naturally drains away from your home and avoid low-lying areas. Before installing, simulate heavy rain by pouring water in the chosen area and observing if puddles form or water flows toward buildings. If you notice pooling, consider raising the fountain base or improving soil drainage with gravel or a French drain before final installation.
When you mention using a solar pathfinder tool or a smartphone app to check for sun exposure, do you have any recommendations for specific apps that work well for figuring out the best spot in a backyard with a lot of trees nearby?
For checking sun exposure in a backyard with many trees, apps like Sun Surveyor and Sun Seeker are quite effective. They use your phone’s camera and GPS to map sun paths and show how shadows from trees will fall throughout the day and year. This makes it much easier to find the sunniest spot for your solar-powered water fountain.
I want to build a simple solar birdbath but I’m on a tight budget. Are there any must-have safety features or steps that I shouldn’t skip even if I’m trying to keep costs low?
Even with a tight budget, make sure your solar birdbath uses a waterproof, outdoor-rated pump and that all wiring is protected from water contact. Always place the solar panel securely to prevent it from shifting or falling. Double-check there are no exposed wires, and keep electrical components out of reach of children and pets. These basic steps help you stay safe while keeping costs down.
Once the fountain is installed, what’s the recommended routine for checking on potential issues like electrical hazards or leaks in the first few months to make sure everything stays safe?
In the first few months after installation, inspect your solar panels and wiring every two weeks for any damage, loose connections, or exposed wires. Check the fountain area for puddles or dampness that could signal leaks. Make sure the pump housing stays dry and free from debris. Monthly, confirm the solar components are securely mounted and functioning properly. If you notice anything unusual, turn off the system and consult a professional.
If there’s a heavy rainstorm and water does start pooling around the fountain, what’s the safest way to fix drainage problems without having to redo the whole installation?
If water pools around your solar fountain after heavy rain, you can improve drainage without a full reinstall. Try adding gravel or small stones around the base to help water disperse. You could also create shallow channels or use a French drain to direct water away from the fountain. Just make sure the fountain remains level and stable after any adjustments.
You mention the risk of electrical hazards—does that mean I should have a licensed electrician check my planned fountain installation, even if everything is labeled as DIY-safe? I want to be sure I am compliant with local codes.
Even if your fountain kit is labeled DIY-safe, it’s a good idea to consult a licensed electrician, especially to ensure compliance with local electrical codes and safety standards. An electrician can review your installation plan, check grounding and weatherproofing, and address any specific local requirements. This helps reduce risk and ensures your setup is both safe and compliant.
When picking a location for a solar-powered fountain, how can I tell if my selected area will really get at least six hours of direct sunlight year-round, especially with seasonal changes? Is there a simple method if I don’t have a solar pathfinder tool?
One practical way is to observe your chosen spot at different times throughout a day, especially around midday, and note how long it remains in direct sunlight. Do this a few times during different seasons if possible. Alternatively, use a sun tracking app on your phone, which can help you estimate sun exposure across the year without needing special equipment.
You mention using a solar pathfinder tool to assess sun availability. Are there budget-friendly alternatives or apps you’d recommend for homeowners who don’t want to buy specialized equipment just for this purpose?
You don’t have to buy a solar pathfinder tool—there are some great free or low-cost alternatives. Many smartphone apps like Sun Surveyor or Solar Pathfinder Assistant use your phone’s camera and GPS to check sun exposure and shading. You can also do a simple DIY assessment by observing your chosen spot several times throughout the day to note how much direct sunlight it receives.
I’m concerned about potential water leaks damaging nearby plants or the foundation of my house. Are there specific drainage solutions or products you’d suggest to address this issue during installation?
To prevent water leaks from damaging your plants or foundation, consider installing a gravel-filled French drain around the fountain’s base to direct excess water away. You can also use a waterproof basin liner under the fountain to catch spills and guide water to a safe drainage area. Pre-formed drainage mats and sloped landscaping are additional options to help manage runoff effectively.
You mentioned making sure the panel mounting hardware matches the surface type. For someone with a concrete patio, are there specific mounts you’d recommend, or tips for securing the panel so it doesn’t get loose over time?
For a concrete patio, use solar panel mounts designed for masonry, such as heavy-duty L-brackets or Z-brackets with stainless steel concrete anchor bolts. Before drilling, check that the surface is level and clean. Use a hammer drill to create anchor holes, then secure the bolts tightly. Adding a weatherproof sealant around the anchors helps prevent loosening over time. Periodically check the mounts for tightness, especially after strong winds or storms.
You mentioned choosing a location that’s level to prevent water pooling. Do you have any tips for checking or correcting how level the ground is, especially if my lawn is slightly sloped?
To check if the ground is level, use a carpenter’s level on a flat board placed where the fountain will sit. If the bubble isn’t centered, you’ll need to adjust. For minor slopes, build up low spots with sand or gravel and tamp it down firmly. For more uneven areas, consider a paving stone or concrete base to create a stable, level platform for your fountain.
Could you elaborate on how to test for proper drainage before actually setting up the fountain? The excerpt talks about avoiding water pooling and slippery surfaces, so tips on simple ways to assess or improve drainage before installing would be helpful.
To test for proper drainage before installing your fountain, try pouring several buckets of water onto the spot where you plan to place it. Watch how quickly the water disappears—if it lingers or creates puddles, drainage is insufficient. To improve drainage, you can mix sand or gravel into the soil, or install a gravel bed beneath the fountain area to help water flow away more easily.
If the area around the fountain is sometimes prone to flooding during heavy rain, do you have any tips on extra drainage measures to protect both the fountain and the solar equipment?
For areas prone to flooding, consider installing a gravel or French drain around the fountain to help channel excess water away. Elevate the fountain base slightly with pavers or a concrete pad to keep it above minor flood levels. Make sure all solar equipment, especially connections and batteries, are mounted on raised platforms or waterproof enclosures. Regularly check that debris or silt isn’t blocking any drainage paths to keep everything working safely.
You mentioned risk of electrical hazards during installation. Are there any particular mistakes first-timers often make when wiring the solar panel to the pump, and what’s the simplest way to avoid them?
A common mistake is connecting wires without turning off all power sources, which can lead to shocks or short circuits. Another issue is mixing up positive and negative terminals, causing the pump to malfunction. To avoid these problems, always double-check the wiring diagram, use the provided connectors, and ensure everything is unplugged before handling wires. If you’re unsure, consider asking someone with electrical experience to help.
The checklist talks about picking a spot with good drainage to prevent slippery surfaces. How can I improve drainage if my preferred area tends to collect water after heavy rain? Is it enough to use gravel, or should I install something more elaborate?
If your chosen spot tends to stay wet after heavy rain, gravel can help, but you might need more. Consider digging a shallow drainage trench filled with gravel to direct water away from the area, or install a French drain for better runoff management. Slope the ground slightly so water flows away from the fountain. These steps will make the area safer and help prevent slippery surfaces.
When budgeting for a solar water fountain project, how much of the total cost should I expect to allocate specifically for safety features like proper mounting systems, waterproof electrical connections, and anti-slip surfaces?
When budgeting for a solar water fountain, you can usually expect safety features—such as sturdy mounting systems, waterproof electrical connections, and anti-slip surfaces—to make up about 15–25% of your total project cost. The exact percentage will vary based on the fountain size, materials chosen, and any extra safety measures needed for your specific location.
For someone on a tight budget, are there any compromises that can be safely made in the materials or safety steps during installation, or are all the precautions you list absolutely necessary for a reliable setup?
All the safety precautions listed are important for ensuring a reliable and risk-free solar fountain installation. While you might find more affordable materials, it’s crucial not to skip key steps like proper waterproofing, secure wiring, and using weather-resistant components. Cutting corners on these essentials can lead to safety hazards and costly repairs later. It’s possible to save money by shopping around for durable but budget-friendly materials, but always follow the core safety guidelines.
If my area is prone to heavy rain and runoff, what’s the best way to keep the fountain’s water supply from getting contaminated or overflowing? Any precautions for drainage or water recycling systems that could help prevent these problems?
To prevent contamination and overflow in areas with heavy rain and runoff, consider installing a covered reservoir or using a mesh screen to keep debris out. Make sure your fountain has an overflow outlet connected to a suitable drainage system so excess water is safely diverted away. For water recycling, regular cleaning and a filtration system will help maintain water quality, even during storms.
You mentioned using a solar pathfinder tool or smartphone app to assess sunlight—are there any specific apps you’d recommend that are easy for non-technical people to use?
Yes, a couple of user-friendly apps can help you assess sunlight for your fountain. ‘Sun Surveyor Lite’ and ‘Sun Seeker’ are both popular choices that let you visualize sun paths and locate the sun’s position throughout the day. They have intuitive interfaces, making them suitable for beginners without a technical background.
You mention using a solar pathfinder tool to assess sun availability—are there any specific apps or devices you’ve found to be reliable for this, particularly in areas with a lot of tree cover? I want to make sure my panel is truly getting enough sunlight year-round.
For checking sun availability in areas with significant tree cover, solar pathfinder devices like the Solar Pathfinder or Solmetric SunEye are reliable choices, as they provide detailed shade analysis. If you prefer using a smartphone, apps such as Sun Seeker or Solar Shading help visualize sun paths and potential obstructions. These tools let you check different times of year, ensuring your panel placement will get optimal sunlight all year round.
Could you clarify what you mean by using a solar pathfinder tool? Is that something I need to buy, or are there certain free smartphone apps you’d suggest for assessing sun exposure before installing the fountain?
A solar pathfinder tool is a device or app that helps you evaluate how much sunlight a specific spot receives throughout the day, which is useful for positioning your solar fountain. While professional installers might use dedicated (often costly) devices, you don’t have to buy one. Many free or inexpensive smartphone apps, like Sun Surveyor or Sun Seeker, can help you assess sun exposure by showing the sun’s path and estimating shaded times in your chosen location.
The article talks about avoiding locations prone to flooding or runoff. What are some early warning signs that a chosen site might have drainage problems, and what affordable solutions exist to address them before installation?
Early warning signs of drainage problems include standing water after rain, soggy soil that takes a long time to dry, and visible water channels or erosion marks. If you notice these issues, affordable solutions include grading the area to create a slight slope away from the fountain, adding gravel or sand to improve soil drainage, or installing a simple French drain using a perforated pipe and gravel to redirect excess water.
When you talk about keeping the solar panels out of areas where they could be stepped on or damaged by pets, do you have tips for protecting panels in small backyards with active dogs or kids around?
To protect solar panels in small backyards with active dogs or kids, consider mounting the panels on a fence, wall, or even on a sturdy pole above reach. You could also use protective cages or barriers around ground-level panels. Placing potted plants or decorative fencing can help discourage pets and children from getting too close without blocking sunlight.
If the fountain is in a place with intermittent shade during the day, like from nearby trees or buildings, are there specific solar panel setups or battery options you would suggest to keep the water flowing consistently?
For areas with intermittent shade, consider using a solar panel with a higher wattage than the fountain requires, as it can compensate for reduced sunlight. Pairing the fountain with a backup battery is also helpful—the battery stores energy when the sun is out and powers the fountain during cloudy or shaded periods. Look for solar kits labeled as ‘with battery backup’ for the most consistent operation.
I’m curious about the risks of water leaks and drainage that you noted. If the area around the fountain is prone to occasional flooding, are there preventive steps or products you’d recommend for added protection against equipment failure?
If your fountain area is prone to flooding, consider elevating the fountain base with a waterproof platform or pavers to keep the equipment above ground level. Installing a French drain or gravel trench nearby can help manage excess water. Also, use waterproof sealants around connections and choose a submersible pump rated for outdoor use and occasional water exposure. Regularly inspect for leaks to catch problems early.
You mentioned making sure the panel’s mounting hardware matches the surface where I’ll install it. If I’m working with a concrete patio, are there particular mounting kits or techniques I should look into for stability and safety?
For a concrete patio, it’s best to use solar panel mounting kits designed specifically for hard surfaces. Look for kits that include concrete anchors or expansion bolts, which securely fasten the mounting brackets into the concrete. Make sure to use a hammer drill to create precise holes, and double-check that the hardware is rated for outdoor use to ensure long-term safety and stability.
Regarding water drainage, do you have any tips for addressing potential water pooling issues in gardens with heavy clay soil? I’m concerned about creating slippery spots or damaging my lawn around the fountain.
Heavy clay soil can definitely lead to water pooling around your fountain. To help with drainage, consider installing a gravel-filled trench or a French drain near the fountain base to direct excess water away. You might also slightly raise the fountain area with sand or gravel before installation. Regularly check for blockages and avoid overfilling to keep your lawn healthy and reduce slippery spots.
Do you have any budgeting tips for someone trying to balance sustainability with cost while still following all the recommended safety steps in your checklist?
Balancing sustainability with cost is definitely possible. Start by prioritizing essential safety components, such as waterproof connectors and proper grounding—these are non-negotiable. Look for used or refurbished solar panels to save money. For other materials, compare prices across local stores and online. If you’re handy, consider DIY installation to cut labor costs, but don’t skip safety steps. Finally, focus on gradual upgrades: start with basic safety and functionality, then add high-efficiency or eco-friendly features as your budget allows.
I’m curious about the type of mounting hardware you recommend for securing solar panels on different surfaces like soil versus concrete. Are there particular brands or types that work best to ensure safety, especially in areas with pets or kids?
For soil, ground-mount kits with galvanized steel stakes or anchors work well, as they provide stability and resist corrosion. On concrete, use heavy-duty L-brackets with expansion bolts for secure anchoring. Look for hardware labeled specifically for outdoor solar installations—brands like Renogy and IronRidge are reputable. Whichever you choose, ensure all mounting hardware is tamper-resistant and edges are covered to minimize risks for pets and kids.
You mentioned using a solar pathfinder tool or smartphone app to check sun exposure for the panels. Could you suggest any specific apps that are user-friendly for someone new to solar installations?
For beginners, apps like Solar Pathways, Sun Surveyor, and PV Solar Calculator are user-friendly choices to evaluate sun exposure for your solar panels. These apps typically use your phone’s camera and GPS to help you find the best panel placement. Most provide visual guides and clear instructions, making them straightforward even if you’re new to solar installations.
I see you reference using a solar pathfinder or app to check sunlight exposure before installing the fountain. Are there any specific tools or apps you recommend for beginners, or are there common mistakes people make when placing the solar panel?
For beginners, apps like Sun Surveyor and Solar Pathfinder Assistant are user-friendly options to check sunlight exposure. Many people mistakenly place panels where trees, buildings, or fences cast shadows during the day, reducing performance. Be sure to observe the area throughout the day to spot any moving shade, and position the panel facing true south for best results.
How long should I expect the installation process to take for someone doing this for the first time? Is there a way to break it into manageable steps over a weekend, especially when considering all the safety checks you listed?
For a first-timer, installing a solar-powered water fountain usually takes about 4 to 6 hours, but spreading the work over a weekend is a smart idea. On day one, you can prep the site, check safety gear, and assemble the fountain. On day two, focus on wiring the solar panel, securing connections, testing the system, and doing final safety checks. This approach lets you work carefully without feeling rushed.
Do you have any recommendations for budget-friendly, weather-resistant solar-powered fountains that are still reliable? I want to avoid costly repairs from equipment failure, as you mentioned could be an issue.
Look for solar-powered fountains made from durable materials like resin, fiberglass, or stainless steel, which handle weather well and are usually affordable. Brands such as Smart Solar, SunJet, and Solatec offer reliable options under $100. Choose models with a good warranty and replaceable pumps, since these features help avoid expensive repairs down the line. Reading recent customer reviews can also help you spot any recurring issues before you buy.
For those of us with pets and small children, are there additional safety measures beyond panel placement and preventing slips that you’d suggest? I’m especially interested in keeping electrical components completely protected.
To keep electrical components safe around pets and small children, consider enclosing all exposed wiring and connectors in waterproof, tamper-resistant casings. Use conduit for cables and mount the control box out of reach or in a locked outdoor cabinet. Regularly check for wear or chew marks on wires. Also, ensure all electrical parts are rated for outdoor use and have proper weatherproof seals.
When it comes to positioning the solar panel to avoid damage from pets or garden equipment, what kind of mounting hardware or protective barriers would you recommend for installations in areas with high foot traffic?
For areas with high foot traffic or the presence of pets and garden equipment, mounting your solar panel on a sturdy pole or wall bracket can keep it safely elevated and out of the way. Consider using weatherproof enclosures or wire mesh guards around the panel base for extra protection. For ground installations, low-profile protective barriers like decorative fencing or rock borders can help deter accidental bumps or tampering.
If I already have an older electric-powered fountain and want to convert it to solar, are there any extra safety steps or compatibility checks I should consider before swapping in a solar pump kit?
Before converting your older electric-powered fountain, check that the solar pump kit matches your fountain’s size and water flow needs. Make sure to fully disconnect and safely cap any old electrical wiring to prevent hazards. Confirm that the solar kit’s wiring and connections are rated for outdoor and wet conditions. Test the solar panel’s positioning to ensure it gets enough sunlight for reliable operation.
You mentioned making sure the mounting hardware matches the surface type, like soil or stone. Could you explain how installation might differ between these surfaces, and if one is generally safer or easier for a DIY project?
Mounting on soil usually involves driving stakes or spikes into the ground, which is simple and forgiving for DIYers, but make sure the soil is firm enough to hold the fountain securely. For stone or concrete, you’ll need masonry anchors or screws, requiring a drill with a masonry bit. Stone installations are more time-consuming and may need extra tools but tend to be sturdier. Soil installations are generally easier for beginners, but always confirm stability before use.
You mention using a solar pathfinder tool or a smartphone app to assess sun exposure for the panels. Do you have any recommendations for specific apps, or tips on how accurate these need to be for a small backyard setup?
For a small backyard fountain, you don’t need ultra-precise readings—just make sure the location gets sun for most of the day. Apps like Sun Surveyor, Solar Pathfinder Assistant, or even Sun Seeker can help you check sun exposure. They’re usually accurate enough for home use. Walk around your yard during different times to confirm there are no big shadows over your chosen spot.
The checklist mentions using a solar pathfinder tool or smartphone app to assess year-round sun exposure. Are there specific apps or tools you would recommend for beginners who are trying this for the first time?
For beginners, smartphone apps like Sun Surveyor (available on both iOS and Android) or Sun Seeker are user-friendly options that help you visualize sun paths and check shading throughout the year. If you prefer a physical tool, the Solar Pathfinder is a well-known device for more detailed assessments, but most first-timers find a good app sufficient for planning a solar fountain installation.
If my yard is prone to a bit of flooding during heavy rain, how can I protect the fountain’s water supply from getting contaminated or the solar equipment from being damaged? Are there extra steps I should take during installation?
To protect your fountain and solar equipment in a flood-prone yard, install the fountain on an elevated platform or mound to prevent contaminated runoff from entering the water. For the solar equipment, use waterproof enclosures and mount panels above the highest flood level you expect. Consider adding gravel or a drainage system around the installation site to help divert excess water away.
If a solar fountain’s pump seems to stop working every cloudy day, is that likely a sign of a setup issue, or do most solar pumps just not work well in low light? Are there backup power options that you’ve found effective for keeping the fountain running during overcast weather?
Most basic solar fountain pumps need direct sunlight and will stop or slow down on cloudy days, so what you’re seeing is common. For more consistent operation, consider a solar pump with a built-in battery backup—these store excess energy during sunny periods to keep the fountain running when clouds roll in. Alternatively, some setups allow you to connect to a standard power supply as a backup.
You mention making sure the solar panel’s mounting hardware matches the surface, like soil or stone. Are there specific mounting types or brands you would recommend for uneven or rocky garden areas to keep everything stable and secure over time?
For uneven or rocky garden areas, look for adjustable mounting brackets or ground spike kits designed for flexibility. Universal solar panel mounts with pivoting or telescopic legs can adapt to bumpy terrain. Brands like ECO-WORTHY and Renogy offer sturdy ground mounts that let you anchor panels securely even in challenging spots. Always check that your chosen hardware is compatible with your specific panel size and weight.
I noticed you mentioned using a solar pathfinder tool or smartphone app to assess sun exposure. Can you recommend any particular apps, or is there a certain feature I should look for when picking one?
When choosing a sun exposure assessment app, look for features like real-time solar angle tracking, the ability to map shade patterns throughout the day, and compatibility with your location. Popular options include Sun Surveyor, Sun Seeker, and Solar Pathfinder Assistant. Make sure the app provides detailed solar data and has good user reviews to ensure accuracy for your fountain placement.
Could you explain more about assessing sun exposure with a solar pathfinder tool or smartphone app? Is there a particular type or brand that you recommend for beginners who have never used these before?
A solar pathfinder tool or a smartphone app helps you determine how much sunlight a specific spot receives throughout the day and year. For beginners, smartphone apps like Sun Surveyor or SolarPathfinder Assistant are user-friendly and can visually map sun patterns using your phone’s camera. If you prefer a physical tool, the Solar Pathfinder brand is well-known and offers clear instructions, making it a solid choice for first-timers.
You mentioned placing the fountain in a spot that avoids water pooling and slippery surfaces. Could you explain what kind of foundation or base material is best to use for leveling and drainage, especially if my yard has a lot of clay soil?
For clay-heavy yards, a gravel base works very well for both drainage and leveling. Start by digging a shallow area where your fountain will sit, then fill it with 3–4 inches of compacted crushed stone or gravel. This helps prevent water pooling and keeps the surface stable. Avoid using plain topsoil or sand, as these don’t drain as effectively in clay-rich areas.
You mention making sure the solar panel’s mounting hardware matches the surface it’s installed on. For someone on a budget, are there certain surfaces or mounting options that tend to be safer or more cost-effective?
Flat, sturdy surfaces like concrete patios or wood decks are often the safest and most budget-friendly mounting options for solar panels. These surfaces allow you to use simple brackets or directly screw the hardware in place. Avoid uneven ground or loose soil, as they can make mounting less stable and might require pricier specialty anchors. If roof mounting is necessary, consider using pre-made solar mounting kits designed for your roof type to save time and ensure safety.
For someone on a budget, are there cost-effective ways to test for optimal sun exposure and safe site conditions without investing in specialized equipment ahead of time?
Absolutely, you can check sun exposure by observing the chosen spot at different times throughout the day to see how many hours it receives direct sunlight. For safe site conditions, look for level ground, avoid areas prone to water pooling, and inspect for overhead obstacles like branches or power lines. These simple checks don’t require any special tools and work well for most home installations.
The article points out the need for mounting hardware that matches your surface type. Could you give some advice on the safest mounting option for solar panels on uneven ground or soil, where stability might be a concern?
For uneven ground or soil, the safest mounting option is usually a ground-mount system with sturdy, corrosion-resistant stakes or anchors. Choose mounting frames with adjustable legs so you can level the panel even if the ground isn’t flat. Secure the stakes deep enough to prevent shifting, and consider using concrete footings for added stability in loose or particularly soft soil.
If my yard is mostly shaded except during a few midday hours, will a solar-powered fountain still operate reliably or should I consider an alternative power source? How much sun exposure would be considered the absolute minimum for consistent performance?
For reliable operation, most solar-powered water fountains need at least 4 to 6 hours of direct sunlight per day. If your yard only gets a few hours of sun around midday, the fountain might work intermittently or with reduced flow. In this case, you may want to consider a solar fountain with a backup battery or even a traditional electric-powered model to ensure consistent performance.
After installing the fountain, what are the most common mistakes homeowners make that could lead to equipment failure or leaks, based on your experience?
Once the fountain is installed, common mistakes include neglecting regular cleaning, which can cause blockages and pump strain, and allowing water levels to drop too low, leading to pump burnout. Some homeowners also overlook checking pipe and seal connections, which may loosen over time and cause leaks. Consistent maintenance and monitoring help prevent most issues.
If my backyard only gets around four hours of direct sunlight due to nearby trees, would a solar-powered water fountain still work efficiently, or do you have any tips for placement to improve performance as suggested in your checklist?
With only four hours of direct sunlight, your solar-powered fountain may run less efficiently or for shorter periods. To improve performance, place the fountain in the sunniest spot available, ideally away from tree shadows. Consider trimming branches if possible. Alternatively, look for a solar fountain with a battery backup so it can store energy and operate even when sunlight is limited.
I see you suggest mounting hardware compatibility for different surfaces like soil and concrete. Could you elaborate on what kind of mounting options are safest if my garden soil is quite soft and sometimes gets muddy?
For gardens with soft or muddy soil, it’s best to use ground anchors or stakes that are long and rust-resistant, such as galvanized steel. These should be deeply driven into the ground to provide stability. Adding a concrete or gravel base beneath the mounting point can also help distribute weight and prevent the fountain from shifting or tipping if the soil becomes saturated.
If my backyard doesn’t have a spot with at least six hours of direct sunlight, do you have any suggestions for optimizing the panel placement, or will that make a solar-powered fountain unworkable?
If your backyard gets less than six hours of direct sun, a solar-powered fountain can still work with some adjustments. Try placing the solar panel in the sunniest available spot, even if it means using an extension cable to position it away from the fountain itself. If possible, trim back overhanging branches or relocate the fountain to a brighter area. For consistently low sunlight, consider a solar fountain with a battery backup so it can run during cloudy periods or in partial shade.
After placement, how often should I check both the panels and foundation for safety issues or maintenance needs? I want to stay ahead of equipment failure but avoid unnecessary work if possible.
It’s a good idea to inspect both the solar panels and the foundation of your fountain every three to six months. Look for signs of shifting, water leaks, dirt buildup, or any obstructions on the panels. After severe weather or noticeable changes in performance, check sooner. This schedule helps you catch issues early without creating unnecessary extra work.
When you talk about using a solar pathfinder tool or an app to assess sun exposure, do you have any specific recommendations or tips for beginners on which tools are easiest to use for this purpose?
For beginners, a physical Solar Pathfinder tool is very straightforward but can be a bit pricey. For easy smartphone options, apps like Sun Surveyor or Sun Seeker are user-friendly and show you where the sun moves throughout the day. These apps help you quickly check if your chosen spot for the fountain gets enough sunlight, making the whole process much simpler.
You advise using a solar pathfinder tool to check year-round sunlight, but is there an affordable or beginner-friendly app you recommend for this, especially for small business owners with limited tech experience?
For those new to solar pathfinding, apps like Sun Surveyor Lite or Sun Seeker are beginner-friendly and affordable. They use your smartphone’s camera and GPS to help you visualize sunlight patterns throughout the year. These apps make it easy to check potential shading without expensive equipment, which is great for small business owners with limited tech experience.
I’m curious about water drainage concerns. In areas prone to occasional flooding, are there effective solutions to keep the fountain base stable and prevent water contamination?
In flood-prone areas, it’s wise to install a raised or well-drained base for your fountain. Consider using gravel beds or concrete pads with good drainage channels to keep the base stable. To prevent contamination, ensure the water reservoir is covered or sealed when flooding is likely, and clean the water regularly. Installing a check valve can also help protect the system from backflow during heavy rains.
You mentioned using a solar pathfinder tool or a smartphone app to check sun availability. Are there specific apps or brands that are particularly reliable for home DIYers, or would a basic compass suffice?
For home DIYers, apps like Sun Surveyor and Solar Pathfinder Assistant are both reliable and user-friendly for checking sun availability. These apps help you visualize sun patterns and potential shading throughout the year, making them more precise than a simple compass. While a compass can give you general direction, using one of these apps will give you much more confidence in placing your solar-powered fountain for optimal performance.
I noticed you highlighted the importance of choosing a location that avoids runoff or flooding. If my yard is prone to occasional heavy rain, what additional drainage strategies would you suggest to keep both the foundation and electrical components safe?
In a yard prone to heavy rain, consider installing a gravel or French drain system around the fountain to channel excess water away. Elevate the fountain base with a concrete or paver pad to prevent pooling. Make sure all electrical connections are housed in waterproof junction boxes and use outdoor-rated extension cords. These steps will help safeguard both the foundation and electrical parts during downpours.
I’m on a tight budget and most of the solar pathfinder tools I found are a bit pricey. Are smartphone apps really accurate enough for DIYers to use, or are there any reliable free tools for checking sun exposure?
Smartphone apps can be surprisingly effective for basic sun exposure checks, especially for DIY home projects. While they may not be as precise as dedicated solar pathfinder tools, many free apps use your phone’s camera and GPS to estimate sunlight hours and shading. For most home fountain installations, these apps should give you reliable guidance on where your panels will get the best sun.
I’m interested in installing a small solar-powered birdbath, but I’m on a tight budget. Based on your checklist, which safety steps are absolutely essential and can’t be skipped, even if I’m trying to keep costs down?
Even on a tight budget, you should never skip basic electrical safety: always use waterproof connectors and check that the solar pump and wiring are rated for outdoor use. Place the fountain on a stable, level surface to prevent tipping, and keep cords tidy to avoid tripping hazards. These steps are crucial for preventing accidents and protecting both you and your equipment.
You mentioned mounting hardware for different surfaces like soil, stone, or concrete. If my garden area is a mix of these, do you have tips for making sure the solar panel stays secure and safe in changing weather conditions?
For a garden with mixed surfaces, it’s best to use mounting hardware designed for each specific surface—spikes or stakes for soil, masonry anchors for stone or concrete. If possible, choose a mounting location that offers the most stability, such as concrete. Make sure all fasteners are tight, and periodically check them, especially after storms. For extra security, you can use weather-resistant mounting brackets and consider adding a stabilizing frame or weight at the base of the solar panel.
You mention using appropriate mounting hardware depending on the surface. Are there cost-effective options for securely installing solar panels on uneven stone, or is hiring a professional usually necessary?
For uneven stone surfaces, there are cost-effective options like adjustable mounting brackets or specialized solar panel feet designed for irregular ground. These can sometimes be installed with masonry anchors or heavy-duty adhesive, depending on the weight and exposure. If you’re comfortable with basic tools and DIY projects, you may not need a professional. However, for large or very uneven surfaces, professional installation ensures long-term stability and safety.
From a budget standpoint, are there affordable tools you recommend for checking sun path and exposure, or is it worth investing in something more advanced like a solar pathfinder tool mentioned in the article?
If you’re working with a limited budget, you can use free or low-cost smartphone apps that track sun path and exposure. These apps are usually accurate enough for simple home projects like installing a solar-powered fountain. Investing in a more advanced tool like a solar pathfinder is helpful for complex or large-scale setups, but for most home users, it’s not necessary.
You mentioned using a solar pathfinder tool or smartphone app to assess sun exposure. Are there any specific apps or brands you would recommend for beginners, or are most of them about the same in terms of accuracy and ease of use?
For beginners, apps like Sun Surveyor and Solar Pathfinder Assistant are often recommended because they have user-friendly interfaces and clear visuals for assessing sun exposure. Most mainstream apps are fairly accurate for basic home use, but these two stand out for their ease of setup and helpful guidance, especially if you’re new to solar projects.
I noticed the article mentions using a solar pathfinder tool or smartphone app to check sun exposure. Are there any specific apps you recommend for beginners that are both affordable and easy to use for finding the best solar panel placement?
For beginners, there are a few easy-to-use and budget-friendly apps to help assess sunlight for solar panel placement. Sun Seeker and SolarPathfinder Assistant are both popular choices that provide visual guides using your phone’s camera. They help you map out the sun’s path and identify any shading issues, making it simpler to choose the most effective spot for your solar fountain.
If my fountain will be near a lot of trees, should I be worried about debris clogging the pump over time, and do you recommend any particular kind of cover or maintenance schedule for situations like this?
Yes, if your fountain is near many trees, leaves and debris can clog the pump over time. To help prevent this, consider installing a mesh or fine screen over the pump intake. Regular maintenance is important—check and clean the pump every one to two weeks, especially during seasons when leaves fall most. This will keep your fountain running smoothly and extend the pump’s life.
When you mention using a solar pathfinder tool or smartphone app to assess sun availability, could you recommend any specific apps that are reliable for homeowners, and are there any you would avoid based on accuracy or ease of use?
For homeowners, apps like Solar Pathfinder Assistant, Sun Surveyor, and PV Solar Calculator are reliable for assessing sun availability. Sun Surveyor is particularly user-friendly and accurate for most locations. It’s best to avoid overly basic apps that don’t use your camera or GPS, as they can give less precise results. Always check recent user reviews to ensure the app works well on your device.
After installation, are there routine maintenance steps or checks you recommend to make sure the fountain stays safe for kids and pets, especially regarding electrical components and water leaks?
Yes, regular maintenance is important for safety. Check the solar panel wires and connectors monthly to make sure they’re intact and properly covered to prevent electrical hazards. Inspect the pump and any electrical parts for signs of wear or moisture. Look around the fountain base for water leaks that could cause slippery surfaces or pooling. Clean the water regularly to avoid mold or algae, which can be harmful to pets. Keeping everything dry, shielded, and clean will help ensure ongoing safety for both kids and pets.
For someone trying to work within a tight budget, what are the essential safety features or equipment you would absolutely not skip when installing a solar-powered water fountain at home?
When working with a limited budget, make sure not to skip essential safety features like using waterproof connectors for all wiring, a ground-fault circuit interrupter (GFCI) outlet to prevent electrical shock, and stable mounting or placement for your solar panel and fountain. Always keep electrical components away from water and ensure everything is rated for outdoor use. These basics help prevent accidents without significantly raising your costs.
I’m wondering about the water pooling issue you talked about. What are some cost-effective ways to improve drainage around the fountain site, especially if my lawn tends to get soggy after it rains?
Improving drainage around your fountain can be simple and budget-friendly. Consider adding a layer of gravel or crushed stone beneath and around the fountain area to help water flow away. You might also dig shallow channels or install perforated drainage pipe (French drain) to redirect excess water. If the lawn is especially soggy, raising the fountain slightly on a mound of soil can also help prevent pooling.
The article mentions using a level area to prevent water pooling around the fountain. Could you elaborate on how to properly assess and improve drainage if my yard tends to get muddy or floods during heavy rains?
If your yard often gets muddy or floods, start by observing where water collects after rain. Choose a spot that stays driest or is on slightly higher ground. You can improve drainage by adding a gravel bed under and around the fountain, or by creating a shallow swale to redirect water away. Installing perforated drainage pipes beneath the area can also help prevent pooling.
For someone on a tight budget, are there any cost-effective tools or reliable DIY methods you recommend for checking year-round sun exposure before placing the solar panel?
You can use simple, low-cost methods to check sun exposure. One option is to observe and record sunlight patterns at your intended location throughout the day, noting any shade from trees or buildings. Alternatively, you can take time-lapse photos with your phone over several days. Some gardening apps also offer free sunlight tracking features. This way, you can confidently find the best spot for your solar panel without investing in specialized equipment.
If I follow all the safety guidelines but the fountain’s water still looks cloudy or gets algae quickly, what troubleshooting steps can help without using harsh chemicals, especially since birds and pets might drink from it?
If you’re noticing cloudy water or rapid algae growth, try cleaning the fountain and all its components regularly using a scrub brush and mild soap, then rinse thoroughly. Place the fountain in a partially shaded area to reduce direct sunlight, which can slow algae growth. Add fresh water often to avoid stagnation, and consider using a small fountain pump to keep water circulating. You might also float a few barley straw pieces in the water—it’s a natural option that’s safe for pets and birds.
I’m a bit unsure about determining if my garden area gets enough sunlight year-round for a solar fountain. Besides using a smartphone app like you mentioned, are there any simple ways I can double-check my chosen spot before I start digging or installing?
To double-check your garden spot, you can observe the area at different times of day and across seasons, noting how many hours of direct sunlight it receives. You could also place a flat object where you plan to install the fountain and check for shadows every hour. Aim for at least 4–6 hours of sunlight daily for most solar fountains. This hands-on approach can help you feel confident before installation.
For someone on a tight budget, are there any lower-cost alternatives or DIY tricks for assessing site drainage and sun availability before installing a solar-powered fountain? Or are the tools you mention pretty essential for getting it right the first time?
You don’t need expensive tools to assess site drainage or sun exposure. For drainage, try watering the spot and seeing how quickly it dries—puddles that linger mean poor drainage. For sun, observe the area throughout the day and note how many hours of direct sunlight it gets. A simple notebook and a bit of patience work well as low-cost alternatives.
If I plan to install a solar-powered fountain as a DIY project, what should I do if the panel’s mounting hardware isn’t a perfect match for my garden’s stone surface? Are there affordable adaptors or workarounds?
If your solar panel’s mounting hardware doesn’t fit your garden’s stone surface, you can use adjustable brackets or universal mounting kits, which are often affordable and designed to adapt to different surfaces. Alternatively, use weather-resistant mounting adhesives or create a simple base with outdoor-rated wood or metal to secure the panel in place. Just ensure any solution is stable and allows the panel to face direct sunlight.
If my fountain is going in a spot that only gets direct sun for about four hours a day, will that cause problems for the pump or water flow? Is there a workaround besides changing the location?
With only four hours of direct sunlight, your solar fountain pump may experience limited run time and reduced water flow, especially on cloudy days. To improve performance without moving the fountain, consider using a solar power system with a battery backup. This setup stores excess energy during sunny hours, allowing the pump to operate even when the sun isn’t shining directly on the panel.
After setting up the solar-powered water fountain according to these safety guidelines, how often should I inspect the installation to make sure it is still safe and functioning correctly, especially when it comes to potential electrical hazards and water leaks?
You should inspect your solar-powered water fountain at least once a month for electrical hazards and water leaks. However, after storms, heavy rainfall, or if you notice any unusual noises or performance issues, it’s wise to check sooner. Regular monthly checks help ensure all connections are secure and there are no signs of wear or leaks, keeping everything safe and running smoothly.
I’d like to know if there’s a cost difference between installing a solar panel on concrete versus soil or stone, especially when it comes to purchasing compatible mounting hardware. Is one option more budget-friendly or durable than the others?
Installing a solar panel on soil or stone often requires specialized mounting hardware like ground stakes or anchors, which can add to the cost. Mounting on concrete is typically more straightforward, using brackets or weighted mounts, and can be less expensive if you already have a solid surface. In terms of durability, concrete bases are usually more stable and long-lasting, making them both a budget-friendly and durable option compared to soil or stone installations.
I’m curious about the recommendation to avoid placing solar panels where pets or people might trip over them. Are there specific mounting solutions or protective covers that work best for gardens with kids and dogs running around?
For gardens with children and pets, elevated mounting solutions like pole mounts or wall brackets are great options to keep solar panels safely out of the way. Ground-level panels can be protected with sturdy, low-profile cages or covers, but these should not block sunlight. Always secure wiring along fences or underground to prevent tripping hazards and damage.
If I have pets that roam the garden, what are some additional precautions I should take to keep them safe around the wiring and water features of a solar-powered fountain?
To keep your pets safe, make sure all wiring is securely covered with protective conduit and kept out of reach or buried. Choose a fountain with a sturdy, stable base to prevent tipping, and use a mesh or grill cover over the water basin if your pet likes to drink from or play in the water. Also, opt for non-toxic materials and avoid chemical cleaners.
For a DIYer on a tight budget, are there any essential safety items in your checklist that are worth investing in versus others that can be improvised without compromising on safety?
For DIY solar fountain projects, it’s important not to compromise on essentials like weatherproof electrical connectors, proper outdoor extension cords, and a reliable ground fault circuit interrupter (GFCI) outlet. These directly protect against electrical hazards. While you can improvise items like gloves or use basic hand tools you already own, always invest in certified, safety-approved electrical components to ensure your project remains safe and functional.
Are there budget-friendly tools or apps you’d recommend for accurately assessing sun exposure in my backyard before I commit to installing a solar-powered fountain?
You can definitely assess sun exposure without expensive equipment. Free or low-cost smartphone apps like Sun Surveyor Lite or Sun Seeker let you track sunlight patterns and duration in your yard, helping you find the best spot for your solar fountain. Even using your phone’s compass and timer over a couple of sunny days can give you a good idea of sun exposure.
When figuring out the best spot for the solar panel, do I need special tools to check sunlight, or will a phone app be accurate enough? I’m not sure how to judge sun exposure year-round, especially since some trees nearby lose leaves in winter.
A phone app that measures sunlight can be quite helpful for finding a good spot for your solar panel, especially if it shows sun patterns throughout the year. You don’t need any special tools beyond that. Make sure to check the area at different times of day and consider how tree shadows change in each season, since bare branches in winter will let in more light.
You mention using a solar pathfinder tool or smartphone app to assess sun availability before installing the panel. Do you have any recommendations for specific apps or tools that are both accurate and easy for a beginner to use?
For beginners, smartphone apps like Sun Surveyor and Solar Pathfinder Assistant are user-friendly and reliable for checking sun exposure. These apps let you visualize the sun’s path at your location and identify any potential shading issues throughout the day. If you prefer a physical tool, the Solar Pathfinder device is a classic choice, but starting with one of these apps should be sufficient for most home fountain projects.
You mentioned using a solar pathfinder tool or a smartphone app to assess sunlight. Can you recommend specific apps or features to look for when trying to get an accurate reading for panel placement?
For assessing sunlight, look for apps with a ‘sun path’ or ‘solar exposure’ feature. Popular options include Sun Seeker and Solar Pathfinder Assistant, both of which help visualize sunlight hours throughout the day and year. Key features to look for are the ability to use your phone’s camera for real-time path overlays, GPS-based site analysis, and the option to simulate shading from trees or buildings. This will help you find the optimal spot for your solar panel installation.
For someone on a strict budget, are there certain safety features or steps from your checklist that are absolutely essential, versus items that could be considered upgrades or nice-to-haves?
If you’re on a strict budget, focus first on essentials like proper waterproofing of electrical connections, using outdoor-rated extension cords, and ensuring secure fountain placement to prevent tipping. Ground-fault circuit interrupters (GFCI) are also a must for safety. Optional upgrades include decorative covers for wiring, advanced surge protectors, and automatic shut-off systems, which add convenience but are not strictly necessary for basic safe operation.
You mention making sure the solar panel’s mounting hardware matches the surface, like soil or concrete. Do you have any recommendations for securing panels in an area with heavy winds or active pets that might knock things over?
For areas with strong winds or active pets, it’s best to use sturdy mounting brackets that can be anchored directly into concrete or deeply set into the ground. Consider weighted bases or ground screws for soil, and expansion bolts for concrete surfaces. Adding protective barriers or low fencing around the panel can also help keep pets from getting too close and knocking things over.
When you talk about water pooling and drainage, do you have any tips for testing if the ground is truly level before I start the installation? I want to avoid future leaks or instability but I’m not sure how best to check this.
To check if your ground is level before installing the fountain, use a carpenter’s level placed on a flat board that is longer than your fountain’s base. Move the board to different spots to ensure the entire area is even. If you don’t have a level, fill a clear hose with water, cap both ends, and compare the water level at various points—any difference shows uneven ground.
How much should I expect to spend on mounting hardware that’s compatible with different surfaces like stone or concrete? Are there affordable options that still meet safety standards?
Mounting hardware for solar-powered water fountains can range from $20 to $60, depending on the materials and surface compatibility. For stone or concrete, look for corrosion-resistant anchors and brackets, which are widely available at home improvement stores. There are budget-friendly options that still meet safety standards—just be sure they have load ratings and certifications (like UL or CE) to ensure secure installation.
How much time should I budget for the full installation process if I’m following all the safety steps in your checklist? I’m trying to decide if this is a manageable weekend DIY project or if I should spread it out over several days.
If you’re following every step in the safety checklist, installation will likely take about 6 to 8 hours for most average-sized solar-powered water fountains. This covers site preparation, assembling the fountain, installing the solar components, and thorough checks. If you’re comfortable with tools and basic electrical work, you could finish in one day, but spreading it over a weekend allows for careful work and breaks if you encounter any issues.
You mentioned making sure the area is level and free from pooling water—do you have any tips for dealing with slightly sloped gardens? I want to avoid water runoff problems but my yard isn’t perfectly flat.
For a slightly sloped garden, consider creating a level base using a layer of compacted sand or gravel where you plan to place the fountain. You can also build a small retaining border with bricks or stones to keep water contained and prevent runoff. Position the fountain slightly uphill if possible so water doesn’t pool around it, and make sure any overflow drains away from your home and plants.
The article mentions ensuring the solar panel is placed where sunlight isn’t blocked, but what happens if I realize later in the year that shade increases due to tree growth? Is it difficult to move the panel after installation, or should I plan for changes now?
It’s smart to plan ahead for changing shade patterns. Most solar panels for water fountains are designed to be movable, so relocating them if more shade appears is usually straightforward. However, consider using a mounting system that makes adjustments easy. Periodically check the sun exposure, especially as seasons change or trees grow, and don’t hesitate to reposition the panel if needed.
You mention using a solar pathfinder tool or an app to assess sun availability. Do you have a specific app you recommend for beginners, and how accurate are these tools when trees change leaf coverage throughout the seasons?
For beginners, apps like Solar Surveyor or Sun Seeker are user-friendly and give a good idea of sun patterns in your yard. However, their predictions are most accurate for open areas. Since trees can drastically change sun exposure between seasons, it’s helpful to check your site during both leafy and bare times, if possible, to get a more reliable year-round assessment.