
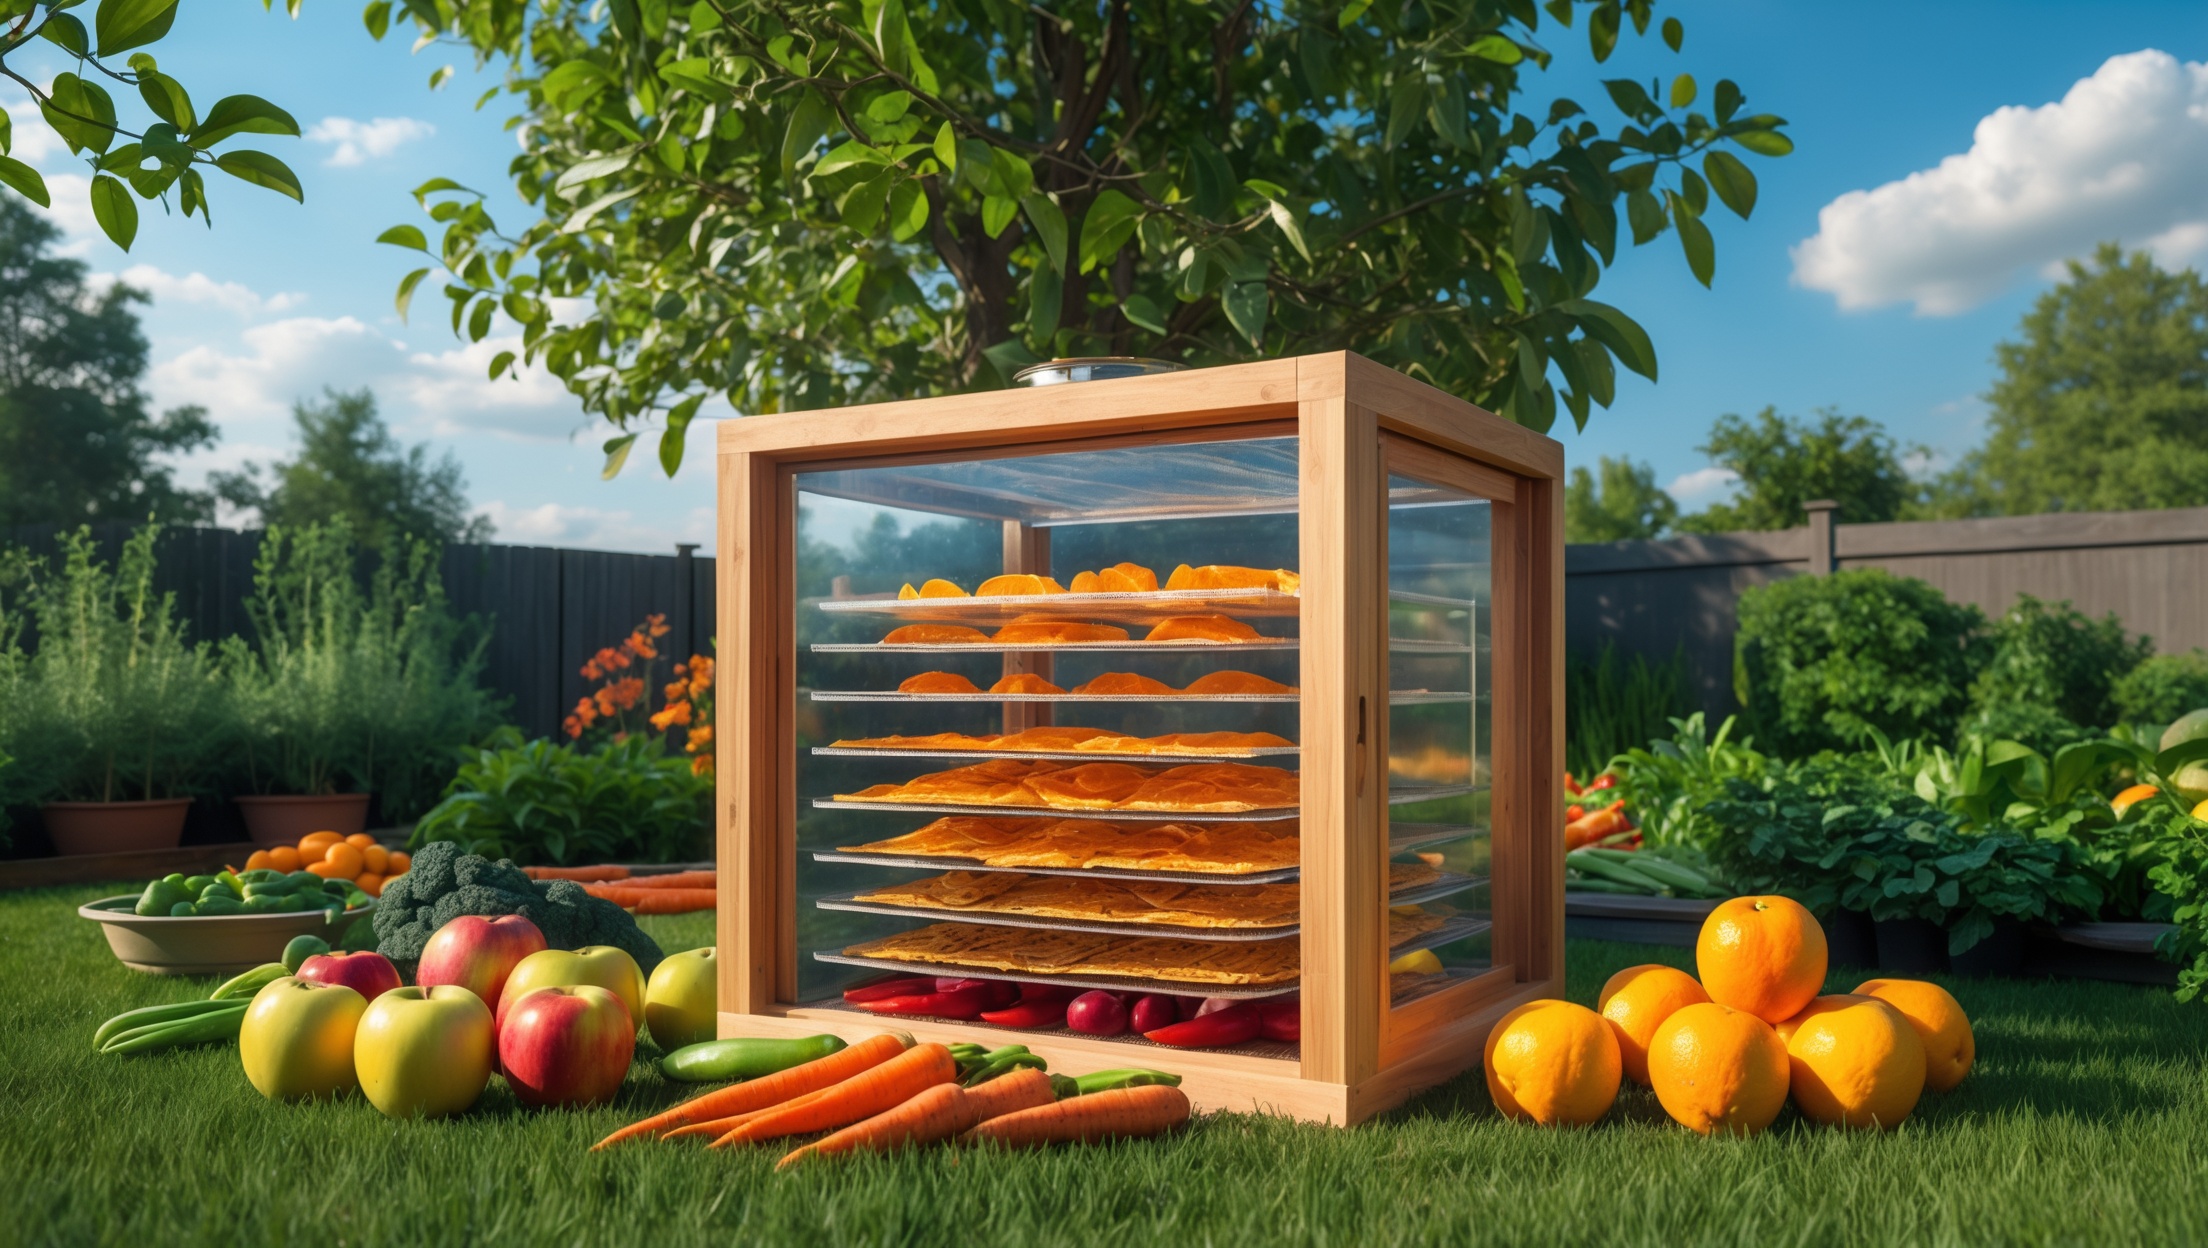
Introduction: Harnessing the Sun for Sustainable Food Preservation
Food preservation is an age-old practice, but modern challenges—rising energy costs, food waste, and sustainability concerns—are making traditional, energy-intensive methods less appealing. Enter the solar dehydrator: a simple, eco-friendly solution that leverages the power of the sun to dry fruits, vegetables, herbs, and even meats for long-term storage. Building your own solar dehydrator not only reduces your household’s carbon footprint, but also empowers you to preserve harvests without relying on electricity or fossil fuels. Whether you’re a backyard gardener, an urban homesteader, or simply someone passionate about sustainable living, constructing a solar dehydrator is a practical project with immediate rewards.
This in-depth guide delivers everything you need to know about the tools, equipment, and step-by-step process of building a DIY solar dehydrator at home. We’ll cover material selection, construction techniques, tips for optimal performance, and maintenance recommendations to ensure your dehydrator delivers consistent results for years to come. Take a deep dive into a hands-on, sustainable technology that helps you save money, reduce waste, and enjoy healthy snacks all year round.
How Solar Dehydrators Work: The Science Behind the Design
Solar dehydrators harness sunlight to heat air, which is then circulated over and around food to evaporate moisture efficiently. Compared to oven or electric dehydrators, solar versions use passive energy, making them both cost-effective and environmentally friendly. The key components of a typical solar dehydrator include:
- Solar Collector: Captures sunlight and converts it into heat. Usually built from dark-colored metal or painted wood with a transparent cover (glass or polycarbonate) to maximize thermal gain.
- Drying Chamber: Where food is placed on racks, allowing warm air to flow evenly and remove moisture.
- Vents/Airflow System: Ensures continuous movement of heated air, preventing spoilage and promoting quick, uniform drying.
Understanding these elements helps you select the right materials and tools for a high-performing, durable dehydrator.
Essential Tools & Equipment: What You Need to Build Your Solar Dehydrator
Hand and Power Tools
- Circular Saw or Handsaw: For cutting plywood, lumber, and framing materials to size.
- Drill/Driver with Bits: For assembling the frame and attaching hardware (screws, hinges, handles).
- Measuring Tape & Carpenter’s Square: Ensures precise cuts and accurate assembly.
- Screwdrivers (Phillips & Flathead): For manual tightening or adjustments.
- Clamps: Hold panels and frames securely during assembly.
- Staple Gun: For attaching mesh or screening material to racks or vents.
- Paintbrush/Roller: To apply non-toxic, food-safe paint or sealant on wood surfaces.
- Sandpaper or Power Sander: Smooths rough edges, ensuring safety and better fit.
Materials & Components
- Plywood or Exterior-Grade Lumber: For the main frame, collector box, and chamber walls. Choose untreated, rot-resistant wood like cedar or redwood for longevity.
- Transparent Glazing Material: Tempered glass, polycarbonate, or acrylic sheets for the collector cover. Glass is more durable and scratch-resistant, while polycarbonate is lighter and shatterproof.
- Black Metal Sheeting or Dark Non-Toxic Paint: To line the collector’s base and maximize heat absorption. Food-safe paint is critical for surfaces exposed to airflow.
- Food-Grade Mesh or Stainless Steel Racks: For placing food items—avoid galvanized or plastic-coated materials that may leach chemicals.
- Hinges, Handles, and Latches: For doors and access points.
- Weatherstripping: To seal doors and prevent insect entry.
- Thermometer and Hygrometer: Optional but valuable for monitoring drying conditions and ensuring food safety.
- Vents and Screen Mesh: For airflow, protected from pests.
Step-by-Step Construction: Building Your Solar Dehydrator
1. Design Selection and Sizing
Begin by determining your dehydrator’s capacity based on available space and intended use. For most households, a unit with 4–6 drying trays, each around 16″ x 16″, is sufficient for seasonal harvests. Sketch your design, ensuring the collector area equals or slightly exceeds the drying chamber’s footprint for optimal airflow.
2. Building the Solar Collector
- Cut plywood or lumber to form a shallow box (typically 3–4 inches deep) sized to your design.
- Line the bottom with black-painted metal sheeting or apply several coats of food-safe black paint for maximum heat absorption.
- Install sidewalls and angle the collector (ideally 30–45° to the ground) for best sun exposure.
- Attach the transparent glazing over the top, sealing edges to prevent heat loss and moisture ingress.
- Add a vent at the lower end to allow fresh air intake. Cover with mesh to prevent insects from entering.
3. Constructing the Drying Chamber
- Assemble a box matching your planned tray dimensions, using exterior-grade lumber or plywood.
- Install support rails for trays, spacing them at least 2–3 inches apart to ensure airflow between levels.
- Build or install food-grade mesh racks that slide in and out for easy loading and cleaning.
- Drill or cut vent holes at the top of the chamber; cover with mesh for pest control.
- Mount a hinged door with weatherstripping for a tight seal and add a handle for convenience.
4. Connecting Collector and Chamber
- Securely join the solar collector to the lower part of the drying chamber, ensuring a tight, insulated connection to direct all heated air into the chamber.
- Double-check for gaps or leaks, which can reduce efficiency and allow pests to enter.
5. Finishing Touches
- Install a thermometer and hygrometer inside the chamber for monitoring conditions.
- Apply food-safe sealant to exposed wood surfaces to protect against moisture and prolong lifespan.
- Test the door and tray fit, making adjustments as needed for smooth operation.
Optimizing Performance: Tips for Efficient Drying
Site Selection & Orientation
Place your dehydrator in a location with maximum sun exposure, ideally facing true south in the Northern Hemisphere (north in the Southern Hemisphere). Avoid shaded areas—trees, fences, and buildings can drastically reduce efficiency.
Airflow Management
Consistent airflow is crucial for preventing mold and achieving even drying. If your design allows, add adjustable vents or a small, solar-powered fan to boost circulation on humid or overcast days.
Temperature & Humidity Control
- Optimal drying temperatures are 120–140°F (49–60°C) for most fruits and vegetables. Monitor regularly, especially in hot climates, to avoid overheating and nutrient loss.
- High humidity can slow drying or cause spoilage. On humid days, increase airflow or plan drying sessions for periods of lower ambient humidity.
Loading & Rotating Trays
Spread food in a single layer, leaving space between pieces for air circulation. Rotate trays periodically during drying to ensure uniform results—trays closest to the collector may dry faster than those farther away.
Cleaning & Food Safety
- Wash all produce thoroughly before drying.
- Sanitize racks and surfaces after each use to prevent contamination.
- Store dried foods in airtight containers in a cool, dry place for maximum shelf life.
Maintenance Best Practices: Keeping Your Dehydrator in Top Shape
Seasonal Inspection Checklist
- Check for Damage: Inspect for cracks in glazing, damaged wood, or warping after extreme weather.
- Clean and Sanitize: Remove trays and wash with hot, soapy water. Wipe down interior surfaces with a food-safe disinfectant.
- Sealant Touch-Ups: Reapply protective coatings as needed, especially on weather-exposed areas.
- Vent and Mesh Maintenance: Ensure screens are intact and free of debris to maintain airflow and prevent pest entry.
- Hardware Check: Tighten loose screws, hinges, and latches for safe, reliable operation.
Winterizing Your Dehydrator
If you live in a cold or wet climate, consider moving the dehydrator under cover or storing it indoors during winter. Remove trays and keep doors ajar to prevent moisture buildup and mold growth during storage.
Cost Breakdown and Budgeting Tips
Building a solar dehydrator is an affordable project, especially when compared to the recurring energy costs of electric dehydrators. Here’s a sample cost breakdown (actual prices will vary by region and material choice):
- Lumber and Plywood: $40–$80
- Glass or Polycarbonate Sheet: $25–$60
- Black Metal or Paint: $10–$20
- Mesh or Racks: $20–$40
- Hardware (hinges, handles, screws): $10–$15
- Thermometer/Hygrometer (optional): $10–$20
- Total Estimated Cost: $115–$235
Save by repurposing materials—old window panes for glazing, scrap lumber for framing, or upcycling oven racks. Prioritize food-safe and weather-resistant components for safety and durability.
Common Mistakes to Avoid
- Using Treated Wood: Pressure-treated or chemically treated lumber can release toxins when heated. Always use untreated, food-safe wood.
- Insufficient Airflow: Neglecting proper vent sizing or mesh installation can lead to uneven drying and spoilage.
- Poor Sealing: Gaps between collector and chamber waste heat and invite pests. Take time to caulk and weatherstrip thoroughly.
- Overloading Trays: Stacking food too thickly slows drying and encourages mold. Stick to single layers.
- Not Monitoring Temperature: Excessive heat can degrade food quality. Use a thermometer for best results.
Conclusion: Empowering Your Sustainable Kitchen
Building a DIY solar dehydrator is more than a weekend project—it’s a long-term investment in sustainability, resilience, and food security. With the right tools and materials, you can create a reliable, low-cost system for preserving excess produce, reducing reliance on energy-hungry appliances, and minimizing food waste throughout the year. The process also provides hands-on experience with passive solar technology, deepening your understanding of green engineering and self-sufficiency.
Once operational, your solar dehydrator will enable you to enjoy the flavor and nutrition of homegrown fruits, vegetables, and herbs all year, free from preservatives or added sugars. It’s a step toward a more sustainable, resilient kitchen—and a satisfying way to close the loop on your garden’s bounty. With careful construction, routine maintenance, and mindful use, your dehydrator can serve your household for years to come, all while harnessing the clean, abundant energy of the sun.
Ready to transform your food preservation routine? Gather your tools, plan your design, and start building. Every tray of sun-dried produce is a testament to practical sustainability and the power of DIY green technology.
I’m curious about the solar collector materials mentioned. If dark-colored metal isn’t easily available, would painting plywood or another wood panel black be nearly as effective for heat absorption, or does metal have a big performance advantage in practice?
Using black-painted plywood or another wood panel can work as a solar collector in a DIY dehydrator, but metal generally absorbs and transfers heat more efficiently. Metal heats up and radiates warmth faster than wood. If you use wood, expect slightly slower drying times. Make sure any paint you use is heat-resistant and non-toxic. Metal is preferable, but painted wood is a reasonable backup if metal isn’t available.
Could you provide more details on the types of transparent covers recommended for the solar collector, like the pros and cons of using glass versus polycarbonate? I’m curious how each material affects heat retention and durability in different climates.
Glass is excellent for heat retention because it transmits sunlight efficiently and helps trap heat inside the collector. It is also scratch-resistant and won’t yellow over time, but it can be heavy and breakable, which may be a concern during storms or in areas with hail. Polycarbonate is lighter, more impact-resistant, and virtually unbreakable, making it ideal for harsher climates. However, polycarbonate can yellow after prolonged sun exposure and may not insulate as well as glass. So, if durability is your priority, especially in rough weather, polycarbonate is a strong choice. For maximum heat retention in mild climates, glass is often preferred.