Introduction: Why Safety Matters in DIY Solar Off-Grid Water Pump Projects
The shift toward sustainable living has inspired many homeowners, farmers, and eco-enthusiasts to embrace green technologies like solar-powered off-grid water pumps. These innovative systems harness the sun’s energy to deliver water for irrigation, livestock, gardens, and homesteads, reducing reliance on fossil fuels and grid electricity. However, despite the clear environmental benefits, installing a DIY solar-powered water pump is not without safety risks. Electrical hazards, water exposure, equipment misconfiguration, and environmental factors all require careful consideration. Ignoring safety protocols can result in injuries, equipment damage, or even legal repercussions.
Whether you’re planning to install a new system or upgrade an existing setup, this comprehensive safety checklist will guide you through every stage of your project—from initial planning and site assessment to installation, testing, and ongoing operation. Our expert advice is tailored for real-world DIYers, focusing on practical steps and actionable tips. By following these guidelines, you’ll protect yourself, your investment, and the environment—while ensuring your solar-powered off-grid water pump operates reliably for years to come.
1. Pre-Installation Safety Preparations
1.1. Assessing Your Site
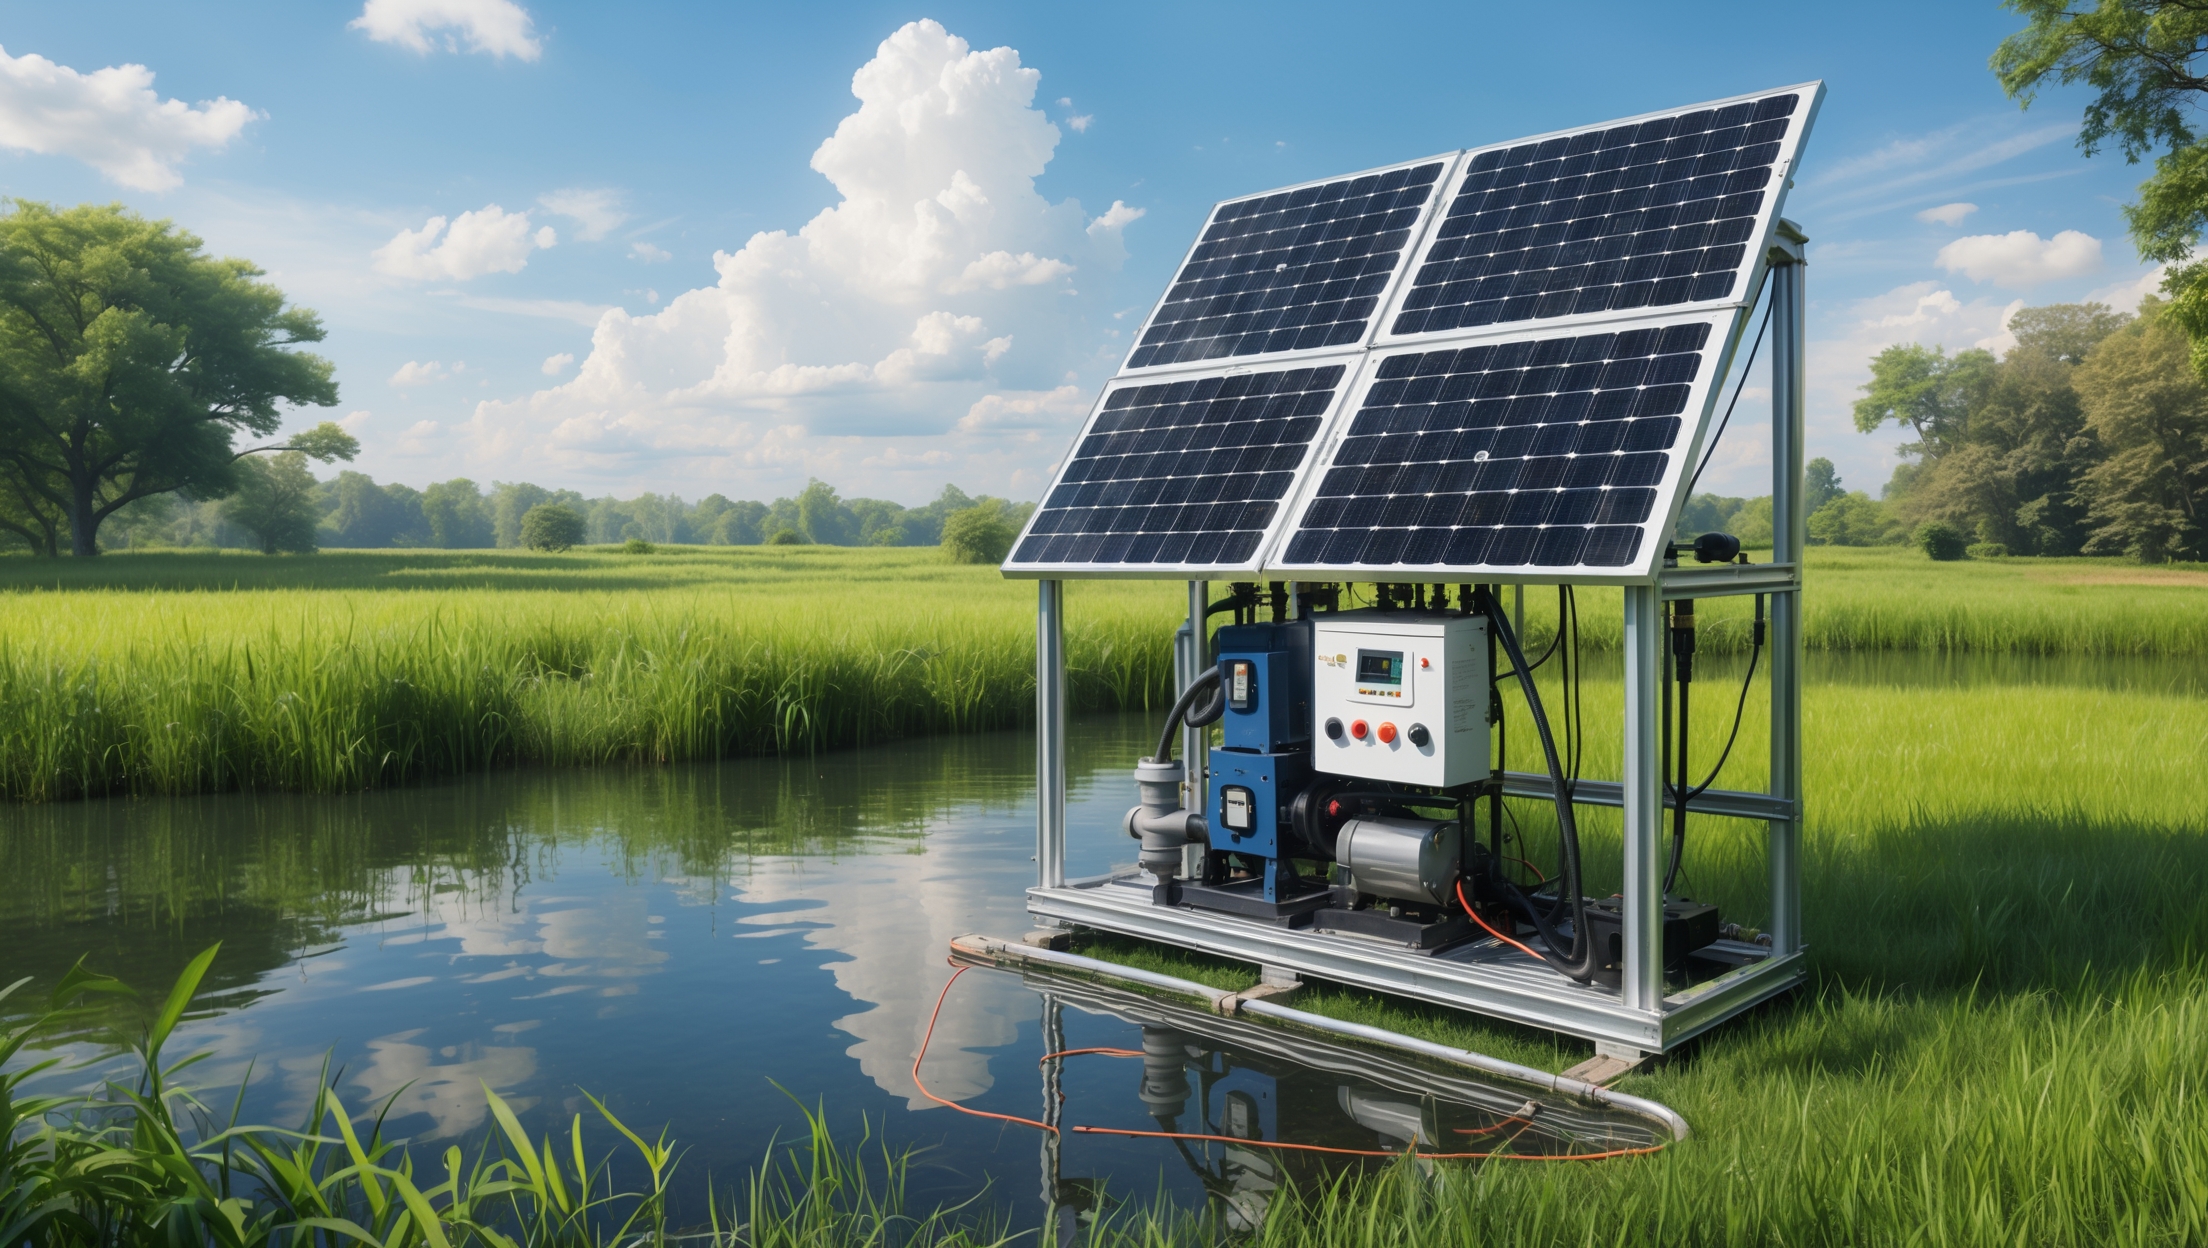
- Terrain Stability: Ensure the ground where solar panels, pump, and wiring will be installed is stable, free of sinkholes, and not prone to flooding.
- Water Source Safety: Confirm that ponds, wells, or streams are accessible without dangerous slopes, unstable banks, or risk of falling.
- Sunlight Exposure: Evaluate shade patterns throughout the day to avoid placing panels where trees or structures block sunlight, which could prompt risky panel relocation later.
1.2. Checking Local Codes and Utility Lines
- Digging Safety: Before breaking ground, call your local utility locator service to mark underground lines and avoid electrocution or water main breaks.
- Compliance: Verify if permits or inspections are required for your off-grid system, even if you aren’t connecting to the grid.
1.3. Personal Protective Equipment (PPE)
- Wear insulated gloves and safety glasses when handling electrical components.
- Use non-slip, waterproof boots—especially if working near water sources or on damp ground.
- Have a first aid kit and emergency contacts readily available on-site.
2. Electrical Safety Protocols
2.1. Handling Solar Panels and Wiring
- Panel Orientation: Position panels so they’re not at risk of being struck by falling branches or debris, which could cause electrical shorts.
- Voltage Awareness: Remember that even disconnected panels can produce electricity when exposed to sunlight. Cover panels with opaque material while wiring.
- Wire Gauge: Use wiring rated for outdoor, direct current (DC) applications, and sized correctly for the system’s voltage and distance to minimize resistance and heat.
- Conduit Protection: Route all cables through UV-resistant, waterproof conduit to prevent accidental cuts, animal damage, and moisture ingress.
2.2. Safe Battery Handling (If Applicable)
- Always use deep-cycle batteries designed for solar use.
- Install batteries in ventilated, weatherproof enclosures away from direct sunlight and open flames.
- Never mix battery types or brands in the same bank.
- Handle batteries with insulated tools and avoid wearing metal jewelry to prevent accidental shorts.
- Neutralize battery acid spills promptly with baking soda and water.
2.3. Grounding and Surge Protection
- System Grounding: Properly ground the solar array, pump, and controller to prevent electric shock and improve lightning resistance.
- Fusing: Install appropriately sized fuses or DC-rated circuit breakers on all positive wires close to the power source.
- Lightning Arrestors: In lightning-prone areas, consider surge protectors or lightning arrestors on both the panel and pump circuits.
3. Water Safety and Pump Installation
3.1. Working Near Water Sources
- Never install or service electrical components while standing in water or during rain.
- Use grounded GFCI outlets for temporary power tools used near water.
- Install pump intakes below the frost line (where applicable) and secure all hoses to prevent accidental tripping or entanglement.
- Mark the water source boundary with visible tape or stakes to alert others to potential slip hazards.
3.2. Pump Placement and Anchoring
- Mount submersible pumps securely to prevent movement or tipping.
- Ensure surface pumps are fixed on stable platforms, away from potential runoff or flooding zones.
- Use non-corrosive, UV-resistant materials for mounting brackets and fasteners.
3.3. Leak Prevention and Pressure Safety
- Use only pressure-rated hoses and fittings compatible with your pump’s output.
- Test all connections for leaks with system pressure before regular use.
- Install pressure relief valves to prevent over-pressurization.
4. Fire Safety Considerations
4.1. Fire Hazards from Electrical Components
- Clear flammable vegetation at least three feet around solar panels, battery banks, and electrical boxes.
- Use flame-retardant enclosures for all junctions and battery terminals.
- Do not overload circuits; stay within rated amperages for all components.
4.2. Emergency Response Preparedness
- Keep a Class C (electrical) fire extinguisher accessible near the system’s main control area.
- Post clear instructions for system shutdown in case of fire or electrical fault.
- Train all household members or site users on emergency procedures.
5. Weatherproofing and Environmental Protection
5.1. Weatherproofing All Equipment
- Use NEMA-rated (weatherproof) boxes for all electrical junctions and controllers.
- Seal all cable entry points with silicone caulk or weatherproof grommets.
- Elevate all electrical equipment above known flood levels or snowpack height.
5.2. Protecting Natural Habitats
- Minimize soil disturbance and avoid trenching through sensitive ecosystems.
- Use eco-friendly lubricants and avoid pesticide runoff near intake points.
- Install wildlife guards on open water intakes to prevent harm to fish and amphibians.
6. Testing, Commissioning, and Ongoing Safety
6.1. Initial System Testing
- Double-check all connections before powering on. Use a multimeter to confirm correct voltages and polarities.
- Test the system in clear daylight, monitoring for abnormal noises, vibration, or heat buildup.
- Check for any water leaks, electrical arcing, or warning indicator lights on controllers or inverters.
6.2. Routine Safety Inspections
- Establish a monthly checklist to inspect wiring, mounting hardware, and the physical integrity of panels and pump.
- Clear debris, rodent nests, or insect hives from around electrical components.
- Test GFCIs and circuit breakers quarterly to ensure fast response.
- Replace worn hoses, cracked fittings, and corroded connectors promptly.
6.3. Documentation and Emergency Planning
- Keep a detailed logbook of installation dates, component models, and wiring diagrams for troubleshooting and future upgrades.
- Post emergency contact numbers, system shutdown instructions, and first aid steps near the system’s main access point.
- Review emergency plans annually and update as needed.
7. Special Considerations for Remote and Off-Grid Locations
7.1. Communications and Accessibility
- Equip your off-grid site with reliable two-way communication (mobile, satellite, or radio) in case of accidents.
- Ensure all paths to and from the system are kept clear year-round for emergency responders.
7.2. Wildlife and Livestock Protection
- Fence off solar arrays and pump systems from livestock and wildlife to prevent trampling and electrical hazards.
- Install tamper-proof enclosures to protect wiring from rodents and curious animals.
Conclusion: Make Safety Your Top Priority for Solar Off-Grid Water Pumping
Embracing solar-powered off-grid water pumps is a powerful step toward sustainable living, but it is not a project to approach lightly. Safety must be baked into every phase—from site selection and equipment handling, through installation, to ongoing operation. Mistakes around electricity and water can be severe and costly. By following this comprehensive safety checklist, you’ll avoid common DIY pitfalls, safeguard yourself and your loved ones, and protect your investment for the long haul. A well-installed, safely operated system rewards you with reliable, green water pumping for years to come—and peace of mind that you’re doing right by both people and planet.
Remember, when in doubt, consult a qualified electrician or solar installation expert—especially for complex electrical work or code compliance. Safety is an investment that pays for itself many times over. Here’s to a future where clean water and clean energy go hand in hand, and where your off-grid solar-powered pump delivers not just water, but true peace of mind.


For folks who are installing solar water pumps near streams or ponds, how do you recommend securing the pump and wiring against flooding or shifting ground over time? I live in an area with occasional flash floods, so wondering about long-term solutions.
To protect pumps and wiring in flood-prone or shifting ground areas, it’s best to mount the pump on a sturdy, elevated platform above historic high water marks. Use weatherproof conduits to run wiring and firmly anchor cables to posts or rocks to prevent movement. Where possible, choose UV- and water-resistant materials. Regularly inspect and adjust the installation after storms to catch any early signs of erosion or shifting.
The checklist mentions calling the local utility locator service before digging. Are there specific types of underground lines or utilities that are most commonly overlooked in rural or suburban areas during these installations?
In rural and suburban areas, it’s common to overlook underground utilities like water lines for irrigation, private electrical wiring to outbuildings, and sometimes old or unused pipes and cables. Besides the obvious gas and main electric lines, these less-visible utilities are often missed. Always have the area marked professionally to avoid accidental damage and ensure safety during your installation.
After installation, what are some key ongoing safety checks or routine maintenance steps you would recommend to ensure the system remains reliable and safe over time?
After installation, it’s important to regularly inspect your wiring and connections for wear, corrosion, or loose fittings. Check solar panels for dirt and debris that could affect performance, and clean them as needed. Monitor pump operation for unusual noises or reduced flow, which could signal issues. Also, inspect mounting hardware and battery terminals for rust or damage, and ensure all safety covers are intact. Keeping a maintenance log can help you track these checks over time.
You mention the importance of evaluating terrain stability and avoiding flood-prone areas before installation. Do you have any recommendations for assessing ground stability if the property has a history of seasonal flooding or shifting soil?
If your property has a history of flooding or shifting soil, it’s wise to consult a local geotechnical engineer or soil specialist for a site assessment. They can test soil composition, drainage, and compaction. Consider installing your pump on elevated platforms or concrete pads to reduce flood risk, and use ground anchors for added stability. Monitoring the area during wet seasons can also help identify potential problem spots before installation.
How do I know if I’m complying with all local codes and regulations before starting my DIY solar water pump project? Are permits usually required, and if so, who should I contact first?
To ensure you comply with local codes and regulations, start by contacting your city or county building department. They can confirm if permits are needed for solar-powered water pumps and advise on specific requirements. In many areas, permits are required for electrical work or modifications to water systems. It’s also a good idea to check with your local health or environmental agency, especially if your project involves groundwater. Document any approvals you receive before beginning your installation.
You mentioned checking local codes and calling utility locator services before digging. How often do DIY installers actually run into issues with hidden utility lines, and what should you do if you discover a line while digging for solar pump installation?
DIY installers sometimes underestimate the risk, but it’s not uncommon to encounter buried utility lines, especially in older or developed areas. If you discover a line while digging, stop work immediately and do not touch or attempt to move it. Contact your local utility provider or the locator service you used—they will assess and advise on safe next steps. Safety is key, so always treat unknown lines as live and dangerous.
If after installation the water output is lower than expected, could that be related to sunlight exposure or panel placement errors mentioned in the pre-installation section? What troubleshooting steps would you recommend in that case?
Yes, low water output can definitely be linked to poor sunlight exposure or incorrect panel placement, as discussed in the pre-installation section. First, check if shadows or dirt are affecting your panels, and ensure they’re facing the right direction and angle for maximum sun. Also, verify all electrical connections are secure and the pump is rated for your setup. If output is still low, monitor sunlight hours and consider relocating or tilting the panels for better exposure.