Introduction: Why Solar-Powered Water Filtration is the Next Big Step in Sustainable Living
Access to safe, clean water is a cornerstone of sustainable living, but conventional filtration methods often rely on grid energy, chemicals, or expensive proprietary systems. Enter solar-powered water filtration—a practical, eco-friendly solution that leverages renewable energy to purify water at home, off-grid cabins, or community gardens. As water scarcity and energy costs climb, more homeowners and DIY enthusiasts are exploring how to build their own solar filtration systems. However, success hinges on having the right tools and equipment. Whether you’re aiming to provide potable water for daily use, garden irrigation, or emergency preparedness, the right gear makes the difference between a reliable, efficient system and a costly, underperforming project. This comprehensive guide covers every essential tool and piece of equipment you’ll need for DIY solar water filtration, from solar panels and charge controllers to plumbing tools, meters, and safety gear. Let’s dive into the practical details that will help you avoid frustration, maximize efficiency, and enjoy years of clean, sustainable water.
Understanding Solar-Powered Water Filtration: Core Components
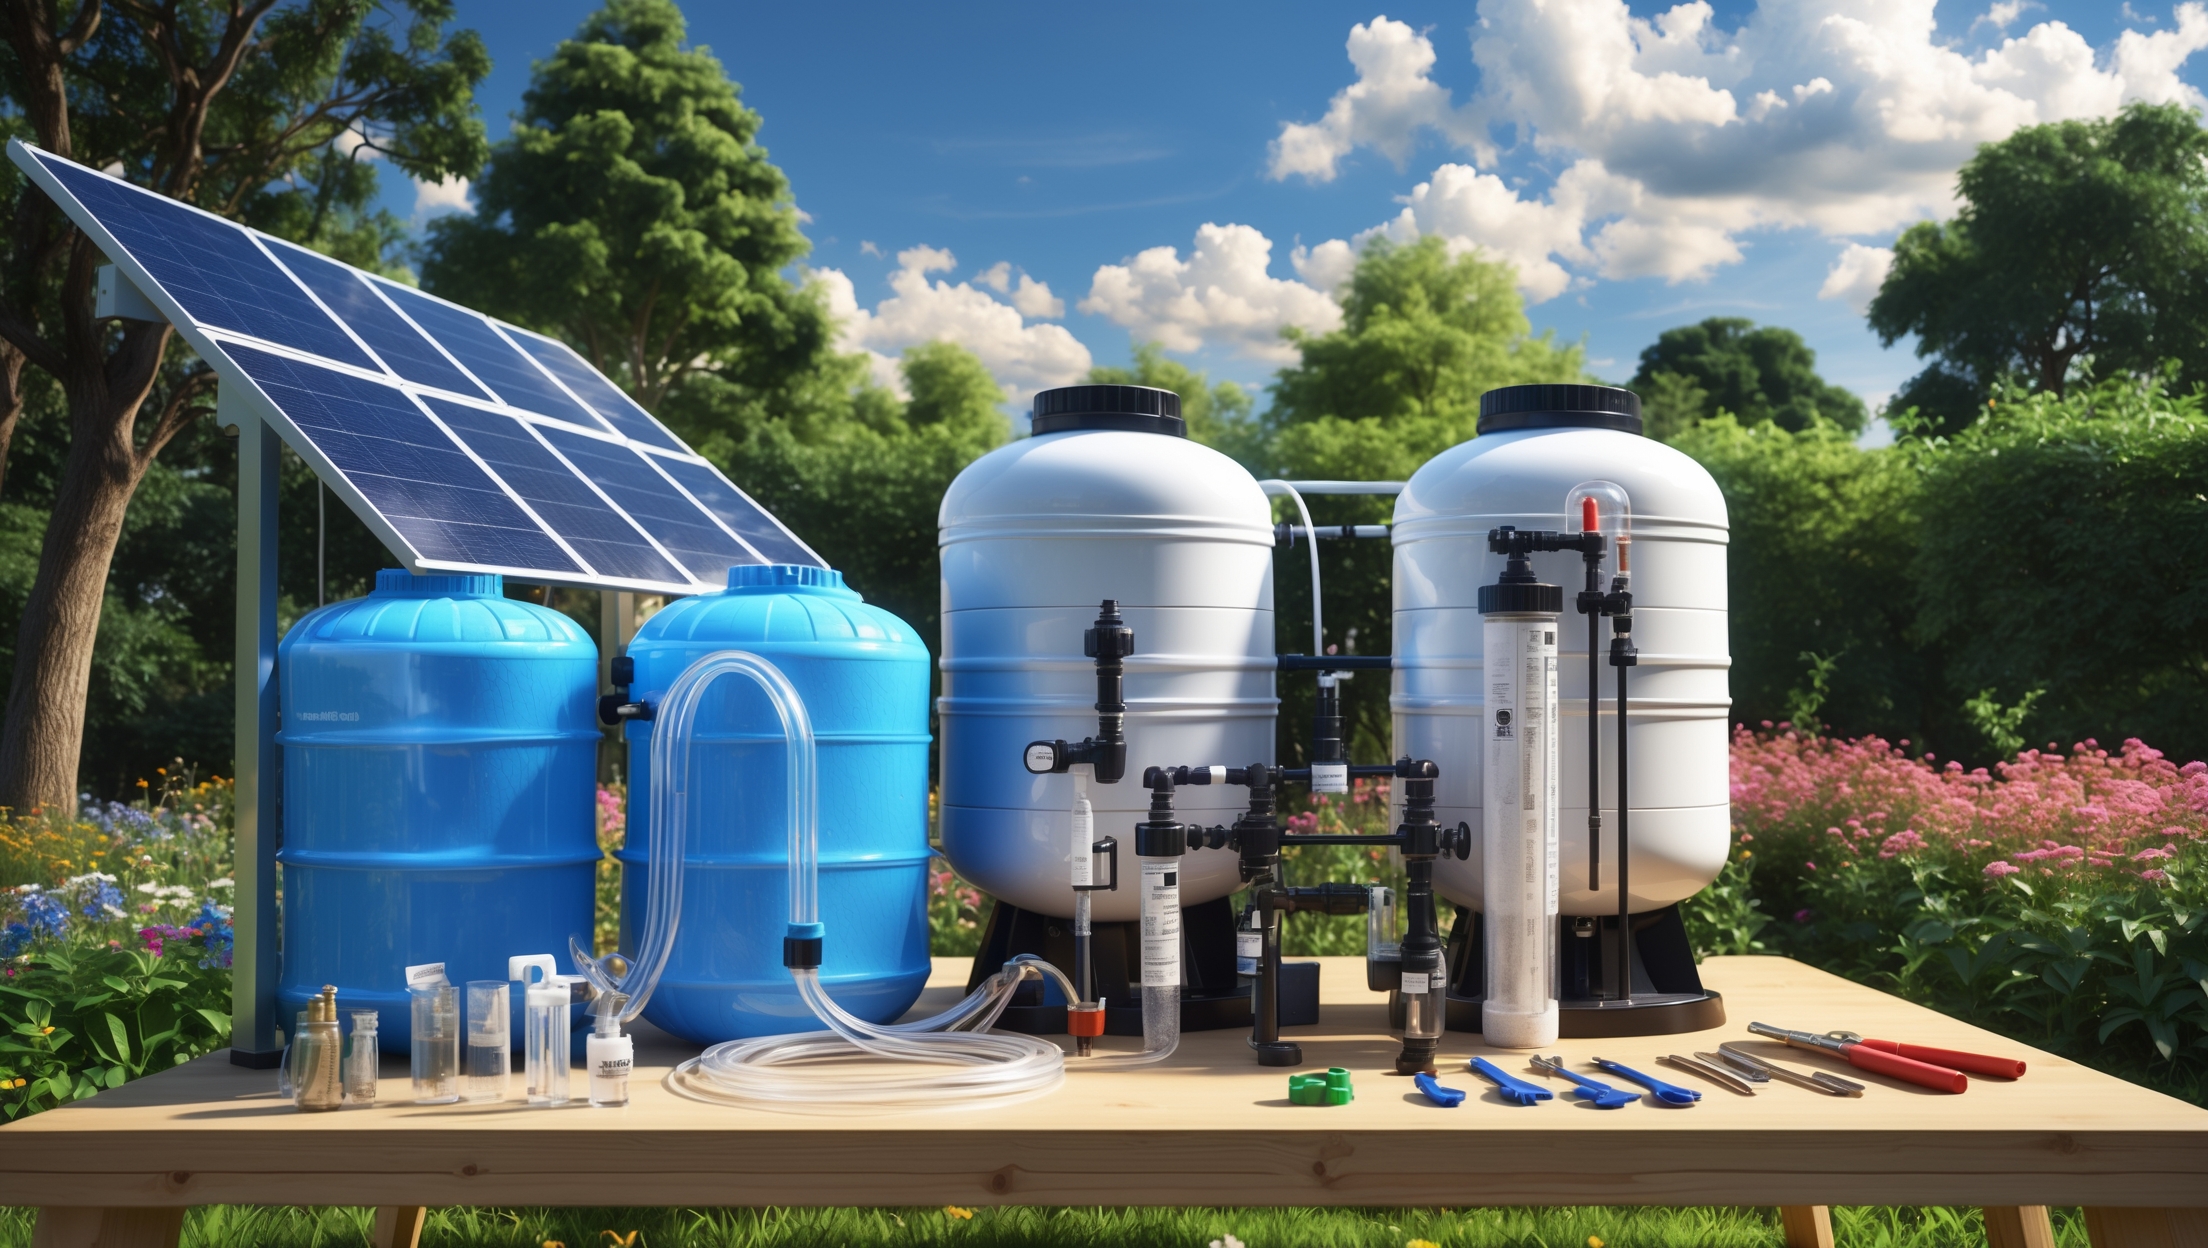
Before delving into specific tools, it’s crucial to understand the main components of a solar-powered water filtration system. Each stage requires specialized equipment and careful assembly for optimal performance.
- Solar Power Generation: Solar panels, charge controllers, batteries (optional), and wiring harnesses convert sunlight to electricity for your system.
- Pumping: A DC (direct current) water pump moves water from the source through the filtration units, powered by solar energy.
- Filtration Units: These may include sediment pre-filters, activated carbon filters, ceramic filters, and optional UV sterilizers.
- Water Storage: Clean water is stored in food-grade tanks or containers after filtration.
- Plumbing and Distribution: Piping, tubing, and valves connect the system and deliver water where it’s needed.
Solar Power Tools and Equipment
Solar Panels
Recommended Specs: For a typical home-scale filtration system, 100–200W panels are sufficient. Monocrystalline panels are most efficient for limited space.
- Best Practice: Choose panels with durable frames and pre-attached MC4 connectors for easy wiring.
Charge Controller
Regulates voltage and current from the panels to the pump or battery, preventing overcharging or system damage.
- MPPT Controllers: More efficient, especially in variable sunlight.
- PWM Controllers: Cost-effective for smaller systems.
Batteries (Optional)
If you want filtration at night or during low sunlight, include deep-cycle AGM or LiFePO4 batteries sized for your pump’s draw.
- Tip: Use a battery box for outdoor installations to protect against moisture and temperature swings.
Solar Wiring and Connectors
- 10–12 AWG solar-rated cable for main runs
- MC4 connectors for waterproof, tool-free panel connections
- Ring terminals and fuse holders for safe battery connections
Essential Solar Tools
- MC4 crimping tool and wrench
- Wire stripper/cutter (adjustable for different gauges)
- Multimeter (for voltage, current, and continuity checks)
- Solar irradiance meter (optional, for panel placement optimization)
Pumping and Plumbing Tools
DC Water Pump Selection
Types: Submersible DC pumps for wells, or surface DC booster pumps for above-ground sources. Match pump specs (flow rate, lift height, voltage) to your filtration needs and solar output.
- Look for brushless designs for quiet, long-term operation.
- Check for built-in prefilters to protect against grit.
Piping and Fittings
Most home systems use food-grade PVC, PEX, or silicone tubing. Gather the correct diameter hoses and compatible barbed fittings, tees, elbows, and ball valves for your layout.
- Pipe cutter or tubing shears (for clean, square cuts)
- PTFE (Teflon) tape for leak-free threaded joints
- Pipe wrenches and adjustable pliers
- PVC cement or PEX crimp tool as needed
Mounting and Securing Tools
- Power drill/driver with masonry and wood bits
- Tapcon screws or lag bolts (for mounting panels, pumps, or tanks)
- Zip ties, hose clamps, and pipe straps for neat, vibration-free plumbing runs
Filtration Unit Setup: Equipment and Tools
Filter Housings and Elements
- Standard 10″ or 20″ filter housings with pressure relief valves
- Sediment cartridges (5–20 micron for pre-filtration)
- Activated carbon blocks (for taste, odor, and chemical reduction)
- Ceramic or ultrafiltration cartridges (for bacteria and protozoa removal)
- UV-C sterilizer (optional, for microbiological safety)
Installation Tools
- Filter housing wrench (for tightening and changing cartridges)
- Pipe thread sealant or PTFE tape
- Level and measuring tape (for precise mounting and spacing)
- Pipe cutter and deburring tool
Water Storage and Distribution: Equipment Checklist
Storage Tanks
- Food-grade polyethylene or stainless steel tanks sized for daily use
- Overflow outlet and screen (to prevent contamination)
- Float valve or electronic level sensor (for auto shutoff)
Distribution Plumbing
- Flexible food-grade hoses or rigid piping
- Check valves to prevent backflow
- Drain valve for periodic cleaning
Installation Tools
- Hole saw (for tank inlets/outlets)
- Grommet and bulkhead fitting installer
- Channel lock pliers and adjustable wrench
Monitoring, Testing, and Maintenance Tools
Water Quality Testing Kits
Regular testing ensures your system’s output remains safe. Invest in reliable kits for:
- Turbidity (cloudiness/sediment)
- pH and chlorine (if using chlorine as a backup sanitizer)
- Total dissolved solids (TDS)
- Bacteria (coliform/E. coli test strips or vials)
Flow Meters and Pressure Gauges
- Inline flow meter (to measure output in liters/gallons per minute)
- Pressure gauge (to monitor filter clogging or pump performance)
Spare Parts and Maintenance Supplies
- Replacement filter cartridges
- O-ring grease and spare O-rings
- Cleaning brushes for filter housings
- Sanitizing solution (food-grade hydrogen peroxide or chlorine, for periodic system cleaning)
Safety Equipment: Protect Yourself and Your Water
- Insulated gloves (for electrical work)
- Safety goggles (when cutting, drilling, or handling chemicals)
- N95 mask (for dusty work or when handling powdered filter media)
- First aid kit (keep one accessible at your work area)
- Non-slip shoes or boots (especially for outdoor installations)
Always disconnect solar panels before working on electrical components, and depressurize the system before opening filter housings.
Choosing Reliable Tools: What to Look For
Durability and Weather Resistance
Outdoor systems demand weatherproof tools and equipment. Opt for stainless steel, powder-coated aluminum, or UV-resistant plastics for mounts, fittings, and housings. All electrical enclosures should be rated at least IP65 for dust and water ingress.
Ease of Use and Maintenance
Modular filter housings and quick-connect plumbing fittings simplify future cartridge changes and repairs. Choose tools with ergonomic grips and clear markings. A well-organized tool kit with labeled compartments saves time during installation and routine maintenance.
Compatibility and Sizing
Check that all pumps, panels, and filters are appropriately sized for your flow rate and water quality needs. Mismatched components lead to leaks, inefficiency, and faster wear. Consult product datasheets and use sizing calculators from reputable manufacturers.
Sample Shopping List: Essential Gear for Your Build
- 1–2 x 100W monocrystalline solar panels with mounts
- 1 x MPPT charge controller (20A recommended)
- 1 x 12V or 24V deep-cycle battery (if off-grid/backup required)
- 1 x Submersible or booster DC water pump (matched to head/flow needs)
- 2–3 x filter housings (sediment, carbon, ceramic/ultrafiltration)
- 1 x UV sterilizer (optional)
- 25–50 ft food-grade PVC or PEX tubing (plus elbows, tees, valves)
- 1 x Food-grade storage tank (50–200 liters)
- Solar wiring, MC4 connectors, fuses, and combiner box
- Pipe cutter, wrenches, screwdrivers, multimeter, filter wrench
- Water test kits, flow meter, pressure gauge
- Safety gear (gloves, goggles, first aid)
Pro Tips for Efficient Assembly and Operation
- Preassemble major components (panel frames, filter housings) before site installation to minimize time outdoors.
- Label all wiring and plumbing runs for easy troubleshooting later.
- Install unions or quick-connects at filter housings and pumps for rapid maintenance.
- Secure all outdoor wiring in conduit or UV-rated cable trays to prevent animal damage and weathering.
- Document your build with photos and a wiring/plumbing schematic for future reference.
Troubleshooting: Most Common Tool-Related Issues
- Leaky joints: Usually due to improper pipe cuts or insufficient thread sealant. Always deburr pipe ends and use PTFE tape liberally.
- Pump not running: Check solar panel output with a multimeter and inspect all wiring for loose connections. Fuse may be blown.
- Low flow rate: Clogged filter or undersized pump—replace cartridge or review pump specs.
- Intermittent power: Faulty MC4 connectors or loose cable. Use MC4 tool for secure, weatherproof connections.
Conclusion: Equip Yourself for Success in Sustainable Water Filtration
Building a solar-powered water filtration system is a rewarding step toward energy independence and environmental stewardship. However, the difference between a system that delivers years of safe, clean water and one plagued by leaks, inefficiency, or electrical hazards lies in your choice of tools and equipment. By investing in high-quality solar hardware, reliable plumbing tools, accurate testing kits, and robust safety gear, you prepare yourself for a smoother installation process and long-term peace of mind. Remember that each tool in your kit—from your MC4 crimping tool to your multimeter and filter wrench—plays a critical role in system performance and safety. Don’t skimp on genuine, food-grade components or skip regular maintenance checks. Instead, approach your project methodically, document your setup, and keep spares on hand for quick fixes. With this expert guide, you’re well-equipped to turn sustainable water dreams into reliable, everyday reality—one solar-powered drop at a time. Whether for home, homestead, or community garden, your system will stand as a model of practical green technology in action.


In terms of safety gear for assembling the solar and plumbing components, are there any particular items you’d consider absolutely necessary for a first-time DIYer to avoid common mistakes?
For a first-time DIYer, safety is key. Make sure you have insulated gloves for any electrical work with the solar components to prevent shocks, and wear safety goggles to protect your eyes from debris while cutting pipes or wires. A dust mask is helpful if you’ll be sawing PVC. Also, closed-toe shoes and a long-sleeved shirt add extra protection. These basics can help prevent the most common mistakes and injuries.
What kind of regular maintenance should I expect with the filtration units and solar power components? I’d love to avoid problems down the line, especially if I’m using the system for emergency backup.
For filtration units, you should regularly inspect and clean filters, replace them as recommended by the manufacturer, and check for any leaks. For solar components, clean the panels to remove dust or debris, inspect wiring and connections for damage, and monitor battery health if your system includes storage. Performing these checks monthly or after severe weather helps ensure reliability during emergencies.
Can you provide more details about wiring harnesses—are pre-made kits generally sufficient for beginners, or is it safer to assemble the wiring yourself from scratch?
Pre-made wiring harness kits are usually sufficient and a good choice for beginners, as they reduce the risk of wiring errors and often include clear instructions. These kits are designed for safety and ease of use. Assembling your own wiring from scratch gives you more customization, but it requires more knowledge about electrical safety and best practices. For most DIY solar water filtration projects, starting with a pre-made kit is safer and more convenient.
I noticed you mentioned UV sterilizers as an optional component. Are there certain situations where a UV sterilizer is absolutely necessary, or can I rely on just sediment and carbon filters for most household uses?
UV sterilizers are particularly important if your water source could be contaminated with bacteria, viruses, or other microorganisms—like untreated surface water from lakes, rivers, or rainwater catchment. Sediment and carbon filters are great for removing particles, chemicals, and improving taste, but they don’t disinfect water. For most well water or municipal sources, sediment and carbon filters are often enough, but if you’re unsure about biological contaminants, a UV sterilizer adds crucial protection.
I’m curious about plumbing the whole setup. What are some common challenges people face when connecting the DC pump to the filtration units and water storage tanks? Any tips for leak prevention or choosing the right pipe materials?
Connecting the DC pump to filtration units and storage tanks often brings challenges like mismatched pipe sizes, improper seals, and difficulty securing watertight connections. Using the correct pipe material, such as food-grade PVC or PEX, helps prevent chemical leaching. For leak prevention, always use proper fittings, apply plumber’s tape to threaded joints, and ensure hose clamps are tight but not over-tightened. Test the system with water at low pressure first to spot leaks before full operation.
You mention using DC water pumps in solar filtration setups. Are there any specific brands or models you recommend for reliability and efficiency, especially for smaller, residential systems?
For smaller, residential solar-powered water filtration systems, DC water pumps from brands like Shurflo and Eco-Worthy are well-regarded for their durability and efficiency. Models such as the Shurflo 2088 or Eco-Worthy’s 12V submersible pumps are popular choices. These pumps are designed for low-voltage solar setups and have good track records in off-grid applications. Always check the flow rate and power requirements to ensure compatibility with your system.
When it comes to choosing a DC water pump for a solar-powered filtration setup, are there certain specs or brands you recommend that balance efficiency and reliability, especially if the system will be running mostly during daylight hours?
For solar-powered filtration systems used mainly in daylight, look for DC water pumps with low voltage requirements (typically 12V or 24V) and a high energy efficiency rating. Brushless motor pumps are generally more reliable and last longer. Brands like Eco-Worthy, SHURflo, and Bayite are well-regarded for balancing efficiency and durability. Make sure to match the pump’s flow rate and head height to your system’s needs for optimal performance.
Could you elaborate more on the safety gear recommended for assembling these systems? I want to make sure I have the right protection when dealing with both electrical components and plumbing.
For assembling solar-powered water filtration systems, it’s important to have insulated gloves and safety goggles when working with electrical components. For plumbing tasks, use heavy-duty work gloves to protect against sharp edges and debris, and wear closed-toe shoes with good grip in case of spills. Consider a dust mask if you’ll be cutting or sanding materials. Always ensure your workspace is dry when handling electricity to prevent shocks.
Could you clarify whether a UV sterilizer is necessary for rainwater filtration, or is a combination of sediment and activated carbon filters usually sufficient in most cases?
A UV sterilizer isn’t strictly necessary for every rainwater filtration setup, but it does add a significant level of safety. Sediment and activated carbon filters remove debris and improve taste, but they may not eliminate all bacteria, viruses, or parasites. If your rainwater source could be contaminated by animal droppings or other pathogens, adding a UV sterilizer is highly recommended for reliable disinfection.
I’m interested in putting together a basic solar-powered water filtration system for an emergency kit. About how long should I expect the full assembly and installation process to take for a DIY beginner?
For a DIY beginner, assembling and installing a basic solar-powered water filtration system typically takes about 3 to 6 hours. This covers unpacking the components, following instructions carefully, connecting the solar panel, setting up the filtration system, and running a first test. Allow a little extra time if you’re learning to use some of the tools for the first time.
When it comes to choosing a DC water pump for a solar-powered system, what specs should I be looking for if my main goal is efficient garden irrigation? There seem to be lots of pump options and I’m not sure where to start.
For efficient garden irrigation with a solar-powered system, focus on a DC pump with low power consumption (matching your solar panel output), sufficient flow rate (usually 2–10 liters per minute for small gardens), and enough head height to lift water where you need it. Also, check for compatibility with your voltage (often 12V or 24V) and look for models designed for continuous operation and clean water. Simple submersible pumps are often easiest for DIY setups.
I saw you mentioned both UV sterilizers and ceramic filters. If I’m on a tight budget and can only pick one, which would do a better job making water safe to drink for a small family, especially if we’re mostly filtering river or lake water?
If you’re choosing between a UV sterilizer and a ceramic filter on a tight budget, a ceramic filter is generally the better choice for making river or lake water safer to drink. Ceramic filters physically remove bacteria, sediments, and some parasites, which are common in surface water. UV sterilizers are effective against microbes, but they don’t remove particles or sediments. For a small family, a ceramic filter offers reliable, all-around protection and requires no electricity, making it ideal for most DIY setups.
How much should I budget for all the essential tools and equipment listed in your guide if I want to build a basic system for serving my business and a small community garden?
For a basic solar-powered water filtration system suitable for a business and a small community garden, you should budget between $600 and $1,200. This estimate covers solar panels, batteries, a water pump, filters, piping, basic hand tools, and installation accessories. Costs may vary depending on the specific brands and local prices, but this range should provide a solid foundation for essential gear.
When assembling the solar-powered water filtration system, what kind of plumbing tools or meters are most crucial to have on hand to avoid leaks or faulty connections, especially for a first-time DIYer?
For assembling a solar-powered water filtration system, it’s important to have adjustable wrenches, Teflon tape (plumber’s tape), and a pipe cutter if working with tubing. A reliable pipe thread sealant can also help prevent leaks. For checking your work, a simple water pressure gauge is very useful to spot leaks or drops in pressure. These tools will make secure, leak-free connections much easier, especially if you’re new to DIY plumbing.
The article mentions using food-grade tanks for water storage. Are there any low-cost alternatives or upcycled containers that still meet safety standards for storing filtered water, especially if the system is for emergency prep?
You can consider using thoroughly cleaned, food-grade barrels that previously held safe items like juice or syrup, as these are often available at low cost or even for free from local businesses. Avoid containers that held chemicals or non-food substances. High-density polyethylene (HDPE) containers marked with a 2 inside the recycling symbol are generally safe for water storage if they are food-grade. Always sanitize any upcycled container before use to ensure safety.
If I’m planning to set up a solar-powered water filtration system for emergency preparedness in a small household, how do I determine the right size for the solar panels and batteries? Is there a basic formula or guideline to help with sizing based on daily water needs?
To size your solar panels and batteries, first estimate your household’s daily water consumption and check the wattage of the filtration system. Multiply the system’s power (in watts) by the hours you expect to run it each day to find daily energy needs (watt-hours). For batteries, add extra capacity for cloudy days. For solar panels, divide daily watt-hours by average peak sunlight hours in your location. This gives a good starting point for sizing your system.
For someone on a relatively tight budget, which tools or components from your guide would you consider absolutely essential to get started with a basic but reliable off-grid solar water filtration setup?
If you’re on a budget, start with a small but reliable solar panel (about 20–50W), a basic 12V battery, a simple charge controller, a low-flow 12V DC pump, and a dependable water filter like a ceramic or hollow fiber type. These are the minimum essentials for a basic off-grid solar-powered filtration setup. You can add more features as your budget allows.
Could you elaborate on whether the solar panels and DC water pump need to be matched in voltage, or if mismatches can cause problems for beginners? I am trying to avoid common mistakes during the assembly step.
It’s important to match the voltage of your solar panels to the requirements of your DC water pump. If the panel voltage is too high, it can damage the pump; too low, and the pump may not run effectively or at all. Always check the pump’s rated voltage and ensure your solar panel output is within that range to avoid common assembly mistakes.
I’m new to DIY projects and wondering—do you recommend starting with a smaller solar panel setup just for garden irrigation, or is it better to invest in a full system that could handle daily drinking water needs from the beginning?
For beginners, starting with a smaller solar panel setup focused on garden irrigation is usually a good idea. It lets you get comfortable with the technology and setup process before making a bigger investment. Once you’re confident and ready to expand, you can upgrade to a full system for daily drinking water needs, using the experience you’ve gained along the way.
I noticed you mentioned optional UV sterilizers for the filtration stage. Are there any specific safety precautions or additional power requirements I should plan for if I decide to include a UV unit in my system?
If you plan to add a UV sterilizer, make sure your unit is rated for the flow rate of your system and always follow the manufacturer’s installation instructions. UV units generally require a stable power source, so ensure your solar setup can handle the extra wattage—most small UV units need around 10–40 watts. Also, remember to shield all wiring and components from moisture to prevent electrical hazards.
I’m curious how quickly a basic DIY setup can be assembled with the tools you listed, assuming I have average handyman skills. Is this more of a weekend project, or should I set aside more time?
With average handyman skills and all the necessary tools and parts on hand, assembling a basic DIY solar-powered water filtration system is usually a weekend project. Most people can finish the main build in one to two days. Allow extra time for testing and any troubleshooting, but you shouldn’t need more than a weekend if you follow the guide’s steps.
If the system stops pumping water on a cloudy day, what’s the general troubleshooting process? Should I look at the charge controller first, or start with the solar panels and wiring?
If the system stops pumping water on a cloudy day, begin by checking if the solar panels are producing enough voltage, as limited sunlight is often the issue. Next, inspect the wiring connections for any loose or corroded points. After that, check the charge controller for error indicators or faults. Address each component in this order to pinpoint where the problem lies.
Once all the recommended equipment is gathered, about how long would it realistically take to assemble and test a basic solar-powered filtration system for emergency water supply? Are there any steps that usually slow down the process?
After collecting all the recommended equipment, assembling and testing a basic solar-powered water filtration system usually takes 3 to 5 hours for most people with some DIY experience. The steps that often slow things down are wiring the solar components correctly and ensuring all water-tight seals are secure. Testing for leaks and confirming the system runs smoothly may also require extra time and adjustments.
For someone who’s never worked with solar panels or wiring before, what are the most common mistakes to watch out for during setup, especially regarding charge controllers and battery safety?
Some common mistakes beginners make include connecting solar panels to batteries without a charge controller, which can damage the batteries. Always wire the charge controller between the panels and batteries. Double-check all wiring for correct polarity, as reversing wires can harm both the controller and batteries. Also, avoid overcharging or fully discharging your batteries, and ensure connections are tight to prevent overheating or sparks. Safety goggles and insulated tools are good precautions during setup.
How do sediment pre-filters compare to ceramic filters in terms of ongoing maintenance and replacement costs over time for a small business setup?
Sediment pre-filters usually need more frequent replacement, often every 3–6 months, because they trap larger particles and clog faster. They’re relatively inexpensive per unit. Ceramic filters last longer—sometimes up to a year or more with regular cleaning—but may have a higher upfront cost. Over time, ceramic filters can be more cost-effective and require less frequent intervention, though periodic scrubbing is needed to maintain flow rates.
What kind of regular maintenance is required for these DIY solar filtration systems, especially considering sediment build-up and checking the solar components? Any troubleshooting tips for keeping everything running smoothly over time?
Routine maintenance for DIY solar-powered water filtration systems includes regularly cleaning or replacing filters to prevent sediment build-up. Inspect the filter housing for clogs and rinse out any accumulated debris. For the solar components, keep the panels clean and free of dust to maximize efficiency, and check connections for corrosion or loose wires. If you notice a drop in power or water flow, look for blockages or test the solar battery with a multimeter. Periodically review all fittings and seals to prevent leaks and ensure smooth operation.
When assembling the filtration units, how do you decide between options like activated carbon, ceramic filters, or adding a UV sterilizer? Is there a way to combine them easily or a recommended order for best results?
Choosing between activated carbon, ceramic filters, and UV sterilizers depends on your water source and what contaminants you want to remove. For the best results, you can combine them: start with a ceramic filter to remove sediments and bacteria, then use activated carbon to reduce chemicals and improve taste, and finish with a UV sterilizer for added protection against viruses. Many modular filtration systems allow you to connect these stages in series for easy combination.
How complicated is the assembly for someone with basic DIY skills? Would you recommend a step-by-step test with individual components like the pump and charge controller before connecting everything together?
The assembly process is quite manageable if you have basic DIY skills, especially if you follow the guide closely. Testing individual components like the pump and charge controller before full assembly is definitely recommended. This helps ensure each part works correctly and makes troubleshooting much easier if any issues come up during the final setup.
Could you clarify whether it’s possible to run a reliable solar-powered filtration system without batteries, especially for intermittent use in a community garden? I’m wondering how much water output I could realistically expect just from direct sunlight.
Yes, you can run a solar-powered filtration system without batteries, but the system will only operate when there’s enough sunlight. For intermittent use, this might be fine if you’re flexible about when water is filtered—for example, during midday when sunlight is strongest. Water output will depend on your solar panel size and pump specs, but typically expect reduced flow on cloudy days. For consistent output or use on demand, batteries are recommended.
When sizing a DC water pump for a solar filtration setup, how do you determine what flow rate and power requirements make sense for basic household use versus outdoor garden irrigation?
To size a DC water pump, first consider your intended use. For basic household needs, a flow rate of 2-4 gallons per minute (GPM) is usually enough. Garden irrigation may require higher flow, around 5-10 GPM depending on garden size. Next, estimate how high (in feet) the water must be lifted and the total distance it must travel to calculate head pressure. Add up the wattage needed to meet both flow and pressure, then choose a solar panel and battery setup that matches or slightly exceeds that power requirement.
Once all the equipment is assembled, how long does it usually take to set up and test a basic solar-powered water filtration system for a small household or a garden?
For a basic solar-powered water filtration system intended for a small household or garden, setup and initial testing typically take between 2 to 4 hours. This includes connecting the solar panel, installing the pump and filtration unit, wiring the system, and running water through it to check for leaks and proper operation. If you’ve prepped your workspace and have all materials ready, the process moves even quicker.
When it comes to the water storage part, do you recommend specific food-grade tanks for outdoor conditions, especially for places with big temperature fluctuations? I’m concerned about safety and durability over time.
For outdoor storage with temperature swings, look for food-grade polyethylene tanks that are UV-resistant and NSF-certified for potable water. These tanks are built to handle sun exposure and temperature changes without leaching chemicals or degrading. Opaque or dark-colored tanks help prevent algae growth. Also, check that the tank has a tight-fitting lid to keep contaminants out and is rated for outdoor use to ensure long-term durability.
I’m interested in using this for emergency preparedness, but I’m not sure what kind of battery setup is needed if I want the system to work on cloudy days or at night. Do you have guidelines for sizing the battery bank?
To size a battery bank for cloudy days or nighttime use, first estimate your system’s daily power consumption in watt-hours. Multiply the total by the number of backup days you want. Choose batteries with enough amp-hour capacity to meet this demand, factoring in efficiency losses and not discharging batteries below 50% for longer lifespan. For example, if your system uses 200 watt-hours per day and you want 2 days of backup, plan for at least 800 watt-hours of battery storage.
What are the most common mistakes people make when wiring the charge controller and batteries in these DIY solar filtration systems? I’d like to avoid potential safety issues or component failures down the line.
Some common mistakes include connecting the charge controller directly to the solar panel before attaching it to the battery, which can cause incorrect voltage readings and potential damage. Reversing polarity is also a frequent error—double-check positive and negative terminals before making connections. Using undersized wires or forgetting fuses can lead to overheating and safety hazards. Always follow the manufacturer’s wiring sequence, use proper gauge wiring, and install fuses or circuit breakers to protect both the batteries and controller from faults.
When it comes to assembling the wiring harness and charge controller, are there common mistakes or safety hazards that beginners should be aware of to avoid damaging their equipment or reducing system efficiency?
When assembling the wiring harness and connecting the charge controller, beginners often overlook proper wire sizing and secure connections. Using wires that are too thin can overheat and damage components. Always double-check polarity to avoid short circuits. Make sure all connections are tight and insulated to prevent accidental contact or corrosion. Also, never work on the wiring while the system is powered to avoid shocks or equipment damage.
Is there a big performance difference between using a DC water pump versus an AC one with an inverter setup, especially when running only on solar power?
Yes, there is a noticeable performance difference. DC water pumps are generally more efficient for solar-powered systems because they can run directly off solar panels or batteries, reducing energy loss. Using an AC pump with an inverter adds extra conversion steps, which can waste power and lower overall efficiency. For a purely solar setup, a DC pump is usually the better choice for maximum performance and reliability.
Could you give an example of the type of DC water pump that works best with a small solar setup for a community garden? I’m wondering if some models are more efficient or reliable than others when running off solar panels.
For a small solar setup in a community garden, a 12V DC brushless submersible pump is often a good choice. Models like the ECO-WORTHY or KKmoon 12V DC submersible pumps are popular because they operate efficiently at low voltages and have modest power requirements, typically around 10–25W. Brushless pumps tend to be more reliable and have a longer lifespan when cycling on and off with solar power.
You mention that proper assembly is crucial for each stage. What are the most common mistakes beginners make with wiring or connecting solar panels and batteries for these systems?
Some of the most common mistakes beginners make include connecting the positive and negative terminals incorrectly, not using the right gauge of wire (which can cause overheating), and failing to install a fuse or circuit breaker for safety. Another frequent error is not securing connections tightly, which can create unreliable power delivery. Always double-check your wiring diagrams and connections before powering up the system.
What are some common troubleshooting steps if the DC water pump runs inconsistently, even when the solar panels seem to be getting plenty of sunlight?
If your DC water pump is running inconsistently despite good sunlight, check the wiring connections and terminals for any loose or corroded spots. Inspect the pump’s inline fuse and replace it if it’s blown. Make sure your solar charge controller (if used) is working correctly. Also, verify the battery (if your system includes one) is properly charged and not faulty. Lastly, ensure the solar panel is clean and not partially shaded during the day, as even small shadows can affect output.
I noticed you mentioned using food-grade tanks for water storage, but are there any other safety standards or certifications I should look for when picking components, especially for emergency use?
In addition to food-grade tanks, it’s a good idea to look for components labeled BPA-free and NSF-certified (specifically NSF/ANSI Standard 61 for drinking water system components). For pipes, hoses, and filters, ensure they’re approved for potable water use. If using pumps or fittings, stainless steel or approved plastics are safest. Always check manufacturer specifications for any official safety certifications relevant to drinking water.
How do you determine the right size and number of solar panels needed for a DC pump and filtration setup? Is there a practical formula or checklist you use to match solar generation with daily water needs?
To size your solar panels, first check the pump and filter’s total wattage and estimate how many hours per day they need to run. Multiply watts by hours to get daily watt-hours (Wh). Divide this by average daily sunlight hours in your location to estimate needed panel wattage. Add about 25% extra for cloudy days and system losses. This simple checklist helps match solar output to your water needs and equipment.
I noticed the guide mentions UV sterilizers as an optional part of the filtration system. How much extra power do these UV units typically require, and is it practical to run them off the same solar setup as the pump?
UV sterilizers for water filtration typically use between 5 and 40 watts, depending on the unit’s size and flow rate. In most DIY solar setups, it’s practical to run a UV sterilizer alongside the pump, as long as your solar array and battery bank are sized to handle the combined wattage. Just make sure to calculate the total power draw and ensure your solar system has enough capacity, especially if you plan to run both devices simultaneously for extended periods.
If you’re only using the system for garden irrigation and not potable water, can you skip any filtration stages mentioned, or would you still suggest keeping all the core components for best results?
If your solar-powered water filtration system is just for garden irrigation, you can simplify the setup a bit. You might skip finer filtration stages like activated carbon or UV treatment, which are mainly for making water safe to drink. However, it’s still important to use basic sediment filters or mesh screens to protect your plants and prevent clogs in your irrigation system.
You mention UV sterilizers as an optional filtration stage. Are there specific safety or maintenance concerns to consider if I include UV sterilization in a DIY setup for a community garden?
If you include a UV sterilizer in your DIY filtration system, be sure to shield the lamp to prevent accidental exposure to UV light, which can harm skin and eyes. Also, regularly clean the quartz sleeve around the lamp, as mineral buildup can reduce effectiveness. Check the manufacturer’s guidance on when to replace the UV bulb, since performance declines over time even if the light still appears on.
If I want to use this setup for emergency preparedness, how do I determine the right size and type of solar panel to reliably power both the pump and filtration components, especially on cloudy days?
To determine the right solar panel size, first check the total wattage required by your pump and filtration components. Add their wattages together, then multiply by the hours you expect to run them each day. To account for cloudy days, increase this number by 25-50%. Choose a solar panel with a rated output above this total. Also, consider adding a battery storage system so you have backup power during periods of low sunlight.
Could you elaborate more on which type of filtration units are best for removing bacteria and viruses if I’m planning to use the system for drinking water at a small business?
For drinking water safety, especially for a small business, look for filtration units that use ultrafiltration (UF), nanofiltration (NF), or reverse osmosis (RO) membranes. These systems are effective at removing bacteria and viruses. UV sterilizers are also a good addition for extra disinfection but should be used alongside physical filtration. Be sure to choose a unit rated specifically for microbial removal and check it meets local drinking water standards.
When assembling the wiring harness between the solar panels, charge controller, and pump, what’s the best way to ensure everything is properly waterproofed? I’ve had trouble with moisture causing shorts in outdoor projects before.
To prevent moisture-related shorts, use weatherproof junction boxes and waterproof cable glands at connection points. Seal all wire splices with heat-shrink tubing lined with adhesive, and apply dielectric grease to exposed metal contacts before connecting. For extra protection, wrap vulnerable areas with self-fusing silicone tape. Make sure all entry points are pointed downward to avoid water pooling. These steps will greatly reduce the risk of moisture intrusion in your setup.
If the solar-powered pump keeps losing pressure or stops pushing water through the filter during the day, what troubleshooting steps would you suggest checking first? Could undersized wiring or battery issues be the main culprit?
If your solar-powered pump is losing pressure or stops working, start by checking the battery charge level—it might not be holding enough power. Inspect all wiring, especially for undersized wires that can cause voltage drops and reduce pump performance. Make sure all electrical connections are secure and clean. Also, look for clogged filters and ensure the solar panels are clean and receiving direct sunlight. Both battery issues and undersized wiring are common causes, so these checks are a solid first step.
For those of us on a tight budget, are there specific pieces of equipment where it’s okay to save money and others where investing in higher quality makes a significant difference in the system’s reliability and safety?
For budget-conscious DIYers, it’s usually fine to save on non-critical items like basic hoses or containers, as long as they’re safe for potable water. However, investing in a reliable water filter and a quality solar panel is important for both performance and safety. These core components directly affect water purity and the system’s ability to function consistently, so it’s best not to compromise on them.
Can you elaborate on the kinds of sediment pre-filters and activated carbon filters that work best in combination for home water use? I’m hoping to avoid frequent replacements and keep maintenance simple.
For home water use, a reusable pleated sediment filter (such as 5-micron or 10-micron) is a good first stage; it traps larger particles and can be rinsed and reused, reducing replacements. Pair this with a high-capacity, solid-block activated carbon filter, which effectively removes chemicals and odors and tends to last longer than granular types. This combination keeps maintenance minimal and extends filter lifespans.
For emergency preparedness, what would you suggest as the quickest way to assemble a temporary solar filtration system with limited tools, and what are the minimum must-have components?
For emergency situations, start with a portable solar panel, a small 12V water pump, a basic pre-filter (like a coffee filter or cloth), and a compact water filter (such as a hollow-fiber or ceramic filter). Connect the panel to the pump, run water through the pre-filter and then the main filter into a clean container. These four components—solar panel, pump, pre-filter, and main filter—are the bare essentials for a quick setup using minimal tools.
I’m getting ready to build a solar-powered water filtration setup in my backyard, but I’m worried about choosing the right DC pump for varying sunlight conditions. Are there any specific pump models you recommend that work well with fluctuating solar power, or should I always include a battery backup?
Choosing a DC pump that handles variable sunlight can be tricky. Look for pumps with built-in MPPT (Maximum Power Point Tracking) controllers, as they adjust performance based on available solar input. Brands like ECO-WORTHY and SHURFLO are popular for solar applications. If consistent water flow is important for your setup, including a battery backup is a good idea to keep the system running during cloudy periods or at night.
After setting up all the core components mentioned, what’s the best way to test if the system is working correctly before relying on it for drinking water? Are there meters or quick checks recommended for beginners?
Once your solar-powered water filtration system is set up, you can start by visually checking for leaks and making sure water is flowing properly through each stage. For beginners, an inexpensive TDS (Total Dissolved Solids) meter is a practical tool; it gives a quick reading of how much material remains in the water after filtration. Additionally, using water test strips or kits designed for bacteria and contaminants is recommended before drinking. These are widely available and easy to use, providing peace of mind that your filtered water is safe.
I’m new to plumbing work. Are there any beginner-friendly tips or common mistakes to watch out for when assembling the plumbing and wiring parts of a DIY solar filtration setup?
When assembling plumbing, always double-check that pipe connections are tight but not over-tightened, as overtightening can cause cracks. Use Teflon tape on threaded joints to prevent leaks. For wiring, ensure all connections are secure and insulated, and turn off power before working. Label wires as you go, and keep water and electricity well separated. Take your time, follow manuals closely, and test for leaks or loose wires before full operation.
For someone with a tight budget starting out, which component would you prioritize for higher quality: the filtration units, the solar panel, or the pump? And are there any parts where it’s safe to choose a more affordable option?
If your budget is limited, it’s most important to invest in a high-quality filtration unit, since water safety is paramount. You can opt for a more basic, affordable solar panel and pump to start; just ensure they meet your minimum power and flow needs. Other supporting components like wiring, housings, and connectors can also be safely chosen from budget-friendly options as long as they’re compatible and reliable.
When setting up the wiring harnesses for solar power generation, what are some common pitfalls to avoid to ensure efficient energy transfer and prevent system failures, especially for beginners working on their first project?
When setting up wiring harnesses, make sure to use the correct wire gauge for your system’s voltage and current to avoid overheating or voltage drops. Double-check all connections, especially polarity, and use proper connectors rather than twisting wires together. Secure wires to prevent movement and abrasion, and avoid running them where they could get wet or damaged. Lastly, add fuses or breakers for safety and label everything clearly to simplify troubleshooting later.
What’s the most common issue people run into when assembling their own solar-powered water filtration? Are there specific steps or components that come up as trouble spots for beginners?
One of the most common issues beginners face is wiring the solar panels correctly and ensuring all electrical connections are safe and secure. Many people also run into trouble with choosing the right pump that matches both the solar power output and the filtration system’s requirements. Double-checking panel orientation for optimal sunlight and carefully following instructions for each component can help avoid these common trouble spots.
You mentioned batteries are optional in the solar power generation section. In what situations would batteries be absolutely necessary versus relying solely on direct solar input for the pump and filters?
Batteries become absolutely necessary when you need your water filtration system to work at night, during cloudy weather, or anytime sunlight isn’t consistently available. If you only plan to run the system during sunny periods and don’t require continuous operation, you can rely solely on direct solar input. For applications needing uninterrupted or scheduled filtering at any hour, batteries are essential to ensure reliable power for the pump and filters.
What kinds of plumbing tools would a beginner need to successfully assemble one of these setups without leaks? Are there any common mistakes first-timers make when connecting the storage tank to the filtration units?
For a beginner, basic plumbing tools like adjustable wrenches, pipe cutters, Teflon tape, and pliers are essential for assembling leak-free connections. A pipe deburring tool helps achieve smoother joins. When connecting the storage tank to filtration units, common mistakes include overtightening fittings (which can crack plastic), failing to use Teflon tape on threaded joints, and not fully seating hoses or pipes. Take your time with each connection, double-check tightness, and run a leak test with water before finalizing the setup.
With rising energy costs, I’m really interested in reducing reliance on the grid. Can you elaborate on how the guide recommends sizing solar panels and batteries if I want the filtration system to run daily for a small office or storefront?
To size solar panels and batteries for daily use in a small office or storefront, the guide suggests first calculating the total daily energy usage of your water filtration system in watt-hours. Once you have that number, choose solar panels that can generate at least that amount on an average day, factoring in local sunlight hours. For batteries, the guide recommends enough capacity to power the system through cloudy periods—typically two to three times your daily energy needs. Adjust these numbers based on your local climate and typical usage patterns.
If I’m just wanting something for emergency use, is it possible to make a very basic version of this system with fewer components, or are all the core parts described necessary for safe drinking water?
You can definitely create a simpler, emergency-use solar-powered water filtration system by focusing on the essentials. At minimum, you’ll need a solar power source, a pump, and a reliable filtration unit (such as a ceramic or carbon filter). While some extra features add convenience and durability, these core parts are necessary to ensure the water is safe to drink. Always make sure the filter is rated for removing bacteria and protozoa.
I’m new to solar projects and was wondering, when you mention using a DC water pump, do you have recommendations for specific types or brands that are both reliable and easy for beginners to install in a basic home setup?
For beginners, look for a submersible 12V DC water pump, as they are user-friendly and commonly used in small solar projects. Brands like ECO-WORTHY and Amarine Made make reliable pumps that are easy to connect with solar panels and basic wiring. Aim for models with clear instructions, simple wiring, and good customer support to help with your first installation.
You mention food-grade water storage tanks—are there specific materials or brands you suggest to avoid issues with leaching or durability over time?
When choosing food-grade water storage tanks, look for materials like high-density polyethylene (HDPE), polypropylene, or stainless steel, as these are resistant to leaching and safe for potable water. Brands such as Norwesco and Snyder are well-known for their durability and compliance with food safety standards. Avoid tanks made from low-quality plastics or those not specifically marked as food-grade to minimize risks of chemical leaching over time.
If I want to set up a portable solar water filtration system for emergency preparedness, are there certain gear choices or compact versions of the essential tools described that you would recommend for easy transport and fast assembly?
For emergency preparedness, look for compact solar panels with USB output, a portable battery pack, and a lightweight, pump-based water filtration kit. Many brands offer all-in-one water filter bottles or gravity-fed systems that pack down small. Quick-connect hoses and collapsible water containers can also speed up assembly and make everything easier to transport. Choose gear designed for backpacking or camping, as these are typically optimized for portability and ease of use.
I understand the guide mentions using a charge controller—are there particular brands or specifications recommended for beginners to avoid electrical issues, or will any generic model work with standard solar panels and pumps?
For beginners, it’s a good idea to choose a charge controller that’s both reliable and easy to use. Look for well-known brands like Renogy or Victron, which offer clear instructions and basic safety features. Make sure the controller’s amperage matches your solar panel and pump setup—most small DIY systems work well with a 10A or 20A controller. Avoid no-name generic models, as they sometimes lack necessary protections against overcharging or short circuits.
How long does it typically take to set up a basic DIY solar-powered filtration system that covers daily potable water needs for a small household, assuming I have most of the tools listed here?
If you already have most of the recommended tools and materials on hand, setting up a basic DIY solar-powered water filtration system for a small household usually takes one to two days. This includes assembling the filtration unit, installing the solar panel, and connecting the system. Allow extra time for testing and making sure everything is sealed properly before regular use.
Could you elaborate on how to safely connect the charge controller, battery, and pump together? I’m comfortable with basic wiring but would appreciate a step-by-step overview to avoid any mistakes during assembly.
Certainly! First, connect the solar panel to the charge controller, ensuring the positive and negative terminals match. Next, connect the charge controller to the battery, again matching polarities. Finally, connect the water pump to the battery, either directly or through the charge controller if it supports load output. Always disconnect the battery while wiring and use fuses on both the positive lines from the panel and battery for extra safety.
I’m curious about the plumbing aspect—are there specific types of food-grade storage tanks or plumbing materials you recommend to ensure water safety and durability for long-term use?
For long-term water safety, it’s best to use storage tanks made from food-grade polyethylene or stainless steel, as these materials resist corrosion and do not leach harmful chemicals. For plumbing, look for PEX tubing, CPVC, or food-grade PVC pipes and fittings, all labeled as NSF-61 certified for potable water. Be sure all seals and gaskets are also rated for drinking water to maintain purity throughout the system.
The article mentions that having the right gear is essential for efficiency. What are some common mistakes DIYers make when selecting components like charge controllers or wiring, and how can I avoid systems that end up underperforming?
DIYers often choose charge controllers that aren’t compatible with their solar panel or battery size, leading to inefficiency or even damage. Undersized wiring is another common issue, causing power loss and overheating. To avoid underperforming systems, always match the charge controller’s voltage and current ratings to your panels and batteries, and use wiring thick enough for the system’s current over the distance needed. Double-check recommended specs and, when in doubt, consult manufacturer guidelines.
I’m curious about the overall budget for setting up a basic solar-powered water filtration system like the one you describe. Is there a significant price difference between assembling it piece by piece versus buying a complete kit, and which route is better for beginners?
For a basic solar-powered water filtration system, you can expect to spend between $200 and $500, depending on the quality and capacity. Assembling the system piece by piece may save money but requires more research and technical skill. Buying a complete kit usually costs a bit more but is much easier for beginners, as it includes compatible parts and detailed instructions. For most newcomers, starting with a kit is the less stressful option.
Are there any budget-friendly options for charge controllers and pumps that still provide reliable performance, or is it generally better to invest in higher-end components for long-term efficiency?
There are definitely budget-friendly charge controllers and pumps that offer reliable performance for small DIY solar water filtration systems. Brands like Renogy and ECO-WORTHY make affordable, well-reviewed charge controllers, while small DC pumps from brands such as Seaflo can be cost-effective and dependable. However, if your system will be running continuously or in demanding conditions, investing in higher-quality components may provide better efficiency and durability over time. It often comes down to balancing your upfront budget with your long-term reliability needs.
When selecting water storage containers for filtered water, are there specific food-grade materials or certifications I should look for to avoid contamination over time?
When choosing water storage containers for filtered water, look for those made from food-grade materials like high-density polyethylene (HDPE), polypropylene, or stainless steel. Containers should be labeled as BPA-free and approved for food or potable water use. Certifications such as NSF/ANSI Standard 61 or FDA approval indicate the materials are safe for long-term water storage and help prevent contamination.
How much time should I realistically budget to assemble and test a full solar-powered filtration setup for a small commercial location? I want to minimize downtime, so any advice on typical installation challenges would be helpful.
For a small commercial location, assembling and testing a full solar-powered filtration system typically takes 2 to 3 days if you have all the necessary tools and parts on hand. Common challenges include securing mounting hardware for solar panels, ensuring a proper water-tight seal in plumbing, and correctly wiring the power system. Test each component individually as you go to catch issues early and minimize downtime. Having extra connectors and sealant available can help avoid delays from unexpected leaks or wiring adjustments.
When sizing the solar panels and battery bank for a home water filtration setup, is there a general rule of thumb you use to balance cost and reliability, especially for regions with frequent cloudy days?
A useful rule of thumb is to size your solar panels and battery bank about 25–50% larger than your estimated daily energy needs, especially in areas with frequent cloudy days. This extra capacity helps maintain reliability when sunlight is limited. Start by calculating your filtration system’s daily watt-hour usage, then factor in your region’s typical sunlight hours and add buffer for cloudy weather. Oversizing a bit may cost more upfront, but it reduces the risk of system downtime.
When it comes to connecting the DC water pump to the solar panels, do I need any special wiring harnesses or connectors, or will standard ones from a hardware store work? I’m hoping to avoid any power losses or potential safety issues.
You can use standard wiring and connectors from a hardware store, but make sure they are rated for the voltage and current your pump and solar panels will handle. Look for weatherproof connectors if your setup is outdoors. Using thicker gauge wire can help minimize power losses. Double-check all connections are secure and insulated to avoid safety issues.
How much should someone reasonably expect to spend on essential gear like solar panels, charge controllers, and pumps if they’re building a filtration system for a small garden or off-grid cabin?
For a small garden or off-grid cabin setup, you can expect to spend around $150 to $400 for a quality solar panel, $30 to $80 for a basic charge controller, and between $50 to $200 for a reliable DC water pump. In total, budgeting about $250 to $700 for these essentials is reasonable, depending on your specific needs and brand preferences.
If a DIYer runs into problems with inconsistent water pressure after assembling the solar-powered system, what troubleshooting steps do you recommend for figuring out if it’s a pump sizing issue or something related to the plumbing setup?
To troubleshoot inconsistent water pressure, start by checking for leaks, loose fittings, or blockages in the plumbing lines. Next, compare the pump’s flow rate and pressure specs to your system’s demands—if the pump is undersized, it may struggle to maintain steady pressure. Also, ensure that the solar panel is providing enough power for the pump. Stepwise, address plumbing issues first, then assess pump sizing.
When it comes to the solar panel setup, do I really need a battery if I only plan to run my water filtration system during the day, or can I skip that component for a smaller project?
If you’re only planning to run your water filtration system when the sun is shining, you can often skip the battery for a smaller DIY solar setup. The solar panel will directly power your system as long as there’s enough sunlight. Just keep in mind that fluctuations in sun (like passing clouds) could affect performance, and without a battery, your system won’t work at night or on very cloudy days.
For the filtration units, is there a significant advantage to using UV sterilizers in a DIY setup, or are multi-stage filters with activated carbon and ceramic elements usually enough for most off-grid applications?
UV sterilizers add an extra layer of protection by neutralizing bacteria and viruses that might slip through physical filters. For most off-grid DIY setups, multi-stage filters with activated carbon and ceramic elements are generally sufficient, especially if your water source is relatively clean. However, if you’re concerned about microbial contamination, especially from surface water, adding a UV sterilizer can increase safety and peace of mind.
From your overview, it seems like there are several types of filtration units to choose from. How do you determine which type—like ceramic versus UV sterilizers—makes the most sense if I’m filtering rainwater for an outdoor café garden?
For filtering rainwater for an outdoor café garden, consider your main concerns—removing particles, bacteria, or viruses. Ceramic filters are great for removing sediment and most bacteria, making them ideal if the water looks cloudy. If you want extra protection against viruses and bacteria, adding a UV sterilizer after the ceramic filter is a good choice. Using both together gives you cleaner and safer water for garden use.
You mention several types of filtration units like sediment pre-filters, activated carbon, and optional UV sterilizers. In your experience, what is the best order to arrange these filters for optimizing both taste and safety of potable water?
For the best results in both taste and safety, arrange your filters in this order: first, use a sediment pre-filter to remove dirt and large particles. Next, install the activated carbon filter to improve taste and remove chemicals or odors. Finally, place the UV sterilizer last, since it works best on clear water and will eliminate any remaining bacteria or viruses before the water is ready to drink.
From a budget perspective, which tools or components are absolutely essential for someone starting from scratch, versus what could be considered nice-to-have upgrades for the system?
For a basic DIY solar-powered water filtration setup, you’ll need core essentials: a solar panel, charge controller, battery, water pump, basic filtration unit (like a ceramic or carbon filter), wiring, and basic hand tools (pliers, screwdriver, wire stripper). Items like advanced filters, digital monitors, automated flow controls, or backup batteries are useful upgrades but aren’t strictly necessary when starting out on a budget.
What safety gear is absolutely essential during installation, especially when handling solar panels and electrical wiring? I want to make sure my employees are properly protected while we put this together.
When installing solar-powered water filtration systems, make sure everyone wears insulated gloves to prevent electrical shocks, safety glasses to protect from flying debris, and a hard hat if working under or around mounted panels. Non-slip, closed-toe shoes are important for stability, while flame-retardant clothing adds extra protection during electrical work. If working at heights or on a roof, use a safety harness. Always use properly rated tools and avoid working on live circuits whenever possible.
You mention a variety of filtration units such as ceramic filters and UV sterilizers. What are the main considerations when deciding which combination is best for treating different types of water sources?
Choosing the right combination depends on the specific contaminants in your water source. For example, ceramic filters are very effective at removing sediments and bacteria, while UV sterilizers are great for inactivating viruses and microbes but require clear water to work well. If your source is muddy or contains a lot of particles, start with a pre-filter or ceramic unit. For water from lakes or rivers that may contain pathogens, combining a ceramic filter with a UV sterilizer offers broader protection.
If I encounter reduced flow or lower filtration efficiency after setting up my system, what troubleshooting steps do you recommend? Are there specific meters or diagnostic tools you suggest for identifying issues in these solar setups?
If you notice reduced flow or lower filtration efficiency, first check for clogged filters or debris in the intake. Inspect all connections for leaks or blockages. For diagnostics, a flow meter helps monitor water output, while a pressure gauge can detect drops in system pressure. A multimeter is useful to check if your solar panels and pump are delivering proper voltage and current. Cleaning or replacing filters and ensuring your solar panels receive adequate sunlight can also help restore performance.
I noticed storage uses food-grade tanks after filtration. Are there specific brands or materials you recommend for long-term water storage in outdoor environments to prevent algae or contamination?
For long-term outdoor water storage, high-density polyethylene (HDPE) food-grade tanks are widely recommended since they’re durable and safe. Look for tanks labeled NSF or FDA-approved for potable water. Dark-colored tanks, like black or blue, help block sunlight, reducing algae growth. Brands such as Norwesco and Ace Roto-Mold are well-regarded for their quality and reliability in outdoor settings.
The guide mentions both DC water pumps and optional batteries. In an off-grid scenario, would you recommend always including a battery for reliability, or can a pump run directly off solar panels during daylight hours?
In an off-grid setup, a battery is highly recommended for reliability. While a DC water pump can run directly from solar panels during daylight, its performance will vary with sunlight conditions. A battery stores excess energy, allowing you to run the pump consistently even during cloudy periods or at night. This ensures a steady water supply regardless of weather or time of day.
Once the solar water system is assembled, how often do you recommend checking or replacing filters and other components to keep things running smoothly? Are there warning signs to look for that something’s not working properly?
For most DIY solar-powered water filtration systems, it’s a good idea to check filters every 1 to 3 months, depending on water quality and usage. Filters typically need replacing every 6 to 12 months, but watch for signs like reduced water flow, unpleasant taste or odor, or visible dirt in the filter. Also, inspect solar panels and connections regularly to ensure efficient power supply. If you notice cloudy water or leaks, it’s time for maintenance or part replacement.
If I want to adapt this setup for emergency preparedness, are there faster assembly or modular options for the main components so it can be deployed quickly when needed?
For emergency preparedness, consider using modular water filtration kits that feature quick-connect hoses and snap-fit panels. Portable folding solar panels and all-in-one pump-filter units can also help with rapid setup. Store pre-assembled hose connections and test the system periodically to ensure it can be deployed quickly when needed.
If I want to set up a basic solar-powered water filtration system mainly for emergency use, which core filtration units would you prioritize to keep costs down without compromising essential water safety?
For a reliable yet budget-friendly emergency setup, prioritize a high-quality sediment pre-filter to remove larger particles, followed by an activated carbon filter to address chemicals and odors. To ensure safe drinking water, add a ceramic or hollow fiber microfilter for bacteria and protozoa removal, or consider a UV purification unit for added protection against viruses. These components offer essential safety while keeping costs manageable.
When choosing food-grade water storage tanks for the filtered water, are there certain materials or brands you recommend that balance safety and price for a home DIY system?
For home DIY solar-powered water filtration, high-density polyethylene (HDPE) and polypropylene tanks are popular food-grade choices, as they are durable, non-leaching, and generally affordable. Look for certifications like NSF or FDA approval to ensure safety. Brands like Norwesco and Ace Roto-Mold are well-regarded for quality and price. Always check that the tank is specifically labeled as food-safe and suitable for potable water storage.
When assembling the solar panels and DC water pump, are there common compatibility issues that DIYers need to watch out for, especially with matching voltage and current requirements? Any recommendations for sizing the solar setup to reliably run the filtration units?
Yes, matching the voltage and current between your solar panels and DC water pump is crucial. The solar panel’s output voltage should closely match the pump’s rated voltage—using a panel with too high or too low voltage can damage the pump or result in unreliable performance. For current, make sure the panel can supply at least the pump’s required amperage. As a guide, choose solar panels whose wattage is at least 20-30% higher than the pump’s power rating to account for inefficiencies and cloudy days.
You mention using food-grade tanks for water storage. Are there particular materials or certifications to look for to ensure long-term safety and to prevent issues like leaching or algae growth in off-grid situations?
For long-term water storage, look for tanks made from food-grade polyethylene or stainless steel, as these materials are resistant to leaching. Certifications like NSF/ANSI Standard 61 indicate the tank is safe for drinking water. To prevent algae growth, choose opaque tanks that block sunlight and keep them covered or shaded. This will help maintain water quality in off-grid conditions.
I’m curious about maintenance over time—what are some key things to watch for to make sure the filtration units and solar components keep working efficiently, especially if the system is used for daily drinking water?
To keep your solar-powered water filtration system running efficiently for daily drinking water, regularly clean or replace filters as they can clog over time. Check all seals and connections for leaks. For the solar components, clean the panels periodically to remove dust and debris, and ensure wiring and connections are secure and free of corrosion. Monitor system performance to catch drops in water quality or power output early.
I’m a bit unsure about plumbing connections in these systems—are there particular types of fittings or materials that work best to avoid leaks and contamination, especially if you plan to store filtered water long term?
For plumbing connections in DIY solar-powered water filtration, use food-grade PVC or polyethylene pipes and fittings, as they’re safe for storing potable water. Opt for threaded or compression fittings, which provide secure seals and are less prone to leaks. Make sure to use PTFE (Teflon) tape on threaded joints for extra leak protection. Avoid metal fittings, which can corrode and contaminate water over time. Regularly inspect and tighten all connections to maintain a contaminant-free and leak-proof setup.
Could you elaborate on how to size the right solar panel and charge controller for a DIY water filtration setup? I’m not sure how to match my energy needs to my filtration system components, especially if I want to add a UV sterilizer.
To size your solar panel and charge controller, start by totaling the wattage of all your system components, including the pump and UV sterilizer, then multiply by the hours they’ll run each day to get daily watt-hours. Divide this by average daily sunlight hours in your area to estimate solar panel size. For the charge controller, choose one rated for your panel’s output and battery bank voltage, with some margin for safety. Oversizing slightly is wise if you plan to add more features later.
You mentioned that having the right tools impacts reliability and cost. Are there any specific budget-friendly brands or alternatives you recommend for essential gear like charge controllers and DC water pumps for first-time builders?
For first-time builders on a budget, brands like Renogy and EPEVER offer reliable yet affordable charge controllers. For DC water pumps, look into brands such as ECO-WORTHY and SHURflo, which are widely used for small DIY solar projects. These options balance quality and cost, making them suitable for beginners without compromising system reliability.
I’m interested in setting up a solar-powered water filtration system at my cabin, but I’m not sure how to choose between different types of filtration units, like activated carbon versus ceramic filters. Is there a situation where one is better than the other, or is it better to use both together?
Activated carbon filters are excellent for removing chemicals, odors, and tastes from water, while ceramic filters are great at physically blocking bacteria and sediments. If your water source is likely to have chemical contaminants, carbon is ideal. For untreated natural water, ceramic is a strong choice. Many people use both in tandem to maximize safety and effectiveness, since they complement each other well.
How long does it typically take to install a complete solar-powered water filtration system using the tools and equipment listed in your guide? I’m wondering if this is a weekend project or something that takes considerably longer for a beginner.
For most beginners, installing a complete solar-powered water filtration system with the tools and equipment from the guide can usually be done over a weekend, especially if you have some basic DIY experience. Expect around 8 to 12 hours, which includes assembling the filtration unit, setting up the solar panel, running wiring, and testing the system. If you run into any unexpected issues or need to troubleshoot, it may stretch into a second day.
For someone setting up a filtration system mainly for emergency preparedness, how long does it realistically take to assemble and test one from scratch, assuming I use the tools and equipment you mention?
If you have all the recommended tools and components ready, assembling a DIY solar-powered water filtration system for emergency use typically takes four to eight hours. This timeframe includes putting together the solar panel setup, connecting filtration parts, and testing the system for leaks and output. Beginners may need a bit longer, especially when double-checking connections and ensuring everything works safely.
What would you estimate as the rough upfront cost for all the necessary tools and equipment to set up a basic but reliable system? I’d like to avoid surprises with hidden expenses as I plan my budget.
For a basic but reliable DIY solar-powered water filtration system, you can expect upfront costs to range from $300 to $700, depending on the quality of materials. This includes solar panels, batteries, a pump, filtration units, tubing, fittings, and basic tools. Be sure to factor in extras like connectors, wiring, mounting hardware, and possibly a charge controller to avoid unexpected expenses.
You mention optional UV sterilizers in the filtration units. Are there specific brands or features you would recommend for UV sterilizers that work reliably with solar-powered setups, especially in off-grid situations?
For solar-powered, off-grid water filtration, look for UV sterilizers rated for low-voltage DC operation, ideally 12V or 24V. Brands like Sterilight and VIQUA have compact, DC-compatible models often used in remote or mobile setups. Prioritize units with low power consumption, durable quartz sleeves, and easy bulb replacement. Always check that your solar system can supply the required wattage and consider a battery backup to keep sterilization consistent even when sunlight is limited.
About the filtration units—how do I know which type is best for my tap water versus water from a nearby creek? You mentioned sediment, carbon, and ceramic filters, but I’m not sure how to choose between them.
To choose the right filter, think about the source. For tap water, a carbon filter is usually enough since it targets chemicals, chlorine, and odors. For creek or surface water, start with a sediment filter to remove dirt and particles, then use a ceramic filter for bacteria and protozoa. If you want extra protection, you can combine them or add a carbon filter to improve taste and remove any remaining contaminants.
I noticed the article lists multiple filter types, like ceramic and activated carbon. Is it necessary to use all these filters together, or can you build an effective system using only one or two for less complex water sources?
You don’t always need to use every type of filter together. For less complex or relatively clean water sources, combining just one or two filters—like a ceramic filter for removing sediments and bacteria, or an activated carbon filter for improving taste and removing chemicals—can be effective. The best choice depends on the specific contaminants you expect in your water. Tailor your system to match your water quality and filtration needs.
When setting up a solar-powered water filtration system for an off-grid cabin, how do you determine the right size for solar panels and batteries to make sure the pump and filters work reliably, especially on cloudy days?
To determine the right size for your solar panels and batteries, start by adding up the wattage of your water pump and filtration system, then estimate how many hours a day they’ll run. Multiply wattage by hours to get daily energy needs in watt-hours. Choose solar panels that generate at least this amount, factoring in reduced sunlight on cloudy days (usually add 25–50% extra). For batteries, ensure enough storage for at least one or two days of use without sun. This ensures reliable operation even in less-than-ideal weather.
When putting together the solar power generation part, are there any specific wiring harnesses or connectors you recommend for someone with minimal electrical experience? I want to make sure I don’t cause any safety issues or inefficiencies, especially since this will be my first time working with solar panels.
For beginners, it’s best to use MC4 connectors when working with solar panels. They are designed for easy, secure plug-and-play connections and are standard in most solar setups. Look for pre-made MC4 wiring harnesses, which reduce the risk of wiring errors and improve safety. Also, always check that your connectors and wires are rated for the panel’s voltage and current. If you’re unsure, starter kits often come with everything you need, including clear instructions.
After reading about the need for charge controllers and batteries, I’m wondering if a battery backup is truly essential for a community garden setup, or if going battery-less is feasible for daytime-only filtration. Any insights on pros and cons?
A battery backup isn’t strictly essential if your filtration needs are limited to sunny daytime hours, since the solar panels can power the system directly. However, without batteries, filtration will stop during cloudy weather or at night. Batteries add cost and maintenance, but ensure consistent operation regardless of sunlight. For a community garden that can tolerate occasional downtime, a battery-less setup is feasible, but batteries offer valuable reliability if around-the-clock filtration is important.
When budgeting for a DIY solar-powered water filtration system, where do most people end up spending the most money—the solar panels, the filtration units, or plumbing components? Any tips on where it makes sense to invest more versus where it’s safe to economize?
Most people find that the biggest portion of their budget goes to the solar panels and the filtration units, with solar panels often being the largest single expense. Filtration units can also be costly, especially for multi-stage or high-capacity systems. It’s wise to invest in quality filtration and reliable solar panels, since these directly affect system performance and water safety. Plumbing components, like pipes and fittings, usually cost less, so it’s often safe to economize there as long as they’re durable and appropriate for your setup.
When setting up the solar power generation part, is it better to use a battery backup or just connect the panels directly to the pump and filtration units if I only need water during the day? I’m trying to understand if batteries are necessary for reliability.
If you only need water during the day and your water demand matches sunlight hours, you can connect the solar panels directly to your pump and filtration units. This setup is simpler and less expensive since you skip batteries. However, batteries add reliability by storing power for cloudy days, sudden shading, or later afternoon needs. If daytime sunlight is consistent, batteries aren’t strictly necessary, but they do provide an extra layer of dependability.
In your guide, you mention the importance of selecting the right solar panels and charge controllers, but could you provide more detail about how to size these components correctly for a small-scale system meant for a family of four?
To size solar panels and charge controllers for a family of four, first estimate your daily water needs and the power requirements of your filtration system. For example, if your system runs a 12V pump that uses 60 watts and operates for 2 hours a day, you’ll need 120 watt-hours per day. Select panels that can supply this energy even on cloudy days—generally, a 100-150W solar panel is sufficient. For charge controllers, choose one rated for the panel’s maximum current output and voltage, slightly above your panel’s specs for safety.
If I want to set up a filtration system mainly for emergency preparedness, what would be the minimum set of tools and filtration components I’d need to start with?
For emergency preparedness, you can keep things simple but effective. At minimum, you’ll need a portable solar panel, a small water pump, basic tubing, and a compact filtration unit such as a ceramic or carbon filter. Also include connectors, a pre-filter (like a mesh or cloth), and a clean container for filtered water. With these basics, you’ll be ready to filter water reliably during emergencies.
How often would the filters and other maintenance-sensitive parts typically need to be replaced in a DIY setup like this, and are there particular brands or types that hold up better in off-grid use?
For most DIY solar-powered water filtration systems, sediment and carbon filters typically need replacing every 6 to 12 months, depending on usage and water quality. Membrane filters (like in reverse osmosis) might last 2–3 years. In off-grid setups, robust brands such as Sawyer and Katadyn are popular for their durability and ease of maintenance. Regularly check seals, pumps, and solar components too, as dust and wear can impact performance.
How do I determine the appropriate size of solar panel and battery for a system intended to provide daily potable water for a small household? Are there any simple formulas or guidelines you can share?
To size your solar panel and battery, first estimate your daily water filtration system’s energy use in watt-hours (system power in watts × hours used per day). Choose a solar panel that can generate at least this amount, factoring in local sunlight hours (divide total watt-hours by average sun hours per day). For the battery, multiply your daily watt-hour need by the number of days of backup you want, then divide by your battery voltage. Always add a safety margin of 20–30% for inefficiencies and cloudy days.
For someone looking to set up a solar-powered filtration system for a small cabin, how do you recommend sizing the solar panel and battery setup to reliably run a DC pump and multi-stage filters?
To size your solar panel and battery system, first check the power rating (watts) of your DC pump and any electronic components in your filtration system. Estimate the total daily run time to calculate daily energy use (watts x hours). Add about 25% extra to cover inefficiencies. Choose a solar panel that provides this daily energy in your location’s average sunlight hours. For batteries, size them to store at least one to two days’ worth of energy, using deep-cycle batteries for best results. This ensures reliable operation even with cloudy weather.
I’m concerned about costs. Are there budget-friendly options for charge controllers and filters that still maintain safe drinking water standards for a small team?
Absolutely, there are budget-friendly choices that don’t compromise on safety. For charge controllers, PWM controllers are generally less expensive than MPPT and can be suitable for small setups. For filters, look for NSF-certified gravity-fed or ceramic filters, which are both affordable and effective. Pairing these with pre-filtration (such as a simple sediment filter) can help extend filter life and maintain water safety for your team.
Once the system is set up, how much routine maintenance is typically needed for the filtration units and solar components to keep things running smoothly over several years? Any tips for making upkeep easier?
Routine maintenance for a DIY solar-powered water filtration system mainly involves cleaning or replacing filters every few months, checking for clogs, and inspecting hoses and connections for leaks. The solar components benefit from wiping dust off panels monthly and checking electrical connections annually. To make upkeep easier, keep a maintenance log and store replacement filters and basic tools nearby. Regular checks help catch small issues before they become bigger problems.
I noticed plumbing tools are mentioned as essential—could you provide more detail on what type of meters or specific plumbing tools are most useful for first-time installers?
For first-time installers, useful plumbing tools include pipe cutters, adjustable wrenches, Teflon tape, and a pipe deburring tool. When it comes to meters, a basic water pressure gauge is important to monitor system performance and prevent leaks. You might also find a flow meter helpful for tracking water output. These tools make the installation process smoother and help ensure a secure, leak-free system.
How much time should I realistically set aside to assemble a complete solar-powered water filtration setup for a small household? Does it usually take a weekend, or is this something that could stretch over several weeks for a first-timer?
For most first-timers, assembling a solar-powered water filtration system for a small household typically takes a weekend if you have all the parts and tools ready. Expect to spend about 8–12 hours in total, often split across two days. If you need to research, gather materials, or handle unexpected issues, it may extend into the following week, but it’s rarely a multi-week project unless you’re customizing or troubleshooting extensively.
Is a UV sterilizer necessary if I’m already using multiple types of mechanical and carbon filters in my DIY system, or is that just for extra peace of mind? I’m trying to balance cost and safety.
A UV sterilizer isn’t strictly necessary if you’re already using good mechanical and carbon filters, but it does add an extra layer of protection. Mechanical and carbon filters remove particles and many contaminants, but UV sterilizers specifically target bacteria, viruses, and other microorganisms that filters might miss. If your water source is questionable or you want to ensure maximum safety, a UV sterilizer is a worthwhile investment.
Can you recommend specific types of water pumps that are efficient when running off solar panels? I’m a bit confused about how to match the pump’s voltage and flow rate with my solar setup to avoid underpowering or overloading the pump.
For solar-powered water filtration, DC pumps are usually more efficient than AC types. Look for 12V or 24V DC submersible or surface pumps, such as brushless models designed for solar use. To match your pump, first check your solar panel’s voltage and wattage output. The pump’s voltage should match the panel’s, and the panel wattage should exceed the pump’s rated power by about 20% to ensure reliable operation. Choose a pump with a flow rate and head (lift) that meets your filtration needs.
I’m a little confused about the role of batteries in these setups. Are they always necessary, or can a DIY system work in real time with just the solar panels and no battery storage?
Batteries aren’t always necessary, but they are helpful. If your DIY solar-powered water filtration system only needs to run during sunny hours, you can connect it directly to the solar panels and skip batteries. However, if you want the system to work at night or during cloudy weather, batteries are needed to store extra energy for later use.
When assembling a DIY solar water filtration system, are there certain plumbing tools or safety gear that are frequently overlooked but make a significant difference in efficiency or long-term reliability?
Absolutely—some lesser-known tools and safety gear can really help. For plumbing, pipe deburring tools and Teflon tape are often overlooked but they ensure leak-free, secure connections. Adjustable wrenches sized for your specific fittings save a lot of time. For safety, gloves and eye protection are key, especially when working with sharp piping or sealants. A voltage tester is also useful if you’re connecting solar components, to ensure safe installation.
I’m just starting out and wondered, when connecting the solar panels to a DC pump, are there certain wiring harnesses or connectors you recommend for beginners to make sure everything is safe and reliable?
For beginners, pre-made MC4 connectors and compatible wiring harnesses are very helpful. MC4 connectors are standard for solar panels—they’re secure, waterproof, and easy to click together. Many kits also include extension cables with MC4 ends. For connecting to a DC pump, use appropriately rated wire and insulated spade or ring terminals, plus an in-line fuse for safety. Always check voltage and current ratings to match your specific setup.
The article mentions using sediment pre-filters and optional UV sterilizers. Is it possible to build an effective system without the UV sterilizer, or would that compromise water safety for everyday household use?
You can build an effective basic filtration system with just sediment pre-filters, which remove particles like dirt and sand. However, skipping the UV sterilizer means the system won’t eliminate bacteria, viruses, or other microorganisms. For everyday household use, especially if the water source has biological contaminants, a UV sterilizer or another disinfection step is strongly recommended to ensure water safety.