
Introduction: Harnessing Solar Power for Sustainable Hot Water
With energy costs rising and the urgent need to reduce our carbon footprint, many homeowners are turning to solar water heating systems as a reliable, sustainable solution. Unlike solar photovoltaic panels that generate electricity, solar water heating systems use the sun’s energy to heat water directly, providing eco-friendly hot water for showers, washing, and household needs. Setting up such a system is within reach for many DIY enthusiasts, but success relies on having the right tools and equipment at your disposal. This comprehensive guide will walk you through everything you need to know about the essential gear, from selecting the best solar collectors to the smallest plumbing accessory. Whether you’re planning a full-scale installation or a simple upgrade, understanding the necessary tools and materials will help you avoid costly mistakes, ensure safety, and maximize your long-term savings. Let’s dive into the nuts and bolts of creating an efficient, sustainable solar water heating system for your home.
Understanding Solar Water Heating: System Types and Key Components
Active vs. Passive Systems
Before assembling your toolkit, it’s important to know what type of solar water heating system you’ll be working with. There are two main types:
- Active Systems: Use pumps or controllers to circulate water or heating fluid between collectors and the storage tank. More complex but often more efficient in colder climates.
- Passive Systems: Rely on natural convection (thermosiphon) to move water. Simpler, with fewer moving parts, but best for frost-free regions.
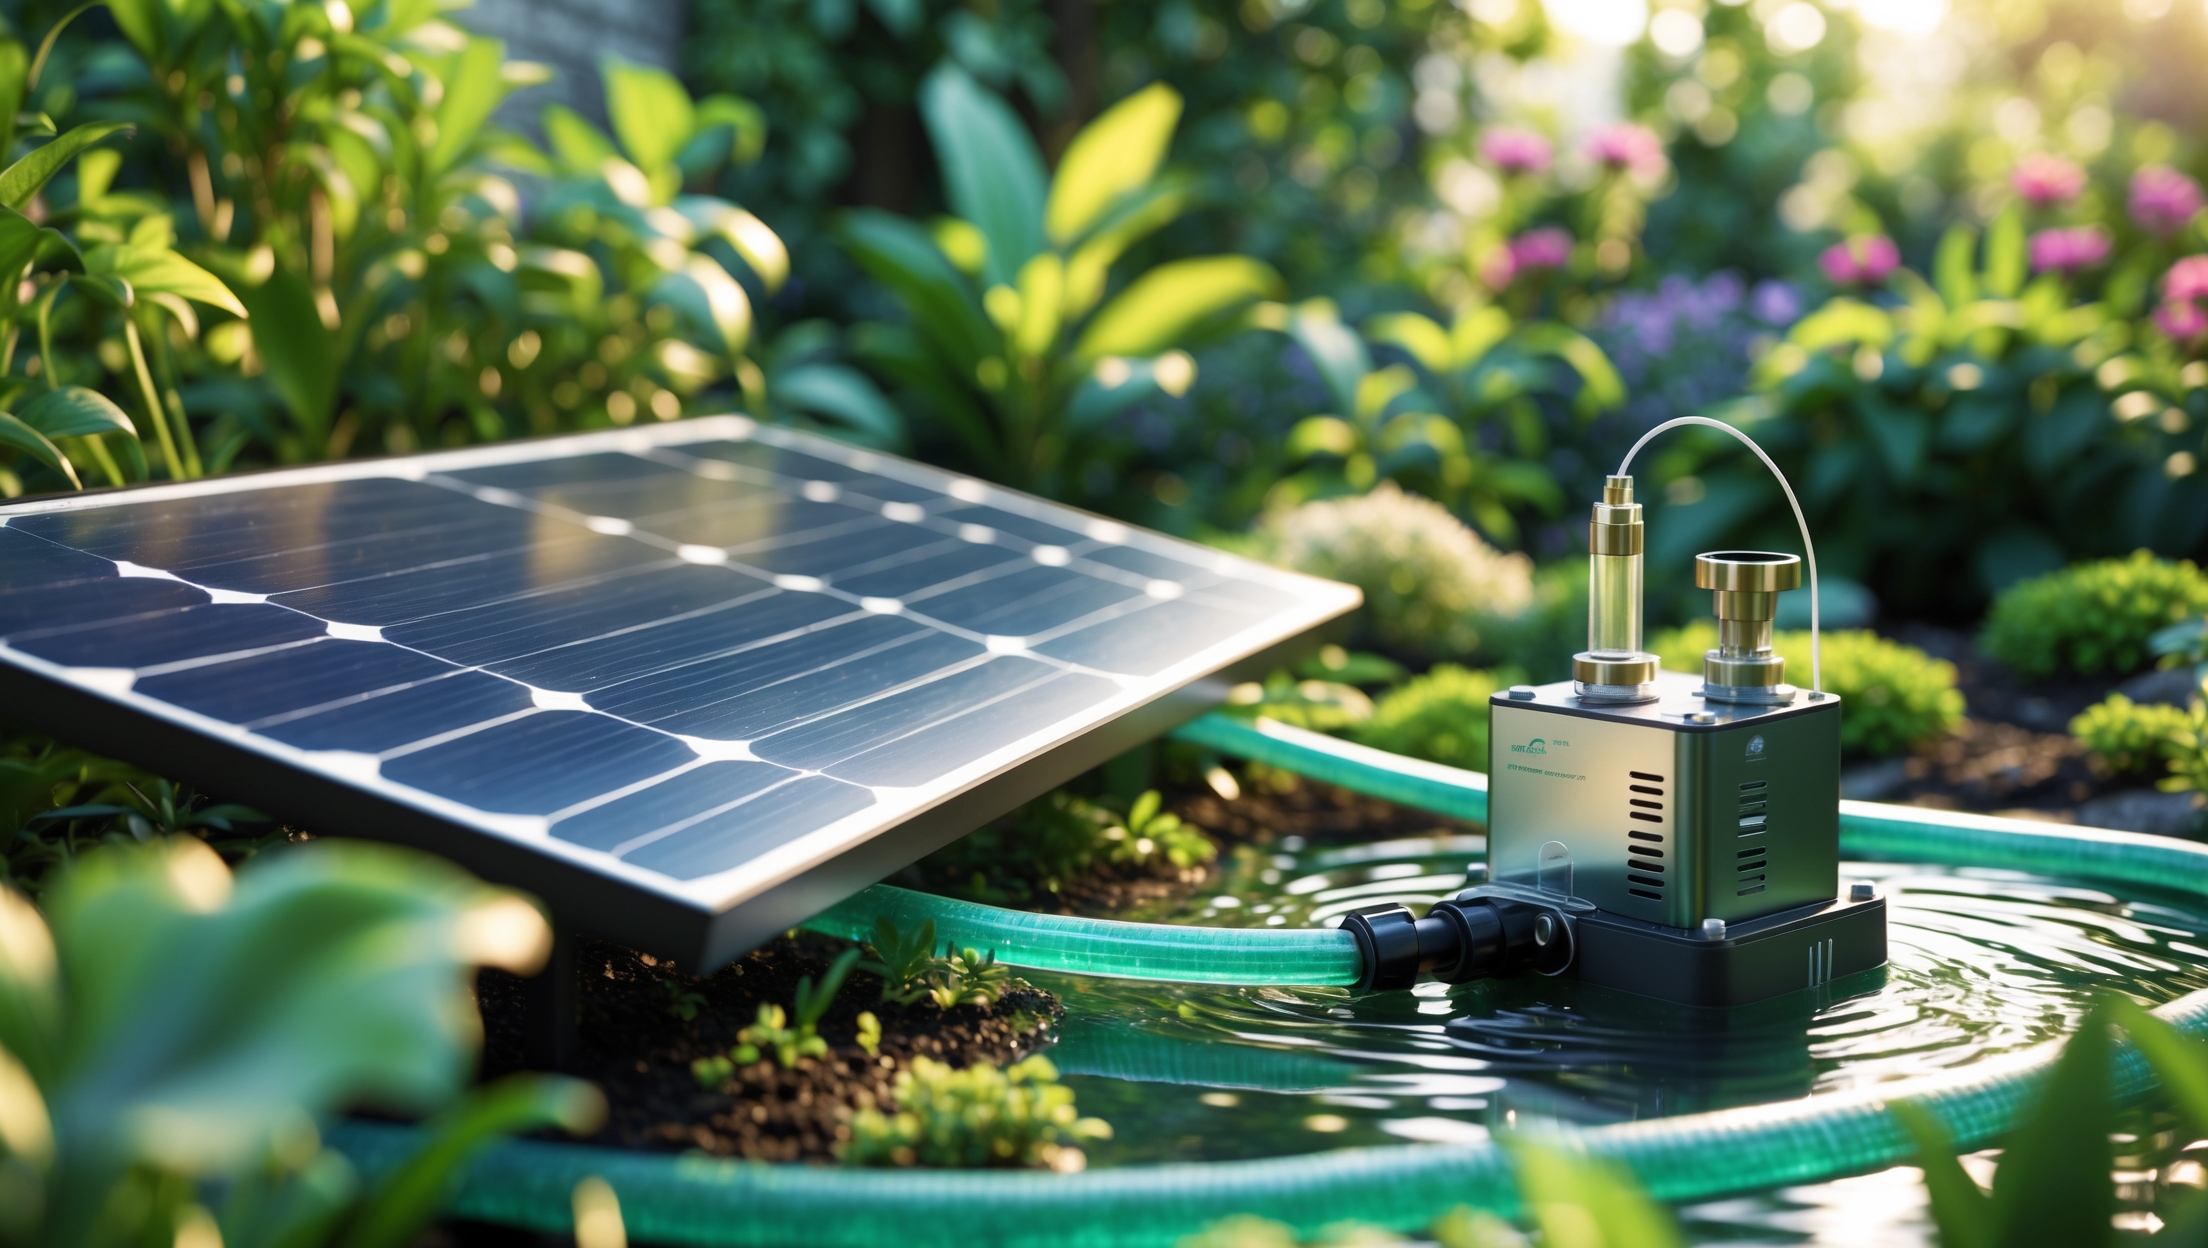
Core Components of a Solar Water Heating System
- Solar Collectors: Flat-plate or evacuated tube panels that absorb solar energy to heat water or a heat-transfer fluid.
- Storage Tank: Insulated tank for storing hot water.
- Piping and Plumbing: Copper or PEX pipes to transport water or fluid.
- Pumps and Controllers (Active systems): Circulate water or fluid and manage system operation.
- Heat Exchanger (Indirect systems): Transfers heat from antifreeze fluid to potable water.
- Valves, Sensors, and Insulation: Ensure safe, efficient operation.
Essential Tools for Solar Water Heating Installation
Hand Tools: The Installer’s Foundation
- Adjustable Wrenches: For tightening pipe fittings and securing hardware.
- Pipe Wrenches: Essential for working with metal piping.
- Tubing Cutter: For precise cuts in copper or PEX piping.
- Pipe Bender: Useful for routing copper pipes without kinking.
- Screwdrivers (Flathead and Phillips): Assembling brackets, mounting hardware, and electrical connections.
- Drill/Driver and Bits: Mounting collectors and brackets to the roof or walls.
- Level: Ensuring correct collector tilt for optimal sunlight exposure and safe water flow.
- Measuring Tape: Accurately measuring pipe runs and system layout.
- Utility Knife: Cutting insulation and packaging materials.
- Hacksaw: For cutting metal brackets or pipes when necessary.
Plumbing Tools and Accessories
- Pipe Threader and Dies: For adding threads to cut pipes, especially in custom installations.
- Pipe Flaring Tool: For creating leak-proof connections in copper tubing.
- PEX Crimp Tool: Required if using PEX piping for water lines.
- Channel Lock Pliers: For gripping and turning large nuts or fittings.
- Plumber’s Torch: For soldering copper pipe joints.
- Deburring Tool: Smoothing cut pipe edges to prevent leaks.
- Pipe Wrenches (Various Sizes): For assembling and disassembling pipework.
- Teflon Tape and Pipe Dope: Sealing threaded connections to prevent leaks.
Electrical Tools (For Active Systems)
- Multimeter: Testing voltage, current, and continuity in pumps, sensors, and controllers.
- Wire Stripper/Cutter: For preparing electrical connections.
- Crimping Tool: Securing wire connectors.
- Voltage Tester: Ensuring circuits are de-energized before working.
- Cordless Drill: For installing sensors and running wiring through walls or roofs.
Safety Equipment
- Protective Gloves: For handling sharp metal, hot pipes, and chemicals.
- Safety Glasses: Preventing eye injury during cutting, drilling, or soldering.
- Roof Harness and Fall Protection: Critical when installing collectors on sloped roofs.
- Work Boots with Grip: For safe movement on rooftops.
- Fire Extinguisher: Especially important when soldering or using torches.
Materials and Equipment: What You’ll Need for a Typical Installation
Solar Collectors
- Flat-Plate Collectors: Durable, cost-effective, and suitable for most climates.
- Evacuated Tube Collectors: More efficient in cold or cloudy conditions; higher upfront cost.
Mounting Hardware
- Mounting Brackets and Rails: Designed specifically for your chosen collector and roof type.
- Roof Flashing and Sealant: Prevents leaks around mounting penetrations.
- Stainless Steel Fasteners: Resist corrosion for long-term durability.
Storage Tank and Accessories
- Solar Hot Water Storage Tank: Heavily insulated, often with an internal heat exchanger.
- Backup Heating Element: Electric or gas for supplemental heating on cloudy days (optional).
- Temperature and Pressure Relief Valve: Essential for safety.
- Expansion Tank: Accommodates water volume changes as it heats and cools.
Piping and Insulation
- Copper or PEX Pipe: Copper is durable and heat-resistant; PEX is flexible and easier to work with.
- Pipe Insulation (UV-resistant): Prevents heat loss and protects pipes from the elements.
- Pipe Hangers and Supports: Secure piping along walls and ceilings.
Pumps, Controllers, and Sensors (Active Systems)
- Circulation Pump: Moves water or heat-transfer fluid through the system.
- Solar Controller: Monitors temperature sensors and operates the pump automatically.
- Temperature Sensors: Placed on collectors and at the tank for accurate system control.
- Flow Meter (optional): Monitors system performance and detects problems early.
Valves and Fittings
- Ball Valves: For isolating parts of the system during maintenance.
- Check Valves: Prevents reverse flow at night or during cold weather.
- Drain Valves: For seasonal draining or maintenance.
- Unions and Flexible Connectors: Allow for easy disassembly and repairs.
Heat Exchanger (For Indirect Systems)
- Brazed Plate or Coil Heat Exchanger: Transfers heat from a closed loop (using antifreeze) to potable water.
- Non-toxic Propylene Glycol Antifreeze: For freeze protection in cold climates.
Miscellaneous Supplies
- Silicone Caulk or Roof Sealant: Sealing roof penetrations and weatherproofing.
- Pipe Clamps and Straps: Secure piping and prevent vibration.
- Pipe Insulation Tape: Additional thermal protection.
- Labeling Tape: Marking pipes for future maintenance.
Choosing Quality Tools and Equipment: Avoiding False Economies
Why Investing in Quality Matters
While it’s tempting to save money on tools and materials, inferior products can lead to leaks, failures, and costly repairs down the road. Here’s why quality counts:
- Durability: Solar collectors, tanks, and piping face years of outdoor exposure. Cheap or poorly-made parts will deteriorate quickly.
- Efficiency: High-quality collectors and pumps ensure you get the maximum heat from every ray of sunshine.
- Safety: Certified components reduce the risk of dangerous failures, leaks, or fires.
Look for products with independent certifications (SRCC, Solar Keymark, CSA), strong warranties, and good user reviews. When buying tools, choose reputable brands—especially for plumbing and electrical work. A reliable pipe cutter or soldering torch can make or break your installation experience.
Specialized Tools for Advanced Installations
- Thermal Imaging Camera: Identify insulation gaps and verify system performance during commissioning.
- Pressure Gauge: Monitor system pressure during filling and operation.
- Vacuum Pump: Required for evacuated tube collector installation or system maintenance.
- Flushing Pump: For cleaning and filling closed-loop systems with antifreeze.
While not strictly necessary for every installation, these tools can be invaluable for troubleshooting, system optimization, and ensuring maximum efficiency.
Where to Source Tools and Equipment
You can find most common hand and plumbing tools at local hardware stores, but solar-specific components (collectors, controllers, pumps, and tanks) are best sourced from specialized solar suppliers or reputable online retailers. Avoid off-brand imports that lack certifications or customer support. Some suppliers offer complete kits, which can simplify the process by guaranteeing compatibility between components.
Consider renting specialized tools—such as pipe threaders or thermal cameras—if you only need them for one project. Tool libraries and community workshops are also great resources for borrowing expensive gear at low or no cost, aligning with the sustainable ethos of your project.
Pre-Installation Checklist: Preparation Is Key
- System Design: Size your collectors and storage tank based on household hot water demand and local climate data.
- Permits and Inspections: Check with local authorities for any required permits or inspections. Some jurisdictions require licensed professionals for certain tasks.
- Roof Assessment: Ensure your roof is structurally sound and oriented for optimal solar exposure. Make repairs before installation if needed.
- Tool Inventory: Gather all required tools and materials before starting work. Double-check you have the correct sizes and quantities.
- Safety Gear: Inspect harnesses, ladders, and electrical safety equipment for wear or damage.
- Weather Forecast: Plan your installation for a period of dry, mild weather to avoid hazards and delays.
Troubleshooting: Tools for Common Issues
- Leak Detection: Use soapy water or an electronic leak detector to check pipe joints and fittings.
- Flow Rate Measurement: A simple bucket test or a digital flow meter can reveal circulation problems.
- Temperature Monitoring: Infrared thermometers or system sensors help identify underperformance or stagnation.
- Electrical Faults: Multimeters and voltage testers are indispensable for diagnosing pump or controller issues.
Keeping these troubleshooting tools handy will help you quickly identify and resolve any issues, minimizing downtime and maximizing system output.
Maintenance Tools: Keeping Your System Efficient
- Soft Brush and Mild Cleaner: For cleaning collector glazing and removing debris.
- Pipe Wrenches and Adjustable Wrenches: For tightening connections during annual inspections.
- Insulation Tape and Replacement Pipe Insulation: To repair or replace weathered sections.
- Flush Pump: For periodic cleaning and refilling of closed-loop systems.
- Thermometer and Pressure Gauge: For regular system performance checks.
Regular maintenance with the right tools ensures your solar water heating system delivers optimal performance for decades.
Pro Tips for DIY Installers
- Label Everything: Mark your pipes, valves, and controls for simple troubleshooting and maintenance down the line.
- Photograph Your Work: Documenting your installation can help with permits, future upgrades, or when seeking technical support.
- Don’t Skimp on Insulation: Well-insulated pipes and tanks are essential for getting the most from your system, especially in cooler climates.
- Test As You Go: Check each part of the system—piping, wiring, and controls—before moving to the next step to catch issues early.
Conclusion: Empowering Your Sustainable Future
Installing a solar water heating system is one of the most impactful moves a homeowner can make toward a greener, more self-sufficient lifestyle. While the prospect might seem daunting at first, the process becomes straightforward and rewarding when you’re equipped with the right tools and a clear understanding of each component. From selecting high-quality collectors and storage tanks to ensuring every pipe joint is secure, attention to detail and proper preparation are your keys to success. The investment in quality tools and components pays dividends in reliability, efficiency, and peace of mind—knowing your system will provide clean, renewable hot water for years to come. As technology advances and solar adoption grows, being hands-on with your home’s energy systems not only saves money but also connects you directly with the sustainable future you’re helping to build. So gather your tools, plan your installation, and take the next step toward energy independence. Your efforts today will heat more than just your water—they’ll help warm a planet in need of sustainable solutions.


I’m curious about the plumbing part of the installation. For someone with limited DIY experience, is it more difficult to work with copper pipes compared to PEX, especially when connecting to an existing water heater?
Working with PEX is generally easier for beginners than copper pipes. PEX is flexible, lightweight, and doesn’t require soldering—just cut it to length and use crimp or push-fit fittings. Copper involves cutting, cleaning, and soldering joints, which can be tricky and requires special tools. For connecting to an existing water heater, PEX often simplifies the process, but always check local codes before starting.
For a busy household with teens taking lots of showers, is there a big difference in efficiency or maintenance needs between flat-plate collectors and evacuated tube panels? If I’m starting from scratch, how should I choose between them?
For a busy household with high hot water demand, evacuated tube panels generally offer better efficiency, especially in cooler or cloudy conditions, since they retain heat more effectively. Flat-plate collectors are durable and lower in initial cost, but may be less efficient in winter or on overcast days. Maintenance is similar for both, though tubes are easier to replace individually if damaged. If you want maximum performance and don’t mind a higher upfront investment, evacuated tubes are a strong choice.
What is the typical cost range for acquiring the essential tools and core components highlighted in your guide for someone starting from scratch with a modest-sized home installation?
For a modest-sized home, the essential tools and core components for a solar water heating system generally cost between $1,500 and $3,500. This estimate covers solar collectors, a storage tank, piping, mounting hardware, a pump (if needed), controller, valves, insulation, and basic installation tools. Prices can vary based on the quality of materials and whether you buy kits or individual parts.
Does this guide include any rough estimates of the upfront costs for tools and equipment needed to set up either an active or passive system? I’m trying to figure out what kind of budget I should plan for before getting started.
The guide provides a general overview of the types of tools and equipment you’ll need for both active and passive solar water heating systems, but it doesn’t list specific upfront cost estimates. For budgeting, it suggests that costs can vary widely depending on system size and local material prices. For a clearer idea, you may want to research prices for each listed component based on your location and intended setup.
Could you expand on the types of pumps and controllers that are best suited for active solar water heating systems? I’m especially interested in options that are reliable and easily sourced in the US for DIY installation.
For active solar water heating systems, the most common and reliable pump type is a bronze or stainless steel circulator pump, such as those made by Grundfos or Taco, which are widely available in the US. For controllers, digital differential temperature controllers like the ones from RESOL or Goldline are popular with DIYers because they allow easy sensor connection and programming. Both types of components are designed for long-term reliability, and you can find them at major plumbing or solar supply stores.
If I run into issues with inconsistent water temperature after setting up my solar water heating system, what troubleshooting steps would you recommend before calling a professional?
For inconsistent water temperature, first check if your solar collector is clean and free from debris, as dirt can reduce efficiency. Make sure the circulation pump is operating correctly and that there are no air locks in the system. Inspect all valves and connections for leaks. Also, verify that the temperature sensors and controller are set up properly. If you have a backup heater, ensure its settings aren’t interfering with the solar system. Addressing these basics often resolves common issues.
I’m trying to budget for a DIY solar water heater installation. Can you give a ballpark cost breakdown for the basic tools and core equipment a homeowner should expect, especially if I opt for the flat-plate collector style?
For a DIY flat-plate solar water heater, expect core equipment costs like $800–$1,500 for a flat-plate collector, $300–$700 for a storage tank, $100–$300 for a pump (if active system), $100–$350 for piping and valves, and $100–$250 for insulation and mounting hardware. For basic tools, budgeting $100–$250 should cover items like pipe wrenches, pipe cutters, screwdrivers, drill, and sealants. Overall, homeowners often spend $1,400–$3,000 total for a basic DIY setup.
Once all the equipment is selected and ready, what’s the recommended first step for actually starting the installation process? Is there a particular order that makes things less prone to mistakes for beginners?
Once you have all your equipment, the first step is to carefully review the installation manual for your specific system. For beginners, it’s best to start by positioning and securing the solar collectors on your roof or designated area before handling any plumbing or electrical connections. This way, you can plan pipe runs and wiring routes more easily and avoid mistakes with alignment or support. Always ensure safety gear is in place before working at heights.
When setting up an active solar water heating system in a colder US climate, are there particular types of pumps or anti-freeze fluids you recommend to handle winter temperatures without risking damage to the equipment?
For colder US climates, it’s important to use a glycol-based antifreeze, such as propylene glycol, in your active solar water heating system to prevent freezing and damage. Also, choose a pump that is rated for use with glycol mixtures and can handle the viscosity at low temperatures. Look for high-quality, corrosion-resistant pumps specifically designed for solar heating systems to ensure reliable winter performance.
In the article, you mention both flat-plate and evacuated tube collectors as options for solar water heating systems. Could you explain the main differences in terms of efficiency, cost, and durability for a homeowner trying to decide between them?
Flat-plate collectors are generally more affordable and durable, requiring less maintenance, but they are a bit less efficient in colder or cloudy conditions. Evacuated tube collectors have higher efficiency, especially in low sunlight or cold climates, but tend to be more expensive and may need more frequent maintenance due to their glass tubes. If you live in a mild climate and want lower upfront costs, flat-plate might be best. For colder areas or year-round performance, evacuated tubes could be worth the investment.
You touched on both copper and PEX piping as options for solar water heating systems. Could you elaborate on what factors might make one material better than the other in terms of long-term durability and efficiency?
Copper piping is highly durable and can withstand higher temperatures and pressures, making it very reliable for solar water heating systems over the long term. It also transfers heat efficiently. However, it is more expensive and can be prone to corrosion in certain water conditions. PEX, on the other hand, is more affordable, resistant to scale and corrosion, and easier to install, but it may not handle very high temperatures as well as copper. If your system will experience high heat or pressure, copper may be the better long-term choice. For moderate conditions and easier installation, PEX is a solid option.
After putting together the core components like collectors and a storage tank, what are the main troubleshooting steps if the system doesn’t seem to be circulating hot water as expected?
If your solar water heating system isn’t circulating hot water, first check if the pump is running and properly connected to power. Inspect for air trapped in the pipes, which can block circulation—bleed the system if needed. Make sure there are no closed valves or obvious leaks. Also, confirm that the temperature sensors and controller are working, as these regulate pump activation.
The article mentions both copper and PEX piping for the plumbing. Are there specific pros and cons to using one over the other in terms of heat retention or ease of installation?
Copper pipes conduct heat very well but can lose some heat along the way, although they’re durable and handle high temperatures. PEX piping is easier to install, flexible, and better at retaining heat because it doesn’t conduct as much. However, PEX may not withstand extremely high temperatures as well as copper. If your system reaches very high temperatures or is exposed to direct sunlight, copper is usually the safer choice.
When choosing between copper and PEX piping for a DIY solar water heating setup, what are the main pros and cons in terms of durability, cost, and ease of installation?
Copper piping is highly durable and handles high temperatures well, making it ideal for solar water heating, but it’s more expensive and requires soldering skills for installation. PEX piping is much cheaper and easier to install due to its flexibility and use of push-fit connectors, but it’s less resistant to UV and high heat, which can affect long-term durability in solar setups. Consider your budget, skill level, and exposure to sunlight when deciding.
I’m interested in upgrading my existing hot water system rather than installing a full-scale solar setup. Does the guide recommend any tools or adapters that make integration with current plumbing easier, or are most installations designed from scratch?
The guide does mention that you can upgrade existing hot water systems by integrating solar components rather than starting from scratch. It highlights the use of solar-compatible water tanks, heat exchangers, and universal pipe adapters that connect new solar panels to your existing plumbing. Flexible piping kits and threaded adapters are especially useful for retrofitting, making it easier to adapt the system without major plumbing changes.
The guide mentions that having the right tools helps avoid costly mistakes. Could you list what you consider the absolute must-have tools for someone just starting out, especially if we’re on a budget and can’t buy everything at once?
If you’re just starting out and need to prioritize, focus on a drill with bits, an adjustable wrench, pipe cutter, tape measure, pipe wrench, and Teflon tape. A sturdy ladder and safety gloves are also important. These basics will handle most of the installation tasks, and you can always borrow or rent less commonly used tools as needed.
For someone living in a colder state, what extra steps or tools are necessary to protect an active solar water heating system from freezing? You mentioned active systems are better for colder climates, but I am worried about winter damage.
In colder states, you’ll want to use a closed-loop active solar water heating system with a non-toxic antifreeze (like propylene glycol) to protect against freezing. Also, make sure all pipes are well-insulated and consider adding freeze protection valves or sensors that activate a backup heater if temperatures drop too low. This setup keeps the system safe during harsh winters.
Are there any specific safety precautions or special tools I should be aware of when connecting the solar collectors to the storage tank, especially regarding high temperatures or potential leaks?
When connecting solar collectors to the storage tank, be cautious of high surface temperatures—use insulated gloves and avoid working during peak sunlight. Make sure to use high-temperature-rated pipe sealants or fittings to prevent leaks. Pressure relief valves and temperature gauges are essential for safety. A pipe wrench, torque wrench, and Teflon tape are common tools needed, but always double-check the tightness of fittings to avoid leaks. Inspect for leaks after filling the system and re-tighten connections if necessary.
For small businesses or homeowners on a tight budget, are there affordable starter kits or ways to minimize initial costs when purchasing the equipment for a basic passive solar water heating system?
Yes, there are affordable starter kits available specifically for passive solar water heating systems, and they’re often designed for easy, do-it-yourself installation. To keep costs low, you can start with a basic batch collector setup using locally sourced or recycled materials such as an old water tank and insulated boxes. Sourcing parts yourself and installing the system can significantly reduce expenses compared to buying a complete commercial kit.
The article mentions both active and passive solar water heating systems. If I live in an area with occasional frost but mostly mild winters, would a passive system still work, or should I consider active despite the extra complexity?
In areas with occasional frost, passive solar water heating systems can be at risk of freezing, especially if the system isn’t specifically designed for those conditions. While passive systems are simpler, you might want to consider an active system with freeze protection features, such as a closed-loop with antifreeze, to ensure reliable operation during cold snaps. This added complexity can help protect your investment and provide consistent hot water through mild winters with occasional frost.
Once the system is up and running, how quickly should I notice savings on my energy bills? Are there certain adjustments or settings I should monitor in the first few weeks to optimize performance?
You can typically notice some savings on your energy bills within the first month, especially if the weather is sunny and your system is sized properly for your needs. In the first few weeks, monitor your water temperature, check for leaks, and make sure the solar collector is clean and unobstructed. Also, keep an eye on the system’s thermostat settings and adjust as needed to balance comfort and efficiency.
Could you explain a bit more about how to decide between copper and PEX piping for different climates or home setups? I want to make sure I’m choosing the right material before I start buying equipment.
Copper piping is highly durable, resists high temperatures, and works very well in hot climates, but it can be more expensive and may corrode in certain water conditions. PEX is more affordable, easier to install, and flexible, making it ideal for colder climates since it can better tolerate pipe expansion during freezing. If your area experiences hard freezes, PEX is generally safer, while copper might be preferable for long-term durability in milder regions. Consider your local water quality and climate when deciding.
After installing a solar water heating system, what are the first signs that something might not be working correctly—like with controllers or circulation? It would be helpful to know what troubleshooting steps to take early on.
After installation, early signs of issues can include a lack of hot water, fluctuating water temperatures, error messages on the controller, or unusually high electricity use if backup heaters kick in. Check that your pump is running when the sun is shining, inspect for leaks, and verify the controller settings. If you notice any air in the system or strange noises, it might indicate circulation problems. Early troubleshooting should include checking power to the controller, making sure valves are open, and confirming the temperature sensors are connected properly.
I’m curious about the overall costs for the essential tools and materials listed here. For a standard passive system, what should I expect to budget for everything, including any basic safety equipment?
For a standard passive solar water heating system, you can expect to spend between $1,000 and $2,500 on all essential tools, materials, and basic safety gear. This includes collectors, storage tanks, piping, insulation, valves, mounting hardware, as well as tools like wrenches, pipe cutters, and safety equipment such as gloves and goggles. Keep in mind, costs can vary depending on system size and local prices, but this range should cover most home setups.
I noticed the guide mentions both flat-plate and evacuated tube collectors. How do the installation steps or necessary equipment differ between these two types of solar collectors?
Flat-plate collectors are usually larger and heavier, so they require sturdy roof mounts and sometimes extra structural support. Their installation is often simpler, with fewer individual parts to assemble. Evacuated tube collectors are lighter and modular, involving assembling and inserting multiple glass tubes into a manifold. For evacuated tubes, care must be taken to avoid breaking the tubes, and you may need additional sealing components. The plumbing connections and overall system layout are similar, but handling and mounting procedures differ due to the collectors’ construction.
After installing a passive solar water heating setup, what are common early troubleshooting issues homeowners might run into, especially regarding water flow or temperature consistency? Any advice on quick fixes before calling in a pro?
After installing a passive solar water heating system, homeowners sometimes notice issues like slow or uneven water flow and fluctuating water temperatures. These can be caused by air trapped in the system, partially closed valves, or sediment buildup in pipes. Try bleeding air from the system, ensuring all valves are fully open, and checking for obvious leaks or blockages. If the water still isn’t heating consistently, check that the collector is getting enough sunlight and isn’t shaded. If these steps don’t help, it’s wise to consult a professional.
When choosing between copper and PEX piping for a DIY solar hot water install, are there any performance or durability trade-offs I should consider, especially with regard to long-term exposure to high heat from the collectors?
Copper piping is highly durable under high temperatures and is resistant to UV light, making it a top choice for solar hot water collectors that regularly reach high heat. PEX piping can degrade or become brittle if exposed to sustained high temperatures or direct sunlight, so it’s best used only on the cooler, indoor sections of the system. For long-term reliability and safety, copper is usually recommended for the collector loop.
Could you give an idea of the minimum toolset a beginner would need to safely install a basic solar water heating system at home? I’m trying to budget for the project and want to avoid buying unnecessary tools.
To safely install a basic solar water heating system, you’ll need a few essential tools: an adjustable wrench, screwdrivers (both flathead and Phillips), pipe cutter, pipe wrench, pliers, a drill with bits for mounting brackets, a tape measure, and a level. You’ll also need Teflon tape and safety equipment like gloves and safety glasses. This list should cover most common setups, helping you avoid buying specialized tools unless your system requires them.
If I want to do a simple upgrade to my existing water heating setup rather than a full installation, which essential tools from your list are absolutely necessary versus nice to have? I’m working with a pretty tight budget.
For a simple upgrade rather than a full installation, you’ll only need a few essentials: a pipe wrench or adjustable wrench for fittings, a good pipe cutter if you’re modifying plumbing, Teflon tape for sealing threads, and a basic multimeter to check electrical connections. Items like pipe benders, soldering kits, or digital flow meters are useful for bigger projects but not strictly necessary for a modest upgrade on a budget.
In colder climates where freezing is a concern, are there additional precautions or components you’d recommend beyond what you covered for an active system with pumps and controllers?
In colder climates, using a closed-loop system with an antifreeze solution, like propylene glycol, instead of water is essential to prevent freezing in active systems. Additionally, make sure all external piping is well-insulated, and consider installing freeze protection controls that automatically circulate fluid during freezing conditions. Also, using a heat exchanger keeps the antifreeze separate from your potable water supply, providing extra safety and efficiency.
You note that solar water heating systems can be a solid option for reducing utility bills. About how long does it usually take for homeowners to see a return on investment, considering both equipment and installation costs?
Homeowners typically see a return on investment from a solar water heating system within 5 to 10 years. The exact timeframe depends on factors like local energy costs, system size, sunlight exposure, and any available incentives or rebates. Over its lifespan, most systems deliver significant savings, making them a worthwhile long-term investment for many households.
How long should I expect the installation process to take if I’m attempting this as a weekend DIY project with minimal experience, assuming I have all the recommended tools and equipment listed in the guide?
If you have all the recommended tools and equipment ready, you should plan for the installation to take one full weekend—typically about 12 to 16 hours spread over two days. Since you have minimal experience, allow extra time for careful reading of instructions, measuring, and making adjustments. Some steps, like mounting collectors and connecting plumbing, may take longer if you work alone. Don’t rush, and remember safety comes first.
Can you clarify what kind of maintenance or troubleshooting tools a DIYer should keep on hand after the system is up and running, particularly for checking leaks or ensuring the pump and controllers are working correctly in an active setup?
For ongoing maintenance of your solar water heating system, it’s a good idea to keep a few basic tools handy: adjustable wrenches and pipe sealant tape for tightening or resealing fittings, a pressure gauge to monitor system pressure, a basic multimeter for checking pump and controller electrical connections, and a thermometer for confirming temperature differences. For leak detection, absorbent towels and a flashlight can help you spot moisture around joints. Regularly check for unusual noises from the pump and make sure the controller display shows normal operating parameters.
How much should I budget for the essential tools and core components you listed if I’m aiming for a basic setup for a small family? I want to avoid overspending on unnecessary gear.
For a basic solar water heating setup for a small family, budgeting around $1,000 to $2,000 for essential tools and core system components is typical. This includes the solar collector, storage tank, circulation pump, controller, piping, and insulation. Essential tools like pipe wrenches, screwdrivers, and a drill are generally affordable, so most of your budget should go towards the system parts. Avoid premium or specialized tools unless your installation presents unique challenges.
I noticed you recommend both copper and PEX piping for the plumbing. Could you elaborate on the pros and cons of each material specifically for solar water heating, such as durability, heat retention, or compatibility with different system types?
Copper pipes are highly durable, handle high temperatures well, and offer excellent heat retention, which is ideal for solar water heating. However, they can be expensive and may corrode if the water is acidic. PEX piping is more affordable, easy to install, and resistant to scaling and corrosion, but it is less heat-resistant than copper and may not be suitable for direct connection to collectors where temperatures get very high. PEX works best in indirect or closed-loop systems, while copper is compatible with both open and closed systems.
Can you provide more details about how to size the storage tank relative to the number of occupants in the home? Are there general guidelines or formulas to ensure enough hot water without over-investing?
When sizing a solar water heater storage tank, a common guideline is to allow 15–20 gallons of storage per person in the home. For example, a family of four would typically need a tank of around 60–80 gallons. This ensures sufficient hot water while avoiding excess capacity and unnecessary costs. Always consider your household’s specific usage patterns for best results.
You mentioned that active systems use pumps and controllers, while passive systems rely on natural convection. How do you decide which system type is better for a specific climate or household size?
Choosing between active and passive solar water heating systems depends on your local climate and your household’s hot water needs. In colder climates or for larger families, active systems are usually better since their pumps and controllers improve efficiency and ensure steady hot water. In warmer climates or smaller households, passive systems are often sufficient, as they’re simpler and require less maintenance. Also, consider roof space, budget, and whether you’re comfortable maintaining mechanical parts when making your choice.
If I already have a standard water heater installed, is it possible to integrate a new solar collector and storage tank with my existing system, or would I need to replace everything? The article talks about upgrades but I’m not sure how that works.
You can typically integrate a solar collector and a separate storage tank with your existing water heater. The most common setup uses the solar system to preheat water, which then flows into your standard heater as needed. This means you don’t need to replace your current heater—just add the solar components and necessary piping, which often makes the upgrade more affordable and less disruptive.
How do you determine the right size for the solar collectors and storage tank if your household uses a lot of hot water, like for laundry and frequent showers?
To determine the right size for your solar collectors and storage tank with high hot water use, estimate your household’s daily hot water consumption in gallons. A common rule is about 20 gallons per person per day. For collectors, plan about 1.5 to 2 square feet of collector area per person, or more if sunlight is limited. The storage tank should hold at least 1.5 gallons per square foot of collector. Consulting a local installer can also help tailor these numbers to your precise needs.
Could you explain a bit more about how the pumps and controllers work in active solar water heating systems? I’m trying to figure out how complicated the setup and maintenance might be compared to a passive system.
In active solar water heating systems, pumps circulate water or a heat-transfer fluid between the solar collectors and your storage tank. Controllers monitor temperatures and automatically turn the pumps on or off to optimize heat collection and prevent overheating or freezing. This setup is more complex than passive systems, which rely on gravity and natural convection, so installation and maintenance can be a bit more involved. However, active systems often provide more efficient heating, especially in colder climates.
If I already have an electric water heater, what are the key extra tools or accessories I’d need to safely retrofit it with solar water heating components? Are there common issues when integrating with existing systems?
To retrofit an electric water heater for solar, you’ll typically need a solar collector, a heat exchanger, additional piping (often copper), a circulating pump, temperature sensors, and a controller. Safety valves and insulation are also important. Common issues include plumbing leaks, incompatible fittings, or insufficient heat transfer if the exchanger isn’t sized correctly. Make sure your existing tank is suitable for solar integration, and consider consulting a professional for safe installation.
Could you elaborate on the specific tools required for installing PEX piping versus copper in a solar water heating system? I’m wondering if the equipment list changes much based on which type of plumbing you choose, especially for a DIY setup.
The equipment list does change depending on whether you use PEX or copper piping. For PEX, you’ll need a PEX cutter, crimping tool, go/no-go gauge, and appropriate fittings. Copper piping requires a pipe cutter, pipe cleaning tool, flux and solder, a torch, and fittings. PEX is generally simpler for DIY setups since it avoids soldering and open flames, while copper needs more precise preparation and joining.
Can you share more about the specific plumbing tools or fittings that are must-haves for connecting copper versus PEX piping? I’m planning my toolkit and want to avoid last-minute hardware store runs since your guide stresses having the right gear upfront.
For copper piping, you’ll need a pipe cutter, pipe cleaning brush, flux, lead-free solder, a propane torch, and copper fittings like elbows, tees, and couplings. For PEX piping, get a PEX cutter, crimp or clamp tool, appropriate PEX rings or clamps, and PEX-compatible fittings (usually brass or plastic). Also, keep some pipe wrenches and Teflon tape handy for both types. Having these on hand should cover most connections for your solar water heating setup.
I’m interested in upgrading my current water heater to a solar system, but I want to understand the possible hidden costs besides the initial tools and components. What are common budget surprises homeowners run into after the main installation?
After the main installation, homeowners sometimes encounter unexpected expenses like roof modifications to support solar collectors, upgrades to plumbing or electrical systems, and permits or inspection fees. Maintenance costs, such as replacing antifreeze in closed-loop systems or repairing leaks, can add up over time. You might also need additional insulation or backup heating elements to ensure efficiency during less sunny periods.
How much regular maintenance should I expect with a home solar water heating system, and what tools are essential for that upkeep versus the initial installation?
A home solar water heating system typically needs minimal regular maintenance. Expect to check for leaks, clean the collector surface, and inspect pipes and connections every 6 to 12 months. For upkeep, basic tools like a wrench, screwdriver, and soft brush for cleaning are usually enough. The initial installation may require more specialized tools such as pipe cutters, a drill, and possibly a multimeter for electrical checks.
When it comes to selecting the plumbing materials, is there a significant cost or performance difference between using copper pipes versus PEX in a DIY solar water heating setup?
Copper pipes usually perform better with high temperatures and are highly durable, making them ideal for solar water heating systems. However, they are more expensive and harder to install than PEX. PEX is cheaper, simpler to work with, and resistant to scale and corrosion, but may not handle prolonged high temperatures as well as copper. For most DIY setups, PEX is cost-effective, but for systems with very hot water, copper might be a safer long-term choice.
The article mentions both copper and PEX piping options. Are there significant long-term cost or durability differences between the two when used with solar-heated water systems?
Copper piping typically lasts longer and handles high temperatures better, which is important in solar water heating systems. However, it’s more expensive both to buy and install. PEX piping is cheaper and easier to work with, but it may not be as durable over decades, especially if exposed to very high temperatures or direct sunlight. For longevity and fewer maintenance worries, copper is superior, but PEX could be a good budget-friendly option if temperatures won’t exceed its rated threshold.
When considering climate, do you have any additional tips for those in borderline frost-prone areas who are interested in passive systems? Is it advisable, or are there risks that outweigh the simplicity of a passive setup?
In borderline frost-prone areas, passive solar water heating systems can work, but extra precautions are needed. Insulate all pipes thoroughly and consider using freeze-protected collectors or drainback systems to avoid freeze damage. Even so, there is always some risk of freezing with passive setups, so active or closed-loop systems with antifreeze might offer better long-term reliability. Evaluate your local freeze frequency before deciding.
I noticed you mentioned both copper and PEX piping for plumbing. Are there pros and cons to each when it comes to durability and ease of installation for a DIY solar water heating setup?
Copper piping is highly durable and handles high temperatures well, making it a long-lasting choice for solar water heating systems. However, it’s more expensive and can be harder to install, especially for DIY projects, since it requires soldering. PEX piping is less costly, easier to work with, and doesn’t require soldering, which makes it popular for DIYers. The downside is that PEX may not handle the highest temperatures as well as copper, so check system specs before choosing.
Can you explain a bit more about how the plumbing materials you choose, like copper versus PEX piping, affect the long-term efficiency and maintenance of the solar water heating system?
Copper piping is highly durable and handles high temperatures well, making it reliable and long-lasting, but it can be more expensive and may corrode if your water is acidic. PEX piping is easier to install, resists scale and corrosion, and is usually less expensive, but it may not tolerate very high temperatures as well as copper. Your choice affects both efficiency and maintenance: copper typically offers better heat transfer and longevity, while PEX is simpler to work with and may reduce potential leaks at joints.
You mention the difference between flat-plate and evacuated tube collectors. For someone with limited roof space, how do you decide which type is more efficient or practical? Is there a big difference in the tools needed to install each?
If your roof space is limited, evacuated tube collectors are usually more efficient per square meter than flat-plate collectors, making them a practical choice. As for installation, both types require similar basic plumbing and mounting tools, but evacuated tubes can be a bit more delicate and may require extra care during handling. The overall installation process is quite similar for both types.
You mentioned both copper and PEX piping as options for the plumbing. Is there a significant difference in longevity or maintenance between the two when exposed to the temperatures and conditions in a solar water heating setup?
Copper piping generally has a longer lifespan and is more resistant to high temperatures, making it a solid choice for solar water heating systems that may see extreme heat. PEX is easier to install and less expensive, but can degrade if exposed to very high temperatures over time. If your system will frequently reach high temperatures, copper is usually the lower-maintenance, longer-lasting option.
Once everything is installed, what are some typical troubleshooting steps or signs that something might not be working right with a newly set-up solar collector or storage tank?
After setting up your solar water heating system, watch for signs like low hot water temperature, leaks around the collector or tank, or strange noises from the pump. Check that the pump is running when the sun is shining and verify the temperature difference between the collector and the storage tank. If you notice air bubbles in the system or drop in pressure, bleeding the air or checking the valves may help. Regularly inspect for shading on the collector surface and ensure all connections are secure.
I noticed you mentioned both copper and PEX piping for the plumbing. Is there a significant performance or longevity difference between the two for solar water heating, especially in terms of heat loss or ease of DIY installation?
Copper piping transfers heat more efficiently and handles high temperatures well, which is great for minimizing heat loss in solar water heating systems. It’s also very durable but can be more expensive and trickier to install, especially for DIY projects. PEX piping is easier to install due to its flexibility and is more affordable, but it doesn’t conduct heat as well and has lower temperature limits. For maximum performance and longevity, copper is usually preferred, but for easier installation, PEX is often chosen.
Could you clarify which plumbing materials hold up better in the long run for solar systems—copper versus PEX? I see both listed but would love practical advice on durability and ease of installation.
Copper is highly durable, resists UV and high temperatures, and has a long track record in solar systems, but it requires soldering and is more expensive. PEX is easier and quicker to install, more flexible, and generally less costly, but it can degrade with prolonged UV exposure and very high temperatures. For outdoor runs exposed to sun or high heat, copper usually outlasts PEX. For indoor, shielded areas, PEX is often a practical, user-friendly choice.
After reading about the core components, I’m curious how much time the average person should expect to spend assembling and installing a full solar water heating system from scratch. Is this a weekend project, or does it typically take longer?
Putting together and installing a full solar water heating system usually takes longer than a single weekend for most people, especially if it’s your first time. For someone with good DIY skills, it can take about 2–4 days, depending on system complexity and your familiarity with plumbing and electrical work. Factoring in time for planning, sourcing parts, and making adjustments, it’s best to set aside several days or even two weekends to complete the job safely.
For someone running a small business with high hot water demands, is there a recommended size or type of solar water heater system that balances efficiency and upfront costs? Also, how do active systems perform in colder US climates?
For a small business with high hot water needs, a larger-capacity active solar water heating system is usually the best balance between efficiency and upfront cost. Look for systems with well-insulated storage tanks and flat-plate or evacuated tube collectors sized for your daily usage. In colder US climates, active systems with freeze protection (like glycol or drain-back designs) perform reliably and are designed to prevent damage during freezing temperatures.
If I want to upgrade my current passive system to include better freeze protection, are there specific tools or plumbing accessories you’d recommend that make retrofitting simpler for a homeowner like myself?
To improve freeze protection in a passive solar water heating system, you might consider adding freeze-resistant pipe insulation, freeze protection valves, or a heat tape with a thermostat. Tools like a pipe cutter, adjustable wrench, and pipe thread sealant will make retrofitting easier. Pre-insulated flexible pipes or quick-connect fittings can also simplify installation for a homeowner.
If I want to start with a simple upgrade instead of a full installation, which tools or materials from your list would be most important for improving the efficiency of an existing solar water heating setup?
To boost the efficiency of your current solar water heating system without a full overhaul, focus on materials like high-quality pipe insulation to reduce heat loss and a solar controller or pump timer to optimize system operation. Tools such as a pipe cutter and insulation tape will be handy for any upgrades. These improvements can make a noticeable difference with minimal changes.
Could you provide more details on the types of pumps and controllers needed for active systems? I’m curious if these components are tricky to source or maintain for someone doing their own installation.
For active solar water heating systems, you generally need a circulation pump—either a standard AC pump or a more efficient DC pump, especially if you want it powered by solar electricity. Controllers are usually differential temperature controllers that switch the pump on when the collector is hotter than your storage tank. Both pumps and controllers are widely available at plumbing or solar supply stores, and maintenance is usually straightforward: periodic cleaning and checking for leaks or electrical issues.
If I’m planning a basic upgrade rather than a full installation, which smaller plumbing accessories should I prioritize replacing to improve the performance of my existing solar water heating system?
For a basic upgrade, focus on replacing or upgrading any old or worn-out valves, pipe insulation, and circulation pumps. Make sure to check and replace damaged or inefficient check valves and air vents, as these help prevent heat loss and improve system flow. Replacing worn gaskets and seals at key connection points can also help prevent leaks and optimize system efficiency.
What kind of maintenance or troubleshooting should I expect with passive systems, especially in regions that are mostly frost-free but occasionally get a cold snap? I’d rather avoid big surprises down the road.
With passive systems in mostly frost-free regions, routine maintenance is usually minimal—just occasional checks for leaks, debris in collector panels, or mineral buildup in pipes. However, since cold snaps can occur, it’s important to insulate all exposed pipes and the storage tank to prevent freezing. After a cold snap, inspect for cracks or leaks. This proactive approach helps prevent unexpected damage and keeps the system running smoothly.
You mentioned that having the right equipment helps avoid costly mistakes. Can you outline the typical mistakes homeowners make during installation and what tools help prevent them?
Typical mistakes include improper pipe connections, poor insulation, and incorrect placement of the collector panels. These can lead to leaks, heat loss, or reduced system efficiency. Using a pipe cutter for clean cuts, a pipe wrench for secure fittings, and an insulation knife for accurate insulation helps avoid these problems. A level also ensures the collector is properly aligned, which is crucial for maximum efficiency.
Can you give more detail on what specific tools a beginner DIYer should prioritize getting first for a basic passive system? I want to avoid buying things I may not actually need for an initial installation.
For a basic passive solar water heating setup, you’ll want to start with essentials: a drill with drill bits, adjustable wrenches, a pipe cutter, Teflon tape, and a hacksaw for cutting pipes. A tape measure, safety gloves, and goggles are also important. Most beginners won’t need advanced plumbing tools or soldering equipment unless your design calls for metal pipe connections. Focus on tools for measuring, cutting, tightening, and safely handling materials.
Are there common mistakes or missteps homeowners make when deciding between copper and PEX piping for their solar water heating system, especially regarding compatibility with active or passive setups?
Homeowners often overlook that copper handles higher temperatures and pressure better, making it more reliable for active solar water heating systems with pumps. PEX, while easier to install and less expensive, can degrade if exposed to the high heat found in some solar setups, especially close to collectors. Another common mistake is not checking local building codes, as some areas require copper for certain applications. Always match your piping choice to your system type and climate demands.
When it comes to the pumps and controllers for active systems, are there any simple models you’d recommend for beginners? I’m concerned about how complicated the wiring and setup might get.
For beginners, it’s best to look for solar water heating pump and controller kits that are designed to be user-friendly. Some models come pre-wired or with clear step-by-step instructions, which minimizes the need for complex wiring. Brands like SunEarth and Heliodyne often offer beginner-friendly kits. You might also look for integrated pump-station units, as they combine the pump, controller, and sensors in one compact package, making installation much simpler.
Could you explain a bit more about choosing between copper and PEX piping for a solar water heating system? I know both are mentioned in the guide, but I’m unsure which is more durable over time and better for DIY installations in colder climates.
Copper piping is highly durable and handles high temperatures well, making it reliable for long-term use, especially in solar systems. However, it’s more expensive and harder to install, often requiring soldering skills. PEX piping is easier for DIY installs, as it’s flexible and can handle freezing better due to its ability to expand. For colder climates, PEX is usually preferred by DIYers because it’s less likely to burst and is more forgiving to work with, though it may not last quite as long as copper.
I’m concerned about the up-front cost—what are some ways to prioritize which tools and equipment are essential to buy first, and are there any budget-friendly options that will still ensure safety and efficiency?
To manage upfront costs, start with the essentials: solar collectors, a storage tank, and basic plumbing tools. Prioritize quality in safety-related items like valves and insulation, as these are crucial for efficient and secure operation. For budget-friendly options, consider purchasing pre-assembled kits or sourcing gently used components from reputable suppliers. Focus on core equipment first, and add optional extras, like monitoring systems, later as your budget allows.
I’m on a tight budget and wondering which core components it makes sense to invest more in and where it might be okay to go with more affordable options. Are there brands or types you recommend for good value?
When working with a tight budget, it’s wise to prioritize quality for the solar collector and the storage tank, since these are critical for performance and longevity. You can save on mounting hardware and plumbing by choosing reliable but non-premium brands. For good value, brands like Sunbank or Rheem are often recommended for collectors and tanks, as they balance durability and affordability. For piping and valves, local hardware store options are usually sufficient if rated for hot water use.
After installing all the core components like the solar collector and storage tank, what are some common mistakes first-timers make during setup or initial use that I should try to avoid?
A few pitfalls to look out for include improper insulation of pipes, which can lead to significant heat loss, and not thoroughly checking for leaks in connections. Many first-timers also forget to properly angle or orient the collector towards the sun. Another common mistake is not flushing the system before first use, which can introduce air or debris. Make sure to test the system for correct flow rates and monitor the temperature settings to avoid overheating or underperformance.
I’m considering a DIY setup as described, but I’m wondering what kind of tools might be too specialized or expensive for a non-professional. Are there any pieces of equipment in the process you think are better left to a contractor?
Some tools used in solar water heating setups can be fairly specialized. For example, pipe benders, flaring tools, and certain soldering equipment might be expensive or tricky for a one-time project. Installing roof mounts, handling pressurized plumbing, or integrating with electrical systems are steps where a contractor could be the safer choice, especially if you’re not experienced with these tasks. It helps to assess your skills honestly and consider professional help for the most technical or safety-critical parts.
Could you clarify which specific tools are considered essential for working with copper versus PEX pipes when setting up a home solar water heating system like the ones described in the guide?
For copper pipes, you’ll need a pipe cutter, propane torch, flux, solder, wire brush, and pipe fittings. For PEX pipes, essential tools are a PEX pipe cutter, PEX crimp or clamp tool, crimp rings or clamps, and appropriate PEX fittings. Copper requires soldering equipment, while PEX uses mechanical connections, making the required tools quite different for each material.
Could you clarify what kinds of pumps and controllers are compatible with home-scale active systems? I’m interested in DIY installation and want to avoid common mistakes when wiring up the circulation pump and sensors.
For home-scale active solar water heating systems, look for low-voltage, high-temperature-rated circulation pumps, such as those specifically labeled for solar thermal use. Common brands include Grundfos and Taco. For controllers, choose a differential temperature controller designed for solar water heating; these manage the pump based on sensor readings from both the collector and storage tank. When wiring, ensure sensors use the correct polarity and weatherproof connections, and always follow the controller’s wiring diagram closely to avoid miswiring or short circuits.
The guide mentions both copper and PEX pipes for plumbing. How do I decide which material is better for my system, and does it make a significant difference in efficiency or maintenance needs?
Copper pipes are highly durable, handle higher temperatures well, and are commonly used for solar water heating, but they’re more expensive and require soldering for installation. PEX pipes are much easier to install, cost less, and resist scale buildup, but may have lower temperature tolerances. For systems with very hot water or outdoor exposure, copper is often preferred. For lower costs and simpler installs, PEX works well indoors. Efficiency differences are minimal, but copper tends to require less maintenance over the long term.
For someone who’s never done plumbing before, how hard is it to properly connect the copper or PEX piping to the storage tank and solar collectors? Are there common mistakes I should watch out for during installation?
Connecting copper or PEX piping to a solar water heating system can be a bit challenging for a beginner, but it’s manageable if you take your time and follow instructions closely. Common mistakes include not tightening fittings enough (which can cause leaks), mixing up hot and cold lines, or failing to use proper insulation on pipes. Double-check all connections for leaks after turning on the water, and if you’re ever unsure, it’s wise to consult a professional.
I’m curious about routine maintenance. What basic tools and checks would you recommend for making sure the system remains efficient and safe after installation?
To keep your solar water heating system running efficiently, it’s good to have a wrench set, screwdrivers, pressure gauge, and a soft brush for cleaning collectors. Regularly inspect pipes for leaks, check insulation for wear, clean dust or debris from the collectors, and monitor pressure and fluid levels if your system uses antifreeze. Also, ensure all electrical connections remain secure and free from corrosion.
Once the system is installed, how quickly should I expect to see a reduction in my utility bills? I’m interested in understanding the typical payback period for the average home.
You should begin to notice a reduction in your utility bills within the first billing cycle after your solar water heating system is up and running, especially if you use a lot of hot water. For most homes, the typical payback period ranges from 5 to 10 years, depending on your local energy rates, available sunlight, and the upfront system cost.
About maintenance, what are some common issues homeowners in frost-prone regions face with their solar water heating systems, and are there any recommended preventative tools or equipment?
Homeowners in frost-prone regions often deal with issues like frozen pipes and cracked collectors in their solar water heating systems. To prevent this, it’s recommended to use glycol-based antifreeze fluids and install freeze protection valves or drain-back systems. Insulating exposed pipes and using temperature sensors to trigger automatic draining are also helpful preventative measures.
After installing the solar collectors and storage tank, what are the most common troubleshooting issues you see with new DIY solar water heating setups, and are there diagnostic tools that are particularly helpful to have on hand?
Some common troubleshooting issues after installing solar collectors and a storage tank include leaks at pipe joints, air trapped in the system, low water temperature, and flow problems due to pump or controller issues. It’s useful to have a reliable pressure gauge and an infrared thermometer to check for leaks and ensure proper temperature. A multimeter can also help diagnose electrical issues with pumps or controllers. Regularly checking connections and monitoring temperatures will help keep your system running smoothly.
When budgeting for a home solar water heating system, what are the typical costs for basic tools and equipment, and is it possible to start with a simple upgrade before investing in a full installation?
For a basic home solar water heating system, equipment costs usually range from $1,500 to $4,000, depending on the system size and quality. Basic tools like wrenches, pipe cutters, and screwdrivers may add $100–$200 if you don’t already own them. If you’d prefer to start small, you could install a simple solar preheater or retrofitted collector alongside your existing water heater, which requires a lower initial investment and can be expanded later.
Can you elaborate on any safety precautions or recommended tools for handling copper versus PEX piping when setting up the plumbing for a solar water heating system?
When working with copper piping, ensure you use a pipe cutter for clean cuts and a torch for soldering joints—wear gloves and safety glasses to protect from burns and sharp edges. For PEX piping, a PEX cutter and crimping tool are necessary. PEX is easier and safer to handle, but still use gloves and check fittings for leaks. Always shut off water and relieve pressure before starting work with either material.
The guide talks about selecting solar collectors, but I’m not sure how to figure out what size or type I actually need for a typical family home. Are there any rules of thumb or calculators you recommend?
To estimate the right solar collector size for a typical family home, a common rule of thumb is about 1 to 1.5 square meters of collector area per person. For a family of four, you’d usually need 4 to 6 square meters. Consider your climate—colder or less sunny areas might need more. Some manufacturers offer online sizing calculators if you want a more tailored estimate.
If I already have part of a plumbing setup in place, how difficult is it to retrofit a solar water heating system onto my current storage tank and pipes? Are there any common issues to watch out for when combining new collectors with older equipment?
Retrofitting a solar water heating system onto an existing plumbing setup is often possible, but some challenges can arise. Key issues include ensuring your current storage tank is compatible with solar-heated water and checking that your older pipes can handle higher temperatures. Corrosion or scale in older pipes may reduce efficiency. You may also need extra valves and controls to integrate new collectors smoothly. Consulting a solar installer for an inspection can help identify and resolve any compatibility concerns before you start.
I’m a bit confused about sizing the storage tank. The article mentions storage tanks but doesn’t really explain how to estimate the right size for a household of four. Is there a general guideline or formula I should use for this?
For a household of four, a common guideline is to allow about 20 gallons (75 liters) of hot water storage per person. So, you’d typically look for an 80-gallon (300-liter) tank. This ensures enough hot water for daily needs while optimizing your system’s efficiency. Tank size can vary depending on your usage habits, but this rule of thumb works well for most families.
I’m a bit worried about how much this whole setup might cost up front. Are there any specific tools or components where it makes sense to save money, or do you recommend investing in higher-end gear across the board for a DIY installation?
It’s smart to balance quality and cost for a DIY solar water heating setup. Prioritize investing in a reliable solar collector and a well-insulated storage tank, as these directly affect efficiency and longevity. For tools like pipe cutters or wrenches, basic models are usually fine if you’ll only use them for this project. Avoid cutting corners on safety valves and high-pressure fittings, but you can save on less critical accessories. Consider local rebates or used components to help with budget, too.
I noticed you mentioned both copper and PEX piping for these setups. Are there significant advantages or drawbacks to each material in terms of durability or how well they work with solar-heated water over time?
Copper piping is very durable and handles high temperatures well, making it excellent for solar water heating systems. However, it can be more expensive and may corrode if your water is acidic. PEX piping is generally cheaper, easier to install, and resists corrosion, but it is not as heat-resistant as copper. If your system runs at very high temperatures, copper might be a better long-term choice.
In your experience, is there a significant performance difference between flat-plate and evacuated tube collectors for home use, particularly in regions with less direct sunlight during the winter months?
Yes, there is a noticeable performance difference between flat-plate and evacuated tube collectors, especially in areas with limited sunlight during winter. Evacuated tube collectors are generally more efficient in colder and low-light conditions because their design minimizes heat loss and captures diffuse sunlight better. Flat-plate collectors work well in sunnier, milder climates but may lose more heat and underperform in cold, overcast regions compared to evacuated tubes.
You mentioned the importance of having the right tools to avoid costly mistakes. What are some common errors beginners make during installation, especially with plumbing or selecting the collector type, and how can they be avoided?
One common mistake is using the wrong pipe materials, which can’t handle hot water and may leak or burst. Beginners also sometimes choose a collector type that isn’t suited for their climate—flat-plate collectors work best in mild areas, while evacuated tube collectors are better for colder climates. To avoid these errors, always check local recommendations, use pipes rated for high temperatures, and match your collector to your regional weather conditions.
How much should a homeowner budget for the essential tools and plumbing accessories outlined, especially if starting from scratch with no prior equipment?
A homeowner starting from scratch should budget around $300 to $600 for essential tools and plumbing accessories needed for a basic home solar water heating system. This covers items like wrenches, pipe cutters, soldering equipment, copper pipes, valves, fittings, insulation, and sealants. The final total depends on your specific setup and local prices, but this range should cover most basic needs for a DIY installation.
I’m curious about the cost difference when choosing between copper and PEX piping for the plumbing part of a home solar water heating setup. Which one is usually more budget-friendly in a DIY installation?
PEX piping is generally much more budget-friendly than copper for a DIY solar water heating system. PEX costs less per foot, is easier and faster to install, and doesn’t require soldering or special tools. Copper is more durable and can handle higher temperatures, but it’s significantly pricier and installation is more labor-intensive. For most DIY setups, PEX is the more cost-effective choice.
Could you provide more details on what specific tools are required for working with copper versus PEX piping when setting up a solar water heating system, and whether one material is easier for a DIY installation?
For copper piping, you’ll need a pipe cutter, torch, solder, flux, pipe cleaning brushes, and fittings. For PEX, the main tools are a PEX cutter and a crimping or cinch tool, along with appropriate connectors. PEX is usually considered easier for DIY installations since it doesn’t require soldering—just cut, fit, and crimp. Copper is more durable but requires more skill and safety precautions due to the use of an open flame.
When it comes to selecting the piping for a solar water heater, is there a big difference in performance or longevity between copper and PEX pipes? I’d like to invest in something that will last but also fits a modest budget.
Copper pipes are known for their durability, excellent heat conductivity, and long lifespan, making them ideal for solar water heating systems. However, they can be pricey and require skilled soldering. PEX pipes are more affordable, easier to install, and resistant to scaling and corrosion, but they may not handle very high temperatures as well as copper. If your system will experience extreme heat, copper is the safer choice for longevity. For moderate climates and budget concerns, PEX can be a practical option.
How much should I realistically budget for all the necessary tools and materials, aside from the main equipment like collectors and tanks, if I am planning a simple passive system?
For a simple passive solar water heating system, you can expect to budget about $200 to $500 for tools and materials aside from the main collectors and tanks. This covers piping, insulation, valves, mounting hardware, sealants, and basic tools like pipe cutters and wrenches. The exact amount depends on your setup specifics and whether you already own some tools.
I noticed you mentioned using either copper or PEX piping for the plumbing. Can you elaborate on the pros and cons of each in terms of long-term durability and ease of installation for homeowners?
Copper piping is highly durable, withstands high temperatures, and resists sunlight, making it excellent for longevity in solar water heating systems. However, it is more expensive and requires soldering, which can be challenging for DIY installations. PEX piping is much easier to install due to its flexibility and push-fit connections, and it costs less. However, PEX is more vulnerable to UV damage if exposed to sunlight and may not last as long under high heat conditions. For outdoor or high-temperature sections, copper is usually preferred, while PEX is a great choice for indoor runs.
When setting up an active solar water heating system, which type of pump is best for handling variable flow rates and is there a recommended controller that balances efficiency with ease for DIY installation?
For active solar water heating systems, a variable-speed pump is ideal for handling variable flow rates, as it can adjust to changing solar input and system demand. As for controllers, look for differential temperature controllers specifically designed for solar water heating; models with digital interfaces are often easier for DIYers to install and program, while also optimizing efficiency. Be sure to choose a controller that matches your pump’s voltage and your system’s requirements.
Could you provide more details about selecting between copper and PEX pipes for a home solar water heating setup? I am concerned about long-term durability and maintenance in different climates.
Copper pipes are highly durable, resist UV rays, and handle high temperatures well, making them a strong choice for hot climates and outdoor exposure. However, they can corrode in acidic water and are more expensive. PEX pipes are more affordable and easier to install, but they may degrade if exposed to direct sunlight and can be sensitive to very high temperatures. In colder climates, PEX resists freezing better. For long-term durability, copper is often preferred outdoors, while PEX can be suitable for indoor runs or milder climates.
For families on a budget, which of the system types mentioned here tends to have a lower overall installation cost, both for tools and essential components?
For families on a budget, the article points out that thermosiphon solar water heating systems usually have the lowest overall installation cost. These systems require fewer components and minimal controls compared to active or pumped systems, making them more affordable in terms of both equipment and installation. Most of the needed tools are basic, so you won’t need specialized equipment either.
When deciding between copper and PEX piping for the plumbing in a solar water heating system, what factors should I consider, especially for homes in regions with occasional freezing temperatures?
When choosing between copper and PEX piping, consider that copper is durable and handles high temperatures well, but it can freeze and burst more easily in cold weather. PEX is more freeze-resistant and flexible, making it a safer choice for regions with occasional freezing temperatures. Also, PEX is generally easier to install and may cost less, but be sure to check if it’s rated for outdoor or UV exposure, as some types degrade in sunlight.
I noticed you talked about both copper and PEX pipes for transporting water. Are there any major pros and cons to choosing one over the other in terms of installation difficulty or long-term durability, especially for DIY beginners?
Copper pipes are very durable and handle high temperatures well, but they’re more challenging to cut, join, and solder, which can be tough for beginners. PEX pipes are much easier to install—they’re flexible, require fewer fittings, and don’t need soldering. However, PEX may degrade faster if exposed to direct sunlight or very high temperatures over time. For most DIY beginners, PEX is usually the easier option to work with, as long as it’s protected from UV and extreme heat.
The guide covers choosing between flat-plate and evacuated tube collectors, but how do I determine which one is most cost-effective for a family of four in a partly cloudy climate?
For a family of four in a partly cloudy climate, evacuated tube collectors are typically more efficient at capturing diffuse sunlight, which means they often provide better year-round performance but usually cost more upfront. Flat-plate collectors are less expensive but might not be as effective on cloudy days. To determine cost-effectiveness, compare the total installed cost with estimated energy savings over time for both types, considering your local weather and hot water needs.
For a beginner tackling their first solar water heat install, what’s the most common mistake people make during the plumbing or mounting process, and do you have any simple tips to avoid it?
One of the most common mistakes beginners make is not securely anchoring the collector panel, which can lead to leaks or even panel movement in strong winds. During plumbing, improper sealing of joints often causes leaks as well. To avoid these issues, double-check all mounting brackets for sturdiness and use proper waterproof sealant or plumber’s tape on every threaded connection. Taking your time with these steps can save a lot of trouble later.
You mention that active systems might be better for colder climates, but do those setups significantly increase the total project cost compared to passive systems? I’d love to understand the budget implications before choosing a direction.
Active solar water heating systems do tend to cost more upfront than passive systems, mainly due to additional components like pumps and controllers. Depending on system size and complexity, you might see a 30–60% higher initial investment. However, active systems can be more efficient in colder climates, offering better year-round performance and potentially greater long-term savings. Factoring in both installation and operational costs will help you decide which system best fits your budget and needs.
How much time should I realistically set aside if I want to install one of these solar water heating systems myself, from start to finish, including learning about the components and handling the actual installation?
For a first-time DIYer, you should plan to spend about two to three days installing a solar water heating system. This estimate includes a full day for reading, understanding the components, and preparing your materials, followed by one to two days for the actual installation work. Factors like your experience, roof accessibility, system size, and weather can affect the total time needed.
After installing a basic passive system, what routine maintenance should DIY homeowners expect to keep it running efficiently over the years?
For a basic passive solar water heating system, homeowners should regularly check for leaks in pipes and storage tanks, clean the collector surface to remove dust or debris, and inspect insulation for any damage. Every year or two, flush the system to prevent mineral buildup and check for signs of corrosion. It’s also wise to monitor temperature and water pressure to ensure the system is operating smoothly.
I’m trying to estimate the overall cost for this kind of project, especially for the basic tools and equipment mentioned in the guide. Do you have a ballpark figure for a straightforward home setup?
For a straightforward home solar water heating setup, you can expect to spend about $1,500 to $3,000 for the main equipment, like solar collectors, storage tanks, and controllers. Basic tools and installation materials may add another $200 to $500 if you don’t already own them. The final cost can vary depending on system size and your local market, but this should give you a solid starting point for budgeting.
I’m still a bit confused about choosing between flat-plate and evacuated tube solar collectors. For a small home with moderate water usage, do you have any tips on which one offers better performance in colder climates?
For a small home in a colder climate, evacuated tube collectors usually perform better than flat-plate collectors. They are more efficient at retaining heat and can work well even on cloudy days and during winter. While flat-plate collectors are reliable and less expensive, evacuated tubes are often worth the investment if maximizing efficiency in cold weather is a priority for your household.
You mentioned needing the right plumbing tools and materials to avoid costly mistakes. Are there particular tools or installation steps that tend to trip up first-time DIYers, especially with copper versus PEX piping?
First-time DIYers often struggle with properly joining copper pipes, since soldering requires a torch, flux, and careful technique to avoid leaks. PEX piping is easier to work with, but you’ll need the correct crimping tool and compatible fittings. A pipe cutter, deburring tool, and a good pipe wrench are essential for both types. Double-check for leaks after installation, as joint mistakes are common early on.
What would be a reasonable ballpark budget for purchasing all the necessary tools and core components you mentioned, assuming a DIY installation for a small household?
For a small household doing a DIY solar water heating setup, you can expect to spend roughly $1,000 to $2,500 on core components like the solar collector, storage tank, pump, and mounting hardware. The necessary tools, if you’re starting from scratch, could add another $150 to $400. Actual costs depend on your local supplier prices and whether you can reuse any existing tools or equipment.
What is a realistic budget range for all the essential tools and materials mentioned in your guide, assuming a typical two-bathroom home? Any tips on where to save versus where not to cut corners?
For a typical two-bathroom home, you can expect to spend around $1,500 to $3,500 on essential tools and materials for a home solar water heating system. Major costs include solar collectors, a storage tank, pumps, and plumbing supplies. If you’re looking to save, consider secondhand or basic tools, but invest in quality collectors, reliable pumps, and proper insulation, as these are crucial for efficiency and longevity. Avoid cutting corners on safety equipment and professional installation for plumbing or electrical work if you’re not experienced.
I’m interested in making this upgrade mainly for long-term savings, but are there any upfront equipment costs or hidden expenses that homeowners often overlook when setting up a basic solar water heating system?
When setting up a basic solar water heating system, you’ll need to consider upfront costs like solar collectors, storage tanks, and installation materials. Homeowners sometimes overlook expenses such as roof reinforcement (if needed), permits, or plumbing modifications. Maintenance costs, like replacing pumps or antifreeze in active systems, can also add up over time. Factoring these in will give you a clearer picture of the true investment.