
Introduction
Outdoor lighting not only elevates your home’s curb appeal and safety but can also significantly impact your energy use and carbon footprint. Traditional wired lighting systems rely on grid electricity—often derived from fossil fuels—leading to higher utility bills and unnecessary emissions. Solar-powered outdoor lighting systems, on the other hand, harness renewable energy, operate independently of the grid, and require minimal ongoing maintenance. Whether you’re looking to light a garden path, accent landscaping features, or deter intruders, installing a solar-powered outdoor lighting system is a practical, sustainable step that pays dividends year-round.
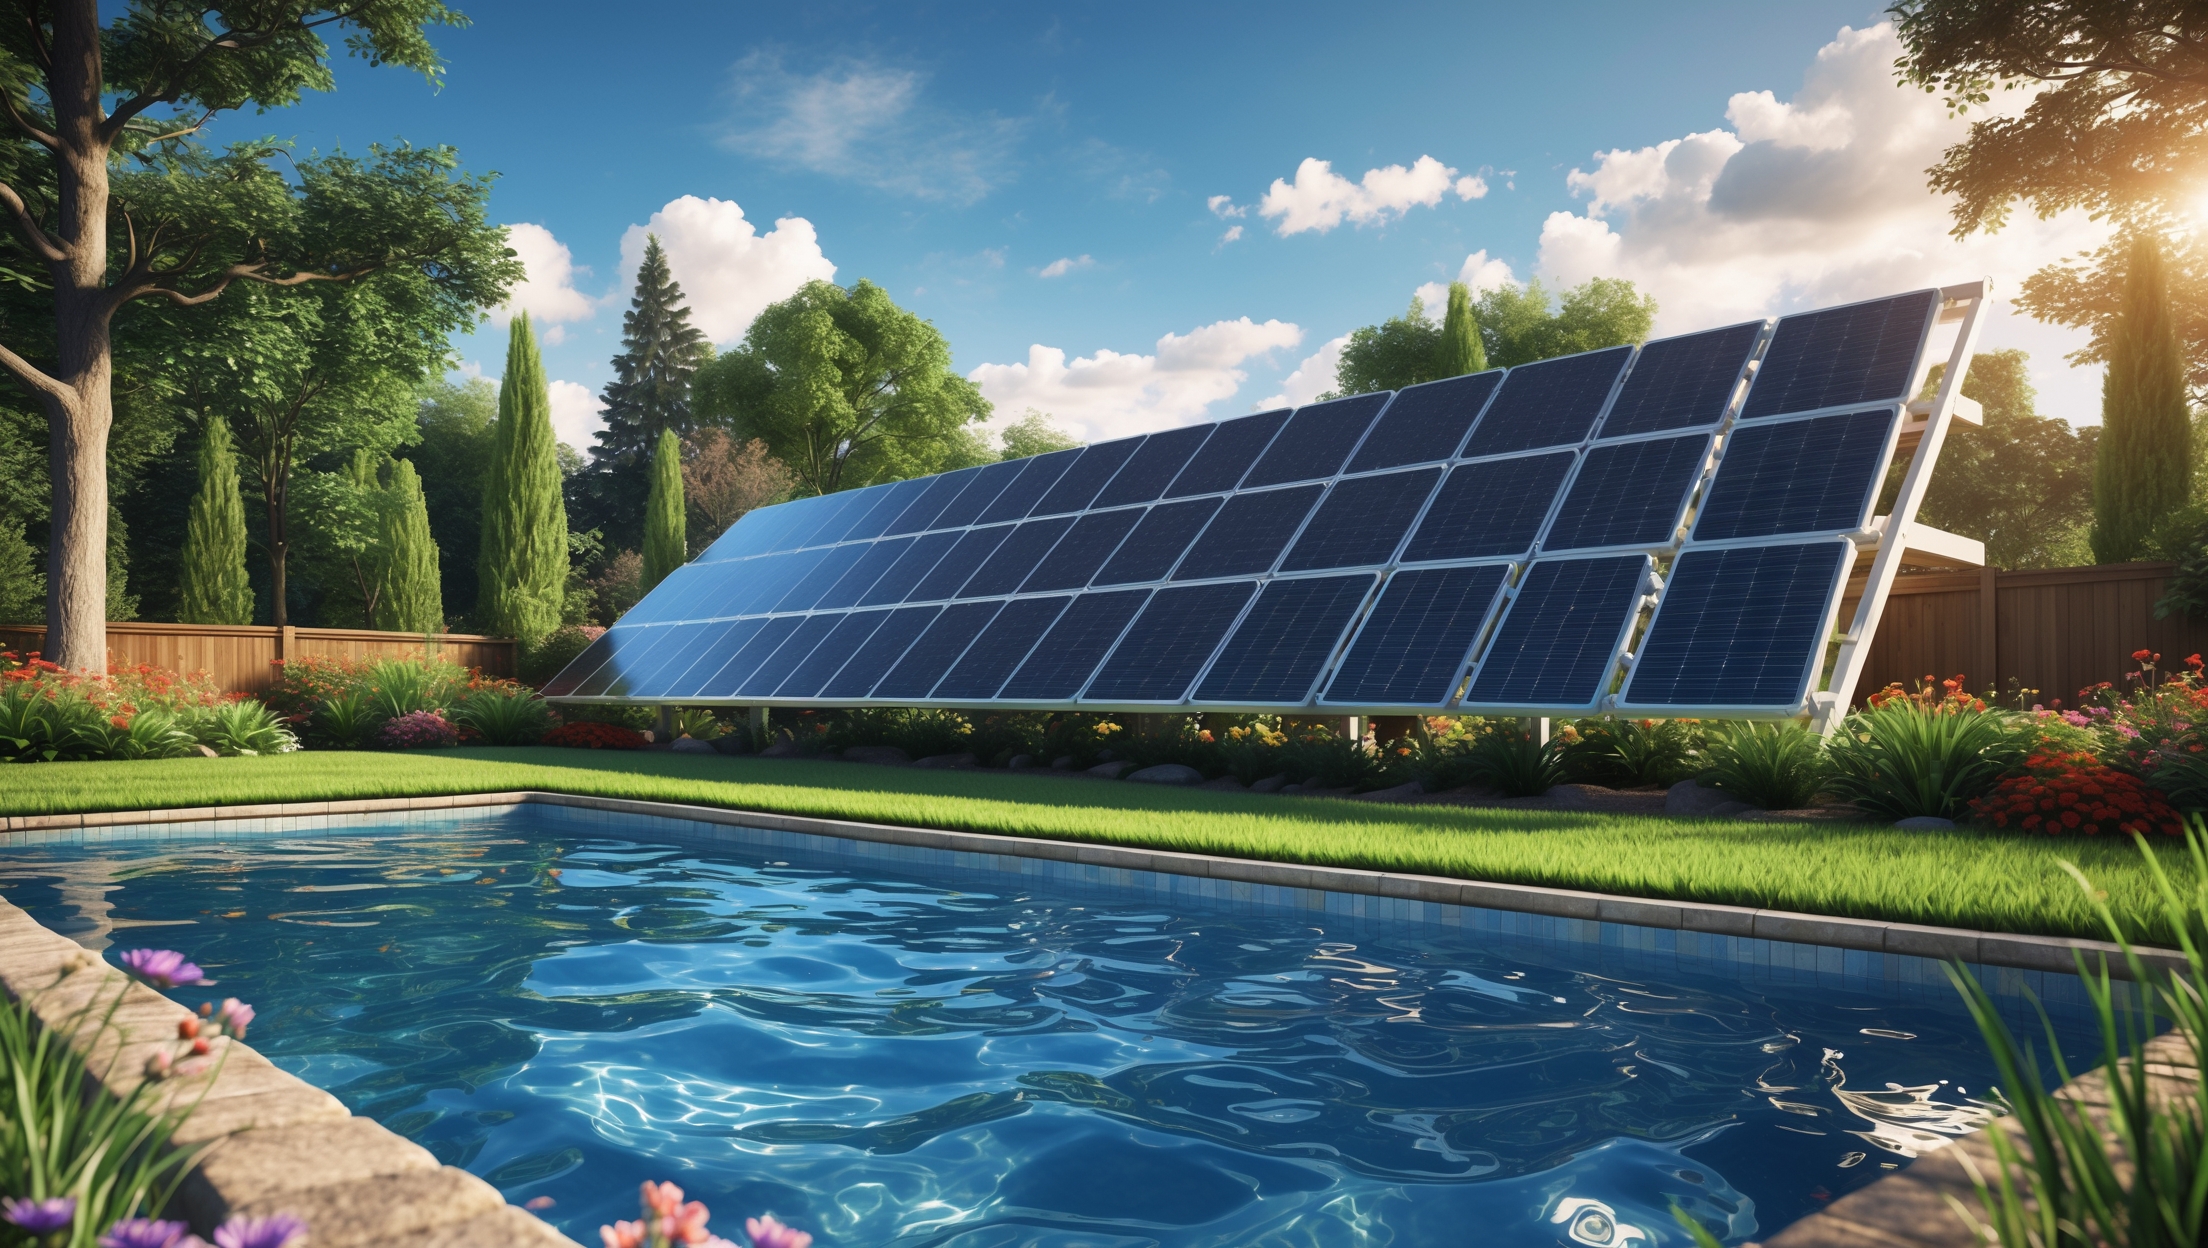
This in-depth tutorial will guide you through every stage of setting up a robust solar-powered outdoor lighting system designed to withstand all seasons, deliver reliable illumination, and maximize energy efficiency. We’ll cover planning, choosing components, installation, troubleshooting, and maintenance—so you can enjoy a beautifully lit, eco-friendly landscape with confidence.
Understanding Solar Outdoor Lighting Systems
Core Components
- Solar Panels: Convert sunlight into electricity.
- Batteries: Store energy for nighttime use; typically lithium-ion or nickel-metal hydride.
- LED Fixtures: Provide efficient, long-lasting light output.
- Charge Controller: Regulates battery charging and prevents overcharging.
- Mounting Hardware: Stakes, poles, or brackets for securing lights and panels.
Types of Solar Outdoor Lights
- Pathway Lights: Low-level, spaced along walkways or driveways.
- Spotlights: Focused beams for accenting trees or architectural features.
- Floodlights: Wide-area illumination for security.
- String Lights: Decorative, often used for patios or gardens.
- Wall-Mounted Fixtures: For entryways or fence lines.
Select lighting types based on your goals: navigation, security, ambiance, or a combination.
Planning Your Solar Lighting System
Step 1: Assess Your Lighting Needs
- Walk your property after sunset and note dark areas that need illumination.
- Identify primary functions: safety, aesthetics, or both.
- Sketch a simple map marking intended light locations.
Step 2: Evaluate Site Conditions
- Ensure each solar panel location receives at least 6–8 hours of direct sunlight daily, even in winter.
- Look for obstructions—trees, buildings, fences—that could cast shade.
- Consider local climate: snow, rain, and extreme temperatures can impact performance.
Step 3: Calculate System Size
- Estimate total wattage needed based on the number and type of fixtures.
- Factor in battery capacity for desired hours of illumination (typically dusk-to-dawn or motion-activated period).
- Choose appropriately sized solar panels and batteries to ensure year-round reliability, especially during shorter winter days.
Selecting Tools and Materials
- Solar lighting kits or individual components (panels, lights, batteries, controllers)
- Shovel or auger for installing stakes or posts
- Wire strippers and weatherproof connectors (for systems with separate panels and fixtures)
- Drill, screwdriver, and mounting hardware for wall or fence lights
- Level and measuring tape
- Silicone sealant or waterproof junction boxes (if needed)
- Cable clips or conduit for neat, safe wire runs
- Protective gloves and safety glasses
Step-by-Step Setup Guide
Step 1: Layout and Pre-Installation Checks
- Lay out all fixtures and panels in their intended locations during daylight.
- Double-check sunlight exposure for each solar panel spot.
- Verify that wiring runs (if using remote panels) are feasible and safe.
Step 2: Panel and Fixture Installation
- Stake-Mounted Lights: Drive stakes into the ground; attach fixtures firmly. Ensure panels face true south (in the Northern Hemisphere) at the optimal tilt angle (roughly equal to your latitude).
- Wall or Fence Lights: Use a drill and appropriate anchors to secure mounting brackets; position panels where they receive unobstructed sunlight.
- Separate Panels: Mount panels in a cleared, sunny area and run cables via weatherproof conduit to the light fixtures.
- Use a level to ensure proper alignment; avoid tilting panels toward shade or reflective surfaces.
Step 3: Wiring and Electrical Connections
- Follow manufacturer instructions for connecting panels, charge controllers, and batteries.
- Use weatherproof connectors and junction boxes to protect all connections from moisture and pests.
- Secure cables with clips or conduit to prevent tripping hazards and damage from lawn equipment.
- Double-check polarity (positive and negative terminals) to avoid short circuits or battery damage.
Step 4: Initial Testing and Programming
- Allow solar panels to charge batteries for a full day before first use.
- Test each light at dusk to confirm illumination, placement, and coverage.
- Adjust fixture angles for optimal light distribution.
- Set timers, dusk-to-dawn sensors, or motion detectors as desired.
Optimizing for All-Season Performance
Winter and Low-Light Conditions
- Increase panel tilt angle in winter to capture lower-angle sunlight and shed snow easily.
- Consider slightly oversizing panels and batteries to compensate for shorter days and higher energy demand.
- Use high-quality, low-temperature rated batteries; lithium batteries outperform nickel-based in cold environments.
- Regularly clear snow, leaves, or debris from panels to maintain efficiency.
Weatherproofing and Durability
- Choose fixtures and panels rated for outdoor use (IP65 or higher for water/dust resistance).
- Seal all joints and entry points with silicone to prevent water ingress.
- Elevate batteries above ground level and use vented, waterproof enclosures if installing separate battery banks.
Troubleshooting Common Issues
- Lights Not Turning On: Check for panel obstructions, battery connections, and test batteries with a multimeter.
- Dim Light Output: Clean panels, ensure batteries are fully charged, and verify correct fixture wattage.
- Intermittent Operation: Inspect wiring for damage, test motion/timer sensors, and check for shading during the day.
- Short Runtime: Upgrade to higher-capacity batteries, reduce fixture wattage, or add more solar panels.
Maintenance Best Practices
- Clean solar panels quarterly with a soft brush and mild soap to remove dust, pollen, and grime.
- Check all fixtures monthly for secure mounting and proper operation.
- Inspect wiring and connectors seasonally for wear or rodent damage.
- Replace rechargeable batteries every 2–3 years (or per manufacturer guidelines) for best performance.
- Test and reset motion sensors or timers annually.
Enhancing Your Solar Outdoor Lighting System
Smart Controls
- Integrate Wi-Fi or Bluetooth-enabled controllers for remote monitoring and scheduling.
- Connect to smart home hubs for automation based on weather or occupancy.
Expanding Your System
- Start with critical areas (entrances, walkways) and expand as budget allows.
- Mix fixture types (spotlights, path lights, floodlights) for layered, customized effects.
- Consider solar-powered cameras for added security.
Cost Considerations and Budgeting
Solar-powered outdoor lighting has a higher upfront cost than traditional low-voltage wired systems, but it quickly pays for itself with zero ongoing electricity costs and minimal maintenance. Typical costs break down as follows:
- Basic Pathway Lights: $20–$60 per fixture (standalone kits)
- Spotlights/Floodlights: $40–$150 per fixture (higher wattage and brightness)
- Expansion Panels/Batteries: $50–$200 per upgrade
- Total DIY System: $200–$1,000 depending on size and complexity
Factor in possible savings from reduced electrical bills, avoided trenching/wiring costs, and potential rebates or incentives for renewable energy installations in your area.
Compliance and Safety Considerations
- Solar lighting generally does not require permits for residential use, but check local codes for large systems or permanent installations (especially if wiring is buried).
- Follow manufacturer instructions to avoid electrical hazards. Use only outdoor-rated components.
- Keep walkways clear of cables, and ensure all fixtures are securely mounted to prevent tripping or falling.
Conclusion
Transitioning to a solar-powered outdoor lighting system is a strategic investment in both sustainability and year-round home comfort. By following a step-by-step approach—starting from careful site assessment and smart component selection, through precise installation and regular maintenance—you can achieve reliable, attractive illumination without the ongoing costs or environmental impact of conventional lighting. Solar outdoor systems are scalable, customizable, and easily upgraded as your needs evolve. With advances in battery and LED technology, today’s solar lights shine brighter, last longer, and operate more efficiently than ever, even in challenging climates.
As you plan and install your system, remember that attention to detail—such as optimal panel placement, robust weatherproofing, and regular upkeep—will ensure trouble-free operation for years. The benefits extend beyond your own property: by choosing solar, you’re joining a global movement toward energy independence, lower emissions, and a greener future. Enjoy the peace of mind that comes with sustainable, self-sufficient illumination, and let your landscape shine as a beacon of environmental stewardship all year long.

I’m looking to install pathway lights around my café’s outdoor seating, but I’m concerned about winter weather affecting performance. Does the tutorial cover adjustments for snow or reduced sunlight during colder months?
The tutorial does address winter considerations like snow and limited sunlight. It suggests positioning solar panels where they’ll get the most sun, even during shorter days, and recommends choosing lights with larger batteries and efficient panels for cloudy conditions. There are also tips on keeping panels clear of snow to maintain performance throughout the colder months.
After installation, how often should I expect to maintain or replace parts like the batteries or the LED fixtures to keep everything running smoothly throughout the seasons?
Once your solar lighting system is installed, plan to check and clean the panels and fixtures every few months, especially after storms or during heavy pollen seasons. The batteries typically need replacement every 2 to 3 years, depending on their quality and local climate. LED fixtures can last 5 to 10 years, but inspect them annually for any signs of dimming or damage to ensure reliable performance.
If some of my LED fixtures start flickering or don’t turn on after installation, what troubleshooting steps would you suggest before calling in a professional?
First, check that all wiring connections are secure and the fixtures are properly attached to the power source. Make sure the solar panel is clean and positioned to receive maximum sunlight. Inspect each LED fixture for any visible damage and verify that the batteries are correctly installed and fully charged. If possible, swap a non-working fixture with a working one to see if the issue follows the fixture or remains at the location. These steps can often resolve common problems without professional help.
For someone on a budget, is it more cost-effective to start with a small solar lighting setup and expand later, or is it better to invest in a full system at the outset to maximize efficiency?
Starting with a small solar lighting setup can be more cost-effective if you’re on a budget. This allows you to spread out costs, learn how the system works, and expand as funds allow. While buying a full system upfront may offer some efficiency and potential bulk discounts, it requires a larger initial investment. Many users successfully add more lights over time, ensuring each new component matches the existing system’s compatibility.
Can you give an estimated budget range for setting up a basic pathway solar lighting system for a medium-sized yard, including the core components you listed? I want to understand the typical costs before I start purchasing anything.
For a medium-sized yard, a basic pathway solar lighting system typically costs between $100 and $300. This estimate covers solar lights, mounting stakes, and basic wiring if needed. Prices vary based on the number of lights, brightness, and durability. If you opt for higher-end models with better weather resistance or integrated batteries, the cost may be on the higher end of that range.
For someone on a modest budget, which component should I invest more in—the solar panels or the LED fixtures—to get the most reliable illumination throughout the year?
If you’re working with a modest budget, it’s usually best to invest more in higher-quality solar panels. Good panels will ensure your lights get enough charge even during cloudy days or shorter winter daylight hours, resulting in more reliable illumination year-round. Budget LED fixtures are generally sufficient, as most LEDs are already energy-efficient and long-lasting.
Is there a significant difference in upfront costs between installing path lights versus wall-mounted fixtures for solar lighting, and how should I budget for a medium-sized yard with both decorative and security needs?
Path lights usually have a lower upfront cost per fixture compared to wall-mounted solar lights, which often come with brighter bulbs and more robust housings for security. For a medium-sized yard, plan your budget by estimating how many of each type you need—decorative path lights for walkways and brighter wall-mounted fixtures for entrances or dark areas. Calculate costs per fixture, include installation if needed, and allow a buffer for extra features or higher quality models.
If the solar-powered lights start dimming or stop working after a few cloudy days, what are the first troubleshooting steps you recommend based on your setup process?
If your solar-powered lights dim or stop working after cloudy days, start by checking that the solar panels are clean and not blocked by debris or shade. Make sure the panels face direct sunlight for as many hours as possible. Next, inspect the batteries—rechargeable batteries can lose capacity over time and might need replacing. Finally, verify all connections are secure and free of moisture.
As a small business owner, I’m interested in using solar-powered outdoor lighting to improve security around my storefront. How do I determine the right mix of floodlights and pathway lights to both deter intruders and provide safe walkways after dark?
To balance security and safety, start by assessing the layout around your storefront. Use solar-powered floodlights to cover entrances, parking areas, and any dark corners—these deter intruders with bright, wide illumination. Place solar pathway lights along walkways and steps to clearly mark safe routes for customers. Consider motion sensor features for floodlights, and check brightness (lumens) ratings to ensure adequate coverage. This combination should boost both security and visibility around your business.
Could you explain a bit more about mounting hardware? I’m not sure whether stakes, poles, or wall mounts are better for keeping lights secure during strong winds or storms.
For strong winds or storms, the most secure mounting option is usually wall mounts, as they provide a sturdy anchor point directly to a solid surface like a wall or fence. Poles can also be reliable if they are firmly anchored deep into the ground with concrete. Stakes are generally less stable in severe weather, as they can be dislodged more easily. Choose wall mounts or well-anchored poles for the best storm resistance.
When planning out a solar lighting system for a larger yard, is it better to go with multiple small solar panels attached to each fixture, or invest in a single larger panel powering multiple lights?
For a larger yard, using a single larger solar panel to power multiple lights is often more efficient and easier to maintain. It allows you to place the panel in the best sunlit area, which is helpful if some lights are in shaded spots. However, this setup requires running wires underground or along pathways. Multiple small panels are more flexible for placement but may not perform as well in partially shaded areas. Consider your yard layout and maintenance preferences when deciding.
If I want to light a long garden path on a budget, are there affordable solar options that still hold up in harsh Midwest winters, or would I have to compromise on brightness or reliability?
You can find affordable solar path lights designed to handle harsh Midwest winters. Look for models with weatherproof ratings (IP65 or higher) and sturdy metal housings. You may need to check user reviews to ensure they perform well in low sunlight and snow. While budget lights may be slightly dimmer, choosing ones with larger solar panels and LED bulbs can help maintain decent brightness and reliability without significantly increasing costs.
How difficult is it to expand the solar lighting system later if I want to add more pathway or floodlights down the road? Would I need new solar panels or just additional fixtures?
Expanding your solar lighting system later is usually straightforward. In many cases, you can simply add more fixtures, as long as your existing solar panel and battery have enough capacity to handle the extra lights. If you plan to add several new lights or more powerful ones like floodlights, you may need to upgrade your solar panel or battery to ensure reliable performance.
If after installing the system, some of the lights seem dimmer than others, what would be the first things to check for troubleshooting? Could it be the panel position, wiring, or maybe the type of battery?
If some lights are dimmer, start by checking if the solar panels for those lights are getting enough direct sunlight or if they’re shaded. Next, inspect the wiring connections to make sure they’re secure and not damaged. Also, verify that the batteries are all the recommended type and fully charged, as mismatched or older batteries can result in dim lighting. These steps should help identify the cause.
For small businesses trying to maximize year-round savings, do you have any ballpark estimates on the upfront investment versus long-term energy bill reductions when switching from traditional wired lighting to a solar-powered system?
For small businesses, upfront costs for solar-powered outdoor lighting typically range from $100 to $300 per fixture, depending on quality and features, while wired lighting can cost less initially but requires trenching and wiring. Over 3–5 years, solar systems can offset their higher upfront cost by cutting outdoor lighting electricity bills close to zero, with potential savings of several hundred dollars annually, especially in areas with high energy rates.
Can you give a rough estimate of the initial cost for a basic setup, like four pathway lights and two spotlights, including the core components? I’m trying to figure out a budget before starting this project.
For a basic setup with four solar pathway lights and two solar spotlights, you can expect to spend around $70 to $150. This estimate covers the core components, including the lights, built-in solar panels, mounting stakes or brackets, and the necessary wiring (if required, though most are wireless). Prices vary based on brightness, brand, and weather resistance. No professional installation is usually needed for these DIY kits.
I noticed you mention both lithium-ion and nickel-metal hydride batteries. Is one better than the other for year-round outdoor use, especially in colder climates, or does it not make much difference?
Lithium-ion batteries generally perform better than nickel-metal hydride (NiMH) batteries for year-round outdoor use, especially in colder climates. Lithium-ion batteries tend to handle lower temperatures more efficiently, have a higher energy density, and last longer over time. If your area experiences harsh winters, lithium-ion is usually the more reliable choice for consistent lighting performance.
Is there any advice on how to troubleshoot if my solar-powered lights stop working after a few cloudy days? I’m curious about what to check first before calling in a professional.
If your solar-powered lights stop working after a few cloudy days, start by checking if the solar panels are clean and free of debris, as dirt can block sunlight. Make sure the panels aren’t shaded by plants or structures. Next, check the battery connections and ensure the batteries are still functional—cloudy weather may not fully charge older or weak batteries. Give the lights a full day of direct sun and see if they recover before seeking professional help.
Is there a typical maintenance schedule I should follow for the charge controller and LED fixtures to keep the system running efficiently, or are these mostly set-and-forget once installed?
While solar-powered lighting systems are designed to be low-maintenance, it’s a good idea to check the charge controller and LED fixtures every 3 to 6 months. For the charge controller, inspect for dust buildup and ensure the wiring is secure. For the LED fixtures, wipe any debris from the lenses and check for moisture inside. This routine helps maintain efficiency and extends the system’s lifespan.
Could you provide more details on troubleshooting issues, like if the lights start to flicker or don’t stay on the whole night? What are the most common reasons for problems like this after installation?
Flickering lights or lights that don’t stay on all night are usually caused by issues like inadequate sunlight exposure, dirty or obstructed solar panels, aging or faulty batteries, or poor connections in the wiring. First, check that the panels are clean and receive direct sunlight for most of the day. Next, inspect the battery for corrosion or reduced capacity, and replace it if needed. Finally, ensure all wiring and connections are secure and protected from moisture. These steps resolve most common issues after installation.
After finishing the installation, is there any seasonal maintenance I need to remember, like cleaning the panels or checking the batteries, to keep everything running smoothly through all four seasons?
Yes, seasonal maintenance is important for solar-powered outdoor lighting systems. In spring and fall, gently clean the solar panels with a soft cloth to remove dust, pollen, or debris. During winter, make sure snow or ice isn’t covering the panels, and check that wiring remains intact after storms. Once or twice a year, inspect and, if needed, replace rechargeable batteries to maintain strong performance throughout the year.
Could you clarify how often the batteries in these outdoor solar lighting systems typically need to be replaced and if there are ways to extend their lifespan with regular maintenance?
The rechargeable batteries in outdoor solar lighting systems usually last between 1.5 to 3 years, depending on usage and environmental conditions. To help extend their lifespan, clean the solar panels regularly to ensure efficient charging, check for corrosion on battery contacts, and avoid placing lights in areas that are shaded during the day. If you notice reduced lighting time or dim performance, it’s a sign the batteries may need to be replaced soon.
The article mentions different types of batteries for solar lighting systems. Is there a big reliability or maintenance difference between lithium-ion and nickel-metal hydride batteries for year-round outdoor use?
Lithium-ion batteries generally offer better reliability and require less maintenance than nickel-metal hydride (NiMH) batteries for year-round outdoor solar lighting. Lithium-ion models tend to last longer, handle temperature fluctuations better, and hold their charge more efficiently. NiMH batteries are more affordable but may need more frequent replacement, especially in extreme temperatures. For most year-round outdoor setups, lithium-ion is the preferred choice if your budget allows.
If I’m on a student budget, which component of the system should I prioritize spending more on for durability or performance, and where can I save without sacrificing too much quality?
If you’re working with a student budget, it’s smartest to prioritize spending on high-quality solar panels and durable batteries, since these directly affect performance and longevity. You can save a bit on the light fixtures and mounting hardware, as mid-range options often work well and last long if installed properly. Just avoid the cheapest options for panels and batteries, as they tend to fail sooner.
If part of the system stops working, like if some lights don’t turn on at night, what are the most common troubleshooting steps to check first? Are there telltale signs that point to an issue with the batteries versus the solar panel?
If some lights aren’t turning on, start by checking if the solar panels are clean and positioned to receive enough sunlight. Next, inspect the batteries—if lights are dim or only work briefly after dark, worn-out batteries are often the cause. Corrosion in battery compartments is another sign. If none of the lights work, the solar panel might be failing. Check for loose connections or damaged wires too.
I run a small retail shop with a limited budget—are there specific solar lighting components I can prioritize now and then gradually expand the system over time without having to redo the whole setup?
Absolutely, you can start with the essentials and build up as your budget allows. Begin with solar light fixtures that cover your shop’s main entrance and pathways. Choose modular solar lights and controllers so you can easily add more units later. Stick with a central charge controller and battery that support future expansion—just make sure your initial wiring and placement accommodate extra lights down the line.
When planning out a security lighting setup for a large backyard, can I mix different types of solar lights, like floodlights and pathway lights, on a single battery and panel system, or should each light have its own solar source?
You can mix different types of solar lights, such as floodlights and pathway lights, on a single battery and panel system, but it’s important to ensure the combined power requirements of all the lights do not exceed the capacity of the solar panel and battery. Alternatively, giving each light its own solar source makes installation simpler and helps avoid overloading your system. If you choose a combined system, careful planning and calculation are key.
I’m trying to keep this project affordable. Can you provide insight into the price differences between setting up solar-powered path lights versus traditional wired options? I’m wondering about the upfront and ongoing costs.
Solar-powered path lights generally have a higher upfront cost per fixture compared to basic wired lights, but they save you money on installation since you don’t need to hire an electrician or run cables. Ongoing costs are lower for solar lights because they don’t use electricity from your home. Wired lights may be cheaper initially, but factoring in installation and electricity costs, solar options are often more cost-effective over time.
I’m curious about the battery choices you mentioned. Is there a significant difference in performance or longevity between lithium-ion and nickel-metal hydride batteries for year-round solar outdoor lighting, especially in regions with cold winters?
Lithium-ion batteries generally outperform nickel-metal hydride (NiMH) batteries for solar outdoor lighting, particularly in cold climates. Lithium-ion batteries maintain their capacity better in freezing temperatures, last longer, and recharge more efficiently. NiMH batteries can lose capacity more quickly in cold weather, leading to shorter runtimes. For year-round, reliable performance, especially in regions with harsh winters, lithium-ion is usually the better choice despite being more expensive.
How much should homeowners typically budget for a robust solar-powered outdoor lighting setup as described in the article, including quality panels, batteries, and installation materials for a medium-sized yard?
For a medium-sized yard, budgeting between $600 and $1,500 is typical for a robust solar-powered outdoor lighting setup. This estimate covers quality solar panels, reliable batteries, durable fixtures, mounting hardware, and wiring. Costs can vary based on the number of lights, brightness needed, and whether you plan to do the installation yourself or hire a professional. Investing in quality components helps ensure year-round performance and longevity.
For small businesses with a parking lot, would the same solar lighting setup described here work for larger open spaces, or would I need a different type of panel or battery to make sure it stays bright all night?
For larger open spaces like a business parking lot, you’ll likely need higher-capacity solar panels and larger batteries than those used in standard residential setups. Commercial-grade solar lights are designed to cover bigger areas and provide reliable brightness throughout the night. It’s important to calculate your lighting requirements and consult with a solar supplier to ensure your system can handle the demands of a larger space.
How much time should I set aside for planning and installing a full solar-powered lighting system for a medium-sized backyard, including setup and basic testing, based on your step-by-step process?
For a medium-sized backyard, you should expect the entire process—planning, installation, and basic testing—to take about 6 to 8 hours. Planning the layout, checking sunlight exposure, and assembling all materials may take 1 to 2 hours. Installing the lights and solar panels could require another 3 to 5 hours, depending on the number of fixtures and any digging or mounting needed. Basic testing and adjustments should take about an hour.
Is there a big difference in cost and installation complexity between solar spotlights versus floodlights for security? The article lists both but doesn’t go into which one is easier for someone on a college student’s budget and with limited tools.
Solar spotlights generally cost less and are easier to install than solar floodlights. Spotlights often have simple mounting stakes or brackets and require basic tools, making them well-suited for limited budgets and toolkits. Solar floodlights tend to be larger, may need more secure mounting, and are a bit pricier due to higher brightness and coverage. For a college student, spotlights are usually the most practical and affordable option.
How long does it usually take from start to finish for a beginner to set up a full solar-powered lighting system, including planning, gathering materials, and installation?
For a beginner, the whole process of planning, gathering materials, and installing a solar-powered outdoor lighting system generally takes about 1 to 2 weekends. Planning and sourcing the right materials can take a few hours to a full day, depending on availability. The actual installation typically requires one to two days, especially if you’re new to basic wiring or mounting fixtures.
For a basic setup along a 40-foot driveway, about how much can I expect to spend on a solar-powered outdoor lighting system, including panels, batteries, and fixtures?
For a 40-foot driveway, the cost for a basic solar-powered outdoor lighting system generally ranges from $300 to $800. This estimate includes 6-10 solar light fixtures, built-in solar panels, and battery packs—most driveway kits combine these components. If you want brighter or more decorative fixtures, costs could be higher, while simple stake lights may be on the lower end. No wiring or electrical connection is needed, which helps keep installation costs low.
I’m curious about battery longevity in these systems—do lithium-ion and nickel-metal hydride batteries differ significantly in performance as outdoor temperatures change throughout the year?
Lithium-ion batteries generally perform better than nickel-metal hydride (NiMH) batteries in outdoor lighting systems, especially when temperatures vary throughout the year. Lithium-ion cells tend to handle cold and hot weather more efficiently, retaining capacity and charging faster. NiMH batteries can lose performance and have a shorter lifespan in temperature extremes. If your area experiences significant seasonal changes, lithium-ion batteries are typically the more reliable choice for consistent lighting performance.
Can you clarify if the solar panels need to be mounted separately from the light fixtures for the best sun exposure, or do integrated options usually provide enough flexibility? I want to make sure my setup gets consistent charging throughout the year.
Integrated solar lights are designed for convenience and often work well in open, sunny locations. However, if your lighting spots are shaded at certain times of the year, mounting the solar panels separately gives you more flexibility to place them in optimal sunlight, ensuring consistent charging. Consider your yard’s sun patterns and choose separate panels if you need to maximize exposure.
After completing the installation, what troubleshooting steps would you recommend if the lights aren’t staying on through the night, particularly in locations that don’t get full sun every day?
If your solar lights aren’t staying on all night, especially in less sunny spots, start by checking if the solar panels are clean and unobstructed—dirt or shade can reduce charging. Try repositioning the panels to maximize sunlight exposure. Make sure the batteries are properly connected and consider replacing them if they’re old or underperforming. Finally, confirm that the lights’ settings are correct and that the wiring is secure. These steps should help boost performance in areas with inconsistent sunlight.
How do solar-powered wall-mounted fixtures compare to traditional wired lights in terms of upfront cost and long-term savings? I’m trying to figure out if the initial investment is worth it.
Solar-powered wall-mounted fixtures usually have a higher upfront cost than basic wired lights, mainly because of the integrated solar panels and batteries. However, you won’t need to pay for wiring, trenching, or increase your electricity bill, so the ongoing costs are much lower. Over a few years, the savings on installation and energy often outweigh the initial investment, especially if your location gets a lot of sunlight.
Do you have any tips for making sure the batteries last through the whole winter, especially in places where it gets dark early and there’s not much sunlight? We get pretty harsh winters and I’m worried about the lights staying on at night.
To help your solar lights last through harsh winters, consider using high-capacity, cold-resistant batteries like lithium-ion instead of standard NiMH. Keep solar panels clean and free of snow for maximum charging, and angle them to catch the most winter sunlight. You can also reduce nightly run time or dim the lights to conserve power on cloudy days. If possible, bring batteries indoors during long stretches of extreme cold.
If I already have some wired outdoor lighting installed, is it possible to integrate new solar-powered fixtures with my existing setup, or would I need to completely remove the old system?
You can definitely add solar-powered fixtures alongside your existing wired outdoor lighting without removing your current system. The solar lights operate independently and don’t need to connect to your home’s electrical wiring. Just install the solar fixtures in locations that receive enough sunlight. This way, you can enjoy both types of lighting and even use the wired lights as a backup if needed.
Could you elaborate on how to determine the optimal placement for solar panels in areas with partial shade throughout the day? I’m worried about getting enough sunlight, especially during winter months.
To find the best placement for your solar panels in partially shaded areas, observe your yard throughout the day and note where the most sunlight falls, especially during winter when the sun is lower. Aim to position panels so they’re exposed to direct sunlight for as many hours as possible, ideally facing south if you’re in the northern hemisphere. Try to avoid locations with consistent shade from trees or buildings. If some shading is unavoidable, consider using multiple smaller panels spread across sunnier spots or use microinverters to reduce shade impact on system performance.
Can you give an estimate of the total installation time and a realistic budget range for setting up a basic solar-powered outdoor lighting system that covers a medium-sized yard?
For a medium-sized yard, installing a basic solar-powered outdoor lighting system usually takes between 4 to 8 hours, depending on the number of lights and your familiarity with simple wiring. In terms of budget, you can expect to spend anywhere from $150 to $500, with the main factors being the quality and number of fixtures chosen. This estimate includes lights, mounting hardware, and any necessary cables or stakes.
How long does a typical installation take from planning through setup for a medium-sized yard, and should I anticipate any challenges during the process, such as mounting panels in shady areas or dealing with hard soil?
For a medium-sized yard, the entire process from planning to setup usually takes about one to two days, depending on how complex your layout is and the number of lights. Common challenges include finding sunny spots for the solar panels—shaded areas can reduce performance. Hard or rocky soil can also make it tougher to install stakes or posts, so having the right tools (like a post driver or soil auger) can help. Planning your panel placement to maximize sunlight and testing soil firmness ahead of time will make the process smoother.
If the lights don’t turn on after installation, what are some common troubleshooting steps I can take before calling in a professional?
If your solar lights aren’t turning on after installation, first check that the solar panel is clean and positioned in direct sunlight. Make sure the batteries are correctly installed and fully charged. Confirm all wiring and connections are secure and not damaged. Also verify that the light’s power switch is turned on and the sensor isn’t being blocked by nearby objects. These steps often resolve most startup issues.
After installing a solar-powered outdoor lighting system, what are some common problems that might come up during the winter, and how can I prepare for or troubleshoot them?
During winter, you might notice your solar lights aren’t as bright or don’t last as long. This is usually because shorter days and cloudy weather reduce sunlight for charging. Snow or ice can also cover the panels, blocking sunlight. To prepare, regularly clear snow off the panels, make sure they’re angled to catch the low winter sun, and keep them clean from debris. If performance drops, check connections for corrosion and ensure batteries are still working, as cold weather can affect battery efficiency.
Are there particular installation challenges or additional steps I should be aware of when mounting wall fixtures on exterior surfaces like brick or stucco compared to wood fences?
Mounting wall fixtures on brick or stucco can be a bit more involved than installing on wood. You’ll need a masonry drill bit to create holes for wall anchors or plugs, as regular screws won’t hold securely in brick or stucco. Be careful to avoid cracking the surface, especially on stucco. Sealing around the fixtures with weatherproof caulk is also a good idea to prevent moisture from entering. On wood fences, you can usually screw the fixtures in directly without special anchors.
Could you elaborate on what kind of regular maintenance is needed for these solar-powered systems? I’m wondering how often I should expect to clean panels or check on the batteries to keep them working well.
To keep your solar-powered outdoor lighting system running efficiently, it’s best to clean the solar panels every one to two months, especially if you notice dust, pollen, or debris accumulating. For the batteries, check them every six months for any corrosion or reduced performance, and replace them if their capacity drops noticeably. Also, inspect wiring and fixtures occasionally to ensure everything is secure and undamaged.
After installing the system, what are some common troubleshooting steps if certain lights are not turning on at night? I’m concerned about having to manually check each component.
If some lights aren’t turning on at night, start by checking that all solar panels are clean, free from shade, and securely connected. Ensure batteries are properly installed and charged—sometimes new systems need a full day of sun to charge. Double-check all wiring connections for loose or disconnected wires. If specific lights still don’t work, swapping bulbs between working and non-working fixtures can help identify if the issue is with the bulb or the connection.
If I’m planning to use solar-powered floodlights for security, how do I determine the right wattage and battery capacity to make sure the lights stay on all night, especially during winter when there’s less sunlight?
To find the right wattage and battery capacity, first, check how many hours of darkness you’ll need coverage for in winter—usually 12–14 hours. Multiply your chosen floodlight’s wattage by those hours to get the total watt-hours needed per night. Add at least 20–30% extra capacity to account for cloudy days and battery aging. Then, select a battery with enough amp-hours (Ah) based on your total watt-hours and the battery voltage. Also, ensure your solar panel can recharge the battery during shorter winter days.
What is a realistic budget range for setting up a basic path and spot lighting arrangement for a medium-sized front yard using the components you mentioned?
For a medium-sized front yard, a basic solar path and spot lighting setup generally costs between $150 and $400. This estimate covers quality solar path lights, a few solar spotlights for highlighting features, mounting stakes, and basic wiring or connectors if separate solar panels are used. Prices can vary depending on brightness, brand, and durability, but this range should get you a reliable, visually appealing result without overspending.
When planning the layout, how do you figure out the right spacing for pathway lights to get even illumination without overdoing it or leaving dark spots? Is there a formula or rule of thumb you use in typical residential setups?
For most residential pathways, a good rule of thumb is spacing solar lights about 6 to 8 feet apart. This usually provides even illumination without overlapping too much or leaving dark patches. If the lights are less bright or the area is especially shadowy, you might place them a bit closer. Walking through the path at night with a flashlight can help you test positions before installing.
How do you recommend positioning the solar panels if my backyard doesn’t get consistent sun throughout the day? Are there tips for maximizing energy efficiency when trees or fences create shade?
If your backyard has inconsistent sun due to trees or fences, try to place the solar panels in the spot that receives the most direct sunlight during the day, even if it’s only for a few hours. Angle the panels to face true south (or north in the southern hemisphere) for maximum exposure. Trim back branches if possible, and avoid locations where shadows fall during peak sunlight hours. Using panels with higher efficiency or adding extra panels can also help compensate for limited sun.
How long does the entire installation process usually take for a beginner, from planning and selecting components to actually mounting and wiring everything as described in the tutorial?
For a beginner, the full installation process typically takes about one to two full days. Planning and selecting components can take a few hours, especially if you’re comparing options and measuring your outdoor space. The actual mounting and wiring, following the tutorial, may require anywhere from half a day to a full day, depending on the number of lights and your familiarity with basic tools.
After completing the initial installation, what kind of regular maintenance should I expect throughout the year? I’m particularly interested in any seasonal checks or cleaning that help keep the system running efficiently.
Throughout the year, you’ll want to keep the solar panels clean by wiping off dust, leaves, and snow as needed—especially after storms or pollen-heavy seasons. Check for any debris blocking the lights or sensors, and ensure all wiring is secure and free from damage. In spring and autumn, inspect battery performance and connections, as extreme temperatures can affect efficiency. Also, trim back any plants or branches that might shade the panels.
The article mentions different types of batteries for solar outdoor lights. Is there a major advantage to choosing lithium-ion over nickel-metal hydride batteries in terms of longevity or maintenance for US homeowners?
Lithium-ion batteries generally last longer than nickel-metal hydride (NiMH) batteries, often providing several more years of service before needing replacement. They also require less maintenance and can hold a charge more efficiently, especially in varying temperatures. For US homeowners seeking lower long-term hassle and better performance, lithium-ion batteries are usually the stronger choice, despite potentially higher upfront costs.
Since my business is on a tight budget, I’m wondering if there are cost-effective ways to start small with solar outdoor lighting and then expand the system later. Are the components you mentioned compatible for scaling up over time?
You can absolutely start small with a basic solar lighting setup, such as installing just a few lights in key areas. The components detailed in the article—like modular solar panels, LED fixtures, and rechargeable batteries—are generally designed to be compatible and scalable. When you’re ready to expand, you can add more lights or upgrade batteries and panels without having to replace the entire system.
Is there a big difference in installation difficulty between wall-mounted fixtures and ground stakes or poles? I don’t have a lot of DIY experience and want to pick the easiest option.
Wall-mounted fixtures are usually a bit more challenging to install than ground stakes or pole lights because they often require drilling into exterior walls and using anchors or screws. Ground stakes and pole lights typically just need to be pushed into the soil, making them much easier and faster to set up, especially if you have limited DIY experience. For simplicity, ground stakes or poles are the best choice.
When troubleshooting a system that isn’t providing reliable illumination at night, what’s the first component you suggest checking based on your installation experience? I saw mention of charge controllers and battery storage, but I’m new to diagnosing these setups.
If your solar lighting system isn’t providing consistent light at night, the first component to check is the battery. Make sure it’s holding a charge and connected properly. If the battery seems fine, then examine the charge controller for any loose wires or error indicators. This basic check often reveals common issues with outdoor solar lights.
The article talks about several types of solar fixtures like spotlights and string lights. How would I figure out the right mix for both security and ambiance in a medium-sized backyard?
To balance security and ambiance, start by identifying key areas in your backyard. Use spotlights for entrances, paths, and darker corners to boost security. For ambiance, string lights or lantern-style fixtures work well around patios, seating areas, or garden features. Walk around at dusk to spot dark spots and imagine how each fixture type would enhance safety or atmosphere. Mixing both allows you to customize lighting for practical needs and mood.
Are there any easy troubleshooting steps you recommend if the LEDs start dimming or not turning on after a few months, even though the solar panels look clean?
If your LEDs are dimming or not turning on, first check the batteries, as rechargeable batteries often lose capacity after several months and may need replacing. Also, inspect the wiring connections for any corrosion or loose wires. Make sure the solar panels are positioned to get enough sunlight during the day and that the light sensor is not obstructed. Finally, try resetting the system by turning it off and on or disconnecting and reconnecting the battery.
You mentioned that most systems use lithium-ion or nickel-metal hydride batteries. Is one type generally better for harsher winters or really hot summers, or does it not make a big difference for year-round reliability?
Lithium-ion batteries generally perform better in both harsh winters and hot summers compared to nickel-metal hydride (NiMH) batteries. Lithium-ion batteries handle temperature fluctuations more efficiently, offer better energy retention, and have a longer lifespan. If you’re in a region with extreme temperatures, lithium-ion is usually the more reliable choice for year-round outdoor lighting performance.
What steps should I take if one section of my outdoor solar lights stops working after a few months? Are there typical troubleshooting techniques for common issues with battery or panel connections?
If a section of your solar lights stops working, first check the solar panel for dirt or debris and clean it if needed. Next, inspect the battery compartment for corrosion and make sure the batteries are properly seated or replace them if they’re old. Also, ensure all wiring connections are secure and intact. Testing with new rechargeable batteries can help rule out battery failure. Checking for loose or damaged wires can often resolve panel connection issues, too.
I see you mentioned both lithium-ion and nickel-metal hydride batteries for storing solar energy. Is one of these better for outdoor lighting in areas with really cold winters, or does it not make much difference?
Lithium-ion batteries generally perform better in cold weather compared to nickel-metal hydride (NiMH) batteries. They maintain their capacity and voltage more effectively at low temperatures, making them a better choice for outdoor lighting in areas with harsh winters. If you expect frequent freezing conditions, lithium-ion batteries are likely to provide more reliable and longer-lasting performance for your solar lighting system.
If my backyard gets a mix of sun and shade throughout the day, will the solar panels still be able to charge the batteries enough to keep the lights on all night? Should I position the panels differently, or is it better to choose a different lighting type?
If your backyard gets both sun and shade, your solar panels may not fully charge the batteries on cloudy days or if shaded for long periods. For best results, place the panels where they’ll get the most direct sunlight, ideally facing south if you’re in the Northern Hemisphere. If consistent sunlight isn’t possible, you might consider solar lights with higher-capacity batteries or hybrid models that can also charge via electricity.
When figuring out how many solar panels and what size batteries I’ll need for year-round use, what’s the best way to estimate energy requirements for different types of outdoor lights, especially if I want a mix of path lights and a couple of spotlights?
To estimate your energy needs, start by checking the wattage and daily usage hours for each type of light (path lights and spotlights). Multiply wattage by hours per night for each light, then add up the total watt-hours for all lights. Factor in extra energy for cloudy days and battery efficiency (typically plan for 1.5 to 2 times your daily total). This total helps you choose both solar panel output and battery storage size to ensure reliable year-round operation.
When installing solar-powered floodlights for security purposes, are there specific mounting hardware recommendations to ensure they stay securely in place during heavy wind or storms?
For solar-powered floodlights in areas prone to strong winds or storms, it’s best to use heavy-duty mounting brackets made of rust-resistant metal, like stainless steel or galvanized steel. Securely anchor the brackets into solid surfaces such as brick, concrete, or wooden beams using expansion bolts or lag screws. Avoid plastic anchors, as they may fail under stress. Double-check that all bolts are tightened and periodically inspect the fixtures to maintain their stability over time.
How long does the typical installation take for a medium-sized garden, including the planning and setup phases? I want to make sure I can realistically fit this project into a busy weekend.
For a medium-sized garden, you can generally expect the entire process—planning, laying out, installing the fixtures, and setting up the solar panels—to take about 6 to 8 hours. This includes time for measuring, placing lights, and securing cables. If you’re well-prepared with materials ahead of time, it’s very doable over a weekend, even with a busy schedule.
When planning for a robust solar-powered outdoor lighting system, how do you determine the right battery capacity to ensure reliable illumination through the longest winter nights, especially in regions with less sunlight?
To determine the right battery capacity for reliable winter lighting, calculate the total watt-hours your lights will use during the longest night, then factor in a few days of autonomy for cloudy weather. Next, divide this by your area’s shortest average daily sunlight hours to estimate needed solar charging. It’s smart to choose batteries with extra capacity to handle reduced winter sunlight and maintain steady illumination.
You mention both lithium-ion and nickel-metal hydride batteries for storing energy. Is there a big difference in performance or lifespan between these types, especially with year-round use?
Lithium-ion batteries generally outperform nickel-metal hydride (NiMH) batteries in both lifespan and performance, especially for year-round outdoor solar lighting. Lithium-ion batteries handle temperature changes better, offer higher energy density, and typically last several years longer than NiMH. If your lighting system will face varying weather or heavy use, lithium-ion is usually the more reliable choice.
In case one or more lights stop working after installation, do you recommend any specific troubleshooting steps to identify whether the issue is with the fixture, panel, or battery?
If a light stops working, try these steps: First, check if the solar panel is clean and positioned for maximum sunlight. Next, inspect the fixture for visible damage or loose connections. Try swapping the battery with one from a working light to see if the problem follows the battery. This process helps you pinpoint if the issue is with the panel, fixture, or battery.
What happens if one of the solar panels gets shaded by trees during the day—will the lights still work at night, or should I be worried about inconsistent charging?
If a solar panel is shaded during the day, it won’t generate as much electricity, which means your batteries may not fully charge. This can lead to dimmer lights or shorter lighting periods at night. To ensure consistent performance, try to install the panels in a spot that receives direct sunlight most of the day or trim any nearby branches causing the shade.
Is it possible to mix different types of solar lights, like pathway lights and wall-mounted fixtures, on the same system, or do they each need their own solar panel?
You can definitely mix different types of solar lights, such as pathway lights and wall-mounted fixtures, in your outdoor setup. However, most solar lights are designed with their own built-in solar panels and operate independently. If you want multiple lights powered by a single, larger solar panel, you’ll need a custom wiring setup with compatible lights and a shared battery system. For most homeowners, using individual solar panels for each fixture is the simplest and most flexible approach.
I noticed the article mentions both lithium-ion and nickel-metal hydride batteries. Is one better than the other for outdoor lighting in cold winter climates, or does it not make much difference?
Lithium-ion batteries generally perform better in cold winter climates compared to nickel-metal hydride (NiMH) batteries. Lithium-ion batteries maintain their capacity and voltage more reliably in lower temperatures, while NiMH batteries can lose efficiency and discharge faster when it’s cold. For outdoor lighting exposed to winter conditions, lithium-ion is usually the better choice for year-round performance.
Is there a ballpark estimate for the total installation cost of a robust solar-powered lighting system for an average-sized backyard, including all core components like panels, batteries, and mounting hardware?
For an average-sized backyard, a robust solar-powered lighting system typically costs between $500 and $2,000. This estimate covers essential components such as solar panels, batteries, LED lights, mounting hardware, wiring, and a charge controller. Costs vary based on lighting intensity, the number of fixtures, and quality of materials, but most homeowners find reliable setups in this price range.
The article covers different types of solar lighting like pathway and spotlights. Are there any cost differences or installation challenges I should consider if I want to combine several types in the same outdoor area on a tight budget?
Combining different solar lighting types can affect both cost and installation. Pathway lights are generally less expensive and easier to install, often just requiring you to stake them into the ground. Spotlights usually cost more and might need adjustable mounts or more careful positioning for optimal effect. If you’re on a budget, consider using more pathway lights and fewer spotlights, and try to install all lights where they receive ample sunlight to avoid extra wiring or accessories.
I’m curious how these solar-powered outdoor lights perform during extended periods of cloudy weather in the winter months. Are there tips in the tutorial for ensuring year-round reliability if you live somewhere that doesn’t get a lot of sun for weeks at a time?
The tutorial touches on winter performance and suggests choosing high-capacity batteries and solar panels with greater efficiency for areas with limited sunlight. It also recommends positioning panels for maximum exposure and occasionally clearing off snow or debris. For locations with very long cloudy stretches, it may help to use backup batteries or hybrid lights that can switch to grid power if needed.
You mentioned maintenance being minimal, but what are some common troubleshooting steps if the lights start flickering or stop working after a few months?
If your solar lights start flickering or stop working, first check if the solar panel is clean and positioned to get enough sunlight. Make sure the batteries are still working—they may need replacement after some months. Also, check that all wiring connections are secure and free of moisture. Sometimes, resetting the light by turning it off and on again can resolve minor issues.
After installation, what sort of maintenance should I expect throughout the year? For example, do the solar panels need cleaning often, or do the lights fade over time?
You can expect minimal maintenance for your solar-powered outdoor lighting. It’s a good idea to clean the solar panels every few months, or more often if you notice dust, leaves, or snow buildup that could block sunlight. Check the lights periodically to ensure they’re working well—bulbs usually last for years, but some fading may occur over time, especially with exposure to harsh weather. Also, inspect connections and batteries annually to keep everything running smoothly.
The tutorial mentions troubleshooting—what are the most common problems you see with solar outdoor lights not working consistently, and what can I do to prevent them upfront?
Common issues with solar outdoor lights include blocked or dirty solar panels, battery failure, poor placement with insufficient sunlight, and faulty connections. To prevent these, regularly clean the panels, install lights in locations with ample sunlight, check and replace batteries as needed, and ensure all connections are secure. Following these steps upfront can help maintain consistent performance year-round.
For the batteries you mentioned, is there a big difference in performance or lifespan between lithium-ion and nickel-metal hydride types for solar outdoor lights? Are certain ones better if I live somewhere with cold winters?
Yes, there’s a noticeable difference between lithium-ion and nickel-metal hydride (NiMH) batteries for solar outdoor lights. Lithium-ion batteries generally offer longer lifespan, better performance, and handle deep discharges more effectively than NiMH. They’re also more reliable in colder climates, as NiMH batteries tend to lose capacity and struggle in freezing temperatures. For areas with cold winters, lithium-ion batteries are usually the better choice.
If one of the lights or panels stops working after installation, what troubleshooting steps should I try first before replacing anything? I’d like to know how to handle common issues that come up with solar outdoor systems.
If a light or panel stops working, start by checking if the solar panel is clean and unobstructed. Make sure all connections are secure and wires are intact. Inspect the battery for corrosion or loose placement, and see if it needs to be replaced. Confirm the light’s switch is set to ‘on’ and test the light at night to rule out daylight sensor issues. These steps often resolve common problems without needing replacements.
Is there a recommended minimum number of sunlight hours per day that these solar-powered systems need to function reliably through the winter, especially in northern regions with shorter days? I’d like to know how to factor in regional sunlight variability during the planning phase.
For reliable operation through winter, most solar-powered lighting systems require at least 4 to 6 full hours of direct sunlight per day. In northern regions with shorter days and more overcast weather, consider choosing larger solar panels or increasing battery capacity to compensate for reduced sunlight. When planning, check your region’s average winter sunlight hours and plan your system based on the lowest expected daily sunlight to ensure year-round performance.
If I want to install floodlights for security and string lights for ambience at the same time, is it possible to connect them to a single solar panel and battery system, or do they require separate setups?
You can connect both floodlights and string lights to a single solar panel and battery system as long as the system is sized to handle the combined power consumption of both. Make sure to calculate the total wattage of all lights you plan to use, and choose a solar panel and battery with enough capacity to support them throughout the night. Separate setups are only needed if your power requirements exceed what one system can provide.
For someone on a tight student budget, which types of solar outdoor lights offer the best balance between upfront cost and long-term durability as mentioned in the tutorial?
For students watching their budget, the tutorial highlights that basic stake-style LED solar path lights and solar string lights are affordable options with decent longevity. These lights typically use durable plastic housings and efficient LEDs, helping them last a few years with minimal maintenance. Look for models with weather-resistant features and replaceable rechargeable batteries for better long-term value.
How do I determine the right battery size for my region, especially if I live somewhere with less sunlight in winter? The article mentions lithium-ion and nickel-metal hydride batteries, so I’d love tips on calculating what’s sufficient for reliable year-round lighting.
To choose the right battery size, start by estimating your lights’ nightly energy use (watts x hours of operation). Factor in the shortest winter days—calculate the average daily sunlight hours during winter in your area. Multiply your energy needs by the number of backup days you want (usually 2–3). This total helps you select a battery with enough amp-hour (Ah) capacity, whether it’s lithium-ion or nickel-metal hydride, to ensure reliable lighting even in cloudy conditions.
When planning for winter, do you have tips for positioning the solar panels to get the most sunlight, especially if my yard gets shade part of the day? I want my system to stay reliable year-round like you described.
To maximize sunlight in winter, angle your solar panels more steeply—around 45 degrees helps capture lower-angle sun and shed snow. Place them in the sunniest spot, aiming south if you’re in the northern hemisphere. If your yard is partly shaded, try to position panels where they’ll get the most midday light, as that’s when sun intensity peaks. Trimming nearby branches or relocating panels seasonally can also help maintain year-round reliability.
For a business on a budget, are there certain types of solar outdoor lights from your list that make the most impact without requiring a lot of upfront costs or complex installation?
For a business aiming to save on costs and keep things simple, motion-sensor solar wall lights and solar path lights are great choices from the list. These options are usually affordable, require little to no wiring, and can be installed with just basic tools. They also provide good security and visibility for entrances or walkways without needing major upfront investment.
If my main goal is both security and ambiance, should I combine spotlights and string lights, or is there a more efficient way to meet both needs without buying a ton of fixtures?
Combining spotlights and string lights is a practical way to achieve both security and ambiance. Spotlights can illuminate key areas for safety, while string lights add warmth and style. To avoid too many fixtures, consider solar-powered floodlights with adjustable brightness for security, paired with a single run of string lights in social areas. This setup keeps your space secure and inviting without overcrowding it with lights.
You mentioned minimal ongoing maintenance, but what troubleshooting should I expect if my solar lights start dimming or not turning on, especially after a few months in use?
If your solar lights start dimming or stop turning on after a few months, check if the solar panels are clean and not blocked by debris or dirt, as this can reduce charging efficiency. Also, inspect the batteries—they may need replacing after extended use. Ensure all connections are secure and not corroded. If the lights have an on/off switch, make sure it’s in the correct position. These steps usually resolve common performance issues.
How do the installation steps differ for string lights versus floodlights, especially when it comes to securing the panels and routing any necessary wiring or connectors outdoors?
For string lights, you’ll typically secure the solar panel near where the lights start, often on a wall, fence, or roof, and then hang the lights along your desired path using hooks or clips. The wiring is usually lightweight and can follow the light string. For floodlights, the solar panel is often mounted higher or in a sun-exposed area, and you may need to use mounting brackets for the heavier light fixture. The wiring is usually thicker, and you may need to secure it along walls or bury it shallowly to protect from weather and damage.
On average, how long does the installation process take for a business property with a medium-sized parking lot and landscaping? I’m trying to gauge whether I’ll need to close off the lot or can do it in stages without major disruptions.
For a medium-sized business parking lot with landscaping, installation typically takes between 2 to 5 days, depending on the complexity and number of lights. Many businesses choose to do the work in phases, closing off sections of the lot at a time. This approach minimizes disruption and usually allows you to keep most of the lot open during the process.
How long does the actual installation process take for a beginner doing this alone, including planning, setup, and initial troubleshooting? I’m wondering if it’s a weekend project or if I should set aside more time.
For a beginner working solo, the entire process—including planning, layout, installing the lights and panels, and basic troubleshooting—can usually be done in one to two full days. If you spread it out, it fits well into a weekend. Complicated yard layouts or unexpected issues might mean you need a few extra hours, but most users find it’s manageable within this timeframe.
Are there any budget-friendly solar outdoor lighting kits you recommend for a small garden path, and do those typically come with all the core components mentioned in the article?
For a small garden path, there are several affordable solar lighting kits available that are reliable and easy to install. Brands like GIGALUMI and Solpex often offer kits with multiple lights at a reasonable price. These kits usually include the solar panels, integrated LEDs, stakes, and rechargeable batteries, so you’ll have all the core components described in the article. Just be sure to check that the kit specifies all items are included before purchasing.
Could you explain more about the maintenance part? What kind of regular checks or cleaning do the solar panels and batteries actually need throughout the year to stay efficient?
To keep your solar-powered lighting efficient, check the solar panels every couple of months for dirt, leaves, or snow and clean them with a soft cloth and mild soapy water if needed. Inspect for any cracks or damage. For batteries, look for corrosion on terminals and ensure connections are tight. Replace rechargeable batteries every 1–2 years, or if you notice diminished performance. Also, check wiring and light fixtures periodically for wear or moisture.
Are there specific maintenance tasks we should schedule each season to keep the solar panels and batteries working efficiently, particularly in places with heavy snowfall or lots of tree debris?
Absolutely, seasonal maintenance is important for optimal solar lighting performance. In fall and spring, clear leaves, branches, and debris from the panels. During winter or after heavy snowfall, gently brush off snow and check for ice buildup. Inspect battery compartments every season for signs of corrosion or water ingress, and tighten any loose connections. Periodically check that panels are angled correctly and not shaded by growing foliage. These simple steps help ensure your system runs efficiently all year.
I’m curious about potential maintenance costs after installation. The article mentions minimal ongoing maintenance, but are there common issues I should budget for, such as battery replacements or panel cleaning?
After installation, the main maintenance costs to consider are battery replacements and occasional panel cleaning. Solar batteries typically last 2–5 years, depending on usage, so budgeting for replacements every few years is wise. Dust, debris, or snow on panels can reduce efficiency, so a periodic cleaning—perhaps a few times a year—might be needed, especially in dusty or snowy areas. These are the most common and predictable expenses.
If I want to light both my front pathway and backyard for security, is it better to buy one type of solar light or mix different types like pathway lights and floodlights? How do I know what combination will give the best coverage?
For the best coverage, it’s usually helpful to mix different types of solar lights. Pathway lights are ideal for illuminating walkways and creating a guiding line, while solar floodlights are stronger and can cover wider areas like your backyard for security. To decide on the right combination, assess the size and layout of each area. Use pathway lights for the walkway and place floodlights at key points to cover open spaces, entrances, or dark corners. This approach ensures both visibility and security.
Could you explain more about how to choose the right battery type for a solar lighting system? I saw you mentioned lithium-ion and nickel-metal hydride options, but I’m not sure which would be best for varying weather conditions throughout the year.
When choosing between lithium-ion and nickel-metal hydride (NiMH) batteries for your solar lighting system, consider your climate. Lithium-ion batteries generally perform better in colder temperatures and have a longer lifespan, but they’re more expensive. NiMH batteries are less costly and handle heat well but may lose capacity faster in cold weather. For year-round outdoor use, especially where winters are cold, lithium-ion batteries are usually the better choice for reliable performance.
After installing the system, what are some common troubleshooting issues people run into, like lights not turning on after a cloudy week, and what quick fixes can I try before calling a professional?
If your solar lights aren’t turning on after a cloudy week, the batteries may not have received enough sunlight to charge fully. Try wiping the solar panels clean and repositioning them for maximum sunlight. Also, check for loose wiring or debris blocking the sensors. If your lights have a manual switch, ensure it’s set to ‘on.’ Replacing old rechargeable batteries can often solve persistent issues. If these steps don’t help, it may be time to consult a professional.
What are the typical ongoing maintenance tasks I should expect after everything is installed? I’m hoping this system won’t take much effort to keep running, but I’d like to know what to plan for, especially during harsh seasons.
Once your solar-powered lighting system is installed, upkeep is minimal but important. You’ll want to periodically clean the solar panels, especially after dust, pollen, or snow accumulation, to keep them efficient. Check for debris blocking the panels or lights, inspect wiring for signs of animal damage, and replace batteries if performance drops—usually every 2–3 years. Before winter, make sure panels are clear and angled to catch the lower sun. Otherwise, just check for loose mounts or moisture in fixtures after heavy storms.
You mentioned that these systems can be designed to withstand all seasons. Are there any specific installation tips to help solar lights keep working well during snowy or rainy months?
To ensure your solar lights work well in snowy or rainy months, install them in locations that get maximum sunlight even in winter—avoid shaded spots under trees or eaves. Mount the panels at a slight angle so snow and rain can easily slide off. Regularly clear off any accumulated snow or debris from the panels to maintain charging efficiency. Also, choose waterproof fixtures rated for outdoor use to prevent water damage.
If I install a solar-powered outdoor lighting system following this tutorial, what kind of regular maintenance should I expect throughout the year to keep everything working reliably, especially during winter or heavy storms?
To keep your solar-powered outdoor lighting system working reliably all year, you should occasionally clean the solar panels to remove dirt, leaves, or snow, especially after storms or during winter. Check for loose connections, damaged wires, or water buildup in fixtures. Trim back any plants that might shade the panels. Reposition panels if needed to maximize sunlight, and replace any batteries if performance drops, as cold weather can reduce battery efficiency.
How long does the whole planning and installation process usually take for a standard-sized yard, and is it realistic to complete it over a weekend if I have two young kids at home?
For a standard-sized yard, planning and installing a solar-powered outdoor lighting system typically takes about one to two days if you’ve gathered your materials in advance. With young kids at home, it can be realistic to finish over a weekend, especially if you break the work into sections—such as planning and mapping on one day, and installation on the next. Setting aside time during naps or after their bedtime can also help you stay on track.
Could you provide some troubleshooting tips if the LED fixtures start flickering or don’t turn on after installation? I’m worried about dealing with issues once everything’s set up outside.
If your LED fixtures flicker or don’t turn on after installation, first check that all wiring connections are secure and the solar panel is placed in full sunlight. Make sure the batteries are properly installed and fully charged. Clean the solar panel surface, as dirt can reduce efficiency. Also, ensure there are no obstructions casting shade on the panel during the day. If problems persist, test the LEDs with regular batteries to rule out fixture issues.
You mentioned different battery types, like lithium-ion and nickel-metal hydride. Are there specific advantages to choosing one over the other for outdoor solar lighting, especially when it comes to lifespan and performance in different temperatures?
Lithium-ion batteries generally last longer and perform better in both high and low temperatures compared to nickel-metal hydride (NiMH) batteries. Lithium-ion also tends to have a higher energy density, meaning they store more power in a smaller space. NiMH batteries are often less expensive and more environmentally friendly, but they don’t handle temperature extremes as well and have a shorter lifespan. For year-round outdoor lighting, lithium-ion is usually the better choice for durability and consistent performance.
After completing installation, if I notice one of the LED fixtures is dim or not turning on at night, what troubleshooting steps do you suggest before considering a replacement?
First, check that the solar panel is clean and getting direct sunlight; dirt or shade can limit charging. Next, inspect the wiring connections to ensure everything is secure and undamaged. Make sure the battery is properly seated and fully charged—sometimes new batteries need an initial, full day of sunlight. Also, confirm the fixture’s sensor isn’t blocked or dirty. If the light still doesn’t work after checking these, try swapping the LED fixture with a working one to see if the issue follows the fixture or stays with the wiring.
What’s a reasonable budget range to expect if I want to install a robust solar-powered lighting system for a medium-sized backyard, including all the key components listed in the tutorial?
For a medium-sized backyard, a robust solar-powered lighting system including quality solar panels, LED fixtures, batteries, controllers, and mounting hardware will usually cost between $600 and $1,500. This range covers reliable components and a professional-looking setup. Costs can vary based on lighting intensity, number of fixtures, and whether you do the installation yourself or hire help.
You mentioned different types of batteries for outdoor solar lighting. Is there a big difference in performance or lifespan between lithium-ion and nickel-metal hydride batteries, especially with year-round exposure to heat and cold?
Lithium-ion batteries generally offer better performance and longer lifespan than nickel-metal hydride (NiMH) batteries, especially in outdoor solar lighting. Lithium-ion handles extreme temperatures—both hot and cold—better, which helps maintain capacity throughout the year. They also have higher energy density and require less maintenance. NiMH batteries are less expensive but can lose capacity faster, especially in cold weather. For year-round outdoor use, lithium-ion is usually the more reliable choice.
The tutorial mentions using charge controllers to prevent battery overcharging. For a small system with only a few LED fixtures, is a charge controller always necessary, or are there integrated systems where this is handled automatically?
For small solar lighting setups with only a few LED fixtures, many all-in-one or integrated solar lights have built-in charge controllers to automatically handle battery charging and prevent overcharging. If you’re using a DIY setup with separate solar panels and batteries, a dedicated charge controller is still recommended for safety and battery longevity. Always check the product specifications—if it mentions an integrated controller, you won’t need an extra one.
What should I do if I notice my LED fixtures starting to flicker or not turn on after a few months? Is there a common troubleshooting process for solar-powered outdoor lights that you recommend?
If your LED fixtures are flickering or not turning on, start by checking if the solar panel is clean and positioned for maximum sunlight. Next, inspect the battery connections to ensure they are secure and look for signs of corrosion. Sometimes, the rechargeable battery may need replacing after several months if performance drops. Also, verify that no water or debris has entered the fixture. These steps usually resolve most common issues with solar-powered outdoor lights.
If the solar panels or lights stop working during the winter months, what are the most common troubleshooting steps I should try before calling in a professional?
If your solar panels or lights stop working in winter, start by checking that the solar panels are clean and clear of snow or debris, as this can block sunlight. Ensure all connections and wiring are secure and not damaged by cold weather. Inspect the batteries, since very low temperatures can reduce their efficiency or cause them to fail. Finally, confirm the timer and sensor settings haven’t changed. If these steps don’t resolve the issue, it may be time to contact a professional.
Once everything is installed, what kind of regular maintenance should I expect for a solar lighting system to keep it running efficiently through different seasons, especially in areas that get snow or heavy rain?
To keep your solar lighting system running efficiently year-round, regularly clean the solar panels to remove dust, leaves, or snow, especially after storms or heavy snowfall. Check and clear away any debris covering the lights. Inspect wiring and connections for signs of wear or water damage, and ensure mounting hardware remains secure. During winter, brush off snow buildup from panels to maintain charging efficiency. Replace rechargeable batteries every 1–2 years for optimal performance.
How long does the entire installation process usually take for a beginner, assuming I’m setting up about six pathway lights and two floodlights? I’m trying to plan out my weekend project timeline.
For a beginner installing six pathway lights and two floodlights, you can expect the entire process to take about 4 to 6 hours. This includes unpacking, assembling, positioning the lights, securing the stakes, wiring (if needed), and testing the system. If you encounter rocky soil or need to troubleshoot solar connections, add an extra hour. You should be able to comfortably complete this project in one weekend afternoon.
If a solar-powered lighting system isn’t providing consistent light throughout the night, what troubleshooting steps should I try first based on your installation and maintenance experience?
If your solar-powered lighting system isn’t staying on all night, start by checking if the solar panel is getting enough direct sunlight during the day. Clean the panel to remove any dirt or debris. Make sure the batteries are properly connected and consider replacing them if they’re older, as battery performance can degrade over time. Also, confirm there are no shadows on the panel during peak sun hours and that all wiring connections are secure.
The tutorial covers various lighting types like pathway, spotlights, and floodlights. If I want to combine security and decorative lighting, is it possible to use different types of solar lights on the same overall system, or do they each function independently?
You can definitely combine different types of solar lights, like security spotlights and decorative pathway lights, in your outdoor setup. Each solar light usually operates independently with its own panel and battery, so you don’t need to wire them together. Just install each type where it’s best suited, making sure their solar panels get enough sunlight throughout the day.
The article mentions different types of batteries like lithium-ion and nickel-metal hydride. Is there a significant difference in performance or maintenance needs between those two options for year-round outdoor use?
Lithium-ion batteries generally offer better performance for year-round outdoor solar lighting. They last longer, hold charge better, and perform well in a wider range of temperatures compared to nickel-metal hydride (NiMH) batteries. Maintenance is also lower with lithium-ion, as they require less frequent replacement. NiMH batteries can be more affordable but may need to be replaced more often, especially in colder climates.
What kind of regular maintenance should I expect for a solar-powered outdoor lighting system? I see that the article says these systems need minimal ongoing maintenance, but what tasks actually need to be done throughout the year?
For solar-powered outdoor lighting, the main maintenance tasks involve keeping the solar panels clean from dust, leaves, or snow to ensure maximum sunlight absorption. Every few months, check that the lights and wiring are secure and free from damage. Occasionally wipe the fixtures and replace rechargeable batteries every 1-2 years if needed. Inspect the area for plants or objects that may start to shade the panels and trim them back if necessary.
Could you clarify how much sunlight is typically needed each day to keep the system charged, especially for the larger floodlights or wall-mounted fixtures? We have a lot of tree cover, so I’m not sure if solar-powered options would work reliably in my yard.
For larger solar floodlights or wall-mounted fixtures, most systems need about 6–8 hours of direct sunlight daily to stay fully charged. If your yard has significant tree cover and the panels are often shaded, the lights may not perform at their best, especially during cloudy days or winter. You might want to consider trimming branches or positioning the panels in the sunniest spots possible to improve charging efficiency.
In the maintenance section, are there any common troubleshooting issues with solar outdoor lights that might come up in winter, like snow accumulation on panels or battery performance drops? I’d appreciate any tips for those conditions.
Yes, winter can introduce issues like snow or ice covering the solar panels, which reduces charging efficiency. It’s important to gently clear snow off the panels regularly. Cold temperatures can also decrease battery performance; using lights designed for lower temperatures or bringing batteries indoors during extreme cold can help. Make sure connections are dry and inspect for any moisture buildup that could cause corrosion.