
Introduction
Outdoor lighting not only elevates your home’s curb appeal and safety but can also significantly impact your energy use and carbon footprint. Traditional wired lighting systems rely on grid electricity—often derived from fossil fuels—leading to higher utility bills and unnecessary emissions. Solar-powered outdoor lighting systems, on the other hand, harness renewable energy, operate independently of the grid, and require minimal ongoing maintenance. Whether you’re looking to light a garden path, accent landscaping features, or deter intruders, installing a solar-powered outdoor lighting system is a practical, sustainable step that pays dividends year-round.
This in-depth tutorial will guide you through every stage of setting up a robust solar-powered outdoor lighting system designed to withstand all seasons, deliver reliable illumination, and maximize energy efficiency. We’ll cover planning, choosing components, installation, troubleshooting, and maintenance—so you can enjoy a beautifully lit, eco-friendly landscape with confidence.
Understanding Solar Outdoor Lighting Systems
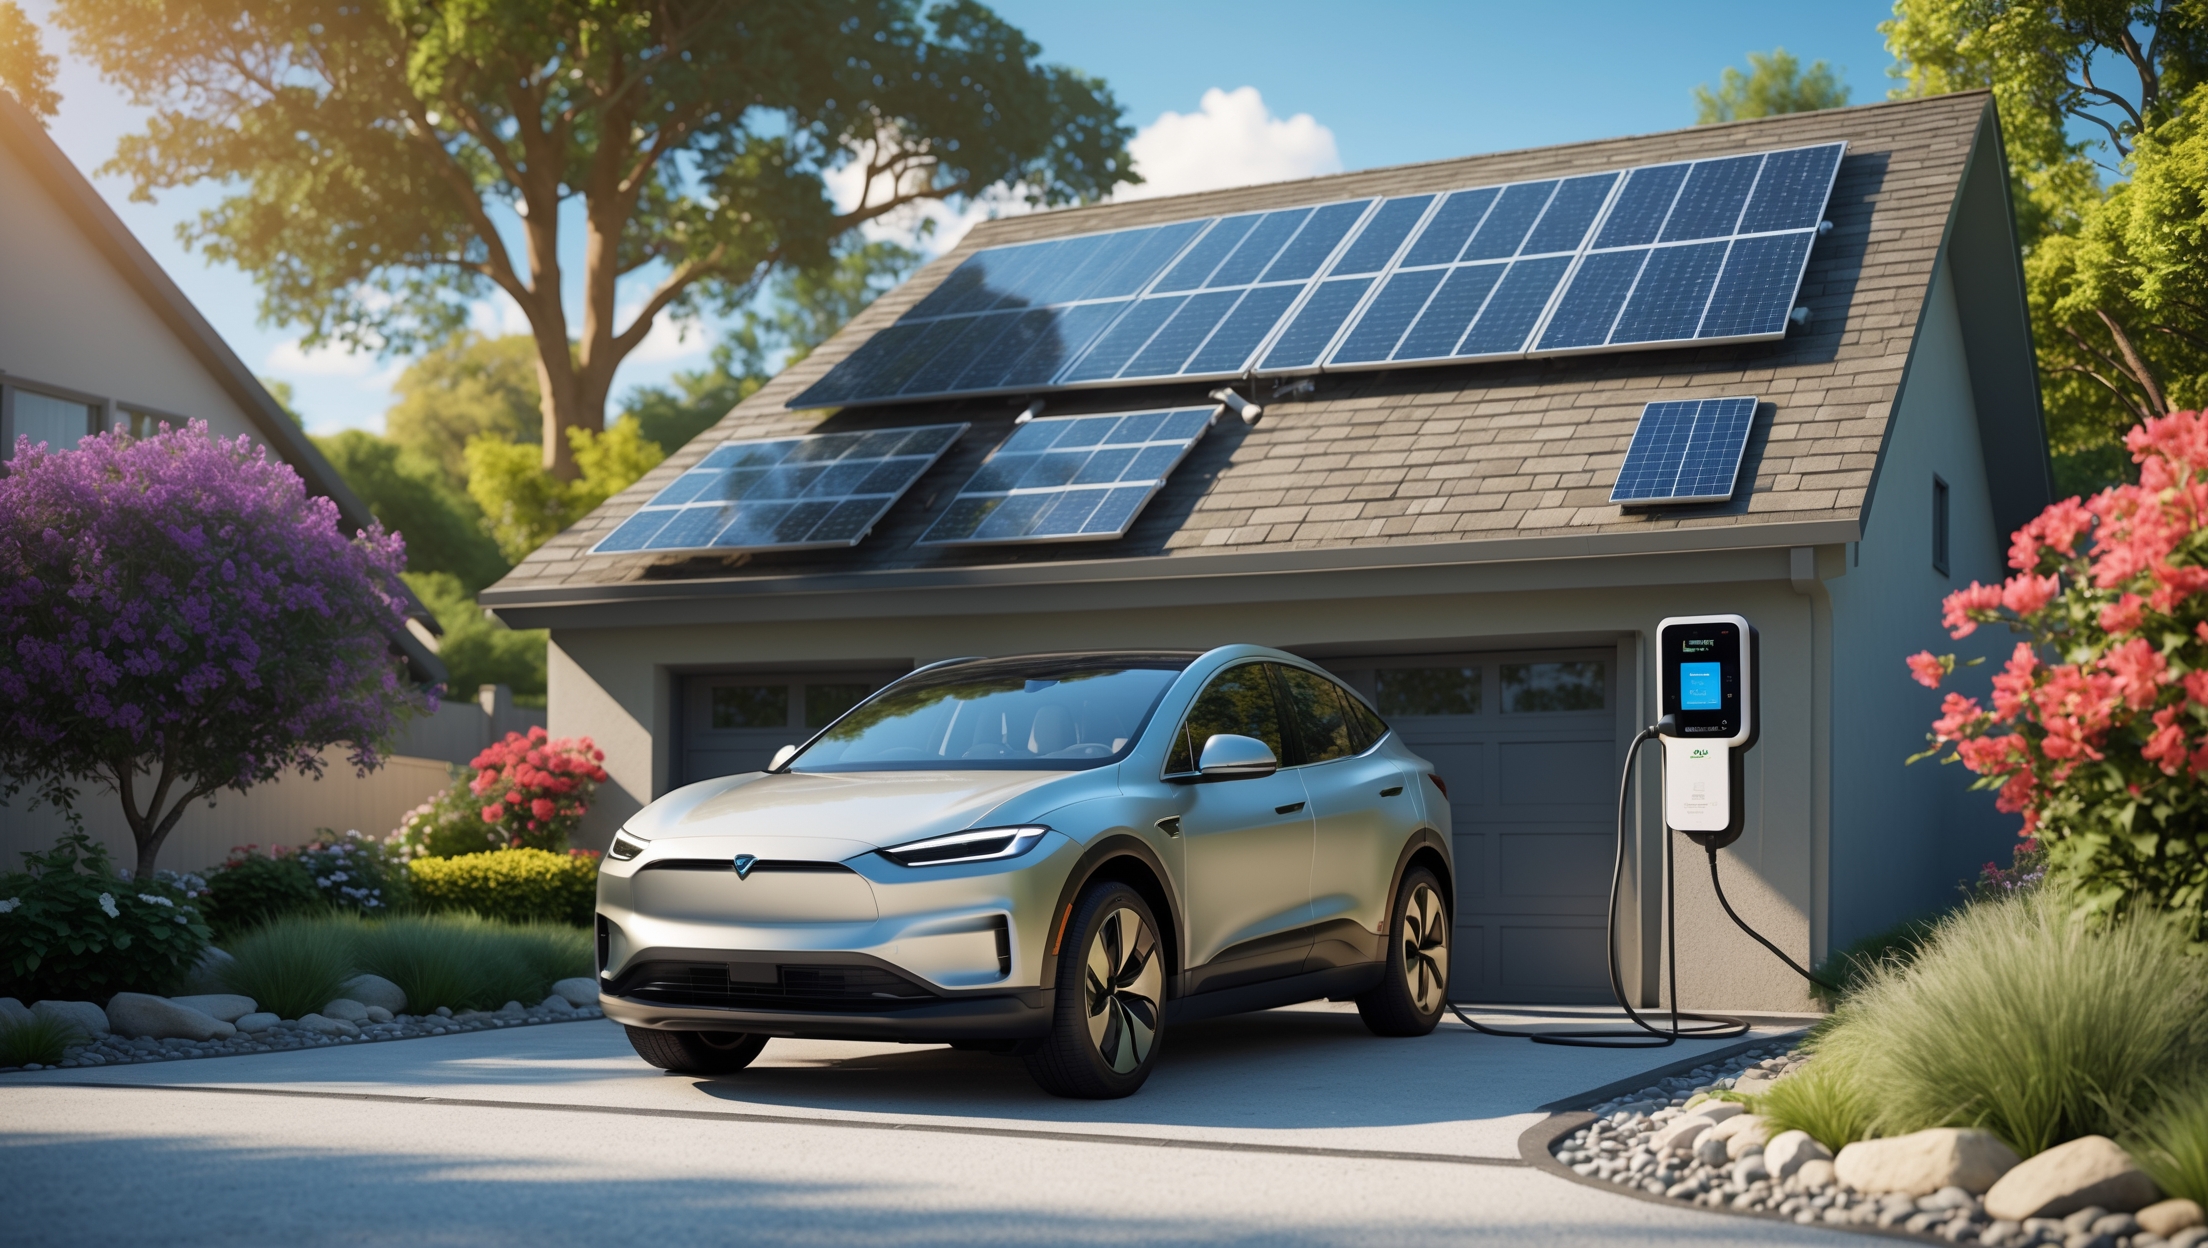
Core Components
- Solar Panels: Convert sunlight into electricity.
- Batteries: Store energy for nighttime use; typically lithium-ion or nickel-metal hydride.
- LED Fixtures: Provide efficient, long-lasting light output.
- Charge Controller: Regulates battery charging and prevents overcharging.
- Mounting Hardware: Stakes, poles, or brackets for securing lights and panels.
Types of Solar Outdoor Lights
- Pathway Lights: Low-level, spaced along walkways or driveways.
- Spotlights: Focused beams for accenting trees or architectural features.
- Floodlights: Wide-area illumination for security.
- String Lights: Decorative, often used for patios or gardens.
- Wall-Mounted Fixtures: For entryways or fence lines.
Select lighting types based on your goals: navigation, security, ambiance, or a combination.
Planning Your Solar Lighting System
Step 1: Assess Your Lighting Needs
- Walk your property after sunset and note dark areas that need illumination.
- Identify primary functions: safety, aesthetics, or both.
- Sketch a simple map marking intended light locations.
Step 2: Evaluate Site Conditions
- Ensure each solar panel location receives at least 6–8 hours of direct sunlight daily, even in winter.
- Look for obstructions—trees, buildings, fences—that could cast shade.
- Consider local climate: snow, rain, and extreme temperatures can impact performance.
Step 3: Calculate System Size
- Estimate total wattage needed based on the number and type of fixtures.
- Factor in battery capacity for desired hours of illumination (typically dusk-to-dawn or motion-activated period).
- Choose appropriately sized solar panels and batteries to ensure year-round reliability, especially during shorter winter days.
Selecting Tools and Materials
- Solar lighting kits or individual components (panels, lights, batteries, controllers)
- Shovel or auger for installing stakes or posts
- Wire strippers and weatherproof connectors (for systems with separate panels and fixtures)
- Drill, screwdriver, and mounting hardware for wall or fence lights
- Level and measuring tape
- Silicone sealant or waterproof junction boxes (if needed)
- Cable clips or conduit for neat, safe wire runs
- Protective gloves and safety glasses
Step-by-Step Setup Guide
Step 1: Layout and Pre-Installation Checks
- Lay out all fixtures and panels in their intended locations during daylight.
- Double-check sunlight exposure for each solar panel spot.
- Verify that wiring runs (if using remote panels) are feasible and safe.
Step 2: Panel and Fixture Installation
- Stake-Mounted Lights: Drive stakes into the ground; attach fixtures firmly. Ensure panels face true south (in the Northern Hemisphere) at the optimal tilt angle (roughly equal to your latitude).
- Wall or Fence Lights: Use a drill and appropriate anchors to secure mounting brackets; position panels where they receive unobstructed sunlight.
- Separate Panels: Mount panels in a cleared, sunny area and run cables via weatherproof conduit to the light fixtures.
- Use a level to ensure proper alignment; avoid tilting panels toward shade or reflective surfaces.
Step 3: Wiring and Electrical Connections
- Follow manufacturer instructions for connecting panels, charge controllers, and batteries.
- Use weatherproof connectors and junction boxes to protect all connections from moisture and pests.
- Secure cables with clips or conduit to prevent tripping hazards and damage from lawn equipment.
- Double-check polarity (positive and negative terminals) to avoid short circuits or battery damage.
Step 4: Initial Testing and Programming
- Allow solar panels to charge batteries for a full day before first use.
- Test each light at dusk to confirm illumination, placement, and coverage.
- Adjust fixture angles for optimal light distribution.
- Set timers, dusk-to-dawn sensors, or motion detectors as desired.
Optimizing for All-Season Performance
Winter and Low-Light Conditions
- Increase panel tilt angle in winter to capture lower-angle sunlight and shed snow easily.
- Consider slightly oversizing panels and batteries to compensate for shorter days and higher energy demand.
- Use high-quality, low-temperature rated batteries; lithium batteries outperform nickel-based in cold environments.
- Regularly clear snow, leaves, or debris from panels to maintain efficiency.
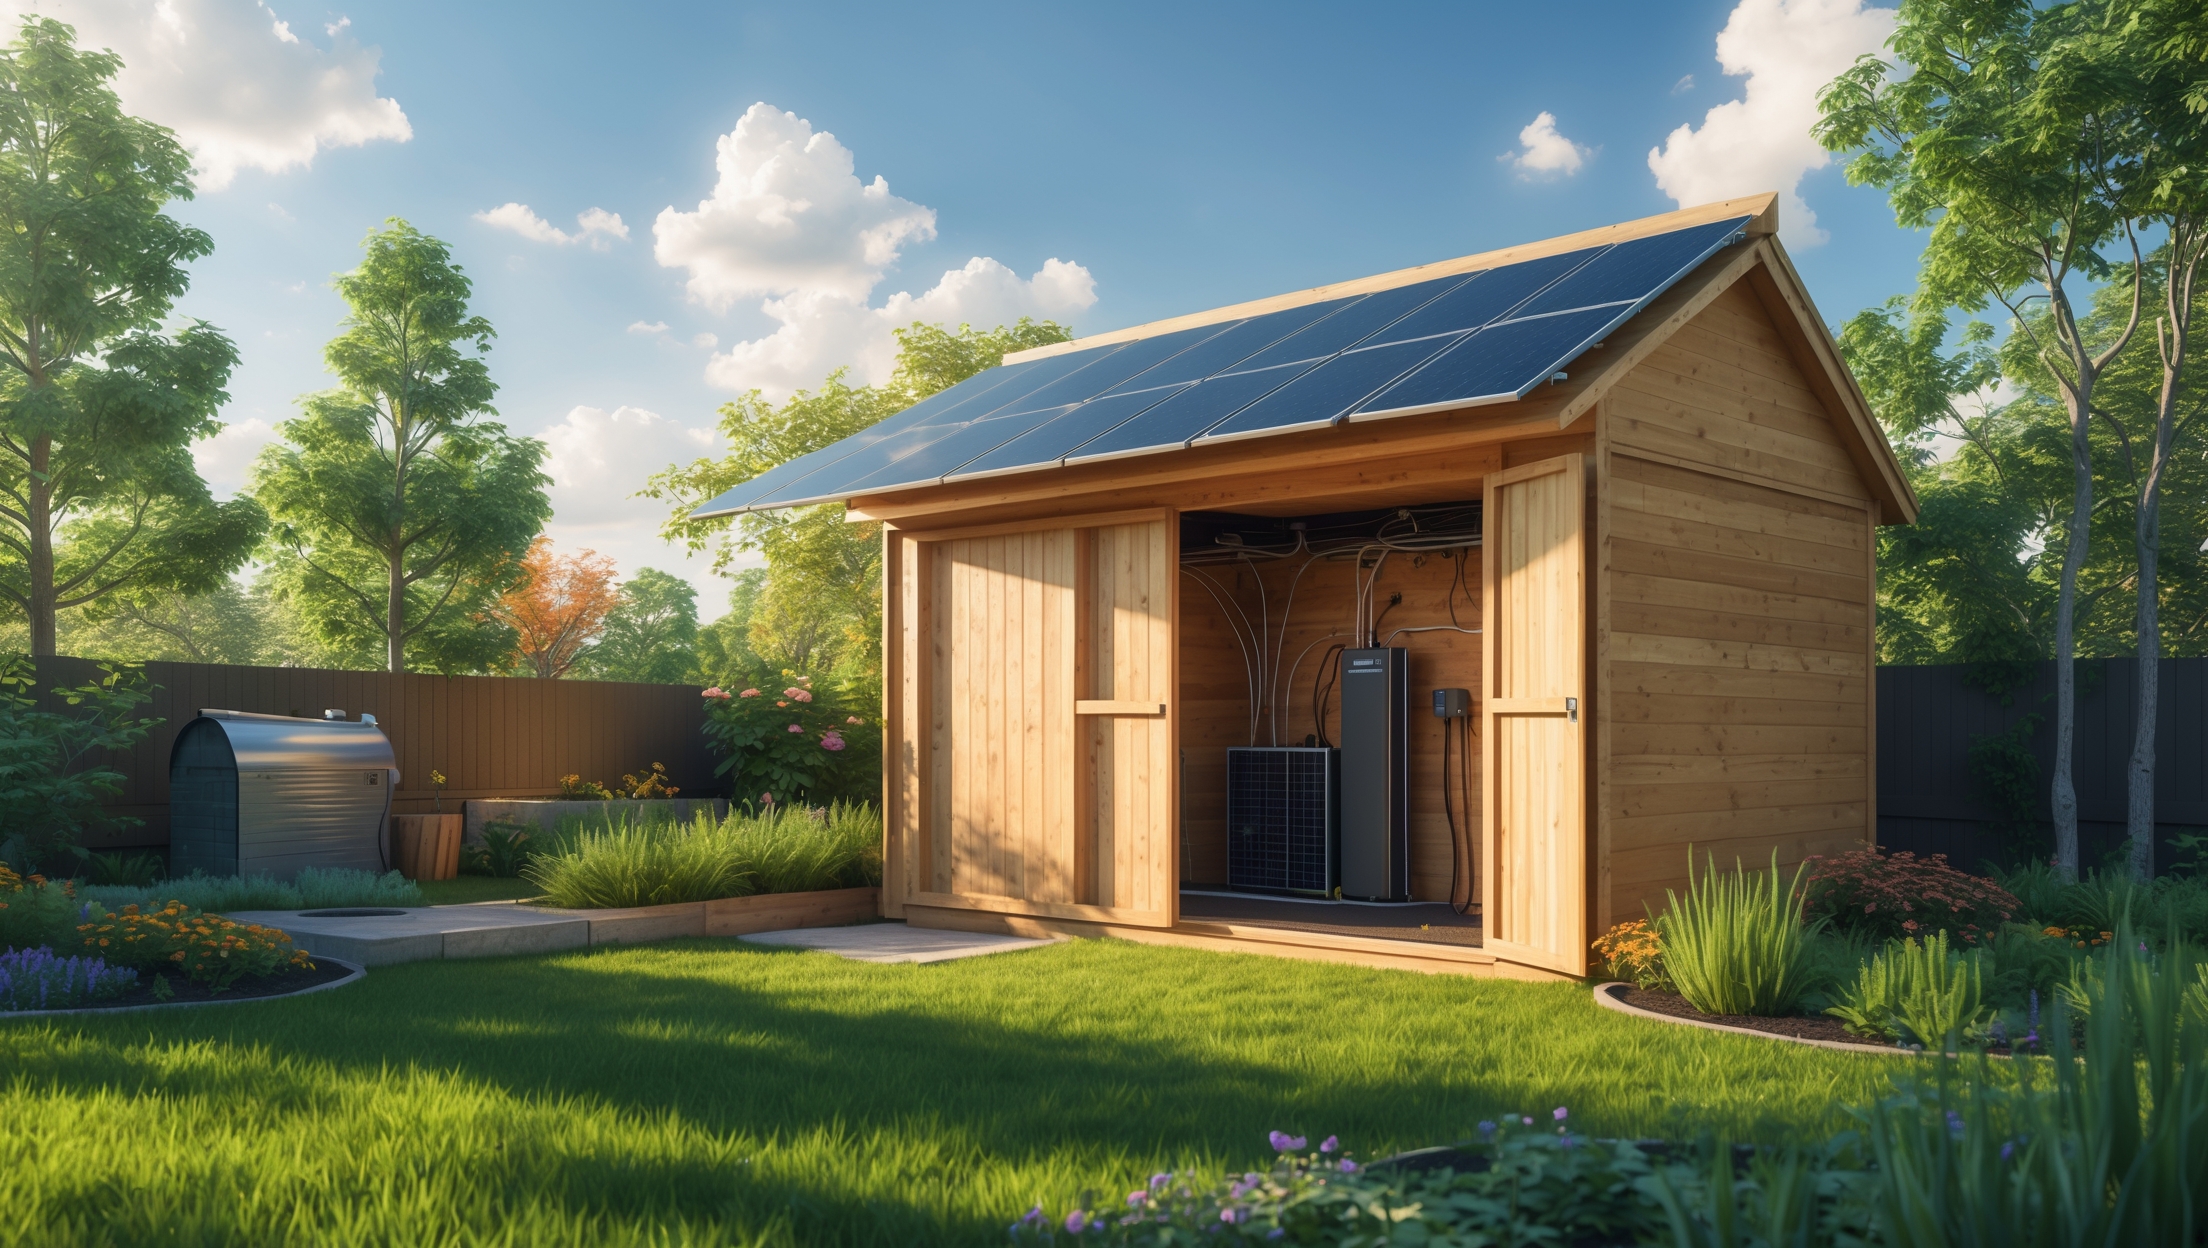
Weatherproofing and Durability
- Choose fixtures and panels rated for outdoor use (IP65 or higher for water/dust resistance).
- Seal all joints and entry points with silicone to prevent water ingress.
- Elevate batteries above ground level and use vented, waterproof enclosures if installing separate battery banks.
Troubleshooting Common Issues
- Lights Not Turning On: Check for panel obstructions, battery connections, and test batteries with a multimeter.
- Dim Light Output: Clean panels, ensure batteries are fully charged, and verify correct fixture wattage.
- Intermittent Operation: Inspect wiring for damage, test motion/timer sensors, and check for shading during the day.
- Short Runtime: Upgrade to higher-capacity batteries, reduce fixture wattage, or add more solar panels.
Maintenance Best Practices
- Clean solar panels quarterly with a soft brush and mild soap to remove dust, pollen, and grime.
- Check all fixtures monthly for secure mounting and proper operation.
- Inspect wiring and connectors seasonally for wear or rodent damage.
- Replace rechargeable batteries every 2–3 years (or per manufacturer guidelines) for best performance.
- Test and reset motion sensors or timers annually.
Enhancing Your Solar Outdoor Lighting System
Smart Controls
- Integrate Wi-Fi or Bluetooth-enabled controllers for remote monitoring and scheduling.
- Connect to smart home hubs for automation based on weather or occupancy.
Expanding Your System
- Start with critical areas (entrances, walkways) and expand as budget allows.
- Mix fixture types (spotlights, path lights, floodlights) for layered, customized effects.
- Consider solar-powered cameras for added security.
Cost Considerations and Budgeting
Solar-powered outdoor lighting has a higher upfront cost than traditional low-voltage wired systems, but it quickly pays for itself with zero ongoing electricity costs and minimal maintenance. Typical costs break down as follows:
- Basic Pathway Lights: $20–$60 per fixture (standalone kits)
- Spotlights/Floodlights: $40–$150 per fixture (higher wattage and brightness)
- Expansion Panels/Batteries: $50–$200 per upgrade
- Total DIY System: $200–$1,000 depending on size and complexity
Factor in possible savings from reduced electrical bills, avoided trenching/wiring costs, and potential rebates or incentives for renewable energy installations in your area.
Compliance and Safety Considerations
- Solar lighting generally does not require permits for residential use, but check local codes for large systems or permanent installations (especially if wiring is buried).
- Follow manufacturer instructions to avoid electrical hazards. Use only outdoor-rated components.
- Keep walkways clear of cables, and ensure all fixtures are securely mounted to prevent tripping or falling.
Conclusion
Transitioning to a solar-powered outdoor lighting system is a strategic investment in both sustainability and year-round home comfort. By following a step-by-step approach—starting from careful site assessment and smart component selection, through precise installation and regular maintenance—you can achieve reliable, attractive illumination without the ongoing costs or environmental impact of conventional lighting. Solar outdoor systems are scalable, customizable, and easily upgraded as your needs evolve. With advances in battery and LED technology, today’s solar lights shine brighter, last longer, and operate more efficiently than ever, even in challenging climates.
As you plan and install your system, remember that attention to detail—such as optimal panel placement, robust weatherproofing, and regular upkeep—will ensure trouble-free operation for years. The benefits extend beyond your own property: by choosing solar, you’re joining a global movement toward energy independence, lower emissions, and a greener future. Enjoy the peace of mind that comes with sustainable, self-sufficient illumination, and let your landscape shine as a beacon of environmental stewardship all year long.

I’m looking to install pathway lights around my café’s outdoor seating, but I’m concerned about winter weather affecting performance. Does the tutorial cover adjustments for snow or reduced sunlight during colder months?
The tutorial does address winter considerations like snow and limited sunlight. It suggests positioning solar panels where they’ll get the most sun, even during shorter days, and recommends choosing lights with larger batteries and efficient panels for cloudy conditions. There are also tips on keeping panels clear of snow to maintain performance throughout the colder months.
After installation, how often should I expect to maintain or replace parts like the batteries or the LED fixtures to keep everything running smoothly throughout the seasons?
Once your solar lighting system is installed, plan to check and clean the panels and fixtures every few months, especially after storms or during heavy pollen seasons. The batteries typically need replacement every 2 to 3 years, depending on their quality and local climate. LED fixtures can last 5 to 10 years, but inspect them annually for any signs of dimming or damage to ensure reliable performance.
Can you give an estimated budget range for setting up a basic pathway solar lighting system for a medium-sized yard, including the core components you listed? I want to understand the typical costs before I start purchasing anything.
For a medium-sized yard, a basic pathway solar lighting system typically costs between $100 and $300. This estimate covers solar lights, mounting stakes, and basic wiring if needed. Prices vary based on the number of lights, brightness, and durability. If you opt for higher-end models with better weather resistance or integrated batteries, the cost may be on the higher end of that range.
For someone on a modest budget, which component should I invest more in—the solar panels or the LED fixtures—to get the most reliable illumination throughout the year?
If you’re working with a modest budget, it’s usually best to invest more in higher-quality solar panels. Good panels will ensure your lights get enough charge even during cloudy days or shorter winter daylight hours, resulting in more reliable illumination year-round. Budget LED fixtures are generally sufficient, as most LEDs are already energy-efficient and long-lasting.
Is there a significant difference in upfront costs between installing path lights versus wall-mounted fixtures for solar lighting, and how should I budget for a medium-sized yard with both decorative and security needs?
Path lights usually have a lower upfront cost per fixture compared to wall-mounted solar lights, which often come with brighter bulbs and more robust housings for security. For a medium-sized yard, plan your budget by estimating how many of each type you need—decorative path lights for walkways and brighter wall-mounted fixtures for entrances or dark areas. Calculate costs per fixture, include installation if needed, and allow a buffer for extra features or higher quality models.
As a small business owner, I’m interested in using solar-powered outdoor lighting to improve security around my storefront. How do I determine the right mix of floodlights and pathway lights to both deter intruders and provide safe walkways after dark?
To balance security and safety, start by assessing the layout around your storefront. Use solar-powered floodlights to cover entrances, parking areas, and any dark corners—these deter intruders with bright, wide illumination. Place solar pathway lights along walkways and steps to clearly mark safe routes for customers. Consider motion sensor features for floodlights, and check brightness (lumens) ratings to ensure adequate coverage. This combination should boost both security and visibility around your business.
If after installing the system, some of the lights seem dimmer than others, what would be the first things to check for troubleshooting? Could it be the panel position, wiring, or maybe the type of battery?
If some lights are dimmer, start by checking if the solar panels for those lights are getting enough direct sunlight or if they’re shaded. Next, inspect the wiring connections to make sure they’re secure and not damaged. Also, verify that the batteries are all the recommended type and fully charged, as mismatched or older batteries can result in dim lighting. These steps should help identify the cause.
Can you give a rough estimate of the initial cost for a basic setup, like four pathway lights and two spotlights, including the core components? I’m trying to figure out a budget before starting this project.
For a basic setup with four solar pathway lights and two solar spotlights, you can expect to spend around $70 to $150. This estimate covers the core components, including the lights, built-in solar panels, mounting stakes or brackets, and the necessary wiring (if required, though most are wireless). Prices vary based on brightness, brand, and weather resistance. No professional installation is usually needed for these DIY kits.
I noticed you mention both lithium-ion and nickel-metal hydride batteries. Is one better than the other for year-round outdoor use, especially in colder climates, or does it not make much difference?
Lithium-ion batteries generally perform better than nickel-metal hydride (NiMH) batteries for year-round outdoor use, especially in colder climates. Lithium-ion batteries tend to handle lower temperatures more efficiently, have a higher energy density, and last longer over time. If your area experiences harsh winters, lithium-ion is usually the more reliable choice for consistent lighting performance.
Is there any advice on how to troubleshoot if my solar-powered lights stop working after a few cloudy days? I’m curious about what to check first before calling in a professional.
If your solar-powered lights stop working after a few cloudy days, start by checking if the solar panels are clean and free of debris, as dirt can block sunlight. Make sure the panels aren’t shaded by plants or structures. Next, check the battery connections and ensure the batteries are still functional—cloudy weather may not fully charge older or weak batteries. Give the lights a full day of direct sun and see if they recover before seeking professional help.
Is there a typical maintenance schedule I should follow for the charge controller and LED fixtures to keep the system running efficiently, or are these mostly set-and-forget once installed?
While solar-powered lighting systems are designed to be low-maintenance, it’s a good idea to check the charge controller and LED fixtures every 3 to 6 months. For the charge controller, inspect for dust buildup and ensure the wiring is secure. For the LED fixtures, wipe any debris from the lenses and check for moisture inside. This routine helps maintain efficiency and extends the system’s lifespan.
Could you provide more details on troubleshooting issues, like if the lights start to flicker or don’t stay on the whole night? What are the most common reasons for problems like this after installation?
Flickering lights or lights that don’t stay on all night are usually caused by issues like inadequate sunlight exposure, dirty or obstructed solar panels, aging or faulty batteries, or poor connections in the wiring. First, check that the panels are clean and receive direct sunlight for most of the day. Next, inspect the battery for corrosion or reduced capacity, and replace it if needed. Finally, ensure all wiring and connections are secure and protected from moisture. These steps resolve most common issues after installation.
Could you clarify how often the batteries in these outdoor solar lighting systems typically need to be replaced and if there are ways to extend their lifespan with regular maintenance?
The rechargeable batteries in outdoor solar lighting systems usually last between 1.5 to 3 years, depending on usage and environmental conditions. To help extend their lifespan, clean the solar panels regularly to ensure efficient charging, check for corrosion on battery contacts, and avoid placing lights in areas that are shaded during the day. If you notice reduced lighting time or dim performance, it’s a sign the batteries may need to be replaced soon.
The article mentions different types of batteries for solar lighting systems. Is there a big reliability or maintenance difference between lithium-ion and nickel-metal hydride batteries for year-round outdoor use?
Lithium-ion batteries generally offer better reliability and require less maintenance than nickel-metal hydride (NiMH) batteries for year-round outdoor solar lighting. Lithium-ion models tend to last longer, handle temperature fluctuations better, and hold their charge more efficiently. NiMH batteries are more affordable but may need more frequent replacement, especially in extreme temperatures. For most year-round outdoor setups, lithium-ion is the preferred choice if your budget allows.
If part of the system stops working, like if some lights don’t turn on at night, what are the most common troubleshooting steps to check first? Are there telltale signs that point to an issue with the batteries versus the solar panel?
If some lights aren’t turning on, start by checking if the solar panels are clean and positioned to receive enough sunlight. Next, inspect the batteries—if lights are dim or only work briefly after dark, worn-out batteries are often the cause. Corrosion in battery compartments is another sign. If none of the lights work, the solar panel might be failing. Check for loose connections or damaged wires too.
I run a small retail shop with a limited budget—are there specific solar lighting components I can prioritize now and then gradually expand the system over time without having to redo the whole setup?
Absolutely, you can start with the essentials and build up as your budget allows. Begin with solar light fixtures that cover your shop’s main entrance and pathways. Choose modular solar lights and controllers so you can easily add more units later. Stick with a central charge controller and battery that support future expansion—just make sure your initial wiring and placement accommodate extra lights down the line.
Is there a big difference in cost and installation complexity between solar spotlights versus floodlights for security? The article lists both but doesn’t go into which one is easier for someone on a college student’s budget and with limited tools.
Solar spotlights generally cost less and are easier to install than solar floodlights. Spotlights often have simple mounting stakes or brackets and require basic tools, making them well-suited for limited budgets and toolkits. Solar floodlights tend to be larger, may need more secure mounting, and are a bit pricier due to higher brightness and coverage. For a college student, spotlights are usually the most practical and affordable option.
For a basic setup along a 40-foot driveway, about how much can I expect to spend on a solar-powered outdoor lighting system, including panels, batteries, and fixtures?
For a 40-foot driveway, the cost for a basic solar-powered outdoor lighting system generally ranges from $300 to $800. This estimate includes 6-10 solar light fixtures, built-in solar panels, and battery packs—most driveway kits combine these components. If you want brighter or more decorative fixtures, costs could be higher, while simple stake lights may be on the lower end. No wiring or electrical connection is needed, which helps keep installation costs low.
Can you clarify if the solar panels need to be mounted separately from the light fixtures for the best sun exposure, or do integrated options usually provide enough flexibility? I want to make sure my setup gets consistent charging throughout the year.
Integrated solar lights are designed for convenience and often work well in open, sunny locations. However, if your lighting spots are shaded at certain times of the year, mounting the solar panels separately gives you more flexibility to place them in optimal sunlight, ensuring consistent charging. Consider your yard’s sun patterns and choose separate panels if you need to maximize exposure.
After completing the installation, what troubleshooting steps would you recommend if the lights aren’t staying on through the night, particularly in locations that don’t get full sun every day?
If your solar lights aren’t staying on all night, especially in less sunny spots, start by checking if the solar panels are clean and unobstructed—dirt or shade can reduce charging. Try repositioning the panels to maximize sunlight exposure. Make sure the batteries are properly connected and consider replacing them if they’re old or underperforming. Finally, confirm that the lights’ settings are correct and that the wiring is secure. These steps should help boost performance in areas with inconsistent sunlight.
How do solar-powered wall-mounted fixtures compare to traditional wired lights in terms of upfront cost and long-term savings? I’m trying to figure out if the initial investment is worth it.
Solar-powered wall-mounted fixtures usually have a higher upfront cost than basic wired lights, mainly because of the integrated solar panels and batteries. However, you won’t need to pay for wiring, trenching, or increase your electricity bill, so the ongoing costs are much lower. Over a few years, the savings on installation and energy often outweigh the initial investment, especially if your location gets a lot of sunlight.
If I already have some wired outdoor lighting installed, is it possible to integrate new solar-powered fixtures with my existing setup, or would I need to completely remove the old system?
You can definitely add solar-powered fixtures alongside your existing wired outdoor lighting without removing your current system. The solar lights operate independently and don’t need to connect to your home’s electrical wiring. Just install the solar fixtures in locations that receive enough sunlight. This way, you can enjoy both types of lighting and even use the wired lights as a backup if needed.
How long does a typical installation take from planning through setup for a medium-sized yard, and should I anticipate any challenges during the process, such as mounting panels in shady areas or dealing with hard soil?
For a medium-sized yard, the entire process from planning to setup usually takes about one to two days, depending on how complex your layout is and the number of lights. Common challenges include finding sunny spots for the solar panels—shaded areas can reduce performance. Hard or rocky soil can also make it tougher to install stakes or posts, so having the right tools (like a post driver or soil auger) can help. Planning your panel placement to maximize sunlight and testing soil firmness ahead of time will make the process smoother.
After installing a solar-powered outdoor lighting system, what are some common problems that might come up during the winter, and how can I prepare for or troubleshoot them?
During winter, you might notice your solar lights aren’t as bright or don’t last as long. This is usually because shorter days and cloudy weather reduce sunlight for charging. Snow or ice can also cover the panels, blocking sunlight. To prepare, regularly clear snow off the panels, make sure they’re angled to catch the low winter sun, and keep them clean from debris. If performance drops, check connections for corrosion and ensure batteries are still working, as cold weather can affect battery efficiency.
Are there particular installation challenges or additional steps I should be aware of when mounting wall fixtures on exterior surfaces like brick or stucco compared to wood fences?
Mounting wall fixtures on brick or stucco can be a bit more involved than installing on wood. You’ll need a masonry drill bit to create holes for wall anchors or plugs, as regular screws won’t hold securely in brick or stucco. Be careful to avoid cracking the surface, especially on stucco. Sealing around the fixtures with weatherproof caulk is also a good idea to prevent moisture from entering. On wood fences, you can usually screw the fixtures in directly without special anchors.
Could you elaborate on what kind of regular maintenance is needed for these solar-powered systems? I’m wondering how often I should expect to clean panels or check on the batteries to keep them working well.
To keep your solar-powered outdoor lighting system running efficiently, it’s best to clean the solar panels every one to two months, especially if you notice dust, pollen, or debris accumulating. For the batteries, check them every six months for any corrosion or reduced performance, and replace them if their capacity drops noticeably. Also, inspect wiring and fixtures occasionally to ensure everything is secure and undamaged.
When planning the layout, how do you figure out the right spacing for pathway lights to get even illumination without overdoing it or leaving dark spots? Is there a formula or rule of thumb you use in typical residential setups?
For most residential pathways, a good rule of thumb is spacing solar lights about 6 to 8 feet apart. This usually provides even illumination without overlapping too much or leaving dark patches. If the lights are less bright or the area is especially shadowy, you might place them a bit closer. Walking through the path at night with a flashlight can help you test positions before installing.
How do you recommend positioning the solar panels if my backyard doesn’t get consistent sun throughout the day? Are there tips for maximizing energy efficiency when trees or fences create shade?
If your backyard has inconsistent sun due to trees or fences, try to place the solar panels in the spot that receives the most direct sunlight during the day, even if it’s only for a few hours. Angle the panels to face true south (or north in the southern hemisphere) for maximum exposure. Trim back branches if possible, and avoid locations where shadows fall during peak sunlight hours. Using panels with higher efficiency or adding extra panels can also help compensate for limited sun.
Since my business is on a tight budget, I’m wondering if there are cost-effective ways to start small with solar outdoor lighting and then expand the system later. Are the components you mentioned compatible for scaling up over time?
You can absolutely start small with a basic solar lighting setup, such as installing just a few lights in key areas. The components detailed in the article—like modular solar panels, LED fixtures, and rechargeable batteries—are generally designed to be compatible and scalable. When you’re ready to expand, you can add more lights or upgrade batteries and panels without having to replace the entire system.
Is there a big difference in installation difficulty between wall-mounted fixtures and ground stakes or poles? I don’t have a lot of DIY experience and want to pick the easiest option.
Wall-mounted fixtures are usually a bit more challenging to install than ground stakes or pole lights because they often require drilling into exterior walls and using anchors or screws. Ground stakes and pole lights typically just need to be pushed into the soil, making them much easier and faster to set up, especially if you have limited DIY experience. For simplicity, ground stakes or poles are the best choice.
The article talks about several types of solar fixtures like spotlights and string lights. How would I figure out the right mix for both security and ambiance in a medium-sized backyard?
To balance security and ambiance, start by identifying key areas in your backyard. Use spotlights for entrances, paths, and darker corners to boost security. For ambiance, string lights or lantern-style fixtures work well around patios, seating areas, or garden features. Walk around at dusk to spot dark spots and imagine how each fixture type would enhance safety or atmosphere. Mixing both allows you to customize lighting for practical needs and mood.