Introduction: Why Install Rainwater Harvesting in Urban Homes?
Urban living places unique demands on natural resources, especially water. With increasing water scarcity and rising utility costs, more homeowners are turning to sustainable solutions to reduce their environmental footprint while saving money. Rainwater harvesting—collecting and storing rainwater from rooftops for later use—offers a practical, eco-friendly way to supplement municipal water supplies, irrigate gardens, wash vehicles, and even flush toilets. Installing a rainwater harvesting system in an urban setting may seem daunting, but with the right planning and guidance, it is achievable and highly rewarding. This comprehensive tutorial walks you through every step, from initial design and equipment selection to proper installation, safety, compliance, and maintenance. Whether you’re a sustainability enthusiast or simply looking to cut your water bill, this guide arms you with the practical knowledge and confidence to set up your own urban rainwater harvesting system.
Planning Your Urban Rainwater Harvesting System
Assessing Your Rainwater Needs and Potential
Before investing in equipment, determine how much rainwater you can realistically collect and what you intend to use it for. Start by calculating your roof’s catchment area (length x width in meters) and research your local area’s average annual rainfall. Multiply the roof area (in square meters) by the annual rainfall (in meters) and by a runoff coefficient (typically 0.8 for pitched roofs) to estimate annual harvestable water in liters. Decide if you’ll use the water only for outdoor chores or indoor non-potable applications as well, as this affects storage and filtration requirements.
- Example calculation: A 60 m² roof in a region with 0.6 m/year rainfall: 60 x 0.6 x 0.8 = 28,800 liters/year harvestable.
Understanding Local Regulations and Permits
Many cities encourage rainwater harvesting, but some have regulations on system design, storage capacity, or usage. Contact your local building department to ask about:
- Permitting requirements for tanks or underground cisterns
- Backflow prevention and cross-connection rules if integrating with home plumbing
- Setback distances from property lines or foundations
- Overflow and drainage requirements
Document all requirements before starting, as non-compliance can result in fines or mandatory removal.
Selecting the Right Harvesting System Type
Choose a system type based on your space, needs, and budget. The main components include:
- Gutter and downspout system: Directs rainwater from roof to storage.
- Pre-filtration: Removes debris before storage (leaf screens, first-flush diverters).
- Storage tank: Above or below ground, typically 200–5,000 liters for urban homes.
- Distribution: Gravity-fed or pump-based, depending on use and site elevation.
- Filtration and treatment: For indoor use or irrigation, consider additional filtration (sand, carbon, UV treatment).
Gathering Tools and Materials
Essential Tools
- Measuring tape and marker
- Level
- Power drill and bits (for mounting brackets and tank fittings)
- Hand saw or hacksaw (for cutting gutters and PVC pipes)
- Pipe wrench and pliers
- Silicone sealant and plumber’s tape
- Screwdrivers
- Protective gloves and goggles
Materials Checklist
- PVC or aluminum gutters and downspouts
- Leaf guards or gutter mesh
- First-flush diverter kit
- Pre-filter (mesh filter or vortex filter)
- Rainwater storage tank (with secure lid and overflow outlet)
- Tank stand or concrete base (for above-ground tanks)
- Inlet and outlet fittings (PVC elbows, tees, valves)
- Overflow pipe and drainage solution
- Pump (optional, for pressure distribution)
- Basic inline filter (for irrigation) or advanced filtration (for indoor use)
Site Preparation and Safety Considerations
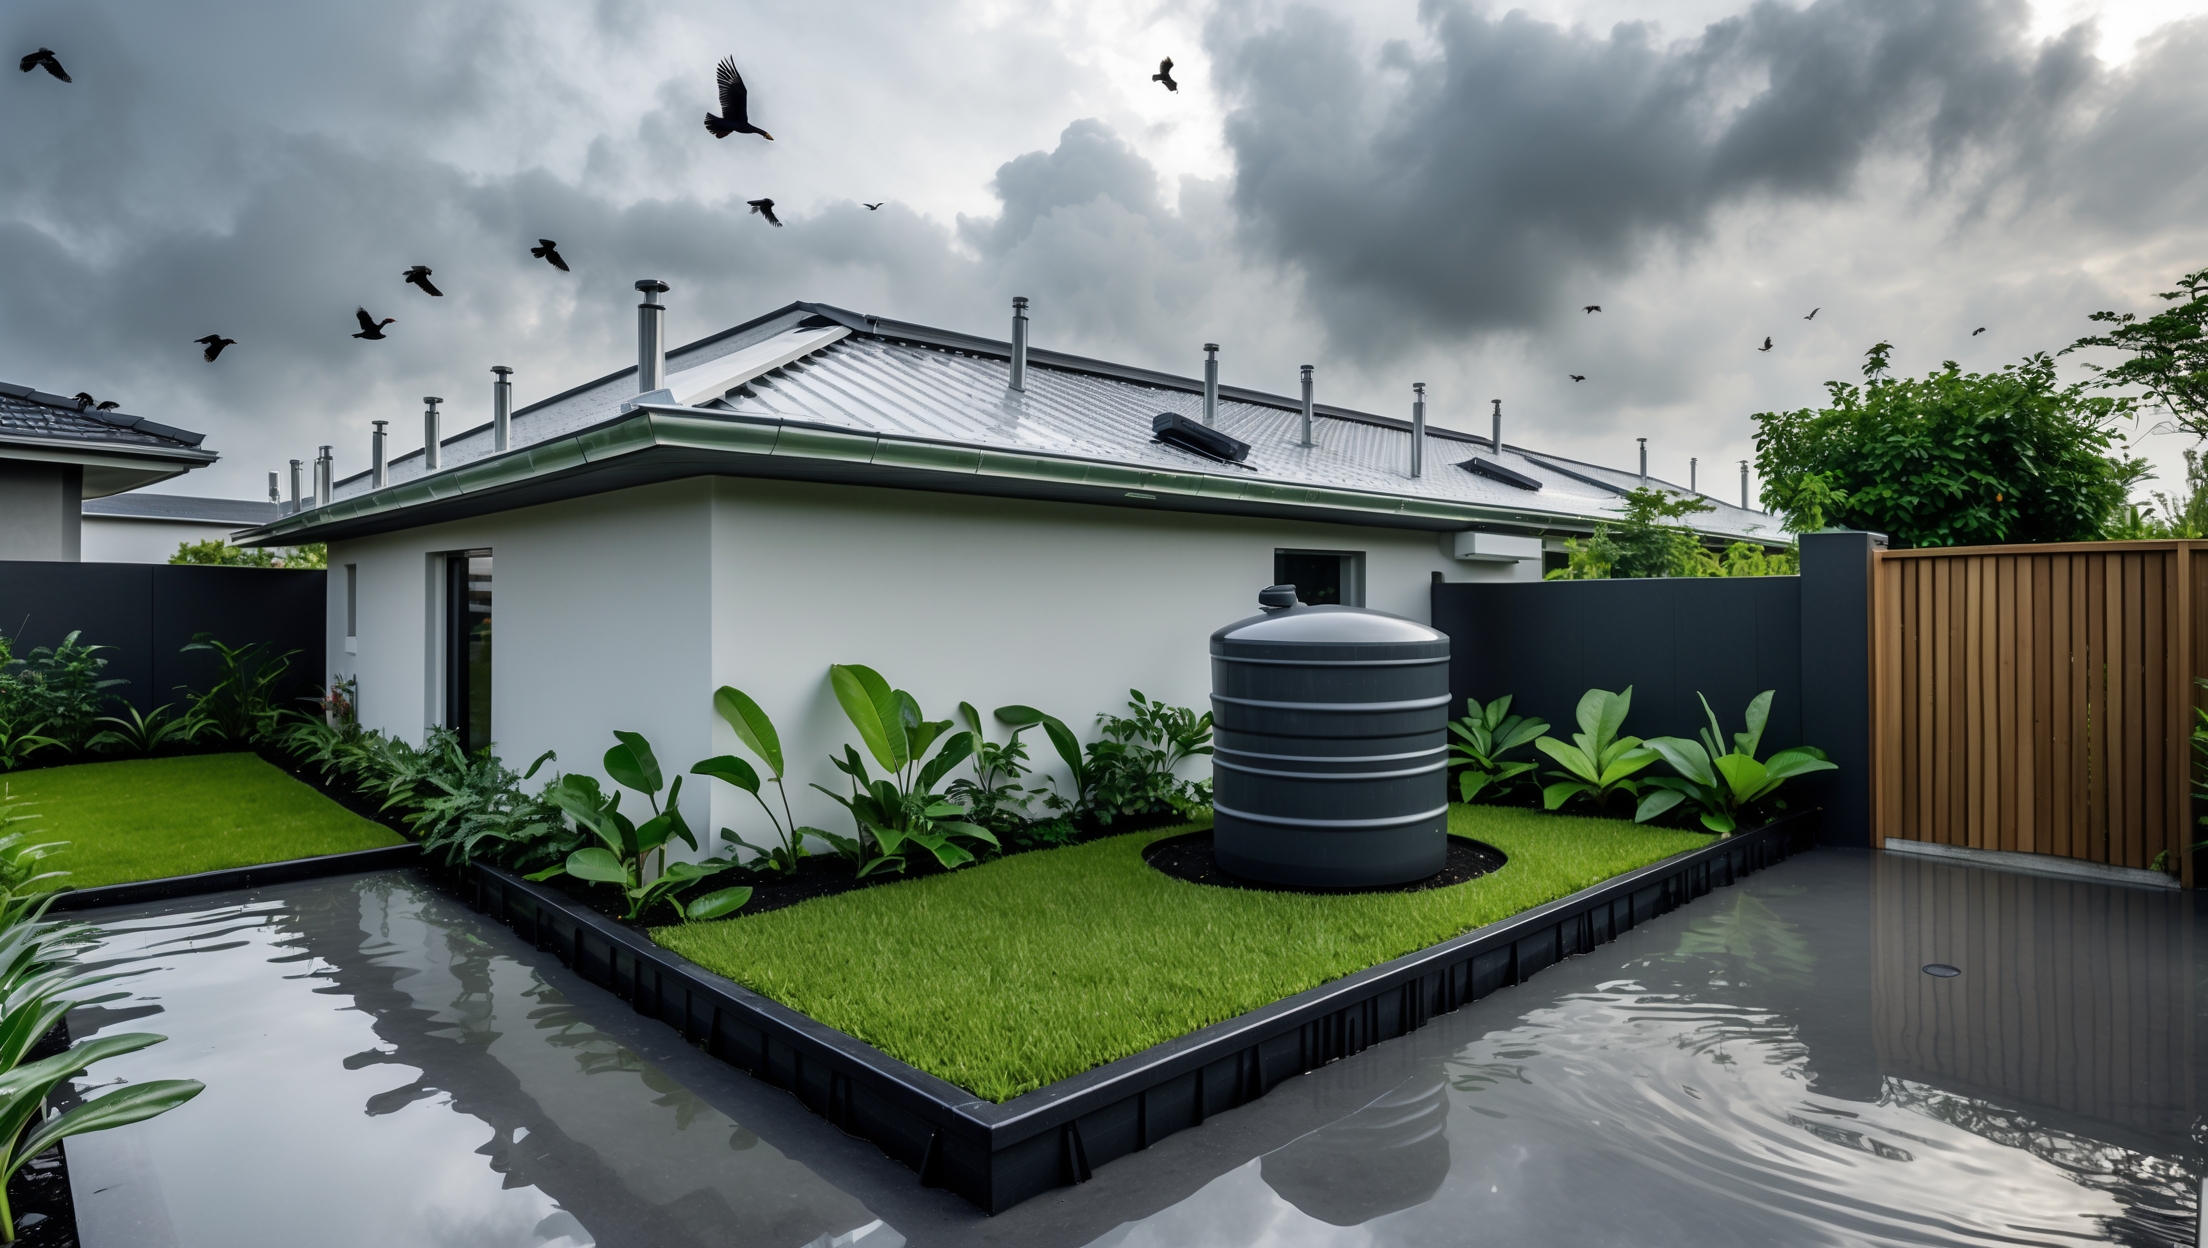
Choosing the Tank Location
Select a flat, stable area close to downspouts, with convenient access for maintenance. Ensure the tank is not exposed to direct sunlight all day (to minimize algae growth), or consider a UV-resistant tank. Allow room for overflow piping and safe drainage away from your home’s foundation.
Preparing the Base
For above-ground tanks, prepare a concrete pad or compacted gravel bed larger than the tank’s footprint. The base must be level and strong enough to support a full tank’s weight (1,000 liters of water = 1 ton).
Safety Checklist
- Wear gloves and goggles when cutting or drilling materials.
- Never work on roofs in wet or windy conditions.
- Use stable ladders and have a partner assist when working at height.
- Ensure all electrical equipment (for pumps) is installed by a licensed electrician.
Step-by-Step Installation Process
1. Installing and Upgrading Gutters
Inspect existing gutters for leaks or sagging. Replace sections as needed and clean thoroughly. Add mesh leaf guards to prevent debris entry. Ensure all gutters slope towards the downspout location (minimum 1:200 fall).
2. Connecting Downspouts to Pre-Filtration
Cut the downspout at the appropriate height to redirect flow into a first-flush diverter or pre-filter. Install the diverter according to manufacturer instructions, making sure water flows through the filter before reaching the tank. This ensures clean water and reduces maintenance.
3. Positioning and Securing the Storage Tank
Move the tank onto the prepared base. Secure it to prevent tipping or shifting, especially in windy areas. Attach the inlet pipe from the pre-filter to the tank’s inlet port. Seal all joints with plumber’s tape and silicone to prevent leaks. Install the overflow pipe at the top of the tank, routing it to a safe drainage area or rain garden.
4. Plumbing the Distribution System
For gravity-fed irrigation, connect a spigot or hose bib at the tank base. For pressure distribution (e.g., drip irrigation or indoor use), install a pump and pressure tank. Use only potable-grade pipes and connectors if water will be used indoors. Install a basic inline filter for outdoor use, or a multi-stage filter (sediment, carbon, UV) for indoor applications.
5. Testing and Leak Checking
Perform a test run during the next rainfall, or fill the gutters with a hose to simulate rain. Check all joints, filters, and tank penetrations for leaks. Tighten or reseal as necessary. Confirm that the overflow works and water drains safely away from your home.
System Upgrades and Smart Features
Smart Rainwater Management
Urban homeowners can enhance efficiency and convenience with smart upgrades:
- Water level sensors: Monitor tank levels remotely with a wireless sensor and smartphone app.
- Automatic pump controllers: Start or stop pumps based on demand or tank level.
- Rain sensors: Pause irrigation when rainfall is detected, maximizing water savings.
Integrating with Home Systems
For indoor non-potable use (laundry, toilets), connect the system to a separate plumbing line with backflow prevention. This may require professional plumbing and local permit approval. Always use clear labeling and cross-connection protection to safeguard municipal supply.
Maintenance Best Practices
Monthly Checks
- Clear gutters and downspouts of leaves and debris.
- Inspect pre-filters and first-flush diverters; clean as needed.
- Check for leaks or signs of overflow erosion.
Quarterly and Seasonal Tasks
- Flush the first-flush diverter to remove sediment.
- Inspect tank for algae, cracks, or insect entry points.
- Test pump and filters for functionality.
- Winterize the system in cold climates—drain hoses, insulate exposed pipes, or bypass tank to prevent freezing.
Annual Maintenance
- Empty and clean the tank (if accessible) to remove sediment buildup.
- Replace or service filters according to manufacturer’s instructions.
- Review the system for wear and schedule repairs before the rainy season.
Compliance, Insurance, and Resale Considerations
Staying Compliant
Keep records of permits, inspection reports, and system modifications. Some cities require annual inspections for backflow prevention or cross-connection devices. Maintain visible labels on all rainwater system plumbing.
Insuring Your Rainwater System
Contact your home insurance provider to add your rainwater harvesting system to your policy. Provide details on tank size, location, and any underground installations. Insuring against storm or accidental damage ensures your investment is protected.
Boosting Home Value
A professionally installed rainwater harvesting system can increase your home’s value and appeal to eco-conscious buyers. Keep documentation of system design, installation, and maintenance to show potential buyers. Highlight water savings and sustainability features in your home’s listing.
Common Mistakes to Avoid
- Underestimating storage needs: Oversized tanks are rarely wasted, but undersized tanks can overflow and waste water.
- Poor filtration: Skimping on filters leads to clogs, smelly tanks, and pump damage.
- Improper overflow drainage: Always direct overflow well away from foundations to prevent water damage.
- Ignoring maintenance: Clogged gutters or filters quickly compromise system performance.
- Non-compliance with codes: Always check and follow local regulations to avoid costly modifications later.
Conclusion: Reaping the Benefits of Urban Rainwater Harvesting
Installing a rainwater harvesting system in your urban home is a powerful step toward sustainable living. By tapping into this free and renewable resource, you reduce your dependence on municipal supplies, lower your water bills, and help conserve precious freshwater. While setup requires careful planning—especially in compact city spaces—the rewards are tangible, from lush gardens to emergency water resilience during shortages. Remember, a successful system starts with realistic assessment of your needs, compliance with local codes, and investment in solid equipment and filtration. Maintenance is key: regular cleaning and inspection will keep your system efficient, hygienic, and long-lasting.
Beyond practical savings, a well-designed rainwater harvesting system contributes to urban stormwater management, reducing runoff and pollution in your neighborhood. As climate patterns shift and water security becomes ever more critical, your investment in rainwater harvesting sets a strong example of proactive, future-proof sustainability. Take pride in every drop you collect and reuse—your urban oasis is greener for it, and your community better off. With the knowledge from this step-by-step guide, you’re ready to implement a system that pays dividends for your wallet, your home, and the planet.


Does the tutorial recommend any specific types of filters or first flush diverters for urban areas where rooftop debris might be a bigger issue? I’m trying to figure out what works best for keeping leaf litter and dust out of the storage tank.
The tutorial does highlight the importance of using both mesh leaf screens and a first flush diverter to handle rooftop debris in urban areas. It suggests opting for fine stainless steel mesh filters at gutter entry points to block leaves and larger debris. For first flush diverters, a simple ball-valve type is recommended to divert the initial runoff that contains dust and finer particles. Both options should be easy to clean and maintain regularly for best results.
I see the article talks about using rainwater for things like flushing toilets and washing vehicles. Do I need a special kind of filtration or treatment system if I want to use harvested rainwater indoors, or are standard filters enough?
If you plan to use harvested rainwater indoors for non-potable uses like flushing toilets or washing clothes, you’ll need more than just basic mesh or sediment filters. A multi-stage filtration system is recommended to remove debris and finer particles, and sometimes UV treatment or chlorination is added to control bacteria. Standard outdoor filters may not be enough for indoor use, so consider a system designed specifically for the intended indoor purposes to ensure safety and reliability.
In your example calculation with a 60 m² roof and 0.6 meters of rainfall, how would the harvestable amount change for a flat versus a pitched roof? Does the runoff coefficient change much depending on roof material?
For a flat roof, you might see slightly less runoff compared to a pitched roof, since flat roofs can allow for more evaporation and minor pooling. The runoff coefficient does vary by roof material—smooth materials like metal have higher coefficients (about 0.9), while rougher surfaces like tiles or asphalt shingles are a bit lower (around 0.8-0.85). So, both roof pitch and material will affect the harvestable amount, though material tends to make a bigger impact.
When figuring out how much rainwater I can actually collect, should I be considering factors like roof material or slope, or is just using the area, local rainfall, and the coefficient enough for an accurate estimate?
For a practical estimate, using roof area, local rainfall, and the runoff coefficient is usually sufficient. The coefficient already accounts for factors like roof material and slope by adjusting for how much water typically runs off versus being absorbed or lost. If you use a recommended coefficient for your roof type, your calculation should be accurate enough for planning purposes.
When figuring out the roof catchment area for the water calculation, do I need to subtract spaces with skylights or roof vents, or just use the entire footprint since rain will still hit those surfaces?
You should include the entire roof footprint for your rainwater calculation, even areas with skylights or vents, because rain will still fall on those surfaces. However, if any sections drain away from your collection system (for example, if certain roof slopes direct water elsewhere), you should only include the portion that actually drains into your gutters and rainwater system.
What would be the estimated installation cost range for a basic system suitable for a small urban storefront, assuming I only want to use the water for cleaning and outdoor landscaping?
For a small urban storefront using rainwater just for cleaning and outdoor landscaping, installation costs usually range from $500 to $2,000. This estimate covers basic components like a collection barrel, first flush diverter, filter, and simple distribution system. Costs can vary depending on barrel size, roof area, and any professional labor needed, but a DIY approach can help keep expenses on the lower end.
I see the example calculation uses a roof area of 60 m² and 0.6 m rainfall, but what if my roof is irregularly shaped or partially shaded? Do you have advice for more accurately estimating potential collected water in such cases?
If your roof is irregularly shaped, try dividing it into smaller, regular sections (like rectangles or triangles), calculate each area, and then sum them up for a total. For shaded or obstructed parts, reduce the effective collection area to account for less rain reaching those spots—estimate what percentage is actually exposed. Also, remember that some roof materials or slopes can affect water flow, so consider that in your calculations for more accuracy.
For the calculation of harvestable rainwater, the article mentions using a runoff coefficient of 0.8. Is this value standard for all roof types, or should it be different for flat or green roofs?
The runoff coefficient of 0.8 is commonly used for impermeable surfaces like metal or tiled roofs. For flat roofs with gravel or especially for green (vegetated) roofs, the coefficient is usually lower—around 0.5 for flat roofs and as low as 0.3 or less for green roofs, since they absorb more water. Adjusting the coefficient based on your roof type will give you a more accurate harvestable rainwater estimate.
I’m wondering how much time a typical installation takes for someone without plumbing experience, especially when following all the planning and safety guidelines in your tutorial. Are most steps DIY-friendly or would I need to hire a professional for parts of it?
For someone without plumbing experience, setting up a basic rainwater harvesting system usually takes a weekend—about 1 to 2 days if you work steadily and follow all safety and planning steps. Most parts, like assembling barrels, piping, and filters, are DIY-friendly. However, if your system connects to indoor plumbing or requires cutting into gutters, hiring a professional for those specific tasks is safer and often required by local codes.
I see the calculation example uses metric units for roof area and rainfall—is there a straightforward way to do this calculation using feet and inches for those of us in the US?
Absolutely, you can use feet and inches for your calculations. First, measure your roof area in square feet. Next, note your local yearly rainfall in inches. To estimate collected rainwater, multiply the roof area (sq ft) by the rainfall (inches), then divide by 12 to convert inches to feet, giving you cubic feet. Multiply that result by 7.48 to get gallons.
When calculating how much rainwater I can collect, the article says to use the roof’s length x width in meters, but my roof is oddly shaped with sections on different levels. Should I just add up the area of each section, or is there a better way?
For a roof with multiple sections at different levels, add up the area of each individual section to get your total catchment area. Measure each section separately—length times width for rectangles or use the right formula for other shapes—then sum them all. This will give you the most accurate estimate of how much rainwater you can collect.
How much time does it usually take for a busy family to set up one of these systems from start to finish, including getting permits if needed?
For a busy family, installing a rainwater harvesting system usually takes about two weekends, assuming everyone works together and the materials are ready beforehand. If permits are required in your area, add another week or two for paperwork and approval, since response times can vary. Preparing in advance and checking local regulations will help streamline the process.
Does the runoff coefficient always stay at 0.8 for different types of roofs, or do materials like metal versus asphalt shingles affect how much rain you can actually harvest?
The runoff coefficient doesn’t always stay at 0.8; it actually varies depending on the roofing material. For example, metal roofs usually have a higher coefficient (around 0.95) because they are smoother and shed water more efficiently. Asphalt shingles typically have a coefficient closer to 0.8, as some water can be absorbed or lost. Using the right coefficient for your roof type ensures you make accurate calculations for your rainwater harvesting system.
What are some common hurdles homeowners encounter when seeking permits for rainwater harvesting systems in cities, and are there tips for navigating municipal requirements smoothly?
Homeowners often face hurdles like unclear local regulations, lengthy approval processes, or varying rules about system size and water usage. It helps to first check your city’s official website for guidelines, then contact the permitting office directly for specifics. Keeping detailed plans and being ready to address safety or environmental questions can also make the process smoother.
You mentioned storage and filtration needs differ depending on indoor versus outdoor use. Could you explain what types of filters or storage tanks are recommended if I want to use harvested rainwater for flushing toilets as well as watering plants?
For using harvested rainwater for both toilet flushing and garden watering, a robust storage tank made of food-grade plastic or concrete is recommended to prevent contamination. For filtration, use a first-flush diverter to remove initial roof debris, followed by a fine mesh or sediment filter. Before indoor use like toilet flushing, add a carbon filter or UV treatment to reduce odors and bacteria. For garden watering, a basic sediment filter is usually enough.
When you mention local regulations and permits, what kinds of restrictions should I watch out for in urban areas? Is it usually about storage tank size, or do they check water quality and usage too?
In many urban areas, regulations can cover several aspects. You might find rules about the maximum size and placement of storage tanks, minimum distances from property lines, and safety measures for mosquito control. Some cities also require you to use covered tanks to prevent contamination or mandate regular water quality checks if you plan to use the water indoors. It’s a good idea to check with your local building or environmental health department for exact requirements.
You say that many cities encourage rainwater harvesting, but regulations can vary. In your experience, how tricky is it to get the right permits, and are there typical requirements that homeowners should look out for before starting the installation?
Getting permits for rainwater harvesting systems can be straightforward or a bit involved, depending on your city. Usually, homeowners need to submit a basic plan showing the tank size, location, and how overflow will be managed. Some cities require backflow prevention devices or specify allowable uses for collected rainwater. It’s always a good idea to check with your local building or environmental department early, as requirements can differ even within the same state.
I noticed the article mentions using a runoff coefficient of 0.8 for pitched roofs. Could you explain how the coefficient might change if my building has a flat roof, and how that would affect the calculation?
The runoff coefficient reflects how much rainwater actually runs off your roof and into the collection system. For flat roofs, the coefficient is usually lower than for pitched roofs—typically around 0.5 to 0.7—since more water tends to be absorbed or evaporates. Using a lower coefficient in your calculations means you’ll estimate a smaller amount of collected water compared to a pitched roof of the same size.
Do you have any suggestions for budget-friendly equipment brands or system designs, especially for students or renters who might want a temporary setup that doesn’t alter the property too much?
For students or renters, consider using portable rain barrels made from food-grade plastic, which are affordable and don’t require permanent installation. Brands like RTS Home Accents and Good Ideas offer budget-friendly options. You can create a simple system with a downspout diverter that’s easy to attach and remove, minimizing changes to the property. Collapsible rain barrels are also great for temporary setups and easy storage.
After installation, what are some practical tips for maintaining the system during winter months in colder parts of the US to prevent freezing or damage?
To protect your rainwater harvesting system during winter in colder regions, drain all pipes, tanks, and gutters before freezing temperatures set in. Disconnect and store hoses, and use insulated covers or heat tape on exposed pipes. Ensure tank lids are secure to keep out debris and ice. Regularly clear gutters of leaves so melting snow can drain properly. These steps help prevent freezing and minimize damage.
If I want to set up a basic system mainly for washing company vehicles, what would be a reasonable budget to expect for the initial setup and maintenance, based on the steps described?
For a basic rainwater harvesting system intended mainly for washing company vehicles, you can expect the initial setup to cost between $500 and $1,500. This range covers items like gutters, a first-flush diverter, a storage tank (usually 500-1,000 gallons), a simple filtration system, and basic plumbing. Annual maintenance, including filter cleaning and occasional checks, typically ranges from $50 to $150. Costs may vary based on tank size and local material prices.
For urban households with only limited outdoor space, what are some practical storage tank options that won’t take up too much room but can still store a meaningful amount of rainwater?
For smaller outdoor spaces, slimline or vertical rainwater tanks are a great choice. These tanks are designed to fit along narrow side yards, next to walls, or even under decks. Stackable modular tanks are another option, as they allow you to customize the shape and capacity based on your available area. Many urban homeowners also use under-deck or underground tanks to maximize storage without sacrificing usable yard space.