
Introduction: Why Build a DIY Greywater Filtration System?
As water scarcity and rising utility costs become more pressing worldwide, sustainable water management at home is increasingly important. One of the most effective ways to reduce potable water use is by reusing greywater—the gently used water from showers, bathroom sinks, and laundry machines—for irrigation and other non-potable purposes. A properly designed greywater filtration system can divert thousands of gallons each year from your local wastewater stream, nourishing your landscape and saving on bills, all while reducing your environmental footprint. Yet, many homeowners hesitate to start because they are unsure which tools and equipment are essential, how to assemble the system, and how to ensure it runs safely and efficiently. This guide will provide you with a comprehensive, step-by-step overview of the tools and equipment you’ll need to build a robust DIY greywater filtration system, tailored for residential use. Whether you want to water your vegetable garden or simply cut down on your household water waste, this resource will empower you with the practical knowledge and confidence to get started the right way.
Understanding Greywater: What Can and Cannot Be Filtered
What Is Greywater?
Greywater is the wastewater generated from non-toilet plumbing systems such as showers, bathtubs, bathroom sinks, and washing machines. It does not include water from toilets (blackwater) or kitchen sinks, as these sources contain higher levels of pathogens and fats that require specialized treatment.
What’s Suitable for a Home Filtration System?
- Showers and Bathtubs: Water from these sources is typically low in contaminants and ideal for filtration and reuse.
- Bathroom Sinks: Acceptable if no harsh chemicals or hair dyes are used.
- Washing Machines: Use with caution—avoid if using bleach or harsh detergents; opt for plant-friendly soaps.
What to Exclude
- Kitchen sink water (due to grease, food scraps, and pathogens)
- Toilet water (blackwater)
- Dishwasher water (contains high concentrations of detergents and food waste)
Key Design Considerations Before You Begin
Local Regulations and Permits
Before assembling any greywater system, check with your local municipality or county for regulations. Many areas require permits for greywater diversion and have specific guidelines regarding treatment, filtration, and distribution. Some regions prohibit the use of greywater for edible crops unless advanced filtration is used.
System Size and Capacity
Assess your household’s daily greywater output. For most homes, a simple system handling 20–100 gallons per day is suitable for irrigating gardens or landscaping. Larger systems may require advanced engineering and additional permits.
Gravity vs. Pumped Systems
Gravity-fed systems are simpler and more reliable, requiring less maintenance and no electrical components, but only work if your landscape slopes away from the house. Flat or uphill sites may require a pump to distribute filtered water.
Essential Tools & Equipment for a DIY Greywater Filtration System
Basic Hand Tools
- Pipe Cutter or Hacksaw: For cutting PVC or ABS piping.
- Adjustable Wrenches: For tightening connections and fittings.
- Pliers: For gripping and turning small components.
- Utility Knife: For trimming tubing or removing insulation.
- Shovel and Spade: For digging trenches for pipes and filtration beds.
- Level: For ensuring correct pipe slopes to prevent blockages.
Plumbing Materials
- PVC or ABS Pipe (1–2” diameter): Main conduit for greywater flow from source to filtration bed.
- Pipe Fittings (elbows, tees, couplers): For routing and connecting pipes.
- PVC or ABS Pipe Cement and Primer: For sealing pipe joints.
- Flexible Tubing (optional): For easier routing around obstacles.
- Ball Valves: To shut off or divert flow as needed.
- Backflow Preventer: Essential for preventing contamination of potable water lines.
Filtration Components
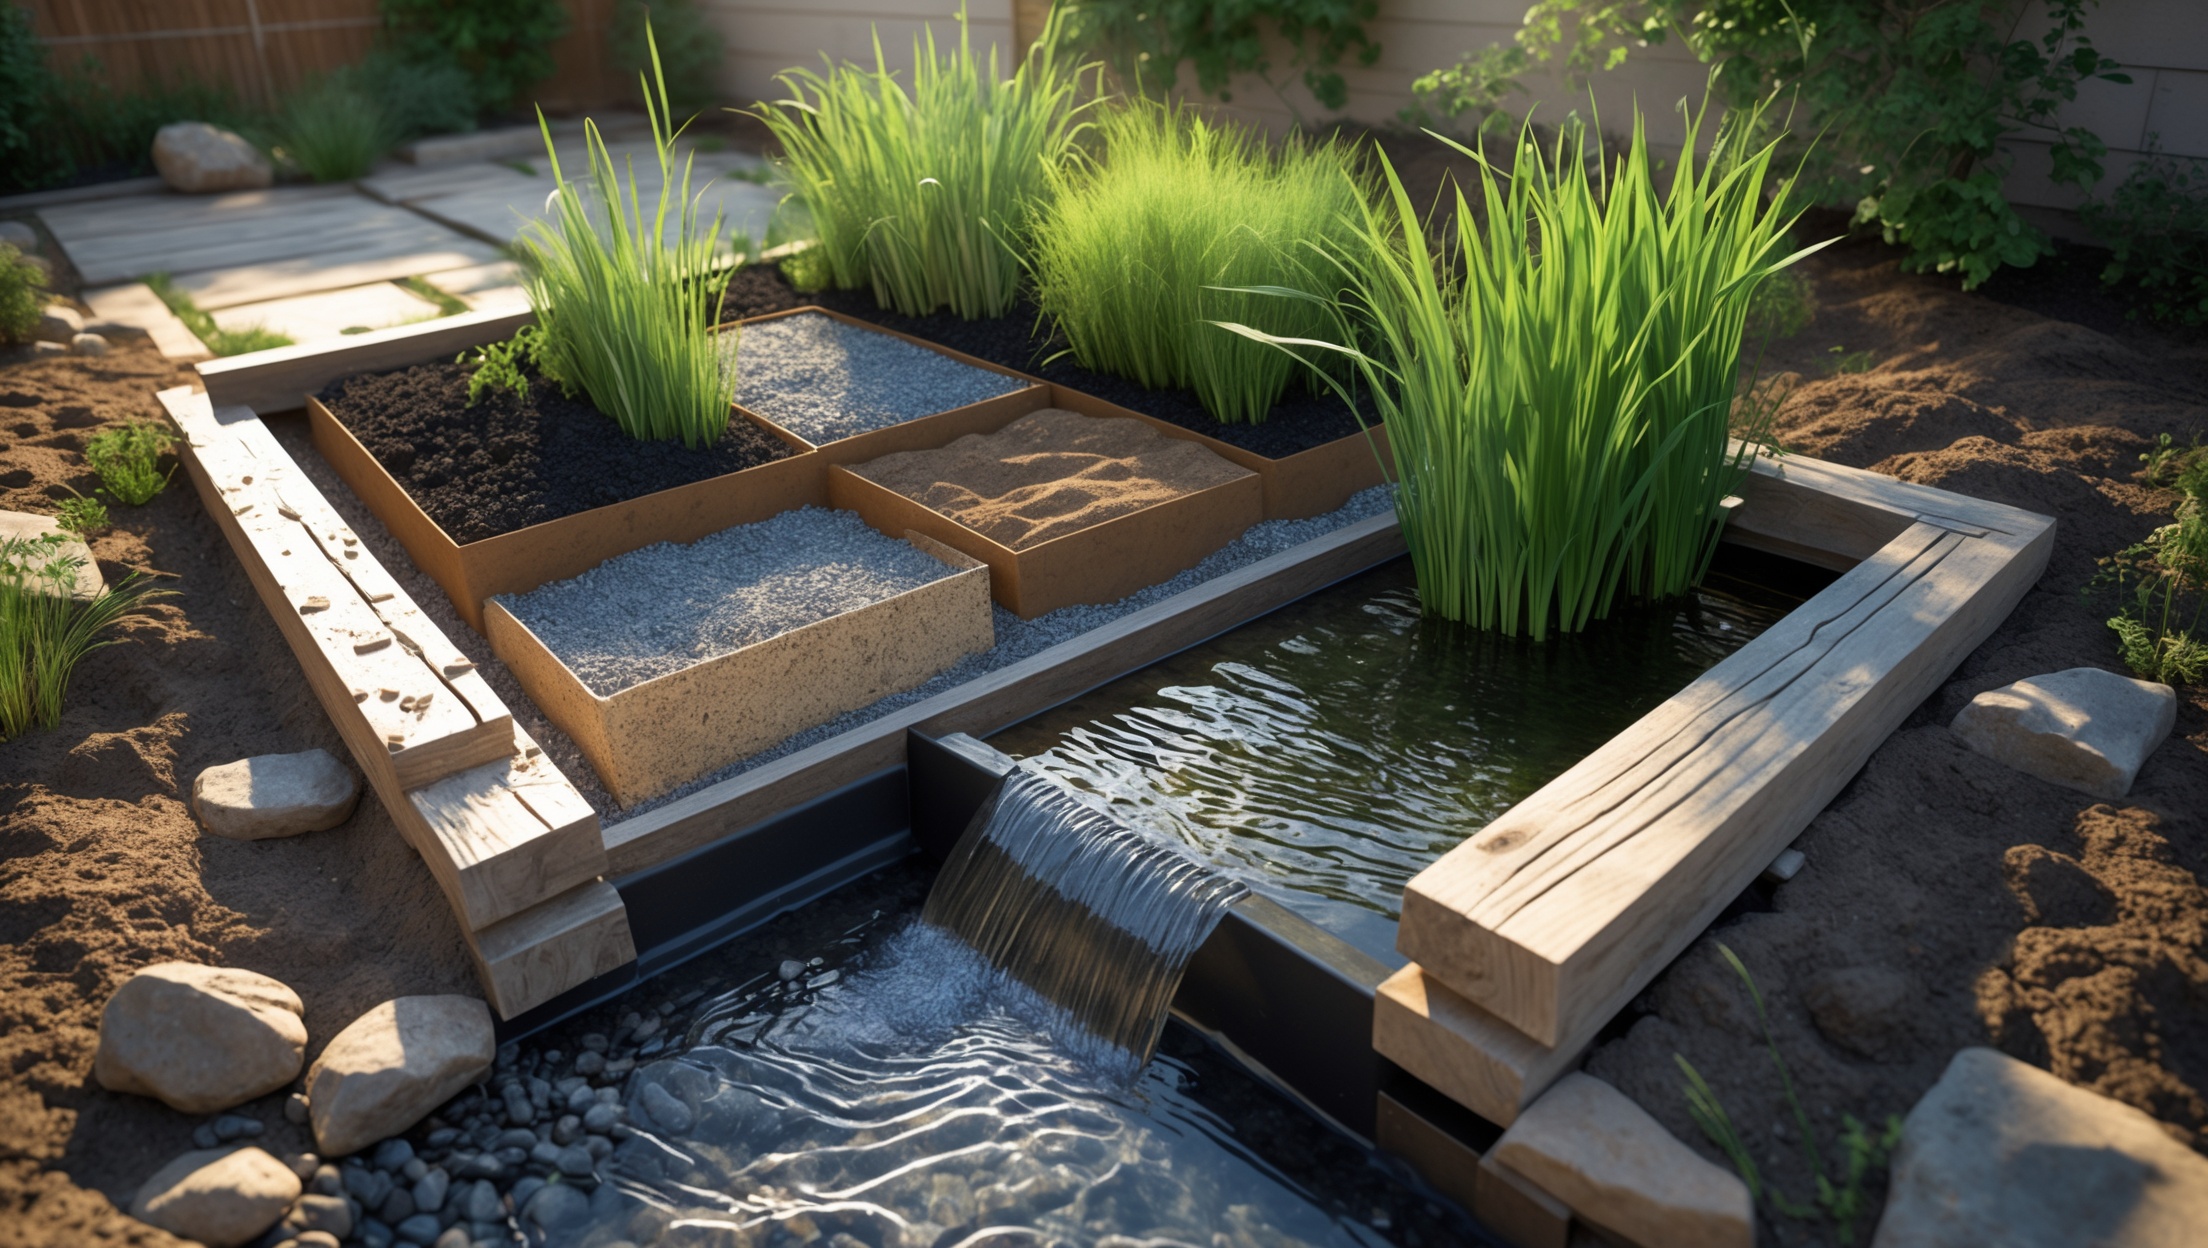
- Filter Box or Barrel: Food-grade plastic barrel (30–55 gallons) or custom-built wooden box lined with pond liner.
- Pond Liner or Heavy-Duty Waterproof Membrane: To prevent leaks and ensure longevity of filtration bed.
- Gravel (¾” or 1″ washed): Base layer for drainage and coarse filtration.
- Pea Gravel: Intermediate filtration layer.
- Coarse Sand: Fine filtration layer to remove suspended solids.
- Landscape Fabric: To prevent sand and silt from clogging outlets.
- Perforated Drain Pipe: For distributing water evenly within the filter bed.
- Planted Wetland Plants (e.g., reeds, rushes, canna lilies): Optional but highly recommended for added biological filtration.
Distribution and Irrigation Materials
- Drip Irrigation Tubing: For low-pressure, even distribution to garden beds.
- Emitter Stakes or Soaker Hoses: For targeting specific plants or rows.
- Mulch: To cover irrigation zones and prevent direct exposure to greywater.
Optional: Pump and Electrical Supplies
- Submersible Utility Pump: For sites where gravity flow is not feasible.
- GFCI Outlet and Waterproof Enclosure: For safe, outdoor-rated electrical connections.
- Float Switch: To automate pump operation based on water levels.
Step-By-Step Assembly: Building Your Greywater Filtration System
1. Planning and Layout
- Map the route from greywater source(s) to filtration area, avoiding utility lines.
- Decide on above-ground or buried piping based on climate and aesthetics.
- Ensure the filtration bed is at least 10 feet from food crops, wells, or potable water lines.
2. Installing Diverter Valves
Install a three-way diverter valve at the greywater source (e.g., under the bathroom sink or at the laundry outlet). This allows you to switch between sending water to the sewer/septic and the filtration system as needed.
3. Setting Up the Filtration Bed
- Excavate a shallow trench or pit sized for your filter box or barrel (typical size: 3–4 feet long, 2 feet wide, 2–3 feet deep).
- Line the hole or box with pond liner or a heavy-duty plastic membrane.
- Add a 6–8 inch layer of coarse gravel for drainage.
- Place a perforated drain pipe at the bottom, capped at the end, with holes facing down.
- Add a 4–6 inch layer of pea gravel, then a 4–6 inch layer of coarse sand.
- Cover with landscape fabric to prevent clogging the outlet.
- Optional: Plant wetland species directly in the sand/gravel or in containers set within the bed.
4. Connecting Piping and Flow Control
- Connect the greywater pipe from your source to the filter bed inlet, ensuring a downward slope (2% grade is ideal).
- Use ball valves to isolate system sections for maintenance.
- Install a backflow preventer at the main supply line if local code requires.
5. Distribution to Irrigation Zones
- Attach drip tubing or soaker hoses to the outlet of the filtration bed.
- Lay tubing in mulched garden beds, keeping lines at least 6 inches below mulch.
- Position emitter stakes near the root zones of ornamental plants and shrubs.
- Do not use greywater for edible root crops or leafy vegetables unless advanced filtration and disinfection are in place.
6. Testing and Adjustments
- Test the system with clean water before diverting greywater.
- Check all joints for leaks and confirm even distribution of water.
- Monitor for pooling or runoff and adjust the flow or layout as needed.
Maintenance Best Practices for Longevity and Safety
Routine Inspection
- Check for clogs in pipes, filter media, and distribution lines every month.
- Remove accumulated hair, lint, and debris from the filter box as needed.
- Flush the system with clean water quarterly to prevent salt or soap buildup.
Filter Media Replacement
- Replace sand and gravel every 2–3 years or when flow slows noticeably.
- Rinse filter media annually to remove fines and organic matter.
Plant Care
- Trim wetland plants to maintain growth and maximize filtration efficiency.
- Remove dead or diseased foliage to prevent odor and pest issues.
Pump and Electrical Safety (If Used)
- Inspect pump operation monthly and test float switches.
- Check GFCI outlets for proper function.
- Clean pump inlet screens regularly to prevent blockages.
Seasonal Maintenance
- Winterize above-ground pipes and pumps in freezing climates by draining lines and storing pumps indoors.
- Inspect pond liner for cracks or wear after heavy storms or seismic activity.
Advanced Tips for a Robust and Eco-Friendly System
- Use only biodegradable, low-sodium, and phosphate-free soaps and detergents in greywater sources.
- Install a simple grease trap if using laundry water with high lint or oily residue.
- Consider adding a UV disinfection stage if you plan to irrigate near play areas or sensitive landscaping.
- Label all greywater outlets and pipes clearly to avoid accidental cross-connections with potable water.
Conclusion: Empowering Sustainable Water Practices at Home
Building your own greywater filtration system is a rewarding project that offers tangible environmental and economic benefits. By reclaiming water that would otherwise go down the drain, you directly reduce your household’s water demand while nourishing your landscape in a responsible, resource-efficient way. The up-front investment in time and materials is offset by long-term savings, reduced strain on municipal systems, and the satisfaction of making your home more resilient in the face of drought or water restrictions. With the right tools—pipe cutters, plumbing materials, filter media, and thoughtful layout—you can create a robust system tailored to your landscape and lifestyle. Regular inspection and basic maintenance will ensure your greywater system remains safe, effective, and trouble-free for years to come. As more communities embrace sustainable water practices, your DIY filtration system not only benefits your household but serves as an inspiring model for neighbors and future generations. Take the first step today—your garden, your wallet, and the planet will thank you.