Introduction: Harnessing the Power of Sun and Rain
As climate variability increases and water conservation becomes a priority, homeowners are seeking sustainable solutions that combine eco-friendly water management with renewable energy. A solar-powered rain barrel system is an innovative way to collect, store, and distribute rainwater using the sun’s energy, reducing both water and electricity bills while supporting green landscapes. Unlike traditional rain barrels, integrating a small solar-powered pump allows you to easily irrigate gardens, fill watering cans, or even supply water to outdoor features, all without relying on the electrical grid. This guide walks you through every step of designing and installing a solar-powered rain barrel setup, from choosing the right equipment to optimizing performance for year-round use. Whether you’re looking to make your garden more resilient, lower your environmental impact, or simply experiment with green technology at home, this detailed tutorial provides practical advice, safety considerations, and troubleshooting tips, ensuring your system delivers sustainable benefits for years to come.
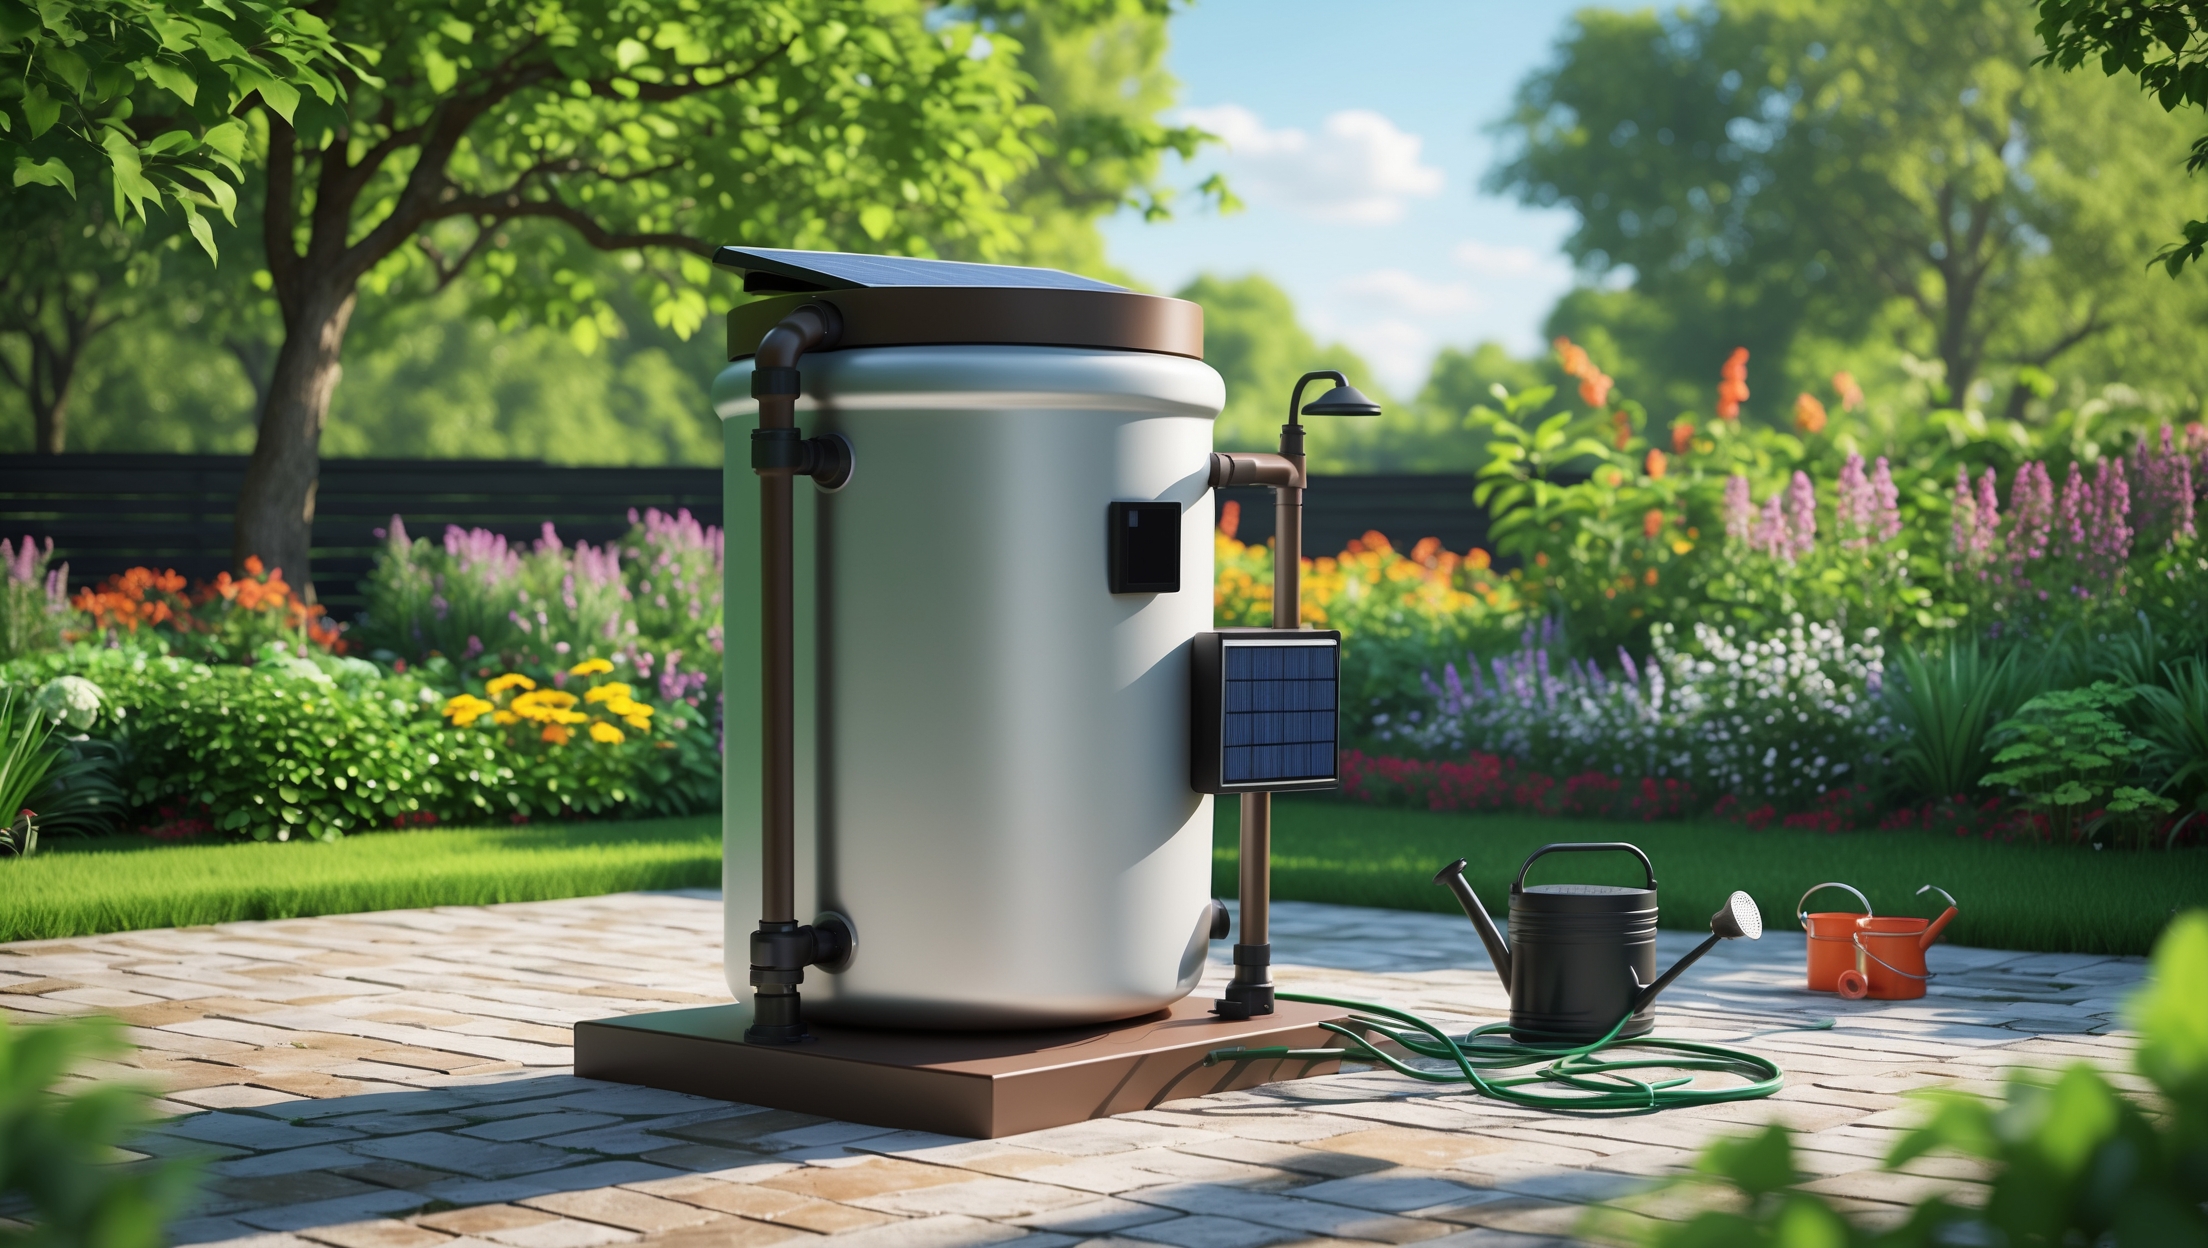
How Solar-Powered Rain Barrel Systems Work
Basic Components and Their Functions
- Rain Barrel: Collects and stores rainwater from rooftop gutters.
- First-Flush Diverter: Ensures debris and contaminants from the first rainfall are diverted away from storage.
- Solar Panel: Converts sunlight into electricity to power a water pump.
- 12V Water Pump: Moves stored water to your garden or irrigation system on demand.
- Battery & Charge Controller (Optional): Stores excess solar energy for use during cloudy periods.
- Filtration: Removes particulates before water enters the barrel or is pumped out.
Advantages Over Traditional Systems
- Enables pressurized water delivery for hoses, drip irrigation, or sprinklers.
- Reduces manual labor—no more struggling with gravity-fed barrels in flat yards.
- Operates entirely off-grid—ideal for eco-conscious and remote properties.
Planning Your Solar-Powered Rain Barrel System
Site Assessment and Sizing
Begin by evaluating your property’s rainfall patterns, roof area, and water needs. Calculate the potential water harvest: for every 1,000 square feet of roof, one inch of rain yields about 623 gallons. Consider how much water you want to store (typical barrels range from 50–100 gallons). Choose a location near downspouts with at least 4-6 hours of direct sunlight for your solar panel. Ensure the site is level, stable, and accessible for maintenance.
System Design Considerations
- Number of Barrels: Multiple barrels can be linked for greater capacity.
- Pump Flow Rate: Match pump power (liters per minute or GPH) to your irrigation needs.
- Solar Panel Size: Typically, a 10–30 watt panel is sufficient for small pumps. Oversizing allows for cloudy days.
- Battery Storage: Not strictly necessary, but a 12V lead-acid or LiFePO4 battery extends system usability into the evening or on overcast days.
- Filtration and Overflow: Include leaf guards, mesh screens, and a safe overflow route away from foundations.
Equipment and Tools Checklist
- Rain barrel(s) with spigot and overflow port
- First-flush diverter kit
- Solar panel (10–30W)
- 12V submersible or inline water pump
- Battery (optional) and charge controller
- Gutter downspout diverter
- Pre-filter mesh or debris screen
- Hose or drip irrigation tubing
- Waterproof electrical connectors
- Mounting brackets and hardware (for panels)
- Level and stable base (concrete pavers or gravel)
- Basic tools: drill, screwdriver, adjustable wrench, pipe sealant tape, wire strippers
- Weatherproof enclosure for electronics (if using battery/charge controller)
- Personal protective equipment: gloves, safety glasses
Step-by-Step Installation Tutorial
1. Prepare the Installation Site
- Clear and level the ground where the barrel will sit; use pavers or gravel to create a stable, mud-free base.
- Ensure the location is close to a downspout and receives ample sunlight for the solar panel.
2. Install Rain Barrel and Diverters
- Assemble the rain barrel per manufacturer instructions. Position under the chosen downspout.
- Install the first-flush diverter to divert initial runoff (usually the first 10–20 liters per rain event).
- Attach a debris screen or gutter filter to prevent leaves and insects from entering the barrel.
- Connect an overflow hose, directing excess water safely away from your house foundation.
3. Mount the Solar Panel
- Choose a mounting location that faces true south (in the Northern Hemisphere) or north (Southern Hemisphere) at a tilt angle equal to your latitude.
- Secure the panel on a roof, fence, or a dedicated ground mount using provided hardware.
- Route the panel’s cable neatly to the planned electronics enclosure.
4. Install the Pump and Plumbing
- Place the submersible pump inside the barrel (or inline pump at the outlet spigot).
- Connect the pump’s output to your irrigation hose or drip tubing.
- Test fit all plumbing, sealing threaded connections with pipe tape.
5. Wire the Electrical System
- Connect the solar panel to the charge controller (if using a battery); otherwise, wire the panel directly to the pump’s positive and negative terminals.
- If using a battery, connect the battery to the charge controller, then wire the pump to the controller’s load output.
- Use waterproof connectors and weatherproof enclosures to protect connections from rain and moisture.
- Secure all wires away from areas where they may be pinched or exposed to damage.
6. Testing and Adjustment
- Fill the barrel with water and activate the pump by exposing the solar panel to sunlight.
- Check for leaks at all joints and connections, tightening as needed.
- Test the flow at your irrigation outlet; adjust hose or drip emitters as necessary for even distribution.
- If using a battery, monitor charge and discharge cycles to ensure system health.
Maintenance Best Practices
Regular Inspection Checklist
- Check the barrel for cracks or algae buildup monthly.
- Clean debris screens after major storms.
- Flush the first-flush diverter regularly to prevent clogging.
- Inspect all electrical connections for corrosion every season.
- Test the pump operation at least monthly, especially before peak irrigation season.
- Clean the solar panel with water and a soft cloth to remove dust or bird droppings.
- Drain and clean the barrel annually to prevent sediment accumulation.
Seasonal Adjustments
- Winterizing (for cold climates): Drain the barrel and disconnect the pump to prevent freeze damage. Store electronics indoors if possible.
- Spring Startup: Inspect system, reconnect components, and perform a test run before the first rain event.
Safety Considerations
- Always disconnect electrical components before maintenance.
- Use GFCI (ground-fault circuit interrupter) protection if connecting to AC power for any reason.
- Secure all wiring away from children and pets.
- Ensure overflow routes do not create slip hazards or direct water toward foundations.
- Install mosquito-proof screens to prevent breeding.
- Label the system as non-potable water unless you have implemented water purification steps.
Troubleshooting Common Issues
- Pump Doesn’t Run: Check solar panel output with a multimeter. Inspect wires for loose or corroded connections.
- Low Water Pressure: Ensure pump is rated for your desired flow and head height. Clean filters and check for hose kinks.
- Barrel Overflows: Verify that overflow hose is clear and directed away from structures.
- Solar Panel Underperforming: Remove shading obstructions and clean panel surface.
- Algae Growth: Paint barrel opaque or use a UV-resistant cover to block sunlight.
Optimizing System Efficiency
Smart Upgrades
- Automatic Timer or Moisture Sensor: Connect a 12V timer or soil moisture sensor to automate watering.
- Multiple Barrels in Series: Increase capacity and capture more rainwater with extra barrels connected via bulkhead fittings.
- Solar Panel Tracking: For tech enthusiasts, a simple tracking mount can boost energy harvest by 10–25%.
- Rainwater Quality Enhancement: Install a charcoal or sand filter for improved water clarity when using for sensitive plants.
Environmental Impact and Cost Savings
Solar-powered rain barrel systems significantly reduce demand on municipal water and energy infrastructure. By irrigating with stored rainwater, you can save hundreds of gallons per season, reducing your water bill and conserving a precious resource. The solar pump eliminates reliance on grid electricity, further shrinking your home’s carbon footprint. Over time, these savings can offset the initial setup costs—especially in regions with high water prices or frequent droughts. Additionally, the system helps manage stormwater runoff, mitigating erosion and reducing pressure on urban drainage systems.
Conclusion: Empowering Sustainable Water Use at Home
Integrating solar power with rainwater harvesting is a practical, scalable step toward sustainable living. A well-designed solar-powered rain barrel system not only conserves water but also exemplifies how small-scale renewable technologies can make a tangible difference in our daily lives. Beyond the environmental and financial benefits, such systems foster a deeper connection to natural cycles, empowering homeowners to take direct action in resource stewardship and climate resilience. By following the steps outlined here—carefully planning, selecting quality equipment, and maintaining your setup—you ensure reliable, efficient operation for years to come. As you enjoy healthier gardens and lower utility bills, you’ll also be contributing to a greener, more self-reliant future, inspiring neighbors and communities to embrace innovative water and energy solutions. Start your project today and discover the satisfaction of making your home a model of eco-friendly ingenuity.


Can you explain how the solar-powered pump gets activated? Is it always running whenever there’s sunlight, or do you need to manually turn it on when you need water for the garden?
The solar-powered pump is typically controlled by a switch or a timer, rather than running automatically whenever there’s sunlight. This means you usually need to manually turn it on when you want to water your garden, or you can set it to operate at specific times if your system includes a timer. This setup helps conserve stored rainwater and only uses the pump when needed.
I’m wondering how big of a solar panel I’d actually need if I want to run the pump for a lawn-sized drip system—does your guide recommend a wattage based on average sun exposure or pump size?
The guide suggests sizing the solar panel mainly according to your pump’s power requirements and local sun exposure. Typically, for a lawn-sized drip system, pumps use between 10 to 40 watts. If your area gets good sunlight, a 20–50 watt solar panel usually works well, but always check your pump’s wattage and add about 20% extra capacity to ensure reliable performance even on cloudy days.
The article mentions using a first-flush diverter to keep debris out of the rain barrel. Could you clarify how often the diverter itself needs to be cleaned, especially in areas with a lot of tree cover?
In areas with heavy tree cover, it’s best to check and clean the first-flush diverter every 2 to 4 weeks, especially during rainy seasons. Leaves, twigs, and other debris can accumulate quickly, which may reduce its effectiveness. Regular cleaning ensures that only cleaner rainwater enters your barrel and helps prevent clogs or overflow.
What are some common troubleshooting issues that homeowners might run into with the solar-powered pump or battery setup, and do you have any tips for keeping the system running smoothly year-round?
Homeowners may encounter issues like the pump not running due to a depleted battery, clogged filters, or faulty wiring. Solar panels can get dirty or shaded, reducing efficiency. To keep things running smoothly, regularly clean solar panels, check battery connections, inspect for debris in the pump and filters, and test system operation monthly. In colder months, protect the battery and electronics from freezing, and drain the system if you expect hard freezes to prevent damage.
Could this solar-powered rain barrel setup be adapted for use with multiple barrels connected together, or would that require a much stronger pump and a larger solar panel? I’m considering scaling up for a bigger vegetable garden.
You can definitely adapt the solar-powered rain barrel system to work with multiple barrels. To do this, you’ll likely need a more powerful pump to handle the increased water volume and possibly a larger solar panel to meet the higher energy demand. Make sure your barrels are connected at the base for even water distribution, and check the pump’s specifications to ensure it can manage the total capacity.