Introduction: Why Seasonal Maintenance Matters for Greywater Recycling Systems
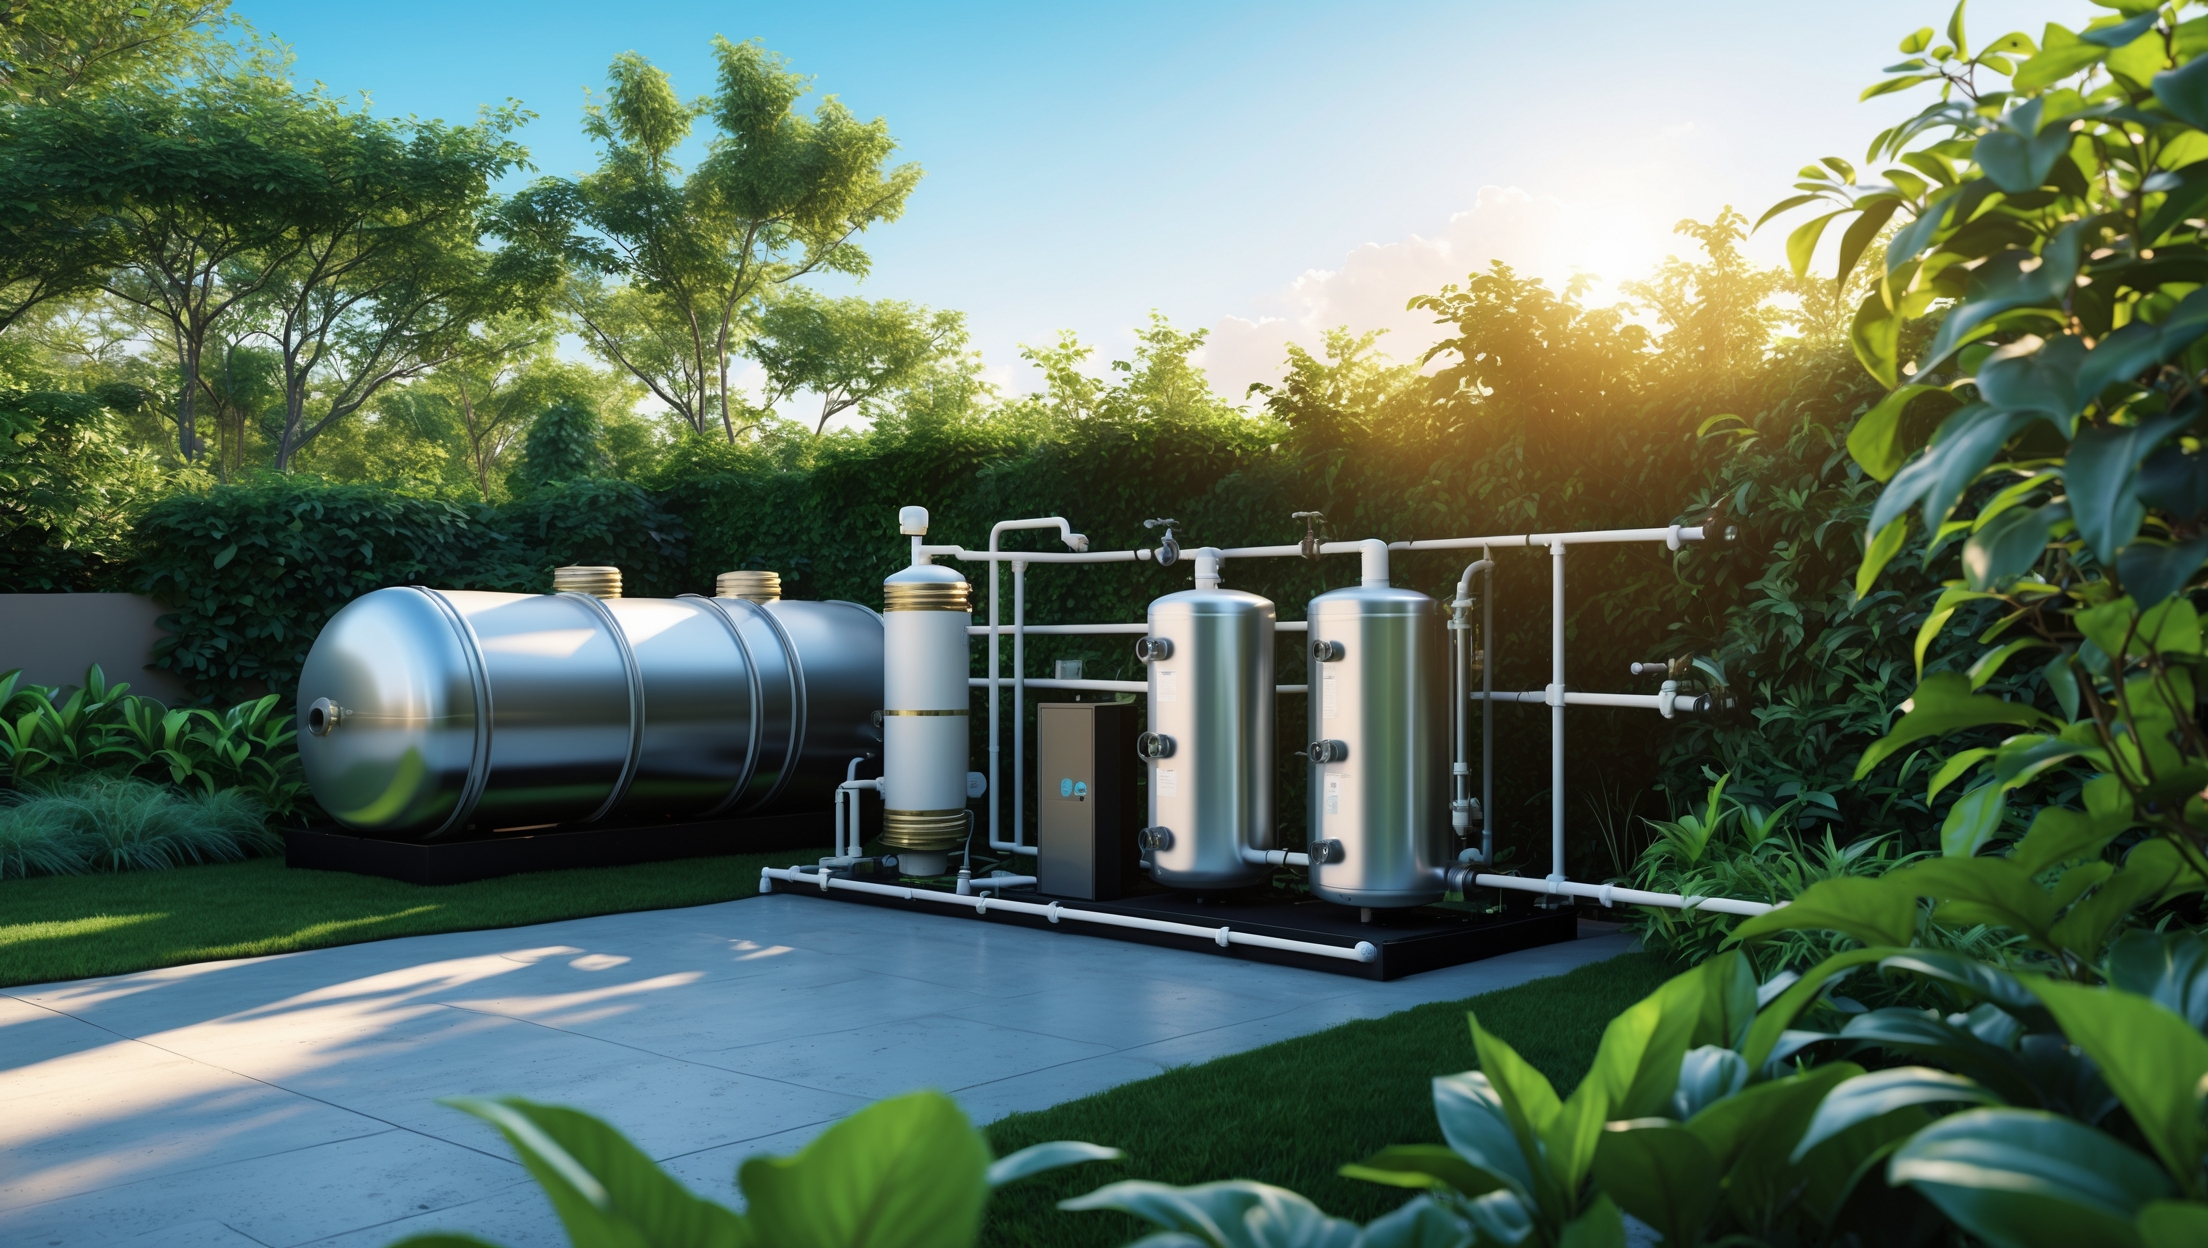
Greywater recycling systems are a cornerstone of sustainable living, allowing households to reuse wastewater from sinks, showers, and laundry for irrigation and flushing. These systems reduce water bills, ease pressure on municipal supplies, and help you tread lighter on the planet. But like any technology, greywater systems demand regular attention to function safely and efficiently. Neglecting periodic maintenance can lead to clogs, odors, system failures, or even health hazards. That’s why adopting a thorough, seasonally-adjusted maintenance routine is crucial—not just for optimal performance, but for regulatory compliance and long-term system health.
This comprehensive checklist guides you through specific tasks to tackle each season, ensuring your greywater recycling system stays reliable, hygienic, and eco-friendly throughout the year. Whether you’re a new adopter or a seasoned user, following this guide will help you maximize savings, minimize downtime, and extend the lifespan of your system.
Spring: System Awakening and Inspection
1. Inspect All Components After Winter
- Visual Check: Examine pipes, tanks, filters, and diverter valves for cracks, leaks, or damage caused by freezing temperatures.
- Test Seals and Gaskets: Ensure all seals are intact, especially on inspection hatches and tank connections. Replace any brittle or cracked gaskets.
2. Clean Filters and Screens
- Primary Filters: Remove and rinse pre-filters, mesh screens, and sediment traps to clear out debris accumulated over winter.
- Biological or Sand Filters: Gently flush or backwash according to manufacturer’s instructions. Avoid disturbing beneficial microbial layers unless necessary.
3. Test Pumps and Valves
- Cycle all pumps and actuated valves manually. Listen for unusual noises or vibrations indicating wear or blockages.
- Lubricate moving parts if recommended by your system manual.
4. Flush and Refill Tanks
- Drain any residual winter water and rinse tanks to prevent buildup of organic matter.
- Check for signs of algae or mold; scrub with a non-toxic cleaner if needed.
5. Inspect Irrigation Outlets
- Check drip lines, emitters, and distribution pipes for blockages, root intrusions, or animal damage.
- Flush lines thoroughly before the growing season begins.
Summer: Peak Demand and Performance Optimization
1. Monitor Water Quality
- Test for odor, clarity, and pH every 2–4 weeks. High temperatures can accelerate bacterial growth and organic decomposition.
- Adjust retention times to minimize stagnation—use timers or float switches to cycle greywater more frequently.
2. Check Filter Loading
- Increase the frequency of filter cleaning, especially after heavy water use (e.g., guests, laundry marathons).
- Replace disposable filters or filter media as needed.
3. Prevent Algae and Odor
- Shade aboveground tanks or paint them with UV-resistant coatings to inhibit algae growth.
- Add ventilation to tank lids or install activated carbon filters to control odors.
4. Inspect and Adjust Irrigation Zones
- Ensure irrigation areas are absorbing water efficiently—look for pooling, runoff, or dry patches.
- Adjust emitters or reconfigure distribution to match plant needs during hot weather.
5. Watch for Signs of Overloading
- If you notice slow drains, backups, or saturated soil, reduce greywater input or schedule a professional inspection.
Autumn: Preparation for Dormancy or Reduced Use
1. Deep Clean and Inspect System
- Perform a thorough cleaning of all filters, traps, and collection tanks.
- Inspect for early signs of wear, corrosion, or root intrusion before winter.
2. Adjust System Settings
- Reduce irrigation frequency as plant water needs decrease.
- Switch diverter valves to direct greywater away from dormant garden beds or sensitive plants.
3. Winterize Exposed Components (if in a cold climate)
- Insulate or drain exposed pipes and tanks to prevent freezing.
- Add heat tape to vulnerable sections if continued operation is needed.
4. Check Electrical and Control Systems
- Test backup power supplies, control panels, and sensors for proper function.
- Update monitoring software or firmware if your system is automated.
Winter: Protection and Low-Use Maintenance
1. Minimize Stagnation
- If the system will not be used for extended periods, fully drain tanks and lines.
- Otherwise, set up periodic flushes to prevent stagnant water and biofilm buildup.
2. Inspect for Freeze Damage
- After severe cold snaps, check all components for cracks, leaks, or ice blockages.
- Clear snow and ice from access points and vent openings.
3. Monitor for Pests and Debris
- Rodents may seek shelter in system enclosures during winter—seal any access points and inspect for gnaw marks or nesting.
- Remove fallen leaves or debris from around tanks, pipes, and distribution zones.
4. Review System Logs and Data
- Analyze usage patterns, water savings, and any maintenance issues flagged by your system’s monitoring features.
- Use this downtime to plan upgrades or schedule professional servicing for spring.
Year-Round Best Practices
1. Use Biodegradable, Low-Sodium Soaps and Detergents
Only use cleaning products compatible with greywater systems to avoid toxic buildup in soil and pipes. Check for plant-safe “greywater approved” labels.
2. Keep Maintenance Records
Log all inspections, filter changes, repairs, and system adjustments. Detailed records help diagnose recurring issues and are useful for warranty or permitting purposes.
3. Stay Informed on Local Regulations
Compliance requirements can change. Stay updated on backflow prevention, water quality testing, and allowable uses for recycled greywater in your area.
4. Educate Household Members
Teach everyone in your home about proper greywater use: what goes down the drain, how to spot problems, and when to call for help.
Troubleshooting: Common Seasonal Issues and Solutions
Odors and Foul Smells
- Check for stagnant water, clogged filters, or insufficient system ventilation.
- Flush tanks and pipes, clean filters, and add vent filters or odor scrubbers.
Low Water Pressure or Flow
- Inspect for blockages in filters, emitters, or lines. Clean or replace as needed.
- Test pump performance and check for worn impellers or stuck valves.
Unusual Algae or Mold Growth
- Reduce light exposure to tanks, increase cleaning frequency, and ensure water is cycling regularly.
Excessive Wear or Leaks
- Replace old gaskets, hoses, or fittings. Consider upgrading to more durable materials if recurring issues occur.
Advanced Tips for Long-Term Reliability
1. Upgrade to Smart Monitoring
Install flow meters, water quality sensors, and remote monitoring modules to get real-time diagnostics and alerts. Many modern systems integrate with home automation platforms for easier management.
2. Schedule Professional Inspections
Hire a certified greywater technician for an annual inspection, especially if your system is complex or serves multiple zones.
3. Plan for Expansion or Upgrades
Consider adding rainwater integration, UV disinfection, or additional storage as your household’s water needs grow.
Conclusion: Commit to Sustainable Water Reuse All Year
Maintaining a home greywater recycling system is not a set-it-and-forget-it task. By following a detailed seasonal checklist, you safeguard your investment, protect your household’s health, and ensure your system continues to deliver environmental and financial benefits. Proactive maintenance prevents the most common failures, extends the life of your equipment, and keeps your landscaping thriving with minimal potable water use. As water scarcity becomes a pressing issue around the globe, every effort to reduce, reuse, and recycle water at home counts. Adopting these best practices not only preserves your system, but also demonstrates a steadfast commitment to sustainable living.
Don’t wait for problems to arise—set up calendar reminders for each maintenance season, stay informed about local regulations, and involve your household in regular system care. The result is peace of mind, lower water bills, and a greener, more resilient home environment. With thoughtful stewardship, your greywater system can remain a dependable ally in your journey toward a sustainable future.


I noticed the checklist recommends checking gaskets and seals for brittleness each spring. Do you have any tips on sourcing replacement gaskets for older systems, or is it better to use universal fittings if the originals aren’t available anymore?
If you can’t find originals, universal gaskets are a practical option as long as their material is compatible with your greywater system (like EPDM or silicone). Measure your existing gaskets’ dimensions carefully so you get the right fit. Many plumbing supply stores or online retailers carry universal seals in various sizes, which should work for most older systems. If you’re unsure, bring the old gasket to a local store for matching advice.
Since you recommend inspecting seals and gaskets after winter, how often do people actually need to replace these parts? Are there affordable replacements or DIY fixes for the most common problem areas?
Seals and gaskets in greywater systems usually last 2–5 years, but their lifespan can vary depending on usage and water quality. After winter, if you notice cracks, brittleness, or leaks, it’s best to replace them right away. Many hardware stores offer affordable, compatible replacements, and for minor leaks, silicone sealant or gasket tape can be quick DIY fixes until you can do a full replacement.
When inspecting after winter, you mention checking for cracks and leaks from freezing. If I find damage in a PVC pipe or a tank, can I do a patch repair myself, or is full replacement usually a safer bet for greywater systems?
If you find small cracks or leaks in your greywater system’s PVC pipes, you can often do a patch repair using PVC primer and solvent cement. For minor tank damage, special sealants may help. However, if the damage is extensive or in a high-pressure area, full replacement is safer to prevent leaks and contamination. Always ensure repairs are watertight and suitable for greywater use.
If my system was unused for several weeks over winter, is there a specific process for flushing and restarting it in the spring to prevent health risks, or does a standard filter clean suffice?
If your greywater system was unused for weeks over winter, it’s best to do more than a standard filter clean. Start by flushing all pipes with clean water to remove any stagnant water or potential buildup. Clean or replace filters, inspect tanks for residue or odors, and check pumps for any signs of clogging. Run the system with fresh water before reconnecting it to your irrigation or reuse setup, ensuring everything flows properly and safely.
When cycling the pumps and actuated valves as suggested, what are some specific noises or vibrations I should listen for that indicate immediate repairs are needed? I want to catch issues before they shut down my system.
When cycling your pumps and actuated valves, listen for loud grinding, squealing, or screeching noises from the pump, which can mean worn bearings or debris inside. For valves, clicking is normal, but loud banging, repeated chattering, or buzzing suggests electrical or mechanical faults. Vibrations that feel stronger or different from usual, especially any knocking or rattling, could point to loose or failing parts that need prompt attention.
If I notice unusual noises or vibrations when testing my pumps and valves during the spring inspection, is it usually something a beginner can fix, or would I need to call in a professional? Any tips for troubleshooting these issues on my own to save on repair costs?
Unusual noises or vibrations from pumps and valves often indicate loose components, debris buildup, or wear and tear. Beginners can safely check for loose mounting bolts or obvious obstructions around the pump. Make sure the unit is turned off before inspecting. If tightening bolts or cleaning debris doesn’t resolve the issue—or if you hear grinding or see leaks—it’s wise to call a professional, as more complex repairs can risk system damage or void warranties.
After flushing and refilling the system in spring, how long should I expect to wait before the water quality is stable enough for irrigation use again? Is there a standard timeframe or does it depend on the system type?
After you flush and refill your greywater system in spring, the time it takes for water quality to stabilize usually depends on your system type. Most systems reach stable quality within 24 to 48 hours, especially if they use filtration and settling tanks. However, if your system includes biological treatment, it may take up to a week for beneficial microbes to reestablish. Always check water clarity and odor before use, and follow any manufacturer guidelines specific to your setup.
For homeowners on a budget, which of the spring maintenance tasks could be safely done DIY, and which ones typically require professional service? Any tips for sourcing affordable replacement gaskets or filters?
Homeowners comfortable with basic tools can typically inspect pipes for leaks, clean filters, and check for clogs themselves in spring. However, tasks like pump servicing, electrical checks, or system reprogramming are best left to professionals for safety. For affordable gaskets or filters, try local plumbing suppliers or search for your system’s model online to find compatible parts. Double-check measurements and materials before purchasing to ensure a good fit.
I noticed the article mentions avoiding disturbing beneficial microbial layers in biological or sand filters. How do I tell when cleaning is necessary versus when I should leave them alone to maintain those beneficial microbes?
A good way to tell if cleaning is needed is to observe the filter’s performance. If you notice slow drainage, pooling water, or unpleasant odors, it may be time for gentle maintenance. Otherwise, try to avoid disturbing the filter media to protect the beneficial microbial layers, as they are essential for effective filtration.