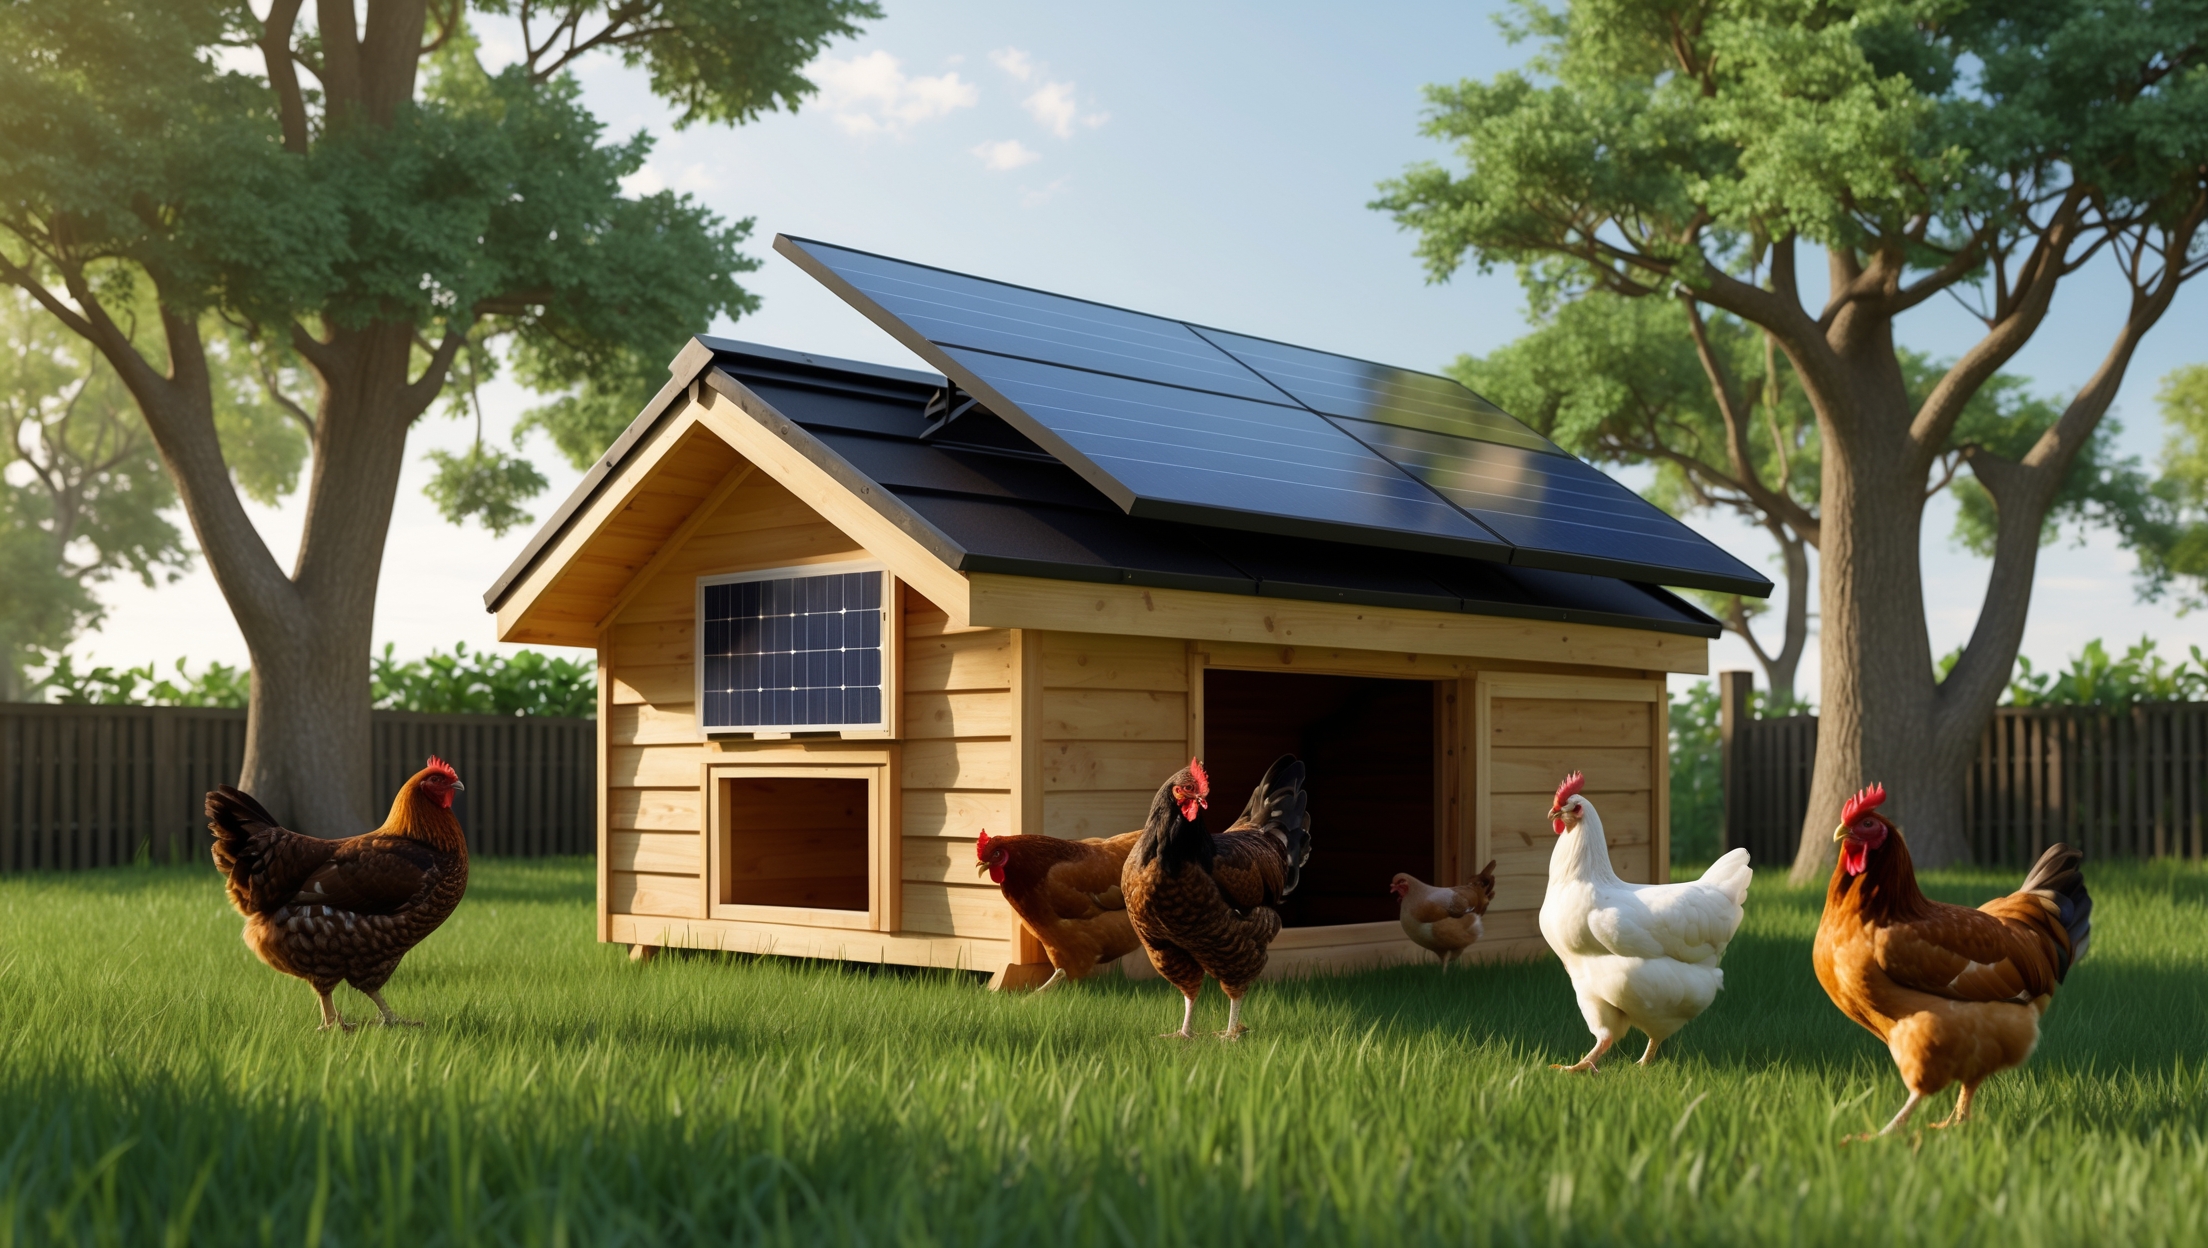
Introduction: Why Go Off-Grid with Your Chicken Coop?
Sustainable living enthusiasts and backyard farmers are increasingly seeking resilient, eco-friendly ways to manage their homesteads. One often-overlooked opportunity is the humble chicken coop. By powering your coop with an off-grid solar system, you not only reduce your carbon footprint but also ensure your flock’s safety and comfort during power outages or in remote locations. Whether you’re raising chickens for eggs, pest control, or soil health, a solar-powered coop is a practical, future-forward solution. This comprehensive guide walks you through the process of designing, installing, and maintaining an off-grid solar-powered chicken coop. We’ll break down essential equipment, wiring, battery choices, safety, ongoing maintenance, common pitfalls, and budgeting considerations. Whether you’re a first-time DIYer or a seasoned sustainable living advocate, this guide will help you power your coop responsibly and efficiently for years to come.
Understanding Your Chicken Coop’s Power Needs
What Needs Power in a Modern Coop?
Before you invest in solar panels or batteries, it’s crucial to identify the electrical loads specific to your chicken coop. The most common uses for electricity include:
- Automatic Doors: Timed or light-sensing doors to keep chickens safe from predators.
- Lighting: LED lights for winter laying or nighttime safety.
- Water Heaters: Prevents water from freezing in cold climates.
- Ventilation Fans: Ensures fresh air and reduces ammonia buildup.
- Security Cameras: Optional, for remote flock monitoring.
Estimating Daily Energy Consumption
Accurate load calculation is the backbone of a reliable off-grid system. Here’s a step-by-step method:
- List each electrical device, its wattage, and estimated runtime per day (in hours).
- Multiply wattage by hours for each device to get daily watt-hours (Wh).
- Add up all devices for total daily energy needs.
Example: An automatic door (5W, 0.5 hours), LED lighting (10W, 4 hours), water heater (30W, 2 hours), and fan (15W, 3 hours) totals 130 Wh/day.
Solar System Design: Sizing Panels, Batteries, and Controllers
Choosing the Right Solar Panels
Select panels that exceed your calculated daily usage by at least 30% to account for cloudy days and inefficiencies. For our 130 Wh/day example, you’ll want at least 170 Wh/day of generation. With typical solar irradiance of 4 peak sun hours per day, a single 50W to 60W panel is sufficient in most climates. For cold regions, consider 100W to 120W for extra margin.
Battery Storage: How Much Do You Need?
Solar is intermittent, so batteries are essential. Use deep-cycle AGM or LiFePO4 batteries for safety and longevity. Calculate battery capacity as follows:
- Multiply daily usage by days of autonomy (how many days you want to run without sun; 2–3 days is typical).
- Divide by battery voltage (usually 12V or 24V), then adjust for depth-of-discharge (DoD; use 50% for AGM, 80% for LiFePO4).
Example: 130 Wh x 3 days = 390 Wh. For 12V LiFePO4 at 80% DoD: 390 Wh / (12V x 0.8) ≈ 40.6 Ah. Round up to a 50 Ah battery for margin.
Charge Controllers: Protecting Your System
MPPT (Maximum Power Point Tracking) controllers are more efficient but costlier than PWM (Pulse Width Modulation). For small coops, PWM may suffice. Ensure the controller matches your panel and battery voltage, and is rated for the panel’s maximum current (amps).
Step-by-Step Installation Process
1. Site Selection and Panel Mounting
Choose a sunny, south-facing location with minimal shading year-round. Mount panels on the coop roof or a nearby pole. Use tilt brackets to optimize for your latitude.
- Ensure the mounting structure is sturdy and weather-resistant.
- Roof installations should not compromise coop waterproofing.
- Keep panels accessible for occasional cleaning and snow removal.
2. Battery and Equipment Placement
Batteries and controllers should be kept indoors or in a weatherproof, ventilated enclosure to avoid temperature extremes and moisture. Mount close to the coop’s electrical loads to minimize voltage drop.
- Elevate batteries off the ground and protect from rodents.
- Keep all components at least a few inches from coop bedding to prevent fire risk.
3. Wiring and Connections
Use appropriately sized, UV-resistant wiring. For most small systems, 10–12 AWG wire is sufficient. All connections should be secure and weather-sealed with waterproof boxes or conduit. Incorporate a DC fuse or breaker between the panel and controller, and between the controller and battery, for fire safety.
4. Connecting Loads
Use a small DC load center or fuse block to distribute power to each device. Label circuits for easy troubleshooting. Where possible, use DC devices to avoid inverter losses; for AC loads, a small pure sine wave inverter is best.
5. System Testing and Commissioning
- Double-check all wiring against schematics.
- Test each load independently before connecting the battery.
- Monitor voltage and current on the controller display after initial power-up.
Budgeting and Cost Breakdown
Typical Expenses
- Solar panel (50–120W): $60–$180
- Charge controller: $15–$60
- Deep-cycle battery (50Ah): $90–$250
- Wiring, fuses, mounting hardware: $40–$100
- DC LED lights, automatic door, water heater: $80–$200
- Optional inverter (for AC loads): $40–$90
- Total estimated cost: $285–$880 (DIY, excluding tools)
Where to Save, Where to Invest
- Invest in quality batteries; cheap units fail early and can leak or catch fire.
- Panels and controllers from reputable brands pay off in reliability.
- Consider used or surplus solar panels for savings, but test before installation.
Practical Tools and Equipment Checklist
- Drill and screwdriver set
- Wire cutters and strippers
- Multimeter (for voltage and current checks)
- Cable ties and wire loom for neat cable management
- Weatherproof mounting brackets and fasteners
- Safety goggles and gloves
- DC fuse holders and fuses (matched to system amperage)
Safety Considerations for Off-Grid Chicken Coops
Electrical Safety
- Always disconnect batteries before working on wiring.
- Use insulated tools, especially when handling live wires.
- Install all components in dry, ventilated areas to prevent corrosion and shorts.
Fire Prevention
- Mount batteries and inverters away from straw or bedding.
- Use only UL-listed or CE-certified components where possible.
- Regularly inspect all wiring for rodent damage or wear.
Predator and Weather Protection
- Ensure panel wiring is protected from raccoons, rodents, and birds.
- Secure all enclosures against wind, snow, and rain ingress.
Maintenance Best Practices
Solar Panel Care
- Clean panels every few months with a soft brush and water; avoid harsh chemicals.
- Check for bird droppings or leaves that could shade cells and reduce output.
- Inspect mounting hardware for rust or looseness annually.
Battery Maintenance
- Keep batteries charged above 50% whenever possible to extend life.
- Check terminals quarterly for corrosion; clean with baking soda and water if needed.
- Replace batteries every 5–10 years (LiFePO4 outlasts lead-acid by 2–3x).
System Monitoring
- Install a basic voltage monitor or Bluetooth battery monitor for remote checks.
- Log monthly performance to spot declining output or other issues early.
- Test all automated devices (doors, lights, heaters) before winter and summer seasons.
Beginner Mistakes to Avoid
- Undersizing panels and batteries (always overestimate needs by 20–30%).
- Ignoring shading from trees, buildings, or snow.
- Using standard household extension cords (not UV/weather-rated).
- Placing batteries directly on the ground or in unventilated spaces.
- Failing to fuse circuits, risking fire or equipment damage.
- Mixing incompatible voltages (12V panel with 24V battery, etc.).
- Neglecting regular inspection, leading to system failures at critical times.
Case Study: Retrofit of a Backyard Coop in Rural Vermont
Background: In 2023, the Williams family retrofitted their 12-chicken coop with a 100W solar panel, 60Ah LiFePO4 battery, and DC-powered water heater. With cold winters and frequent power outages, the off-grid system provided:
- Consistent operation of an automatic door and heated waterer down to -10°C (14°F)
- Winter lighting, extending egg laying by 2 months per year
- Zero electric bills for the coop and improved peace of mind
Lessons Learned: The main challenge was snow shading; the family added a steeper panel tilt and scheduled monthly brush-offs. The LiFePO4 battery performed flawlessly, even in sub-zero temperatures.
Conclusion: The Value of a Solar-Powered Chicken Coop
An off-grid solar-powered chicken coop is more than a sustainability statement—it’s a practical, resilient upgrade that protects your flock, cuts energy bills, and supports a closed-loop, eco-friendly homestead. By understanding your coop’s unique energy needs, investing in appropriately sized solar panels and batteries, and following safety and maintenance best practices, you can ensure reliable operation year-round, even during grid outages or harsh weather. The up-front investment pays dividends in reduced operating costs, peace of mind, and the satisfaction of producing eggs and compost with minimal environmental impact. Whether you’re supplying your family with fresh eggs or running a small-scale urban farm, solar powering your chicken coop is a tangible step toward energy independence and sustainable living. Start small, monitor your system, and expand as your needs grow. Your chickens—and the planet—will thank you.


You listed several possible electrical loads, but what is the most energy-efficient way to heat water in winter without oversizing the entire solar setup? Are there alternatives to electric water heaters that still work off-grid?
Heating water electrically can quickly drain your off-grid solar system, especially in winter. Instead, consider passive solar water heaters, which use sunlight to warm water directly in insulated tanks or pipes. Another option is propane or wood-fired water heaters—these don’t rely on your solar power at all. Both alternatives let you provide hot water without needing a much larger solar array or battery bank.
The article mentions budgeting considerations for going solar with a chicken coop. Can you give a rough estimate of what a basic but reliable setup (automatic door, a little lighting, and maybe a small heater) might cost upfront and what ongoing maintenance expenses to expect?
A basic yet reliable solar setup for a chicken coop—including a small system to power an automatic door, a bit of LED lighting, and a modest heater—typically costs between $400 and $900 upfront. This covers solar panels, a charge controller, battery, inverter, and wiring. Ongoing maintenance is minimal: expect to spend around $20–$50 annually for occasional battery checks, cleaning panels, and replacing minor parts every few years.
You mentioned automatic doors and water heaters as common coop devices. Are there any reliable low-power alternatives to standard water heaters you’d recommend to minimize overall energy consumption?
Yes, there are a few low-power alternatives to traditional water heaters that work well in off-grid chicken coops. Heated poultry waterer bases that use less than 40 watts can keep water from freezing without drawing much power. You can also try heavily insulated water containers, or use black rubber tubs placed in sunny spots to absorb natural heat during the day. Some people find success with homemade bottle warmers using low-wattage aquarium heaters too.
The article mentions security cameras as optional. Have you found any low-power camera models that work well off-grid, or is it better to look at motion-activated options to save battery life?
Motion-activated security cameras are usually the best fit for off-grid setups because they only draw power when needed, helping to conserve your battery. Look for cameras labeled as low-power or specifically designed for solar use. Models with built-in rechargeable batteries and efficient standby modes can also work well. Brands that offer solar-compatible, motion-triggered cameras might be worth exploring for your coop.
When calculating the watt-hours for devices like automatic doors and ventilation fans, do you have any tips for factoring in seasonal changes, especially in daylight hours and temperature swings?
To account for seasonal changes, estimate energy use based on the most demanding months—usually winter for lighting and summer for ventilation. Track how many hours devices run during the shortest days and coldest or hottest temperatures. For example, automatic doors may use more power in winter when daylight is limited, while fans might run longer during summer heat. Basing your calculations on these peak needs ensures your system can handle year-round demands.
I’m curious about sizing the battery bank for the chicken coop. If I want to power a water heater and ventilation fans during a couple of cloudy days, how do I figure out how much battery capacity I’ll need for reliable backup?
To size your battery bank, start by adding up the total watt-hours your water heater and fans use per day. Multiply this by the number of backup days you want (like two cloudy days). Divide that number by the battery voltage (usually 12V or 24V) to get amp-hours needed. It’s wise to add 20–30% extra for efficiency losses and to avoid fully draining your batteries.
Can you share more about the typical maintenance required for the solar components during winter, especially to prevent issues with snow or ice on panels and freezing battery enclosures?
During winter, it’s important to regularly clear snow and ice from the solar panels using a soft brush or broom to maintain efficiency. For batteries, keep their enclosures insulated and, if possible, above freezing—some people use small, energy-efficient heaters or thermal wraps. Also, check wiring and connections for any moisture buildup or ice damage. Routine inspection every few days helps prevent power loss and extend the life of your system.
When figuring out daily energy consumption for the coop, is it better to overestimate device runtimes just in case, or should I try to be as exact as possible to save on upfront equipment costs?
It’s wise to slightly overestimate device runtimes when calculating daily energy needs for your coop. This provides a buffer for unexpected use or cloudy days and helps ensure your system runs reliably. Being too exact may save on upfront costs, but it risks leaving you without enough power, especially during times of higher demand or poor sunlight.
I’m new to calculating watt-hours for all these devices. Are there any tools or templates you recommend for tracking the wattage and daily runtimes, or is it really just a matter of using a spreadsheet and doing the math by hand?
You don’t have to rely solely on doing the math by hand. Many people use spreadsheets like Excel or Google Sheets, which make it easy to input wattage and daily runtimes, then automatically calculate total watt-hours. There are also free online solar load calculators that let you enter device info and usage times. For ongoing tracking, a spreadsheet is flexible and customizable, especially as your setup changes.