Introduction
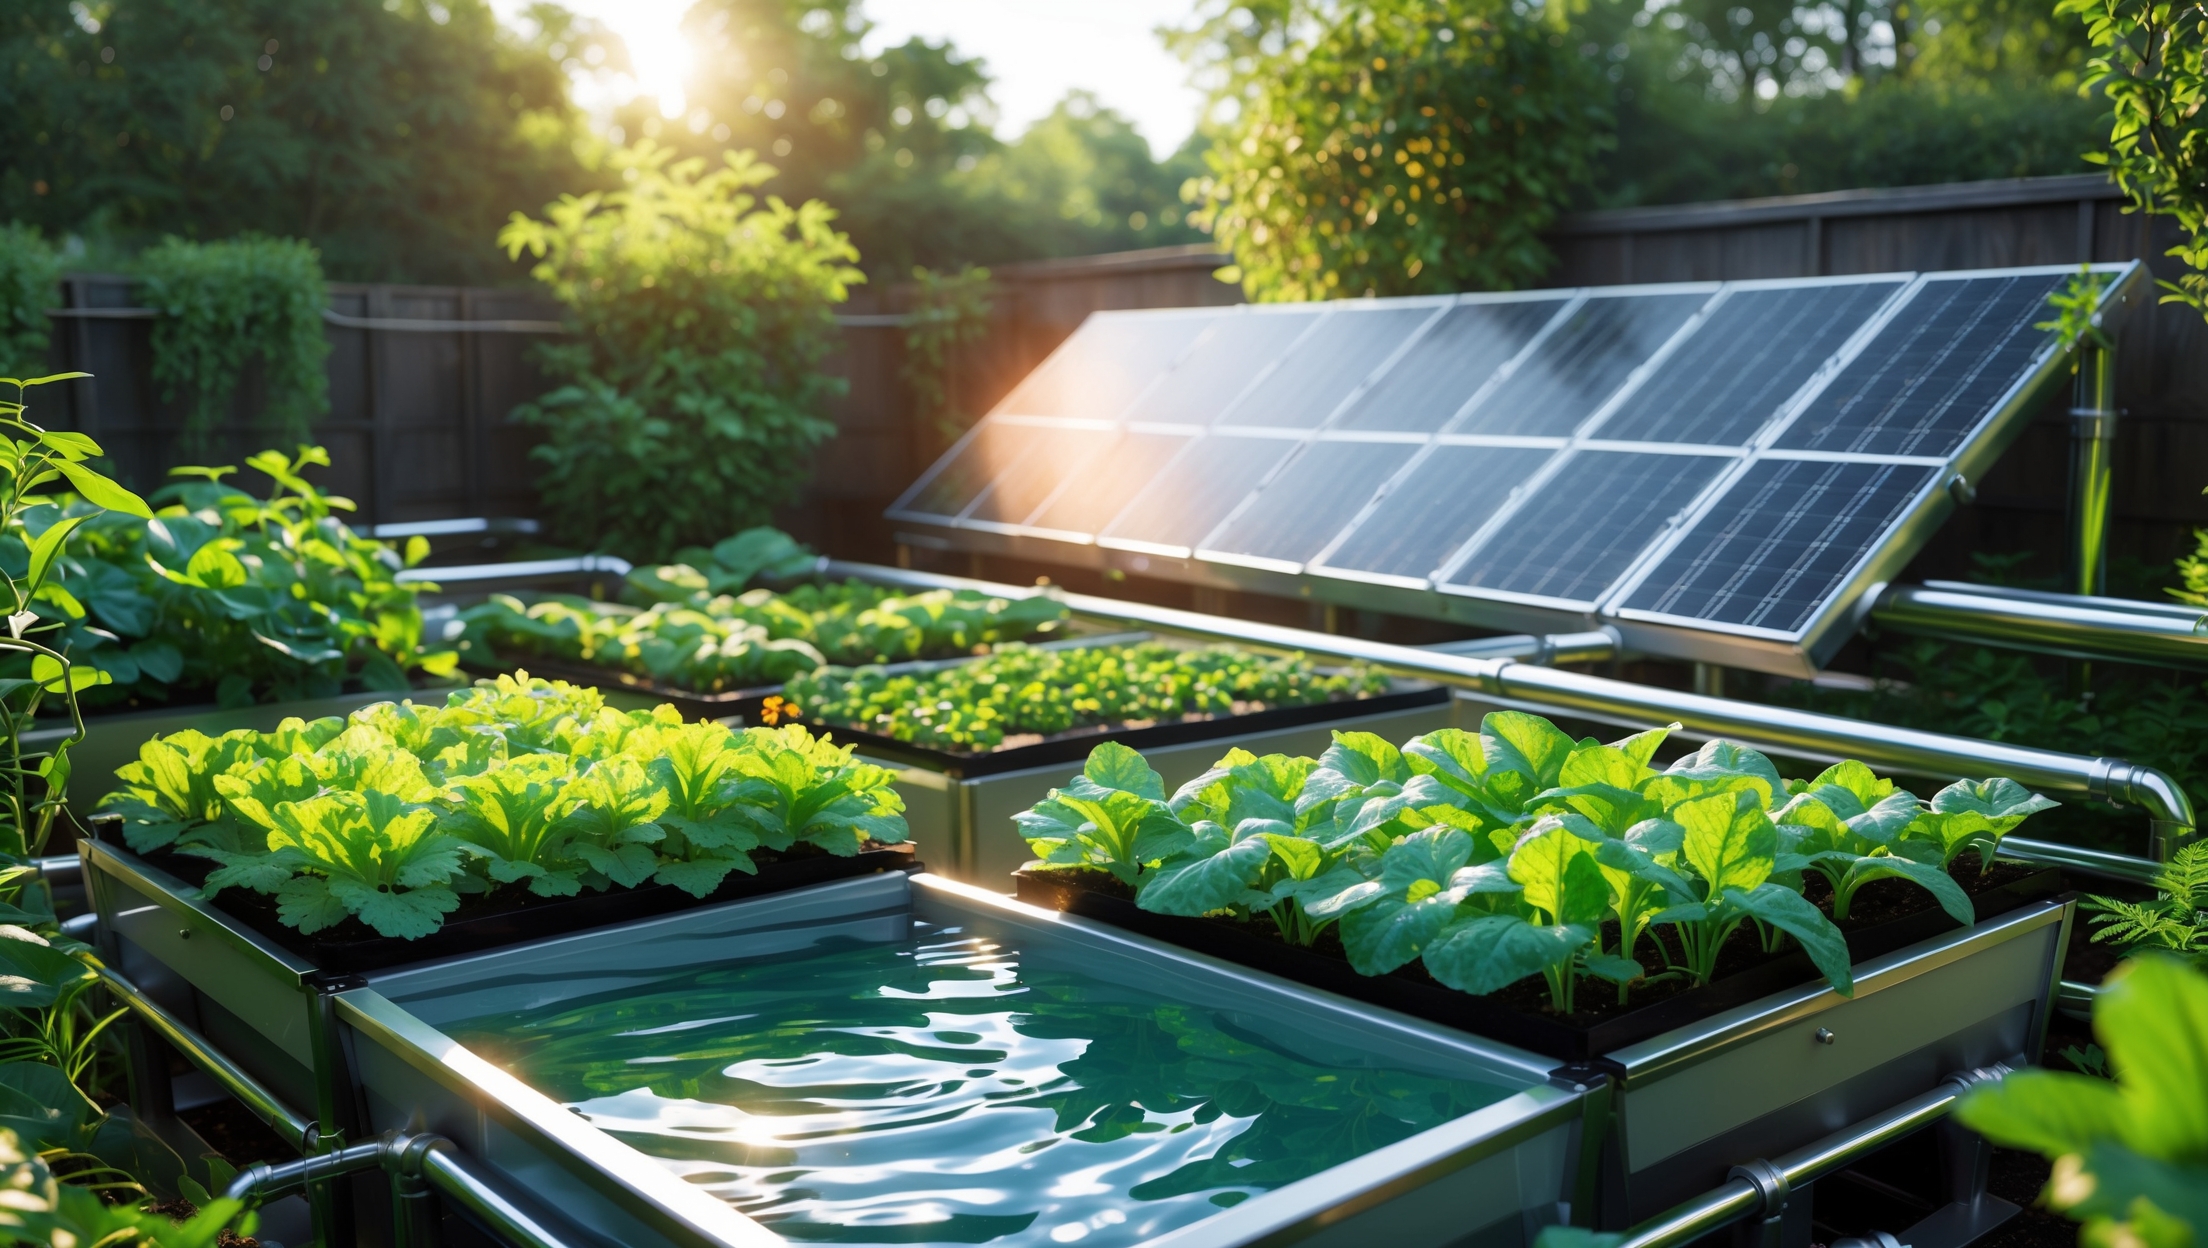
As sustainable living becomes more than a trend and evolves into a necessity, homeowners across the globe are seeking innovative ways to minimize their environmental footprint and boost self-sufficiency. One approach that elegantly marries food production with renewable energy is the home solar-powered aquaponics system. By combining aquaculture (raising fish) with hydroponics (growing plants without soil), aquaponics systems create a closed-loop ecosystem where fish waste provides nutrients for plants, and plants help purify the water for the fish. When powered by solar energy, this system transforms into a model of true ecological harmony, slashing utility bills and reducing reliance on fossil fuels.
However, setting up a solar-powered aquaponics system at home isn’t as straightforward as plugging in a few panels and filling a tank with fish. Success hinges on having the right tools and equipment from the outset. Choices made during setup impact everything from system efficiency to maintenance workload and crop yield. In this comprehensive guide, we’ll delve deep into the essential tools, gear, and equipment you’ll need to get your home solar-powered aquaponics system off the ground. Whether you’re a green tech enthusiast or a backyard food grower looking to level up, this expert guide will help you navigate equipment selection, streamline your setup, and avoid costly errors.
Understanding Solar-Powered Aquaponics Systems
What Is Aquaponics?
Aquaponics is a symbiotic system where fish and plants grow together in a water-based environment. Fish waste provides an organic nutrient source for the plants, which in turn filter and clean the water that is recirculated back to the fish tanks. This process creates a balanced, low-waste ecosystem ideal for sustainable food production.
Why Go Solar?
Traditional aquaponics systems rely on electric pumps, aerators, and supplemental lighting, which can drive up energy bills and reduce the overall sustainability of the setup. By incorporating solar energy, you can power critical components off-grid, lower operational costs, and minimize your system’s environmental impact.
Core Components of a Solar-Powered Aquaponics System
Structural Elements
- Fish Tank: The heart of the system. Food-grade IBC totes (275-330 gallons), stock tanks, or custom fiberglass tanks are common. Material must be non-toxic and UV-resistant.
- Grow Beds: Typically made from high-density polyethylene (HDPE) or food-grade plastics. Ensure adequate depth (8-12 inches) for plant roots and media.
- Support Frame: Treated wood, steel, or aluminum frames provide structural integrity. Consider corrosion resistance and load-bearing capacity.
Plumbing and Water Movement
- PVC Piping and Fittings: Schedule 40 or 80 PVC, resistant to UV and pressure. Elbows, tees, ball valves, and unions are essential for routing water.
- Water Pumps: Submersible DC pumps (solar-compatible) or AC pumps with an inverter. Flow rate should match system size (recommend 400-1000 GPH for small to medium systems).
- Air Pumps and Diffusers: Oxygenate water for fish health. Look for solar-powered or battery-backed models to ensure continuity during cloudy days.
- Filter Units: Mechanical and biological filters help manage solids and maintain water quality.
Solar Power System
- Solar Panels: High-efficiency monocrystalline or polycrystalline panels. Calculate total wattage based on pump and lighting loads (typically 200W-800W for home-scale systems).
- Mounting Hardware: Roof or ground-mounted racking, tilt brackets for optimal sun exposure, and weatherproof fasteners.
- Charge Controller: MPPT controllers maximize power harvest and protect batteries from overcharge.
- Batteries: Deep-cycle AGM, gel, or lithium batteries store power for nighttime and cloudy days. Sizing depends on system draw and autonomy requirements.
- Inverter: Pure sine wave inverter if running AC pumps or lights. Ensure wattage matches maximum draw.
- Wiring and Connectors: UV-resistant, appropriately gauged wires with waterproof connectors and inline fuses.
Monitoring and Control
- Timers and Relays: Automate pump and lighting schedules to optimize efficiency.
- Water Quality Test Kits: Essential for measuring pH, ammonia, nitrite, nitrate, and dissolved oxygen.
- Temperature Sensors: Monitor water and ambient temperature to prevent stress to fish and plants.
- Solar Charge Monitors: Track battery voltage, panel output, and system health remotely or locally.
Must-Have Tools for Efficient Installation
Basic Hand Tools
- Screwdrivers (Phillips and flathead)
- Adjustable wrench and socket set
- Utility knife
- Measuring tape and level
- Pliers and wire cutters
- PVC pipe cutter or hacksaw
- Marker or grease pencil for labeling
Electrical Tools
- Wire stripper/crimper
- Multimeter for checking voltage and continuity
- Heat shrink tubing and heat gun for waterproof connections
- Drill with bits for mounting panels and hardware
Specialty Aquaponics Tools
- pH meter (digital or drop test)
- Ammonia/nitrite/nitrate test kits
- Waterproof thermometer
- Submersible water quality sensors (optional for automated systems)
Choosing the Right Equipment: Practical Considerations
Matching Pump and Panel Size
Undersized pumps or panels lead to poor water circulation, stressed fish, and stunted plant growth. Use the following formula to estimate your solar panel needs:
- Total Daily Watt-Hours Needed = (Pump wattage + aerator wattage + lighting wattage) x hours per day
- Factor in a 20-30% loss for inefficiencies and cloudy weather.
For example, a 60W pump and 20W aerator running 24/7, plus 30W of supplemental lighting for 8 hours, would require approximately 2,320 Wh per day. With 5 peak sun hours, you’d need at least 500W of panels (plus battery capacity for storage).
Selecting Safe Plumbing Materials
Always use food-grade, UV-stable plastics or stainless steel for any component that contacts water. Avoid reusing containers that held chemicals or non-food substances. Schedule 40 or 80 PVC is standard for small systems, while larger systems may benefit from flexible tubing for easier layout.
Battery Chemistry and Placement
- AGM/Gel: Maintenance-free, safer for indoor use, but heavier and lower cycle life than lithium.
- Lithium: Higher upfront cost but longer lifespan and lighter weight. Ideal for systems requiring frequent cycling.
Install batteries in ventilated, weather-protected enclosures, away from direct sunlight and potential flooding.
Monitoring and Automation Upgrades
Smart controllers and IoT sensors can automate feeding, monitor water quality, and send alerts for maintenance, reducing manual checks and improving system resilience. Consider Wi-Fi-enabled devices for remote management, especially if you travel frequently.
Assembly: Practical Tips for a Streamlined Build
Pre-Assembly Preparation
- Lay out all components and tools in a shaded, organized workspace.
- Pre-cut and dry-fit plumbing to minimize leaks.
- Label all wiring and pipes for easy troubleshooting.
Solar Panel Installation
- Mount panels at a south-facing angle (northern hemisphere) or north-facing (southern hemisphere), tilted at your latitude for optimal year-round output.
- Use corrosion-resistant fasteners and seal mounting holes with weatherproof caulk.
- Run cables through UV-resistant conduit to protect against weather and animal damage.
- Install the charge controller and batteries in a ventilated, waterproof enclosure close to the panels and loads to minimize voltage drop.
Plumbing and Tank Setup
- Install the fish tank on a solid, level surface to avoid stress cracks.
- Place grow beds at a height that allows gravity return to the tank, reducing pump energy use.
- Use unions at all major junctions for easy disassembly and cleaning.
- Test for leaks with water before introducing fish or plants.
Electrical and Pump Connections
- Connect DC pumps and aerators directly to the charge controller for efficiency, or use an inverter for AC models.
- Install inline fuses near the battery terminal for safety.
- Use waterproof boxes for all electrical junctions.
Essential Accessories for Long-Term Success
Backup Power Solutions
- Consider a small generator or grid-tied inverter as emergency backup during prolonged cloudy periods.
- Solar battery monitors with Wi-Fi alerts can prevent unexpected outages.
Spare Parts and Consumables
- Keep spare impellers, O-rings, and filter media on hand.
- Stock up on test kit refills, water conditioner, and fish food in bulk to reduce supply disruptions.
Protection from Wildlife and Weather
- Use fine mesh netting or rigid covers to prevent birds and animals from accessing tanks and beds.
- Install shade cloth or greenhouse panels if you live in a region with extreme summer sun or cold snaps.
Cleaning and Maintenance Tools
- Dedicated aquarium-safe brushes and siphons for tank cleaning.
- Portable wet/dry vacuum for removing sludge from tanks and grow beds.
- Replacement bulbs for UV sterilizers (if used).
Sample Equipment Checklist for a 250-Gallon System
- 1 x 250-gallon food-grade fish tank
- 2 x 50-gallon grow beds (HDPE or equivalent)
- 1 x 800 GPH DC submersible water pump
- 1 x 40W solar air pump with diffusers
- 3 x 200W monocrystalline solar panels
- 1 x 40A MPPT charge controller
- 2 x 12V 100Ah deep-cycle batteries (AGM or lithium)
- 1 x 600W pure sine wave inverter
- 100′ schedule 40 PVC pipe (1-inch), with elbows, tees, valves, and unions
- Assorted wiring (10 AWG for DC, 12 AWG for AC), conduit, fuses, and waterproof boxes
- pH and ammonia/nitrite/nitrate test kits
- Hand tools and power drill
Common Pitfalls and How the Right Tools Help Avoid Them
- Leakage and Water Loss: Proper pipe cutters and quality PVC cement prevent leaks. Unions make it easy to fix connections without cutting.
- Undersized Solar Array: A multimeter and solar charge monitor ensure your panels provide adequate output before you scale up.
- Poor Water Quality: Reliable test kits and meters let you respond quickly to ammonia spikes or pH swings, protecting fish and plants.
- Electrical Hazards: Using waterproof boxes, inline fuses, and correct wire gauges reduces the risk of shorts and fire.
- Inaccessible Components: Modular frames and labeled wiring/plumbing streamline troubleshooting and upgrades.
Conclusion
Building a solar-powered aquaponics system at home is more than an eco-friendly project—it’s an investment in resilience, food security, and a greener future. As you’ve seen, success starts with selecting the right tools and equipment, from food-grade tanks and solar panels to reliable pumps and precise monitoring gear. Each component plays a critical role, and careful planning pays off in longevity, efficiency, and minimized maintenance.
Don’t be tempted to cut corners with untested materials or mismatched electronics; the upfront investment in robust, solar-compatible equipment saves untold hours of troubleshooting and replacement down the line. Equip yourself with the right hand tools, electrical testers, and water quality meters to ensure your system runs smoothly from day one. Remember, the ecosystem you’re building relies on balance—between sun and power, fish and plants, innovation and nature.
Whether you’re aiming to grow fresh produce year-round, reduce your carbon footprint, or inspire your community, a well-equipped solar-powered aquaponics garden is a tangible step toward true sustainability. Take the time to source quality components, assemble your toolkit before starting, and embrace the learning journey. With the right equipment in your corner, you’ll enjoy a steady harvest of both food and energy for years to come.


I get the idea behind the closed-loop system, but I’m worried about what happens if there isn’t enough sunlight for a few days. Does the guide suggest any backup solutions to keep the fish and plants healthy when solar power dips?
You’re right to consider what happens during periods of low sunlight. The guide recommends having a backup battery system to store extra solar energy for cloudy days. It also suggests using a small generator or connecting to the grid as a last resort to keep water pumps and aerators running, ensuring both fish and plants stay healthy even when solar power is low.
For someone just starting out, how do you determine the minimum number of solar panels you’ll need to reliably run both the pumps and the grow lights for an average-sized home aquaponics setup, especially considering seasonal sunlight differences in the US?
To figure out the minimum number of solar panels, first add up the total wattage your pumps and grow lights use, and estimate how many hours per day they’ll run. Multiply power usage by hours for total daily energy needs in watt-hours. Then, check your average local sunlight hours (peak sun hours) per day, which can vary by season and region. Divide your total daily energy need by these sun hours to get the needed solar panel wattage, and add 20–25% as a buffer for cloudy days and energy loss.
If we experience several cloudy days in a row, how well do solar-powered aquaponics systems typically perform? Are there any particular battery setups or backup suggestions you would recommend to keep the ecosystem stable?
Solar-powered aquaponics systems can see reduced performance during several cloudy days since solar panels generate less energy. To keep your system stable, it’s important to have a battery bank sized to provide power for at least 2–3 days without sun. Deep-cycle batteries (like AGM or lithium) are popular choices. As an extra precaution, consider a backup generator or the ability to temporarily switch to grid power if needed.