Introduction: Why Build a Solar-Powered Compost Tea Brewer?
Sustainable gardening is all about harnessing renewable energy and natural processes to foster a thriving, eco-friendly landscape. Compost tea—a living liquid fertilizer teeming with beneficial microbes—has become a staple for organic gardeners aiming to boost soil health, suppress diseases, and enhance plant vigor. Traditionally, brewing compost tea requires a constant supply of aeration to keep beneficial microbes alive and active, which usually means running an electric air pump for 24-48 hours at a time. For off-grid enthusiasts, eco-conscious gardeners, or anyone seeking to reduce their carbon footprint, this presents a perfect opportunity to integrate solar power into garden routines.
Building your own solar-powered compost tea brewer not only cuts down on utility bills and emissions, but also empowers you to produce high-quality, living plant food virtually anywhere sunlight is available. This comprehensive guide will walk you through every step of constructing and operating a DIY solar-powered compost tea system—from choosing the right solar panel and air pump, to ensuring safe, effective brews that maximize garden results. Whether you’re a permaculture practitioner, urban gardener, or just starting your sustainable journey, this project offers a hands-on way to merge green technology with regenerative gardening. Read on to discover how to assemble, optimize, and maintain your own solar-powered compost tea brewer for healthier soils and a greener future.
How Compost Tea Benefits Your Garden
Microbial Magic: What’s in Compost Tea?
Compost tea is a fermented liquid produced by steeping high-quality compost in aerated water. The process extracts and multiplies beneficial bacteria, fungi, protozoa, and nematodes which, when applied to soil or foliage, colonize root zones and leaf surfaces. This living solution can:
- Suppress plant pathogens and diseases naturally
- Improve nutrient uptake and soil structure
- Reduce the need for synthetic fertilizers and pesticides
- Boost plant immune systems and resilience
Why Aeration Matters
Oxygen is vital for brewing a healthy, microbe-rich tea. Insufficient aeration leads to anaerobic conditions, which can produce harmful compounds and pathogens. A solar-powered air pump ensures continuous oxygenation without relying on grid power, making it both eco-friendly and reliable for remote or off-grid gardens.
Planning Your Solar-Powered Compost Tea Brewer
Assessing Your Garden’s Needs
Before gathering supplies, consider the following:
- Batch Size: How much compost tea do you want to produce at a time? Typical home gardens benefit from 5-20 gallon brews.
- Mobility vs. Stationary: Do you want a portable system or a fixed installation?
- Sunlight Availability: Ensure your setup location receives at least 4-6 hours of direct sunlight daily for optimal solar charging.
Key Components and Equipment Checklist
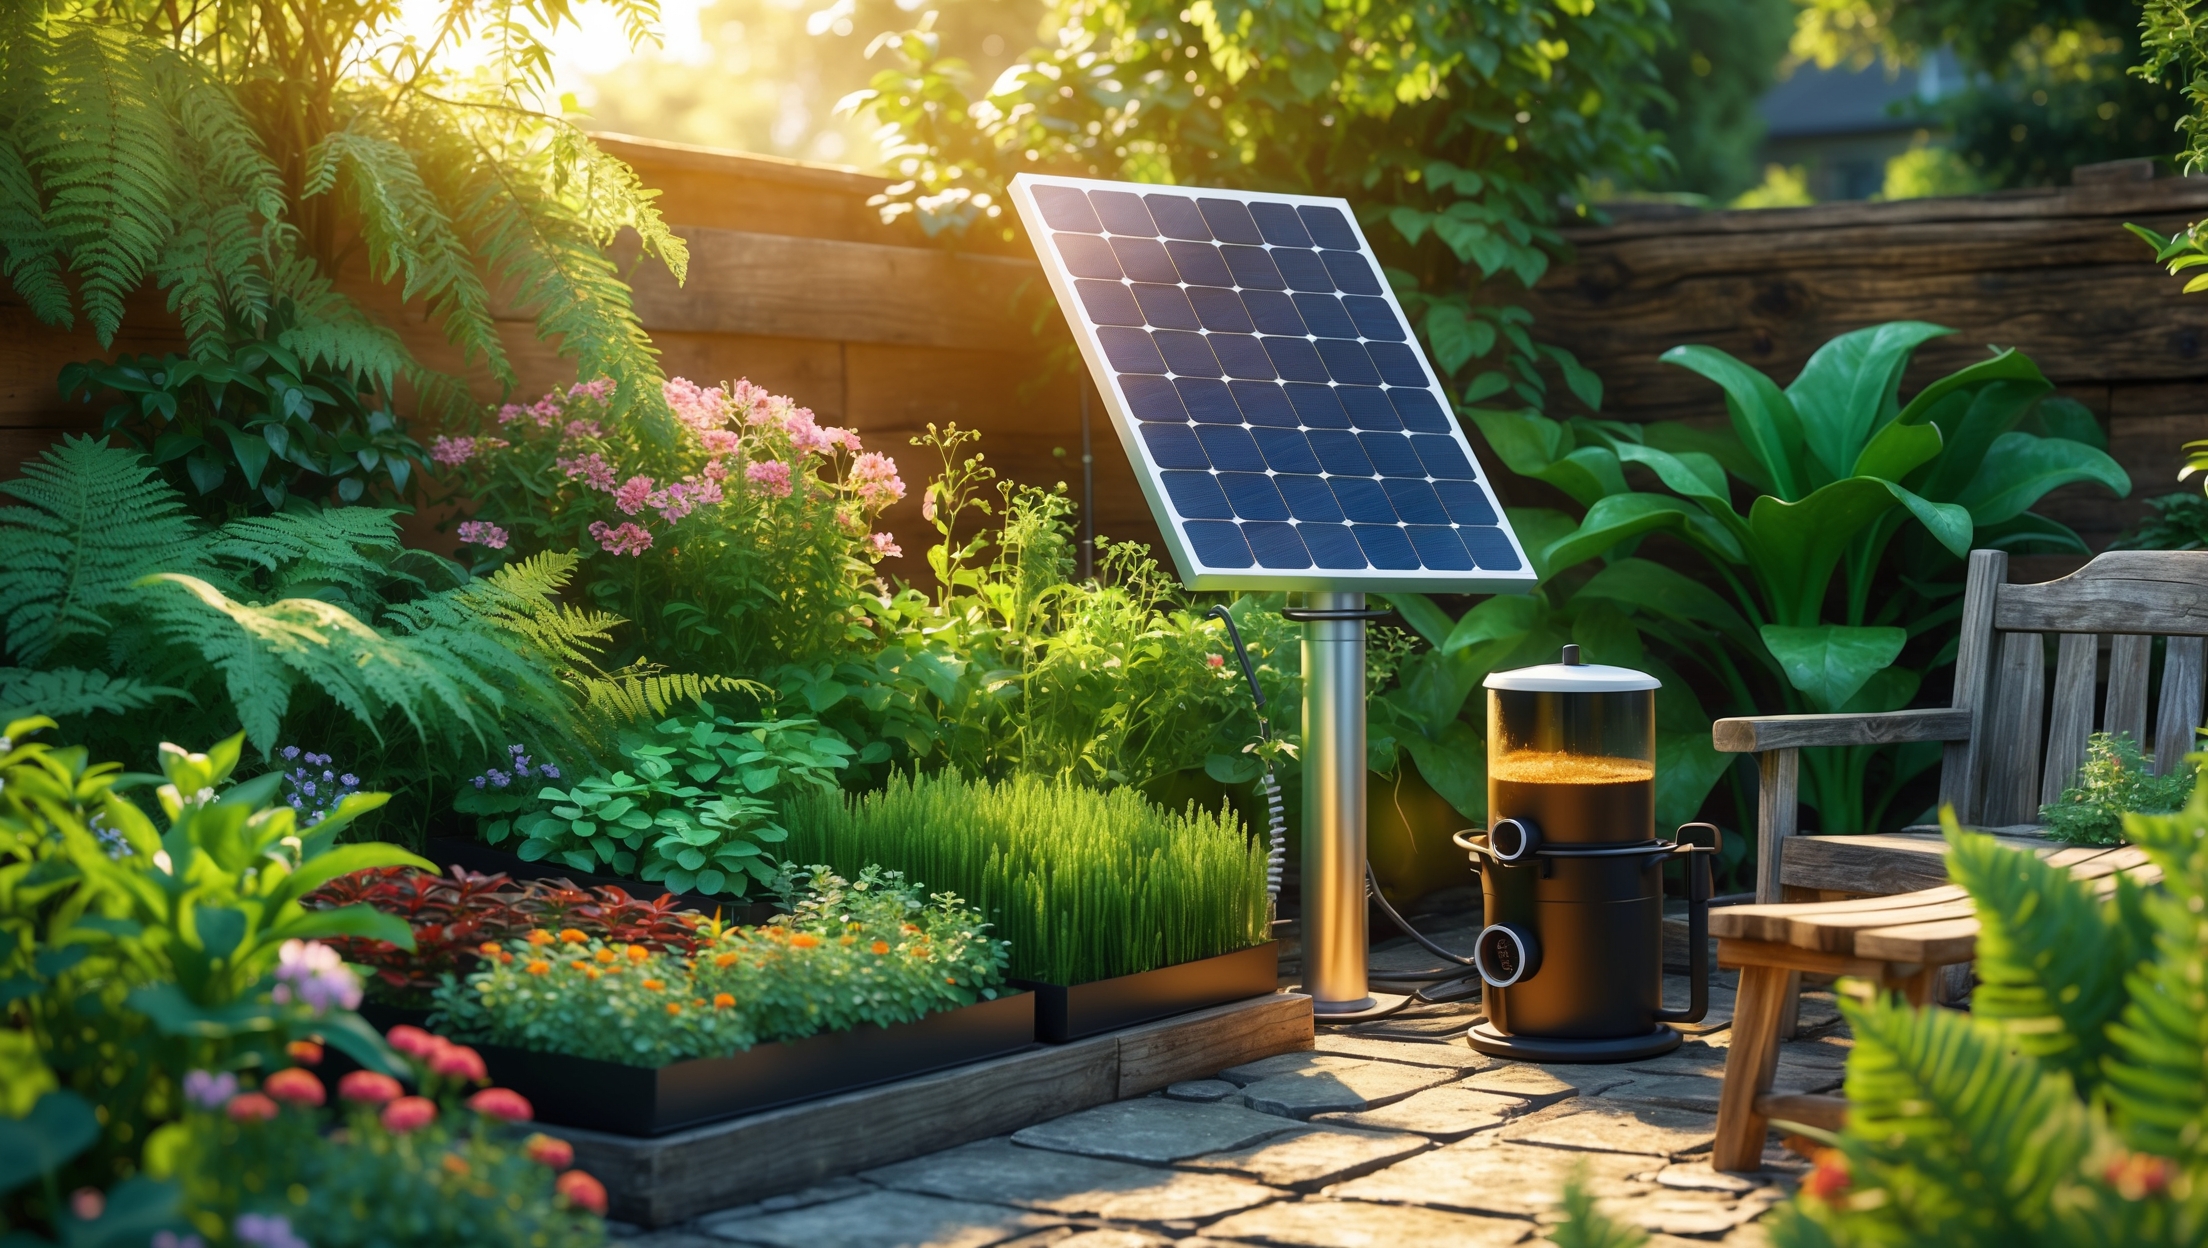
- Solar Panel: 20-50 watt panel (size depends on pump requirements and brew size)
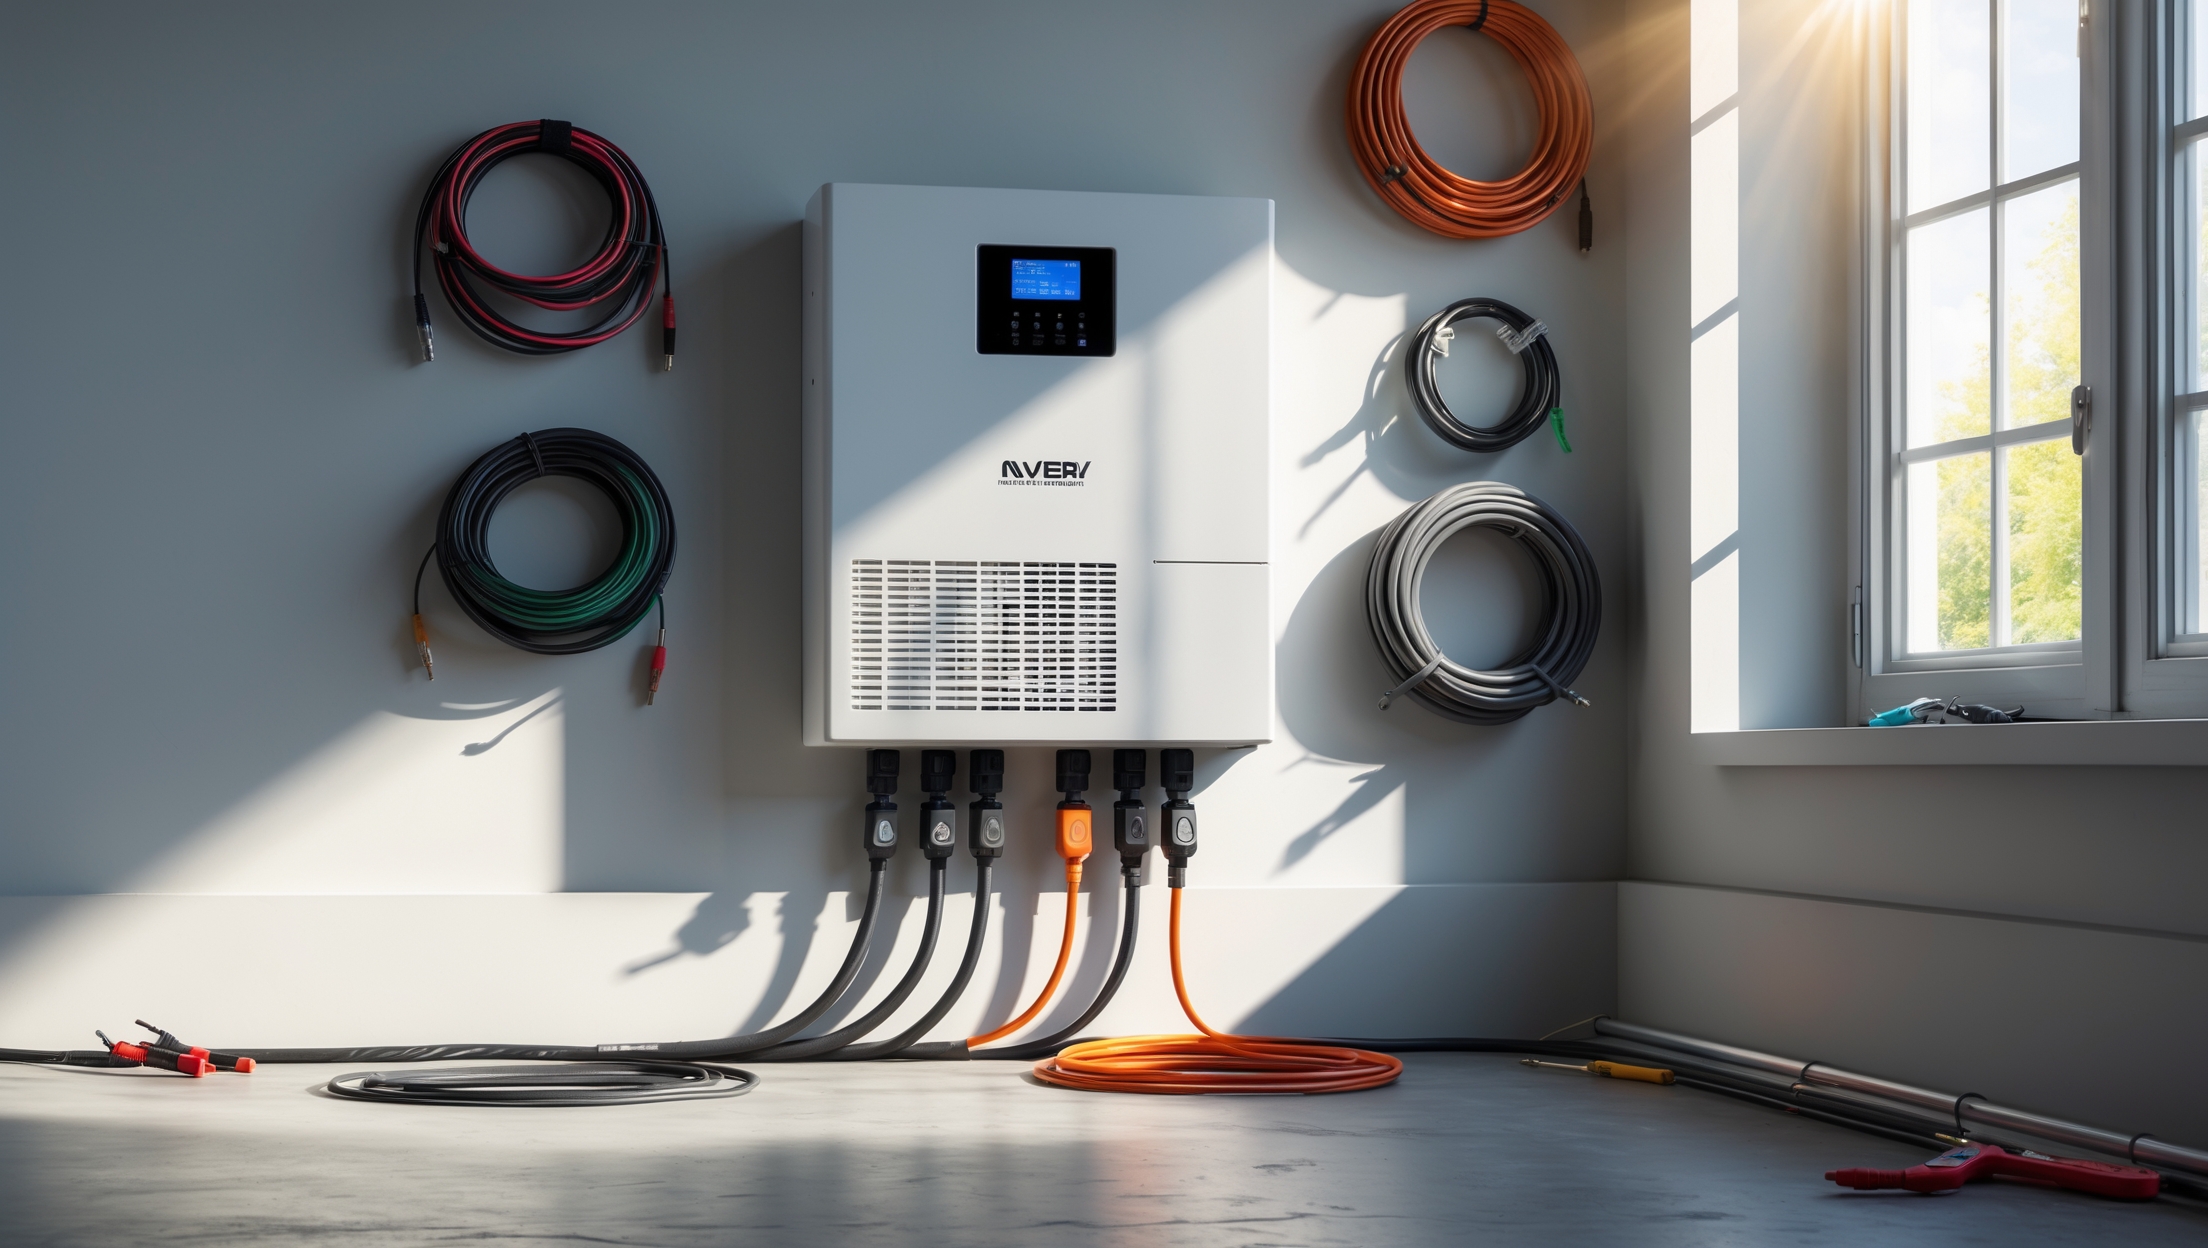
- Charge Controller: Regulates power from panel to battery, preventing overcharging
- Deep Cycle Battery: 12V AGM or lithium, sized for at least 24-48 hours of air pump operation
- DC Air Pump: High-output, continuous-duty pump rated for desired brew volume
- Air Tubing & Diffusers: Food-grade silicone tubing and weighted aquarium-style air stones
- Brewing Vessel: Food-safe plastic or stainless steel container (5-20 gallons)
- Compost & Ingredients: Mature, high-quality compost, unsulfured molasses, optional amendments (kelp meal, rock dust, etc.)
- Weatherproof Enclosure: For protecting electrical components and battery
- Basic Tools: Drill, pliers, wire strippers, waterproof connectors, zip ties, mounting hardware
Step-by-Step Setup: Assembling Your Solar Compost Tea Brewer
Step 1: Selecting and Placing Your Solar Panel
Choose a solar panel size that matches your air pump’s power draw. For a typical 10-20 gallon brew, a 20-30 watt panel is adequate if you’re brewing only on sunny days. If you want night or cloudy-day operation, opt for 40-50 watts and a larger battery. Mount the panel in a location with maximum sun exposure, ideally facing true south (northern hemisphere) or true north (southern hemisphere) at an angle matching your latitude. Secure with proper brackets or pole mounts, ensuring no shading throughout the day.
Step 2: Wiring the Charge Controller and Battery
Connect the solar panel’s output cables to the charge controller’s solar input terminals, observing polarity (+/-). Next, connect the charge controller’s battery output terminals to the deep cycle battery. Use waterproof connectors and appropriately sized wire to handle the current safely. Mount the charge controller and battery in a weatherproof box near the brewer, with ventilation to avoid overheating.
Step 3: Connecting the DC Air Pump
Wire the 12V DC air pump directly to the battery’s output (ideally via a fused connection for safety). Some pumps can be wired through a timer or manual switch for convenience. Ensure all connections are secure, protected from moisture, and labeled for troubleshooting.
Step 4: Installing Air Tubing and Diffusers
Attach food-grade silicone tubing to the air pump’s outlet. Run the tubing into your brewing vessel, securing it along the rim with zip ties or clips. Attach weighted air stones to ensure even distribution of bubbles throughout the vessel. For large brewers, use multiple diffusers for complete aeration.
Step 5: Preparing the Brewing Vessel
Thoroughly clean the brewing container before use. Drill holes in the lid (if using) to accommodate air lines and to allow gases to escape. Place the vessel near your solar setup, ensuring it sits level and is easily accessible for filling and cleaning.
Step 6: Test Run and Troubleshooting
- Turn on the system during sunny conditions. Verify the solar panel charges the battery and the air pump runs continuously.
- Check for strong, consistent bubbling throughout the vessel. Adjust diffuser placement as needed.
- Inspect all wiring and connectors for heat, moisture intrusion, or loose connections.
- Test battery voltage after 24 hours to ensure it holds sufficient charge for your desired brew cycle.
Brewing Your First Batch: Ingredients and Process
Compost Selection and Additives
Use mature, finished compost rich in fungal and bacterial life. Avoid compost with visible pathogens, pests, or weed seeds. For a balanced brew:
- 2 cups high-quality compost per 5 gallons of water
- 2 tablespoons unsulfured molasses (feeds microbes)
- Optional: 1 tablespoon kelp meal, rock dust, or fish hydrolysate per 5 gallons
Fill the vessel with dechlorinated water (let tap water sit uncovered for 24 hours, or use rainwater). Place compost in a mesh bag or directly in the vessel. Add molasses and amendments, then submerge the bag and start the air pump.
Brewing Timeline and Tips
- Brew for 24-36 hours at 60°F-80°F (16°C-27°C) for optimal microbial activity.
- Monitor the smell—finished tea should smell earthy, not sour or rotten.
- Avoid brewing in direct sunlight if temperatures are hot; shade the vessel or brew indoors during heatwaves.
- Use the tea within 4-6 hours of finishing for maximum microbial viability.
Applying Compost Tea: Methods and Best Practices
Soil Drench
Pour tea directly around the root zones of vegetables, flowers, trees, or shrubs. This inoculates the soil with beneficial microbes, improving nutrient cycling and root health.
Foliar Spray
Filter tea through a fine mesh to remove solids. Use a clean sprayer to apply to leaf surfaces early in the morning or late afternoon. Foliar application can protect against certain leaf diseases and boost nutrient uptake.
Frequency and Timing
- Apply every 2-4 weeks during the growing season for best results.
- Increase frequency after transplanting or during periods of plant stress.
- Do not apply under strong midday sun to avoid leaf burn.
Maintenance and Troubleshooting
Cleaning and Upkeep
- Rinse brewing vessel, tubing, and diffusers thoroughly after each batch to prevent pathogen buildup.
- Remove and scrub air stones weekly to prevent clogging.
- Inspect wiring, solar panel, and battery connections monthly for corrosion or wear.
- Store battery and pump in a dry, ventilated enclosure.
Common Issues and Solutions
- Weak Aeration: Check for blocked air stones, low battery voltage, or pump malfunction.
- Low Battery Performance: Ensure solar panel is not shaded, clean panel surface, and check charge controller function.
- Unpleasant Odor: Indicates anaerobic conditions—clean thoroughly, increase aeration, and brew smaller batches if needed.
Safety Considerations for Solar and Compost Systems
Electrical Safety
- Always use waterproof, outdoor-rated wiring and connectors.
- Install fuses or circuit breakers on battery circuits to prevent short-circuiting.
- Keep electrical components out of reach of children and pets.
Biological Safety
- Use gloves when handling compost and cleaning equipment.
- Do not use compost tea on edible crops within 24 hours of harvest to minimize food safety risks.
- Avoid using manure-based composts to prevent E. coli contamination.
Maximizing Results: Advanced Tips and Modifications
Larger Systems and Scaling Up
For community gardens or small farms, scale up by using larger solar arrays, bigger batteries, and multiple brewing vessels. Consider using high-efficiency brushless pumps for energy savings. Modular designs allow for simultaneous brewing of multiple batches.
Data Logging and Automation
- Integrate a solar charge meter or battery monitor to track energy usage and system health.
- Install a timer or programmable relay to automate pump cycles if you want to optimize power use.
- Use wireless temperature and humidity sensors for remote monitoring, especially in greenhouses or large gardens.
Eco-Friendly Enhancements
- Use recycled or upcycled containers for the brewing vessel to further reduce environmental impact.
- Collect rainwater for brewing to conserve potable water resources.
- Pair with a solar-powered irrigation pump for a closed-loop, off-grid fertigation system.
Conclusion: Growing Greener with Solar-Powered Compost Tea
Building a solar-powered compost tea brewer is more than just a DIY project—it’s a practical step toward self-reliance, resilience, and regenerative gardening. By tapping into the sun’s energy, you’re not only reducing your reliance on fossil fuels and the electrical grid but also producing a living, organic input that nourishes your soil and supports the complex web of life beneath your plants. The setup process, while hands-on, is straightforward and highly customizable to fit any garden size or budget. With careful planning and regular maintenance, your brewer will deliver years of healthy, microbe-rich compost tea that feeds your crops, suppresses disease, and fosters a truly sustainable ecosystem.
As you fine-tune your system and witness the improved vigor of your plants, you’ll experience firsthand how renewable energy and nature’s own biology can work in harmony. Start small, experiment with different brewing recipes, and don’t hesitate to scale up or share with neighbors. Your solar-powered compost tea brewer isn’t just a tool—it’s a bridge toward a more sustainable, productive, and eco-conscious future. Happy brewing and greener growing!


How often do you have to clean or maintain the solar-powered system to keep it running effectively? I’m wondering if there are extra maintenance steps compared to a conventional compost tea brewer.
The solar-powered system generally needs similar maintenance to a conventional compost tea brewer, such as cleaning the tubing, air stones, and tea container after each batch. For the solar parts, it’s a good idea to wipe down the solar panel every couple of weeks to remove dust or debris, and check electrical connections once a month. These extra steps help ensure the system stays efficient and reliable.
I’m curious about optimizing the quality of my brews—do you have tips on ensuring enough aeration with a solar-powered system, especially compared to traditional plug-in pumps? Have you noticed any difference in microbe activity or final results?
To boost aeration with a solar-powered system, make sure you’re using a high-efficiency air pump sized for your brewer and good quality diffusers for fine bubbles. Place solar panels in full sun for maximum output or consider a small battery backup for cloudy periods. Many gardeners report similar microbe activity if the aeration is steady, but inconsistent sunlight can reduce oxygen levels, so monitoring bubbles and smell helps ensure quality brews.
How long does it typically take from start to finish to build and assemble all the components for a solar-powered compost tea brewer, especially for someone with minimal DIY experience? I’m trying to plan out how much time to set aside for this project.
For someone with minimal DIY experience, you can expect the whole process to take between 4 to 6 hours from gathering materials to final assembly. This includes setting up the solar panel, connecting the pump, assembling the brewer, and testing everything. Giving yourself a full afternoon or two shorter sessions should allow plenty of time to follow each step carefully.
If I already own a small solar panel, can I adapt this design without replacing it? What would be the most important specs to check on my current panel before reusing it in this brewer setup?
You can likely use your existing small solar panel, as long as it meets a few key requirements. Check the panel’s wattage and voltage—make sure it can provide enough power for the air pump needed in the brewer setup, usually 12V and at least 10–20 watts. Also, confirm your panel has compatible connectors for the charge controller or battery you’ll use. If these specs align, you should be able to adapt the design without buying a new panel.
For the solar-powered brewer setup described, are there specific types or wattages of solar panels and air pumps you recommend for a small backyard garden? I want to make sure I choose equipment that’s powerful enough but still cost-effective.
For a small backyard garden, a 20-30 watt solar panel usually provides enough power for a compost tea brewer. Pair this with a 5-10 watt air pump, which is sufficient to keep the tea aerated without drawing too much energy. Look for an air pump rated for at least 20-40 liters per minute. This combination balances power and cost-effectiveness while ensuring your compost tea stays oxygenated.
If I want to scale up the compost tea brewer to serve a bigger garden, what changes should I make to the solar power setup and to the size of the air pump?
To scale up for a bigger garden, you’ll need a larger container for brewing and a higher-capacity air pump to ensure adequate aeration. For the solar power setup, increase the size of the solar panel and battery to match the higher wattage required by the bigger air pump. Make sure your charge controller can also handle the increased load.